FORDification.com
   (powered by Google)


  HOME

  Technical Articles

  Factory Literature

  Discussion Forums

  Photo Galleries


  Service Bulletins (TSBs)

  Decoding Your VIN

  Diagrams & Schematics

  Links & Resources

  In the Movies

  Downloads
  Member Meet & Greets

  In the Media

  Site Index

 MISC / PERSONAL

  My Truck Projects

  My Heinz 57 '67

  I've Been Censored!

  Contact


You are here: Home My Truck Projects The '67 Page 33
Back to My '67 Project Index
It's Finally a Rolling Chassis!

Sunday, Sept. 12, 2004  -  I was hoping to get the Dana 60 completed several weeks ago, but I ran into what I thought was a problem when I went to install the axles. Unlike the Ford 9" rearend, the semi-floater Dana 60 doesn't have a sealed axle bearing, and when I installed the axle on one side, there was a lot of up-and-down slop that I couldn't figure out. I spent an entire afternoon talking with the machine shop, and then a local mechanic and finally the shop foreman at the local Ford dealership, but nobody had any ideas what was going on. My buddy Ray, the one I'd gotten the Dana 60 from originally, came over to check things out, and had it figured out within a couple of minutes. If I'd tried to install BOTH axles at the same time instead of crying wolf after only installing one, I'd have noticed that the slop would have been corrected after the installation of the second. Oh well...

So anyway, I hit the shop late morning and went to work getting the axles installed. When I attempted to install one of the brake drums, I found that when the machine shop pressed the new axle bearings, they'd boogered up the round protrusion which centers the drum on the axle, not allowing the drum to seat. I spent some time with a hand file getting the axle end cleaned up and got the drum installed. I bolted on the white-spoke wheels that were on the truck when I originally got it, and then rolled it outside to get the whole thing rinsed and wiped down for a photo session. While it was getting cleaned up, there were several cars which drove by and slowed down to check the chassis out, and one of the cars came back around the block. An elderly gentleman and his wife pulled into the driveway and the old guy got out and came over to check things out. Even though he was a lifetime Chevy man, he had an appreciation for Ford products and spent several minutes admiring the powder-coated frame.
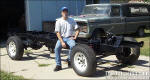

Fig. 4

Fig. 5

Fig. 6


Fig. 1  -  Continuing with what seems to be my tradition, I had my wife snap a pic of me and the '67 chassis at this momentous occasion. Don't ask me why I'm not smiling. I'm actually happy as heck!


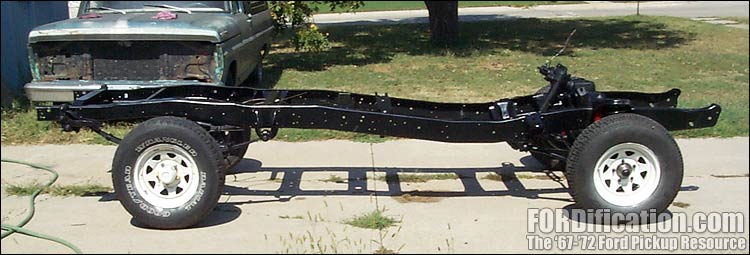
Fig. 2
- I decided to use the old wheels/tires while the project progresses, so minimize any damage that might occur.


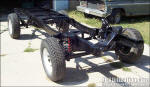
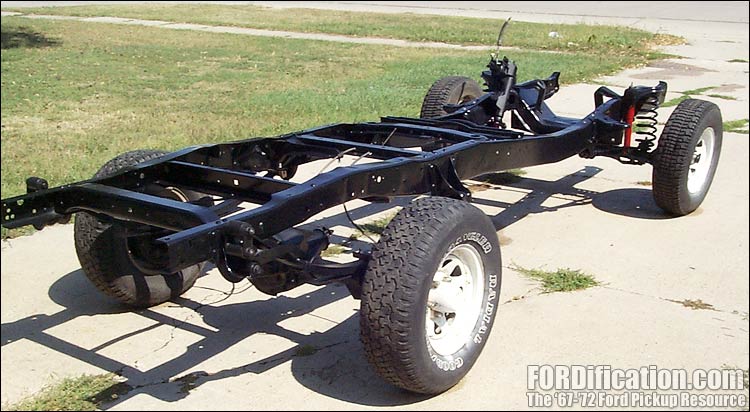
Fig. 3 - Since the auxiliary fuel tank I'd mocked up wasn't cleaned up  yet, I removed it for this picture session.


Fig. 7 - The sandblasted cab is finally rolled out of the sandblast booth,  awaiting the patch panels.

Once I rolled the chassis outside, I spent a few hours getting the shop cleaned up and rearranged, making room and getting ready for the next phase of this project. In between running all new fuel and brake lines, I'll also be getting started on the cab repair. I've got the double-flaring tools for constructing the lines and will be getting started on that as soon as I pick up the supplies. I bought new cab corners a while back, so I'm ready to get started getting the old ones cut out. I rolled out the Hobart welder and will probably spend at least one afternoon practicing welding on some junk body panels to refresh my skills before attacking the cab. Here are a few pics of cab repairs needed:

Fig. 8 - This crease is in the left rear of the cab. I'd swear it wasn't here when I sandblasted the cab, but it's here now.

Fig. 9 - The rusted area of the cab roof that was cut out back on Page 18 will get a patch panel which wraps around the cab. This is going to be the hardest repair.

Fig. 10 - The driver's-side door pillar post had rust which had to be cut out. This will be my first welding task, since the welds will be hidden, so they don't have to be pretty.

Fig. 11 - An overly-long bolt for the in-cab fuel tank caused this dimple in the back of the cab. Fig. 12 - Here you can see the left rear cab corner rust.... Fig. 13 - ...and here's the passenger-side cab corner. It's not as bad, but still needs fixin'.


Fig. 16 - This was the best birthday present I've ever gotten.

Fig. 14 - One small section of the passenger-side floorboard has some pinholes in it. I'll go ahead and cut this area out and weld in some good metal. Fig. 15 - I dug out the cab corner patch panels and dusted off the Hobart Handler 175 welder. I'll practice on a few junk body panels first, to refresh my skills.

As with all projects, it takes money to get supplies...and since the truck fund is a little low at the moment, more than likely I'll be getting started on the cab repairs before I get started on the brake and fuel lines, since I already have everything I need. In a week or two when I get the lines I can then get started on that. Stay tuned!


first  previous

next   last


Home  |  Back to My '67 Project Index  |

You are here: Home My Truck Projects The '67 Page 33


Want to link to this site? Please save this banner to your hard drive to place on your webpage.
The correct link to use is http://www.fordification.com


Copyright library© 1999-2019 FORDification.com unless otherwise noted. All rights reserved.
All brand names and product names used on this website are trade names, service marks or registered trademarks of their respective holders.  
No portion or content of this site may be reproduced or otherwise used without explicit permission.
To report problems or provide comments or suggestions, please click here.