|
Sunday, August
22, 2004
- Got started working in the shop today about 11 A.M., bound and
determined to get the front end finished up!
First on the agenda was
getting the new rotors attached. I packed each bearing and installed it,
and then tapped the seals into place. I then flipped each over, packed
the front bearing and dropped it into place. Then it was a simple matter
of sliding the new rotors onto the spindle shafts, installing the
washers and nuts, and tapping on the covers.
Next came the calipers.
These were about as simple an installation as it can get. I simply set
the brake pads inside the calipers and slid them over the rotors, and
secured them to the spindles. All that remained was bolting on the
wheels/tires to drop the front end back down onto the ground...for the
first time in almost a year!
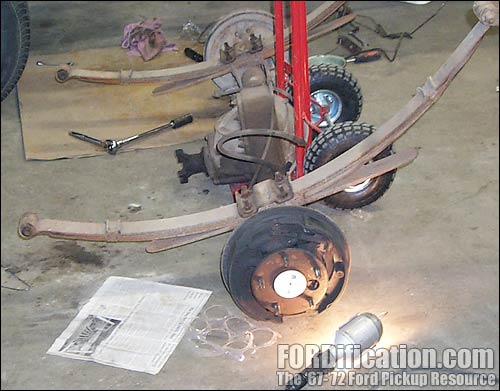
I then got started on
the back brakes. I'd already purchased new shoes and wheel cylinders, so
I simply had to do a lot of cleanup to all the other springs, clips and
cables. I just used the wire wheel attachment on the bench grinder to
clean everything down to bare metal, and then wiped a VERY thin coat of
wheel bearing grease on them, just enough to stop future rust. And one
word of caution...if you clean small parts on a wire wheel like I was,
please be careful. I was holding onto each part with a small pair of
Vice-Grips, but it can still be dangerous. When I was cleaning one of
the springs, in a millisecond the wire wheel snatched the spring and
Vice-Grips right out of my hand and got it jammed down behind the wheel,
dragging the grinder down to a full stop in about 2 seconds! I had to
partially disassemble the grinder to retrieve the spring and
Vice-Grips...and then had to get a replacement spring from the 9" Ford
rearend because the grinder had stretched this one completely out of
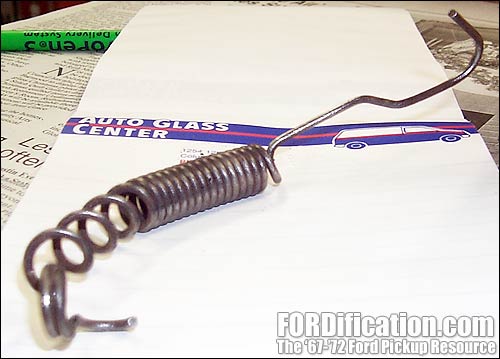
shape! (Fig. 10)
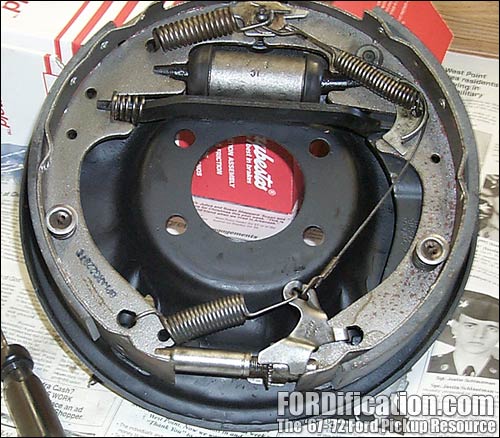
Yes, that's right! I
found out that my 5-lug Dana 60 has the exact same backing plate and
brake hardware as a standard 9" Ford rearend. This will make servicing
much easier in the future...PLUS will mean that I should have no
problems installing rear disc brakes later down the road. If it fits a
9" Ford, it'll also fit this Dana 60. When assembling the rear brake
assemblies, I ended up dragging a 9" Ford unit over by the bench so I
could use it for reference as to proper parts orientation.
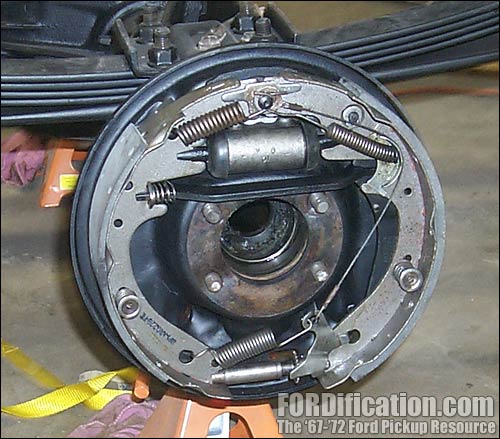
Once assembled, I went
ahead and set them on the rearend housing to await the next step, which
is to get new bearing pressed onto the axles and new brake drums
installed...the last steps to getting a complete rolling chassis.
|
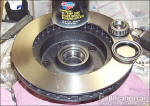
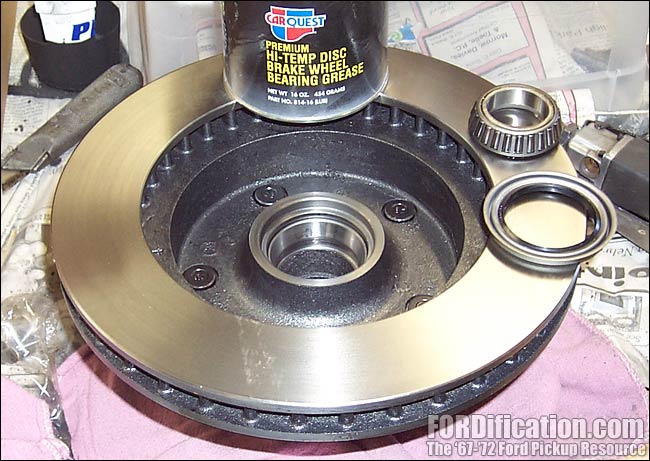
Fig. 1 - Here is one of
the new rotors ready for a new inner bearing and seal.
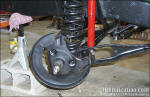
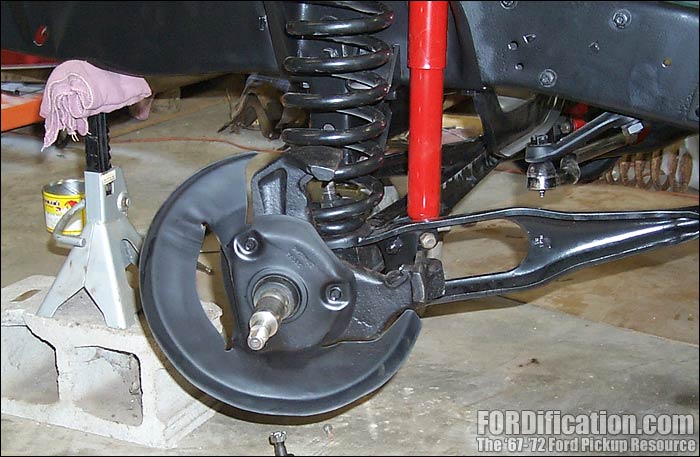
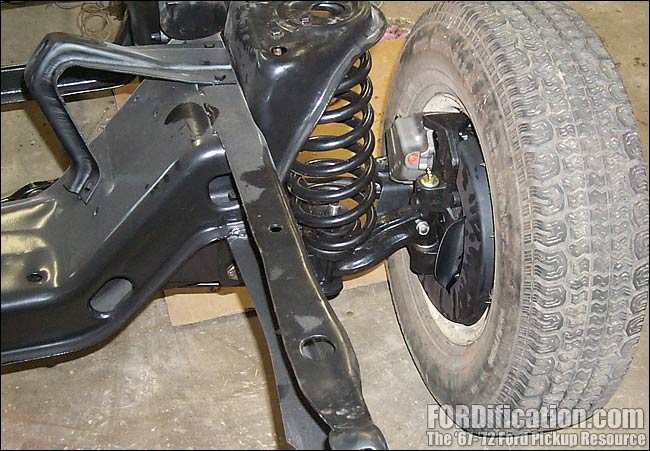
Fig. 2 - Here's a shot of the bare spindle with the disc brake dust
shield installed....

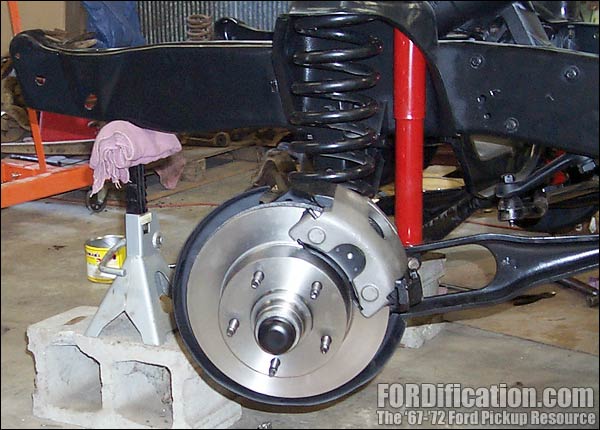
Fig. 3 - ...and here's the new rotor and caliper installed. Looks
good!
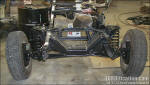
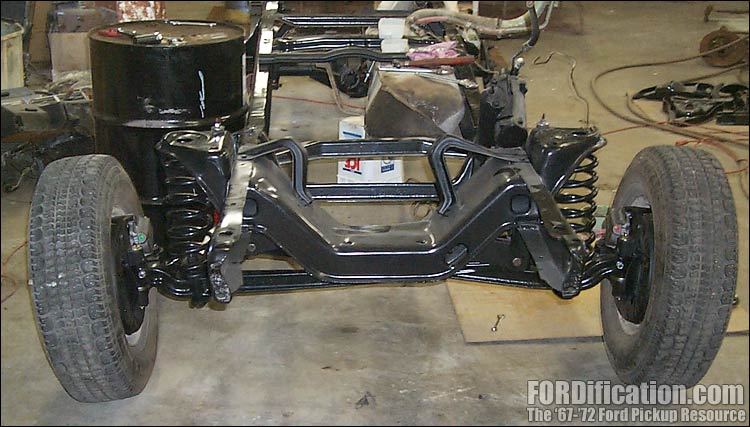
Fig. 4 - FINALLY! The front end is setting back on the ground for
the first time in almost a year! WOOHOO!

Fig. 5 - A shot of the installed front brake units.
|