|


|

|
Getting the F250 Parts Truck Home |
|
 |
|
02-25-05
- Well, the F250 finally came home tonight...but I'll tell you,
it was an adventure getting it loaded!
I
hooked the truck onto the back of the trailer and towed it up to
a flat spot in the lot. It turned out that as we were setting up
the ramps we noticed it seemed like the front end might be
almost too wide to fit. I dug out my tape measure and sure
enough, the overall front track width was about 1/4" wider than
the trailer's siderails. This was caused by chrome wagon-wheel
rims with a major offset, which increased the width by several
inches. Well, we hoped that we could still force it on anyway,
since we didn't have any other 8-lug rims to use as
replacements.
We
were able to get it about a third loaded before it wedged itself
so tight between the rails that it just wouldn't come on any
more. At first we thought we'd remove the front wheels and just
winch it up on the front drums, but that plan got nixed. We
ended up grabbing a large roll-around hydraulic jack and lifting
the front end up in the air far enough to get the edges of the
rims above the rails. Then using a LOT of manpower, Gary ran the
come-along and I pulled with all my might on the jack...and it
finally made it all the way. However, once we dropped the jack,
the front end wedged itself so tightly between the trailer's
siderails that the front tires were actually about an inch off
the bed. I went ahead and secured the truck to the trailer,
though I had my doubts whether that was even necessary...it sure
as heck wasn't going to go anywhere! We figured that bouncing
around on the highway for a few miles would let it settle down
onto the bed, but after driving for a couple minutes and then
pulling over to check it out, we were surprised to find that it
hadn't budged! Even after the entire 75-mile trip home, it
didn't move at all.
I
was supposed to return the trailer tonight after unloading the
truck, but since it was dark by the time we made it home, we
called the guy who loaned the trailer to us and told him that we
were going to keep it overnight and would return it in the
morning. Trying to get this truck unwedged from the trailer is
probably going to take a while, so I'm gonna get started on that
first thing tomorrow morning. I'll probably try to jack the
front end back up with a hydraulic jack until the front wheels
clear the siderails again, and then either push it off, or tie
the truck to a tree and drive out from under it. |

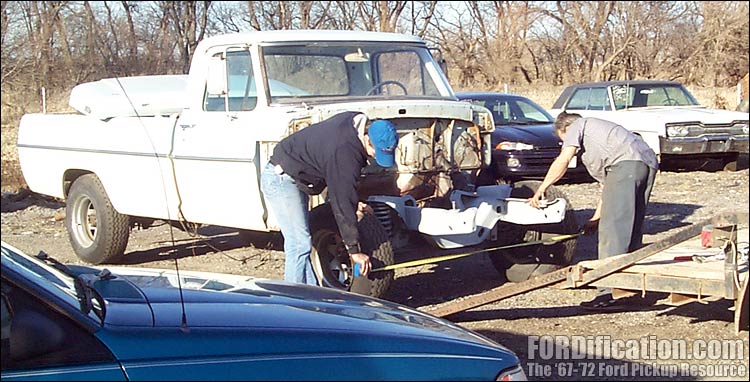
Fig. 1 - Gary and I finding out that loading this truck was
not going to be an easy task.
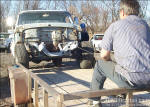
Fig. 2 - Here you can see our dilemma. I tried wiggling the
steering wheel while the truck was coming up the ramps, to try
to work it in. We got it about 1/3 the way before it got too
tight.
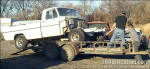
Fig. 3 - We were able to jack the front end up above the
side rails go gain enough clearance to finish loading the truck.
|
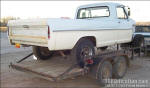
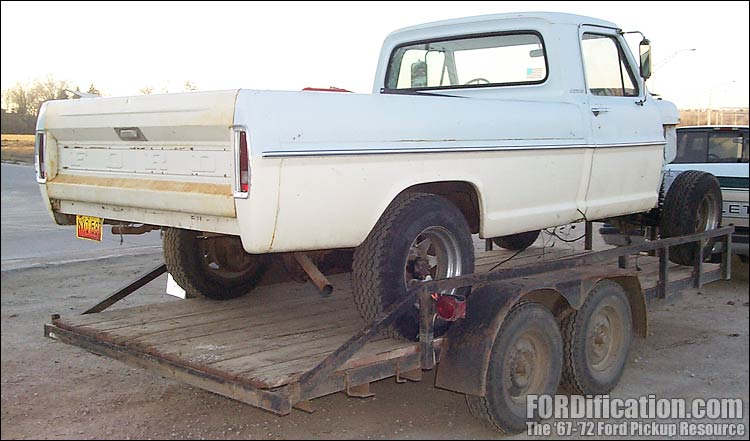
Fig. 4 - Here's a shot of the loaded truck. Even after
bouncing around on the highway for a few miles, you can still
see daylight under that right front tire. |
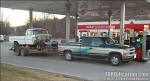
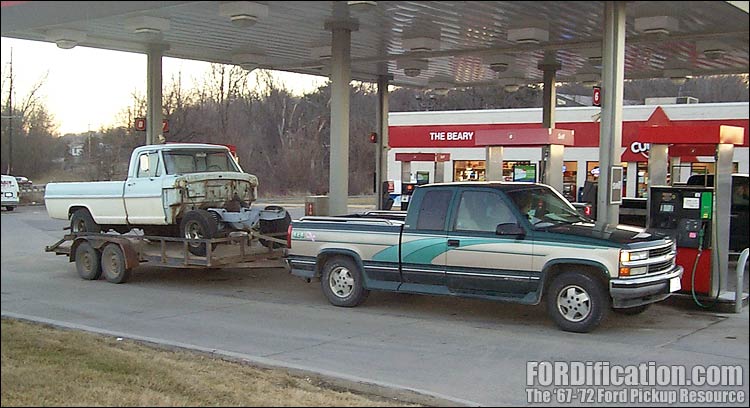
Fig. 5 - We stopped to gas up about 1/3 of the 75-mile trip
home, and the front end was still up in the air. |
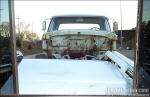
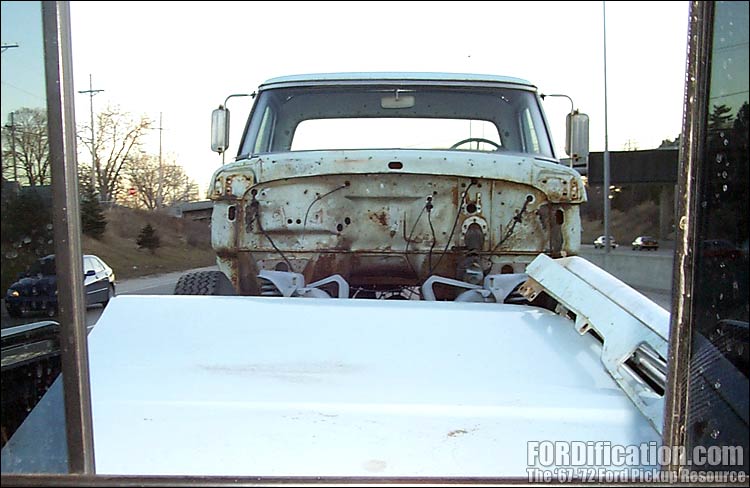
Fig. 6 - I'll bet this is the first time this truck has been
out on the freeway in many years! |
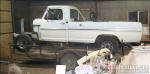
Fig. 7 - Finally home in the shop. I snapped a few pictures
before calling it a night...they appear below. |
|
After dropping the truck off at the shop tonight, we decided
it was too dark and too late to get started trying to unload
it, so before heading home I grabbed the camera and walked
around the truck a few times snapping a few pictures: |
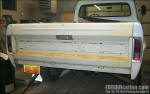
Fig. 8 - Though the tailgate is from a different
truck, it's in great shape. There is one tiny dent above the
release handle, but that's it. No rust at all. This gate is
drilled for the trim panel but that wasn't included.
However, I already have a good one, so I'm all set. |
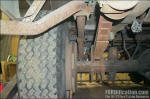
Fig. 9 - AHA! NOW we know that the reason for the
wheels with major offset was for exhaust pipe clearance! The
owner wanted to install dual exhaust, but since this truck
had the auxiliary fuel tank, the left side pipe had to be
run outside the frame rail. |

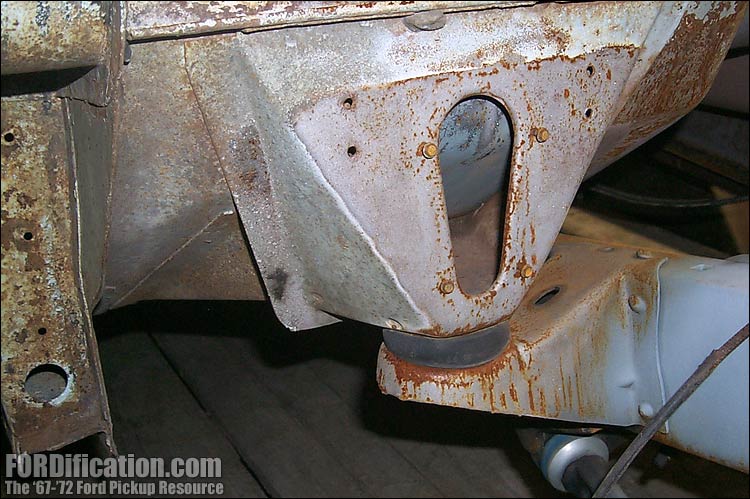
Fig. 10 - The front cab mounts and surrounding areas
were sandblasted clean, but due to being stored outside was
starting to flash rust. They're in great shape overall. You
can also see where he's installed urethane bushings when
rebuilding the front end. |
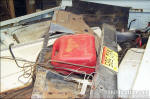
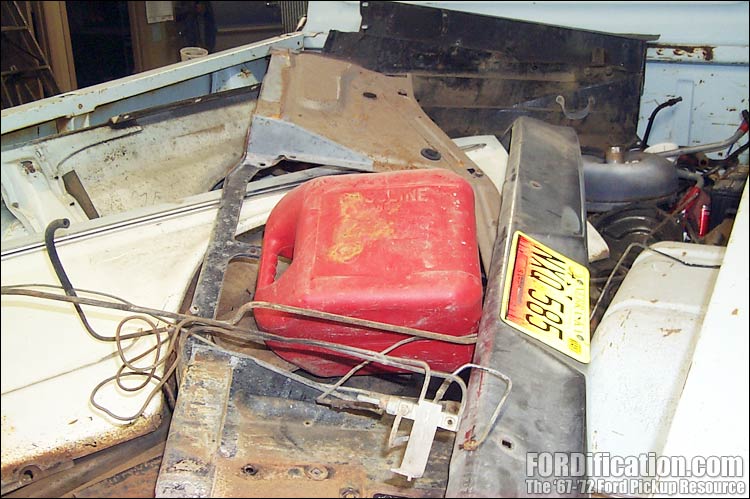
Fig. 11 - In the bed I find both front fenders,
bumper, almost NOS inner fenderwell and radiator support and
lots of small parts. |

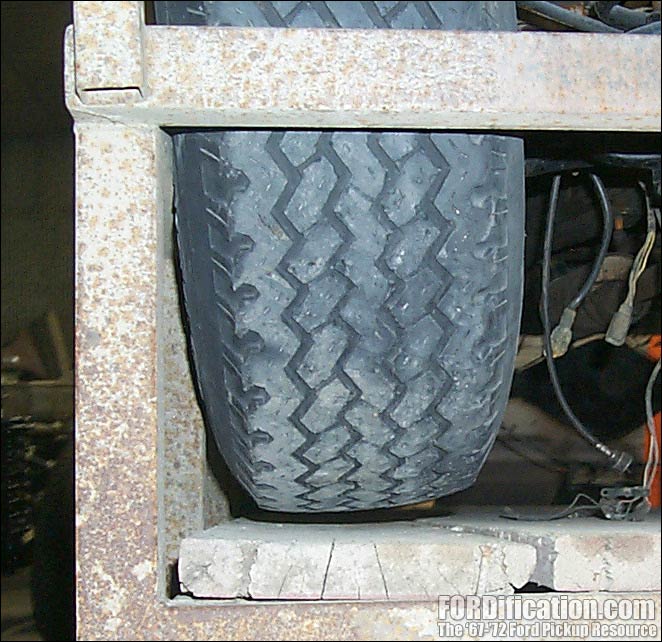
Fig. 12 - The front tires were an inch off the bed
all the way home. |

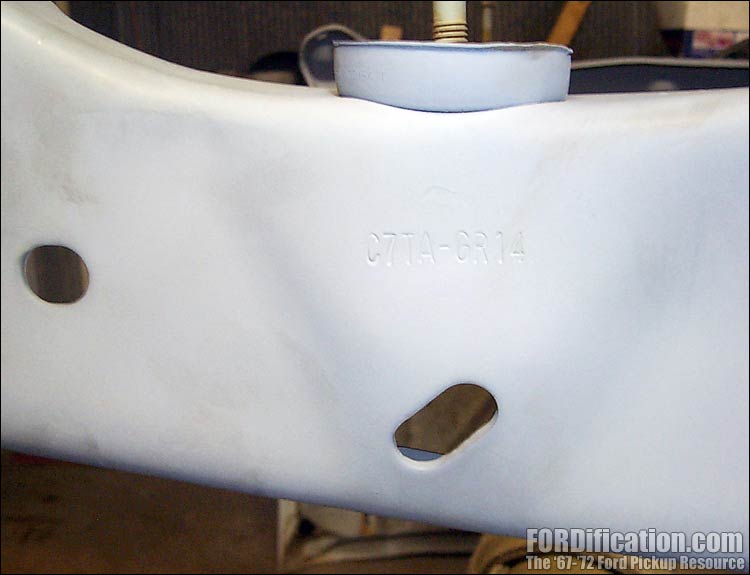
Fig. 13 - Here's a good shot of the frame's PN on the
left front frame rail. This is something I've only noticed
on '67s. |
Fig. 14 - The Camper Special emblems are removed but
I have them. There is also an additional set of holes on the
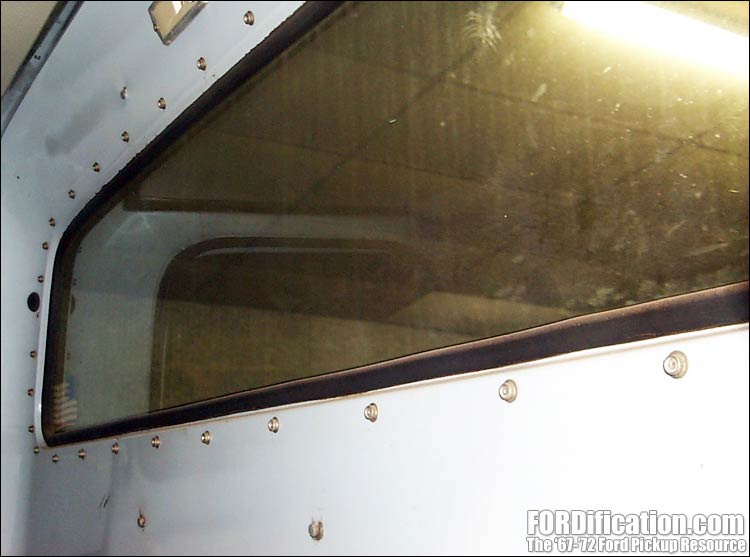
cowl panel, presumably for cabover camper supports. There are identical
holes on the other side. |
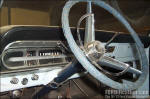
Fig. 15 - Full-instrumentation instrument cluster and
a perfect black dashpad. Chrome horn ring has no pitting.
The hole for the radio is mutilated a bit. |
Fig. 16 - This concerns me a bit. Snaps were
installed around the rear window for a camper boot, plus
there are two additional holes above and two below the
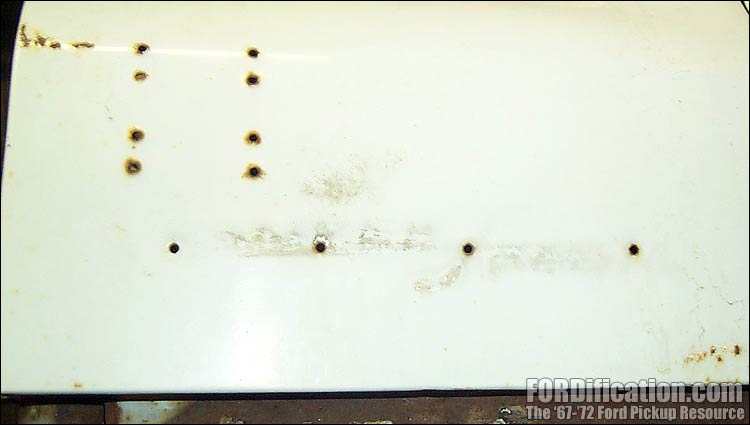
window. (Gun rack? Nah, too close together.) |
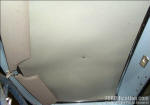
Fig. 17 - An almost perfect headliner, with only very minor
bowing. This will be easy to correct and use. |
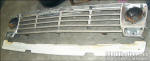
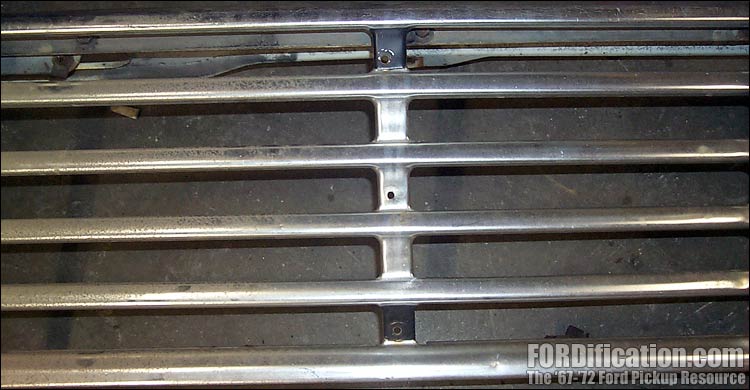
Fig. 18 - A very straight aluminum grille (just a couple
tiny dings) and valance panel. This is one of very few
valance panels I've come across that isn't dented or
rusty...or both. The headlight doors are AWOL. |
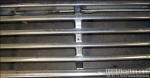
Fig. 19 - A previous owner installed an aftermarket A/C
condenser on the backside of the grille, by drilling three
holes of each of the two outer vertical support bars. |
|
The pictures above were taken during a quick inspection this
evening, and I still haven't really had time to very closely
inspect this truck....that will come tomorrow. From what I
can tell, this truck is basically complete, minus an engine
and transmission. The right-side inner fender is rusted out
but included. The auxiliary fuel tank and skidplate are
missing, but all the other related hardware is still
installed, such as the underdash switch for the sending
units, the on-floor tank selector valve, the filler neck and
filler neck shield (in the bed). Other than some scratches,
the hood appears to be perfect.
After I unload the truck tomorrow (which will probably be a
bigger adventure than getting it loaded today!), I'll be
spending the day in the shop taking a complete inventory of
all the parts and their condition, and then deciding which
will be used for my F100. All in all I'm very happy with
everything, considering I only paid $350 for the whole
truck. |
|
 |

Want to link to
this site? Please save this banner to your hard drive to place on your
webpage.
The correct link to use is
http://www.fordification.com
|