Insulation between inner and outer fenders: which type?

Moderator: FORDification

Post Reply
User avatar
robroy
100% FORDified!
100% FORDified!
Posts: 3768
Joined: Sun Jul 06, 2008 4:36 pm
Location: California, Salinas

Insulation between inner and outer fenders: which type?

Post by robroy »

Good day!

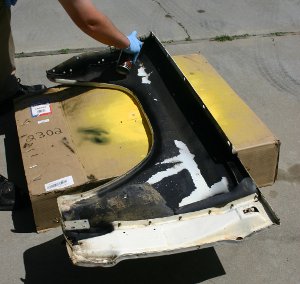
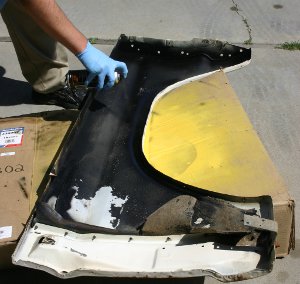
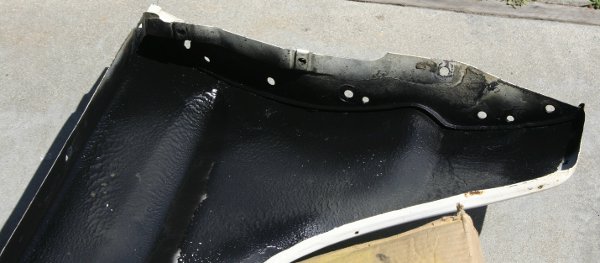
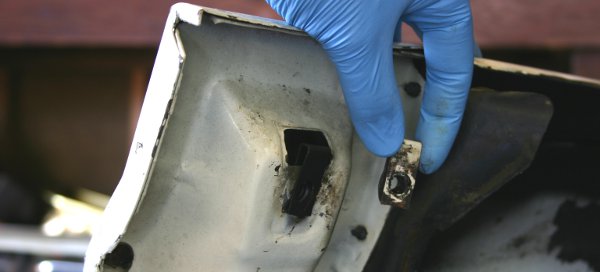
Yesterday I took a close look at the putty-like goop between the inner fenders and the outer ones. I'll be replacing this on my truck pretty soon. Here's what I'm looking at:

Image

I think this stuff might be called "Fender Welt" by Dennis Carpenter. And if that's truly what this is, they sell three different types:
  1. 48-16070: Black Vinyl - 30' roll
  2. 48-16070-SS: Stainless Steel - 8' lengths
  3. 48-16070-RR: Rubber - 8' lengths
Am I looking at the correct material for this area? And if I am, which type is best? It's hard for me to imagine "stainless steel" taking the place of vinyl or rubber, but maybe there's something I'm missing here.

Thanks very much!
Robroy
Last edited by robroy on Sun May 29, 2011 10:54 am, edited 1 time in total.
User avatar
lee_ford
Preferred User
Preferred User
Posts: 251
Joined: Fri Mar 17, 2006 1:43 am
Location: Lubbock, Texas

Re: Insulation between inner and outer fenders: which type?

Post by lee_ford »

robroy wrote:It's hard for me to imagine "stainless steel" taking the place of vinyl or rubber, but maybe there's something I'm missing here.
I bet the SS is only on the rounded edge. Just a way to dress up the engine compartment. The original was rubber I bet. The vinyl is an update and would last longer. A Concourse ready restore would need the rubber, but if you are just wanting an updated Bump, go with the vinyl.
My 1969 F100 Gallery
[Please note: A lot of what I write may be common knowledge to some of us. But for a new comer and even us at one time, somebody had to inform us that FIRST time.]
User avatar
robroy
100% FORDified!
100% FORDified!
Posts: 3768
Joined: Sun Jul 06, 2008 4:36 pm
Location: California, Salinas

Re: Insulation between inner and outer fenders: which type?

Post by robroy »

Hey Lee, thanks for replying!

Now that you mention it, the explanation for the stainless stuff really makes sense! And a stainless steel strip just meant for looks is definitely not something I'm in to.

The original stuff actually seemed almost like a tar-like paste or a thick, hard putty. It didn't seem like rubber, unless it was rubber that disintegrated in to this material over the decades.

But based on your advice, it sounds like the vinyl is the best choice for me.

Thank you Lee!
Robroy
fordman
100% FORDified!
100% FORDified!
Posts: 22329
Joined: Sun Aug 28, 2005 8:17 pm
Location: Kansas, Ottawa
Contact:

Re: Insulation between inner and outer fenders: which type?

Post by fordman »

it is called buytl tape. i have not seen the sticky black type used before in this place. i have only seen the nuetral color used on the inner fender. the blackstuff is the sticky kind that is used on the removalble hump for the transmission.
User avatar
madbiker4
New Member
New Member
Posts: 83
Joined: Wed Feb 25, 2009 4:30 pm
Location: sw virginia

Re: Insulation between inner and outer fenders: which type?

Post by madbiker4 »

I'm going to agree with fordman, the fender welt strips were used on older trucks and cars with the big flared fenders, the welt was placed between the fender and side of the firewall and between the rear fenders and bed on fleetsides .
1972 f100 ranger xlt, 300 cid I6, Clifford performance 6=8 intake manifold, Holley 600 cfm 4bbl carb, Heddman dual exhaust headers, dual flowmaster mufflers, duraspark II, power disk brakes.
User avatar
71PA_Highboy
Blue Oval Fanatic
Blue Oval Fanatic
Posts: 923
Joined: Tue May 23, 2006 11:32 am
Location: Denver of the East

Re: Insulation between inner and outer fenders: which type?

Post by 71PA_Highboy »

It is neither fender welting nor Butyl Tape.

Originally it was applied on the line with a caulking gun, and the closest comparable product is '3M Glazing and Bedding compound'. There is also a product called 'stick caulking' that a lot of restorers use as it is easy to manipulate and holds in place without smearing around - nice when you are wiggling a fender to get it right.

Personally, I use the stick caulking, it is easy, stackable and I don't have to worry about it leaking out of the caulking gun.

JMHO,

Eric
Got Ford?
2 EarlyBroncos (68,69)
2 Classic Mustangs (69,70)
1 F250 4x4 (71) - OB - 360, NP435, D24, HPD60 4.10, D60,
1 94 Ranger, 2.3, 5spd
1 Lincoln Mark VIII
User avatar
robroy
100% FORDified!
100% FORDified!
Posts: 3768
Joined: Sun Jul 06, 2008 4:36 pm
Location: California, Salinas

Re: Insulation between inner and outer fenders: which type?

Post by robroy »

Good evening Fordman, MadBiker4, and Eric, thanks for your excellent replies!
fordman wrote:it is called buytl tape. i have not seen the sticky black type used before in this place. i have only seen the nuetral color used on the inner fender. the blackstuff is the sticky kind that is used on the removalble hump for the transmission.
Interesting! Perhaps this was yet another specification that was open to interpretation at the Ford factory.
madbiker4 wrote:I'm going to agree with fordman, the fender welt strips were used on older trucks and cars with the big flared fenders, the welt was placed between the fender and side of the firewall and between the rear fenders and bed on fleetsides .
I see! That makes sense; thanks for clarifying this.
71PA_Highboy wrote:It is neither fender welting nor Butyl Tape.

Originally it was applied on the line with a caulking gun, and the closest comparable product is '3M Glazing and Bedding compound'. There is also a product called 'stick caulking' that a lot of restorers use as it is easy to manipulate and holds in place without smearing around - nice when you are wiggling a fender to get it right.
Most excellent! Thanks for this recommendation. I've found this product entitled, "Strip Calk." I'm sure that's what you're referencing! Here's what I'm looking at:

The 3M Web Page for 3M Strip Calk, P/N 08578
Image
71PA_Highboy wrote:Personally, I use the stick caulking, it is easy, stackable and I don't have to worry about it leaking out of the caulking gun.
I'll give this a whirl then!

It has been about a year since my last post to this thread, and I'm just now seriously ready to install new material between the inner and outer fenders.

I'll be sure to post photos of the material and its application.

Fordman, MadBiker4, and Eric, thanks again for your super helpful replies!
Robroy
User avatar
mk
Blue Oval Fanatic
Blue Oval Fanatic
Posts: 917
Joined: Wed Mar 02, 2005 1:12 am
Location: CANADA, central Alberta

Re: Insulation between inner and outer fenders: which type?

Post by mk »

That strip calk (aka dumdum) is exactly what it is. I picked up a barely used box at a garage sale for 2 bucks last year.


mike
Always drink upstream from the herd...

~Will Rogers

Mercury truck ID thread:
http://www.fordification.com/forum/view ... =2&t=35331
Ford truck model history:
http://www.fordification.com/forum/view ... =2&t=37394
Using dentside fender liners:
http://fordification.com/forum/viewtopi ... =7&t=35675
Matchbox diecast bumps:
http://www.fordification.com/forum/view ... =2&t=45618
cwii
New Member
New Member
Posts: 30
Joined: Wed Mar 17, 2010 7:11 pm

Re: Insulation between inner and outer fenders: which type?

Post by cwii »

RobRoy, Great Post. I have been wondering the same thing. My truck had stuff that fell off as I took the fenders apart. I am a couple of weeks away from putting the fenders back on, I may use the rubber or vinyl to avoid the mess. I know me if it can leak or be a gotcha for ordinary folks I will have a hlll of a mess. I will have to sacrifice a few $$ just for trouble savings.
Have a great Ford day.

By the way where did you get the name for your truck?
chuck
1971 F250 Sport Custom Camper Special
El Paso Tx.
User avatar
convincor
100% FORDified!
100% FORDified!
Posts: 1511
Joined: Wed Sep 12, 2007 5:05 am
Location: Connecticut

Re: Insulation between inner and outer fenders: which type?

Post by convincor »

NPD calls it "Stripping Caulk Cord".
page 264. listed as "correct strip used to seal, fenders to apron, seal around screws and plugs , etc."
3/16"dia x 60', black......903-1
.19" dia x 65' gray.........903-4
http://npd.dirxion.com/WebProject.asp?B ... flx&from=2
68 Custom Cab Shorty, 390, C6, 9"-3.50:1 Currie T/L
"Still Plays With Trucks"
http://s101.photobucket.com/albums/m41/convincor/F100/
User avatar
robroy
100% FORDified!
100% FORDified!
Posts: 3768
Joined: Sun Jul 06, 2008 4:36 pm
Location: California, Salinas

Re: Insulation between inner and outer fenders: which type?

Post by robroy »

Good day Mike, Chuck, and Convincor, thanks for your great replies!
mk wrote:That strip calk (aka dumdum) is exactly what it is. I picked up a barely used box at a garage sale for 2 bucks last year.
Okay, thanks for the confirmation! That sounds like you got a great deal on that.
cwii wrote:RobRoy, Great Post. I have been wondering the same thing.
Thanks Chuck!
cwii wrote:My truck had stuff that fell off as I took the fenders apart.
Same here, to some degree, although the material I found was still pretty much stuck to the panels. But regardless of whether it fell off or was stuck there, I'm sure it doesn't compare to the resilience and pliability of the new material.
cwii wrote:I am a couple of weeks away from putting the fenders back on, I may use the rubber or vinyl to avoid the mess. I know me if it can leak or be a gotcha for ordinary folks I will have a hlll of a mess. I will have to sacrifice a few $$ just for trouble savings.
I see! This 3M product doesn't seem all that messy, and it was only $15.70 where I picked it up. If you choose the rubber of vinyl product, I'll be curious to see how it turns out. As mentioned by contributors to this thread, the rubber and vinyl strips aren't really made for this particular use; they're made for sealing around the huge fenders found on older Ford pickups.
cwii wrote:Have a great Ford day.
Thanks Chuck--that I'll do!
cwii wrote:By the way where did you get the name for your truck?
My very first car was a light GVW F250 that once lived in a Texas school district vehicle fleet, and its fleet ID number was "40." It had "#40" painted on the driver's side door. So when I picked up my second Bumpside, it seemed natural to increment by ten and maintain the fine old tradition. There a little more to the story here: Photos of my trucks 12-14 years ago.

Today's Update:

Yesterday I stopped by Peninsula Color Service in Santa Cruz; they had 3M Strip Calk on the shelf! I paid $15.70 for it including tax.

Here are some photos I just took outside. Y'all can click on these to see the full-sized versions.

ImageImage
Image
Image

Today's Question:
  • ID 6: Will a single skinny strip of this stuff be sufficient between the inner and outer fenders, given that it'll smash down and spread out? Or would two strips in parallel be more fitting?
Mike, Chuck, and Convincor, thanks for your superb replies!
Robroy
User avatar
71PA_Highboy
Blue Oval Fanatic
Blue Oval Fanatic
Posts: 923
Joined: Tue May 23, 2006 11:32 am
Location: Denver of the East

Re: Insulation between inner and outer fenders: which type?

Post by 71PA_Highboy »

I set the fender in place, and look to see home much gap I have to fill, then STACK it approriately to fill the height.

It will flatten out as you tighten the bolts, so no worries on the width.

Some places will look like you don't need it, and others will look to need 2 or 3 pieces stacked.... just do what looks right. You can always scrape off any extruded excess.

Good luck!
Got Ford?
2 EarlyBroncos (68,69)
2 Classic Mustangs (69,70)
1 F250 4x4 (71) - OB - 360, NP435, D24, HPD60 4.10, D60,
1 94 Ranger, 2.3, 5spd
1 Lincoln Mark VIII
User avatar
convincor
100% FORDified!
100% FORDified!
Posts: 1511
Joined: Wed Sep 12, 2007 5:05 am
Location: Connecticut

Re: Insulation between inner and outer fenders: which type?

Post by convincor »

from what I vaguely remember taking it apart the caulking was about 3/4"-1" wide.. if that helps. :? oh, and mine was grey.
68 Custom Cab Shorty, 390, C6, 9"-3.50:1 Currie T/L
"Still Plays With Trucks"
http://s101.photobucket.com/albums/m41/convincor/F100/
User avatar
robroy
100% FORDified!
100% FORDified!
Posts: 3768
Joined: Sun Jul 06, 2008 4:36 pm
Location: California, Salinas

Re: Insulation between inner and outer fenders: which type?

Post by robroy »

Good evening Eric and Convincor, thanks for your outstanding replies!
71PA_Highboy wrote:I set the fender in place, and look to see home much gap I have to fill, then STACK it approriately to fill the height.
Understood, thanks! I just did a test-fit earlier this afternoon and could see what you mean about seeing how much gap there is, since it's not totally even. I'll stack it as advised!
71PA_Highboy wrote:It will flatten out as you tighten the bolts, so no worries on the width.
Okay, perfect!
71PA_Highboy wrote:Some places will look like you don't need it, and others will look to need 2 or 3 pieces stacked.... just do what looks right. You can always scrape off any extruded excess.
I see what you mean. Thanks Eric!
convincor wrote:from what I vaguely remember taking it apart the caulking was about 3/4"-1" wide.. if that helps. :? oh, and mine was grey.
That width sounds about like what I remember seeing on there from the factory. That's interesting that yours was gray. You know, now that I think about it, I remembering that mine was gray too right under the surface. The surface of the putty had turned black somehow, yet when I scraped it off and pieces of it broke up, I could see that it was gray on the inside.

This Evening's Update:

I de-buried the old fenders from the corner of the garage. Since removing them from the truck in July 2008 I'd hosed them off but that was the extent of the care they received. Needless to say I wasn't inclined to bolt them up all dirty and smash their gritty surfaces up against the restored inner fenders!

I hosed them down, then scrubbed them with some de-greaser. A lot of dirt came off despite having been hosed down in 2008. Y'all can click on any of these images to see the full-sized versions.

ImageImage
Image

I gave their original exteriors a similar treatment, then set them in the sun with an electric fan to speed up the drying.

ImageImage

The paint looked a lot better without all the dirt and mold!

ImageImage

After they'd thoroughly dried, I hit some of the rust areas with Eastwood's Rust Encapsulator from a rattle-can. I'm not trying to do a fancy job with these fenders, yet I couldn't bear to bolt them up with significant patches of surface rust left bare. Since the Rust Encapsualtor finish is porous, I'll top-coat tomorrow.

ImageImageImage
Image

Eric and Convincor, thanks for your outstanding advice!!!
Robroy
User avatar
robroy
100% FORDified!
100% FORDified!
Posts: 3768
Joined: Sun Jul 06, 2008 4:36 pm
Location: California, Salinas

Re: Insulation between inner and outer fenders: which type?

Post by robroy »

Good evening!

I made some fender installation progress today and took photos along the way. Y'all can click on any of these photos to see large editions.

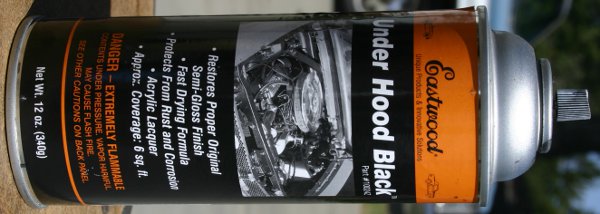
Here I'm putting a top-coat on the surface rust areas. I missed the ideal top-coat time (24 hours after Rust Encapsulator), but I figured a top-coat would still be a good idea. I sprayed with an Eastwood Under Hood Black rattle-can. This stuff dries quickly!
Image
ImageImage
Image

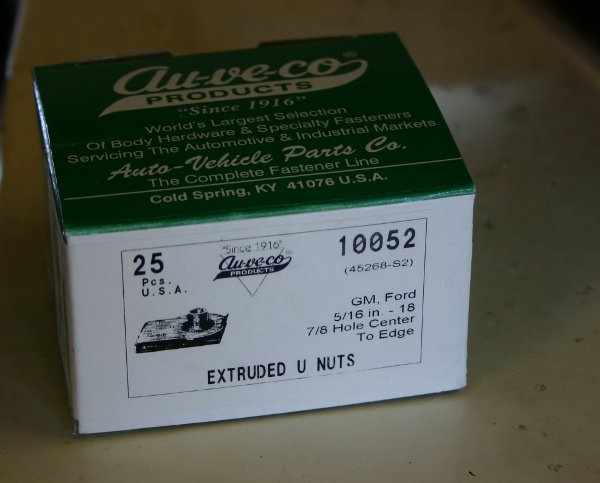
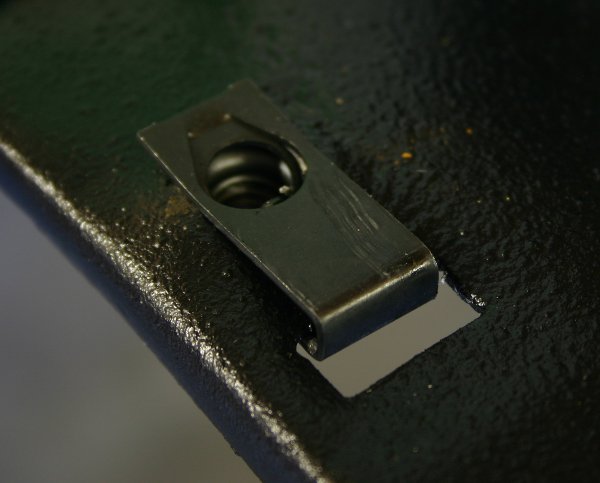
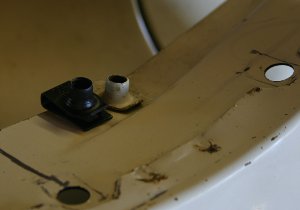
Next the LH inner fender was fitted with new Auveco 10052 Extruded U-Nuts; their fit is identical to the factory U-Nuts, only they're a little more snug since they're new. I also fitted the top, rear fender fastener location with this same nut.
Image
Image
Image
Image

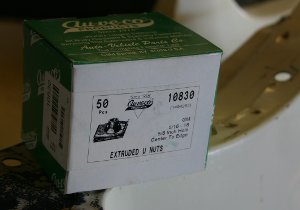
The front edge of the fenders (left) were fitted with the shorter Auveco 10830 Extruded U-Nuts (right). Like the 10052 nuts, the fit of these nuts is basically identical to the ones Ford installed. They're perfect replacements.
ImageImage

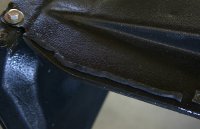
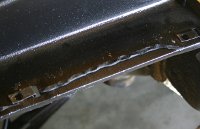
Next I began laying down some 3M Strip-Calk! At first I tried a single bead instead of stacking multiple beads. I cut off short sections to fit in between the u-nuts (left and center photos). Then I set the fender on #50 to determine whether one bead was a sufficient quantity of Strip-Calk (right).
ImageImageImage

In order to hold the fender on, I used these stainless bolts from Totally Stainless. I ordered a kit made for Bumpsides back in 2008.
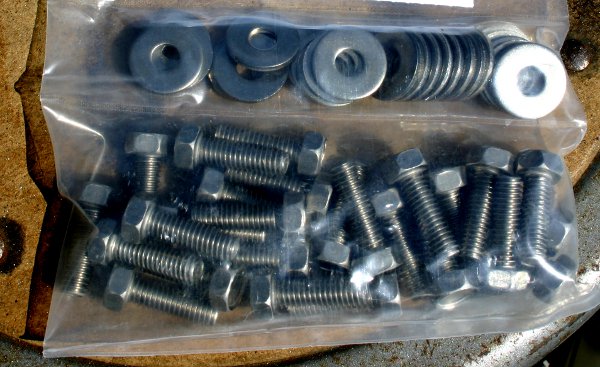
Image

Since the lower, rear fender fastening position had failed in typical Bumpside fashion, crude brackets were installed long ago to hold the fenders on. I might re-architect this makeshift solution. Here's a large photo of one of the brackets: IMG_9722x.JPG.

As described by Eric, I found that some portions of the crack between the inner and outer fender were wider than others--it wasn't totally even. This photo shows one of the wide areas. It's visually exaggerated since the bolts weren't in place, yet you get the idea.
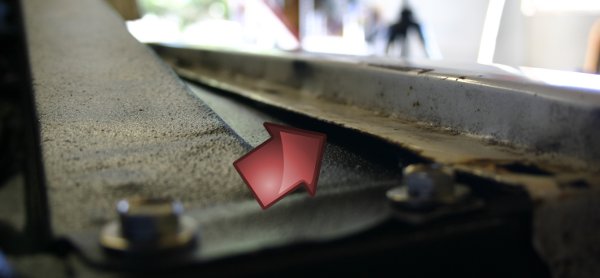
Image

I decided to pull the fender back off and lay down one or more additional layers of 3M Strip-Calk. With the fender removed, the condition of the initial Strip-Calk was telling; it was easy to see the areas that were tight enough to compress it, and those that weren't! The area closet to the cab was the only one in which a single layer of Strip-Calk seemed sufficient. Here's a photo of that Strip-Calk section all smashed down.

Image

You can see in these photos that the two middle Strip-Calk segments hadn't been compressed much. These two photos accidentally look like a single, long photo. Perhaps clicking on them to see them individually will make them more clear.

ImageImage

And the front-most segment was basically untouched; that's where the biggest gap was. Here you can see it in its untouched state (left) and after one or two additional lengths of Strip-Calk were added (right).
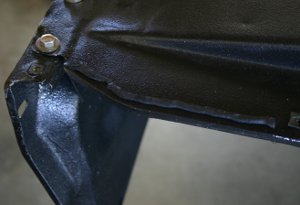
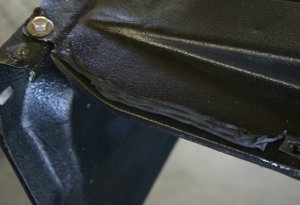
ImageImage

Here's one of the middle segments with additional layers of Strip-Calk added on. By the time I'd arrived at the RH fender, I'd improved my technique by stacking the layers in a cleaner, more purely vertical fashion.

Image

With a total of two to three layers of Strip-Calk applied between each pair of u-nuts, I set the fender back on. The crack looked much better with the extra Strip-Calk in there, and just like Eric mentioned, any excess Strip-Calk can just be cut away with a putty knife. It's easy and fun to work with, and smells terrific! The smell's about half way between a fat permanent marker and fresh black-top pavement.
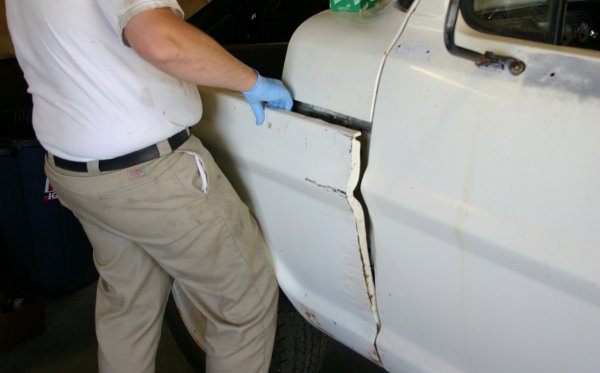
Image

By the time I got to the RH side, I was ready to really lay this Strip-Calk down! I stacked three layers on the front-most segment and two layers for the others. I probably could have used even more.
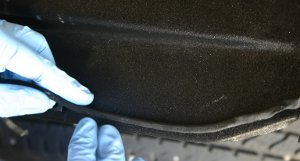
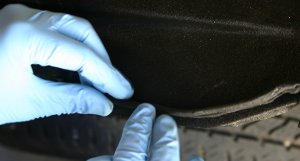
ImageImage
Image

This photo illustrates the peculiar characteristics of Strip-Calk. If candy were made from tar, which I believe it once was (I've heard of antique, tar-based chewing gum), it would behave just like Strip-Calk. This stuff would do wonders at holding dentures in! And you can see how much of the package I used up on the front fenders! I'd better re-order quickly; I now only have enough for thirty-seven more vehicles.
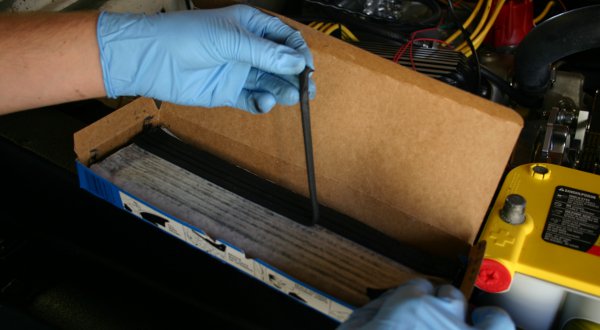
Image

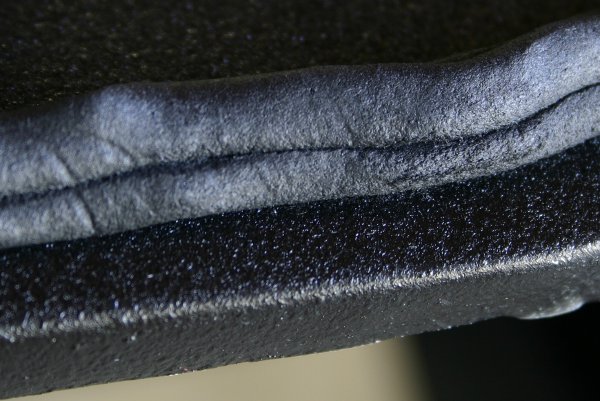
Here's a detailed photo of two pieces of Strip-Calk.
Image

And one more detailed Strip-Calk photo. Y'all will probably want to click on this one to see the heinous details.

Image

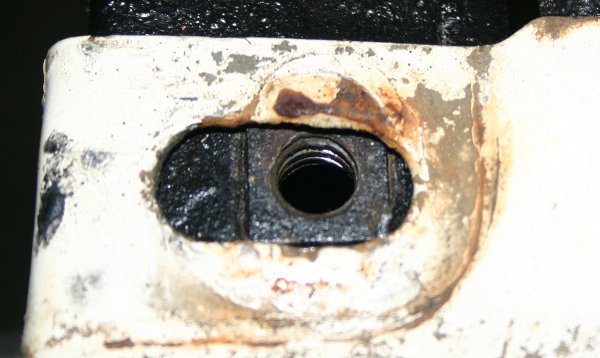
On the LH side I found this captive nut. It's part of the radiator support and sits right under the front tip of the fender. This nut was missing on the RH side; it must have been vaporized by a telekinetic crawdad.
Image

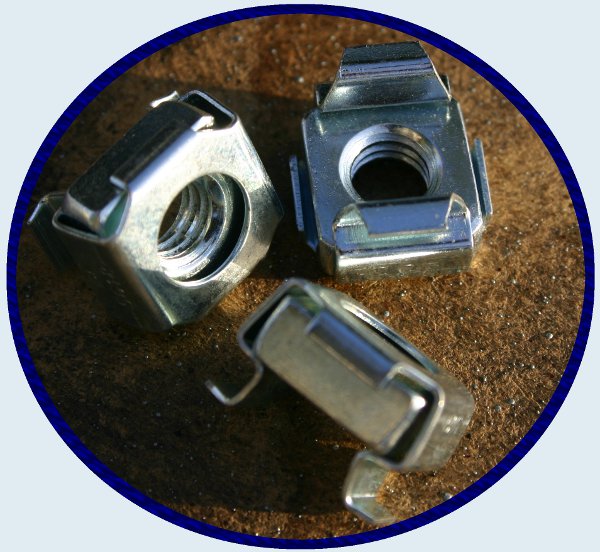
Long ago I ordered these special nuts from McMaster-Carr, yet they didn't seem to be a sufficiently close match to the original captive nuts, so I shelved them and forgot about it (until today). If anybody would like a part number, I could dig it up.
Image

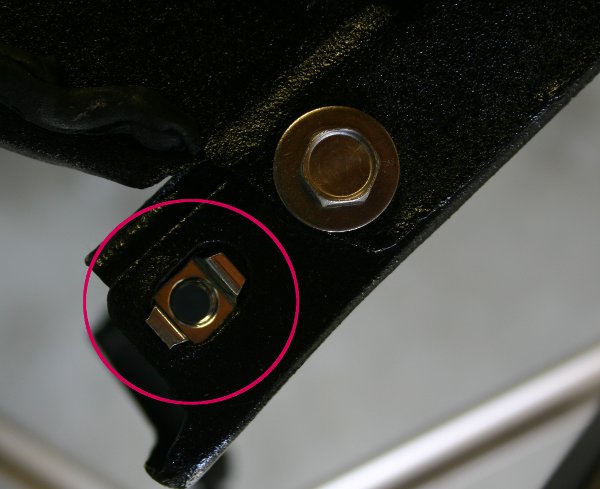
Here's the new captive nut snapped in to place. It actually looks pretty tidy, and although it's clearly not a faithful reproduction of the original part, I think it'll work! It was really easy to install and feels like it won't come loose. The only functional issue I can see is that it's slightly recessed in to the radiator support sheet metal, while the factory captive nut was perfectly flush. I'm guessing that this isn't a big deal.
Image

Here's how the new captive nut looked with the fender sitting on top.

Image

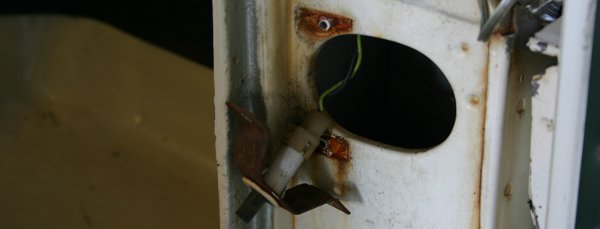
I had to unfasten the dome lamp switch to squeeze my hand in the notorious rear fender bolt zone. I can get my hand to fit in there, but getting the bolt started is like saving the Tin Woodman from choking to death on a carrot.
Image

Thanks for all the superb advice!
Robroy
Post Reply