|
There are
many reasons given by truck owners for wanting to swap their
bumpside truck onto a dentside chassis. Most are looking it
as an upgrade...as a quicker way of giving their truck power
steering, power front-disc brakes and a rear-mounted fuel
tank. If the dentside donor is a Camper Special, then the
truck is also already equipped with a standard front
anti-sway bars and possibly the optional rear bar. (Bumpside
trucks could only get a front anti-swaybar on the front of
F350 and some F250 models, and it was a strange piece that
extended between the front radius arms instead of being
mounted up front of the axles, as in a car application. See
Figs. 3 and 4).
Whatever
the reasons, if you've decided to explore the possibility,
here are some of the things you need to be aware of.
Mounting
the cab and front sheetmetal is a bolt-on affair...there
were no changes done to the front part of the frame to
affect that. However, keep in mind that the rear cab mounts
on all 2WD and F100 4WD trucks are part of the frame
crossmember, whereas F250/F350 4WD trucks have a bracket on
the outside of the frame. To mount a 2WD cab onto a
F250/F350 4WD chassis you'll need to drill new holes in the
cab in the areas shown in Fig. 7
(picture coming soon).
However,
because the rear frame section is longer and wider, mounting
the box will require a little work, though it's still
definitely do-able.
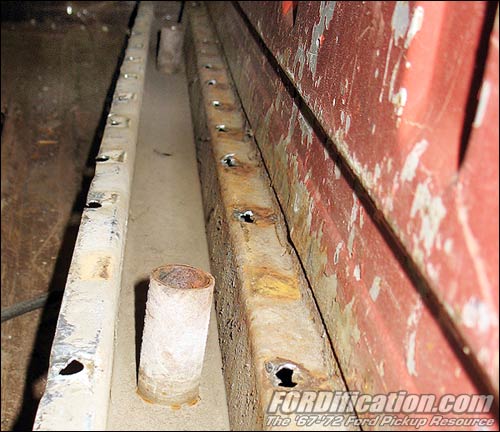
The box is
bolted directly to the frame. Because the dentside frame is
wider, you'll have to drill new mounting holes in the box.
In of itself this is pretty straight-forward, except that
you need to consider that the factory reinforced the bed's
mounting holes with hollow tubing, preventing the bed floor
from distorting when the hold-down bolts were tightened up
and to prevent the bolt heads from pulling through the
floor. Fig. 8 at right shows these tubes on my '67 after
removing the bed floor. Because these are inside the bed
support, it'll be next to impossible to add these, but you
might be able to reach in through the end of the bed
support with something long to insert a similar piece of
tubing. Otherwise, be aware that over-tightening the
hold-down bolts will distort the floor and could possibly
cause the bolt head to completely pull through the floor.
The other
thing to consider is the difference in wheelbase. Remember
that the dentside truck frames are 2" longer behind the cab.
Therefore, positioning the box so that the rear wheels are
centered inside the wheelwells will create a slightly larger
gap between the cab and the front of the box. On the other
hand, if you shift the box forward to restore the proper
cab-to-box gap, then the rear wheels will no longer be
centered in the wheelwells.
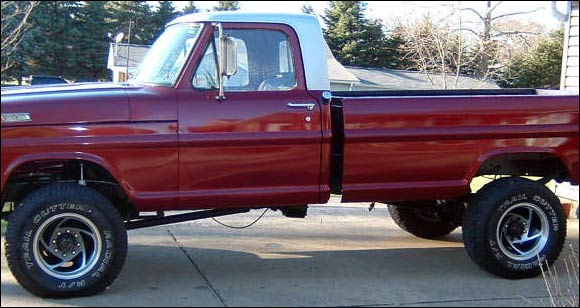
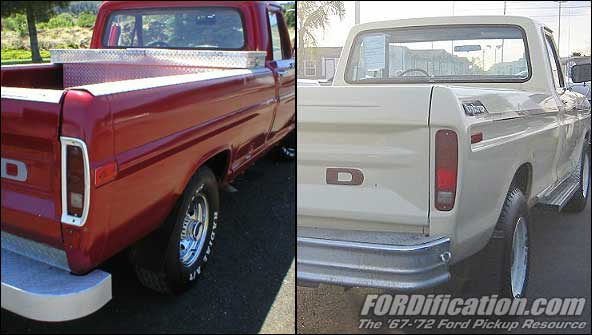
An example of a '72 F-250 body mounted on
a '76 chassis. In this case, the owner centered the rear
tire in the wheelwell when mounting the bed, resulting in a
2" greater gap between the cab and the bed.
There are
two ways of dealing with the situation:
-
Simply
split the 2" difference, resulting in a cab-to-box gap
that is only 1" wider than factory and rear wheels that
are about 1" farther back towards the rear of the
wheelwell. Most truck owners who do the body swap use
this method and report the difference is virtually
unnoticeable on a 2WD truck and not even an issue on a
4WD.
-
The
second method is considerably more work, but the end
result is better. Mount the box in the full-forward
position, maintaining the proper cab-to-box gap. Then
relocate the rear spring mounts 2" forward, which will
in turn bring the entire rearend housing with it,
centering the wheel in the wheelwell. Of course, this
method will probably require the need to shorten the
driveshaft to compensate, and possibly the rear brake
lines.
|
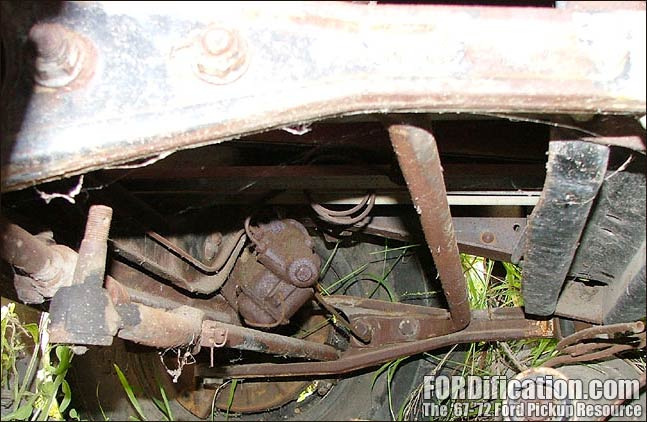
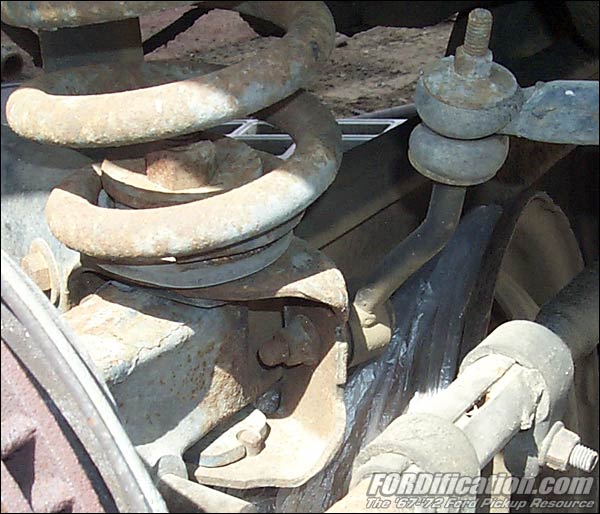
Fig. 3 - Bumpside front anti-sway bar. This style of
swaybar interferes with header installation.
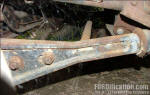
Fig. 4 - Bumpside front anti-sway bar
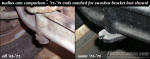
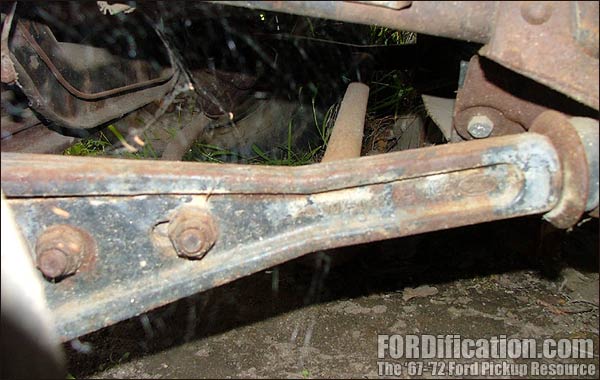
Fig. 5 - A comparison shot of the end of radius arms.
The dentside version is slightly longer and has a notch to
accept the front swaybar link bracket (not shown).

Fig. 6 - I couldn't find a picture of the swaybar
link bracket as mounted on a truck, so here's one from a
van. The bracket is identical though. You can see the notch
in the end of the radius arm to accept the link rod locating
pin.
[PICTURE COMING SOON]
Fig. 7 - Here are the areas where you'll need to drill
new cab mounting holes to mount a 2WD cab onto an F250/F350
4WD frame.
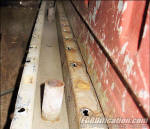
Fig. 8 - Here's a view of the bed-floor supports,
shown after removing the floor. These keep the hold-down
bolts from distorting the bed floor when tightened down, as
well as preventing the bolt from pulling through the floor. |