|


|

Page 04
Getting Started...and Getting Some Bad News |
|
 |
|
January 01, 2007 -
This is the first
of the new year, so I figured I'd start the first page of
the new choptop truck project. I spent the day at the shop
today getting started on what could prove to be an
interesting time.
After much consideration, I've decided that this is going to
be my 'rat rod' truck. I'm not going to make this one pretty
or do a restoration on it, but instead will put it back
together with all the spare parts I have from my parts
trucks. My '67 SWB project is kinda on hold for the time
being, since I'm basically at the stage where I need to
start painting it, but it's too cold now to do that. So I
decided that I'd spent the winter thrashing (as much as I
can anyway) on the choptop, and see if I can't have it
re-assembled and running by springtime. When I bought this
truck it came with a 460/C6 which at first I was going to go
ahead and install in the choptop, but since the project has
a time limit, and since I have a complete assembled (but
used) 390 on the shop floor, I've decided to just install
the 390 in the choptop instead. I'll just steam-clean the
heck out of it and bolt it in. The 460, therefore, will be
installed in the '67 daily driver. |
|
ven though this truck is going to be 'ratty-looking by design',
I still wanted to make sure the bottom side of the cab and box
were stripped and sealed, so the first thing on today's agenda
was to get started stripping down the bottom of the cab. The guy
I bought the truck from had done a lot of rust repair, replacing
the floorpans, front cab mounts and rear cab corners. He sealed
up all the joints with what appears to be tar, and while it
probably would have been OK as is, I decided I wanted to get all
that tar stripped off, get the bottom side cleaned down to bare
metal, and then seal it off with POR-15.
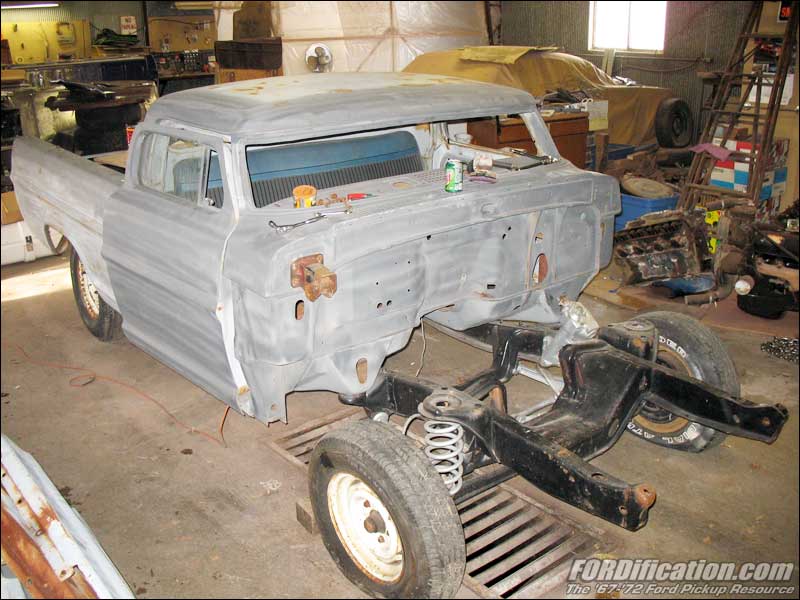
First I had to remove the front sheetmetal (Fig. 01), which was
an easy 30-minute job, since most of it was barely attached
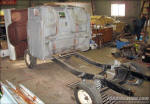
several months ago for it's trip from Michigan. Removing the box
was just as easy (Fig. 02), as it was only held on with two
bolts. I laid some carpet down on the shop floor and flipped the
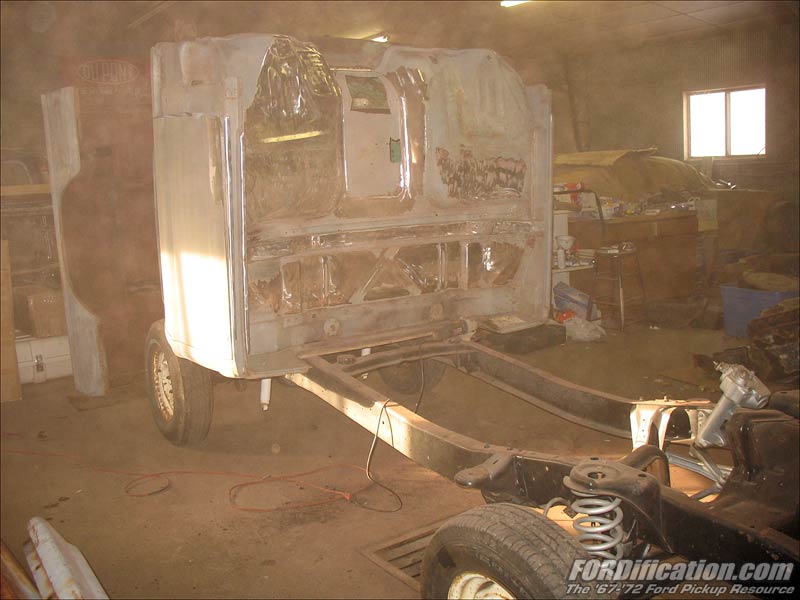
bed up on end behind the truck. The cab wasn't bolted down at
all, so I simply had to lay down some plywood on the rear frame
and flip the cab up on it's back. I then spent a few minutes
just checking out the underside and putting together a plan of
attack....and taking some 'before' shots. |
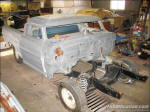
Fig. 01 - Spent a few minutes stripping the front sheetmetal
off...
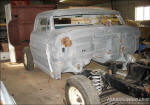
Fig. 02 - ...and then I got the box removed and setting up
on end, to make way for the cab to be rolled on it's back.
|
 |
|
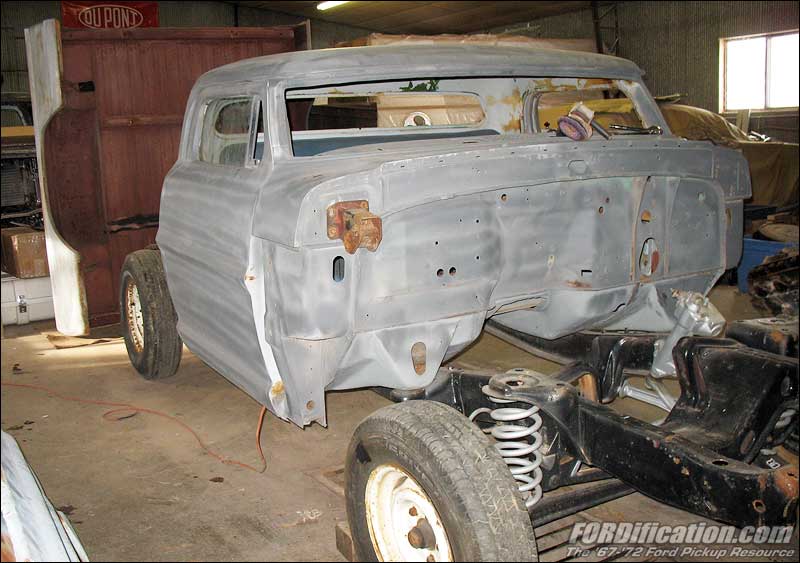
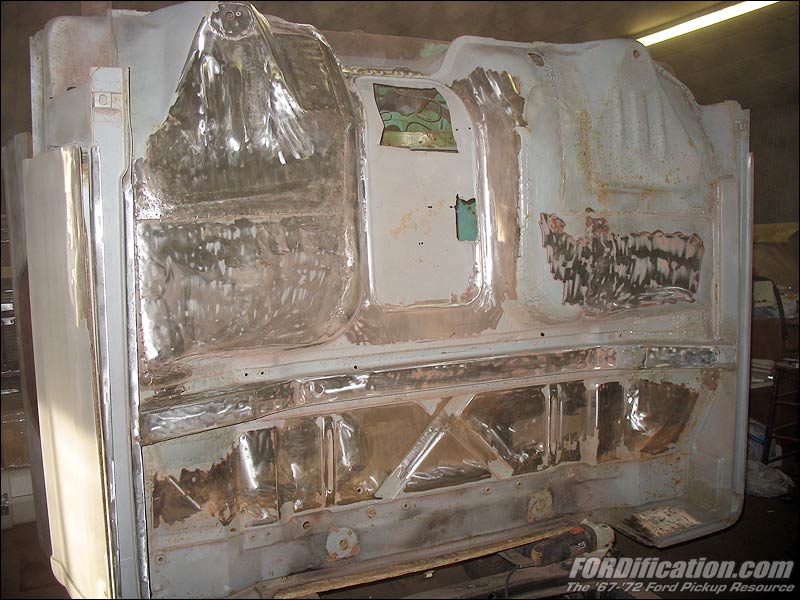
Fig. 03 - One last look before flipping the cab back. In the
foreground is the 390 that'll go in this truck and
the junkyard tilt column that will also be used |
|
 |
|
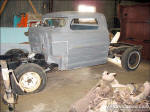
Fig. 04 - Got the cab flipped back, ready to get the bottom
side cleaned up. The previous owner had stripped and
painted the frame, after sitting outside for a while
it's looking ratty....perfect. |
|
 |
|
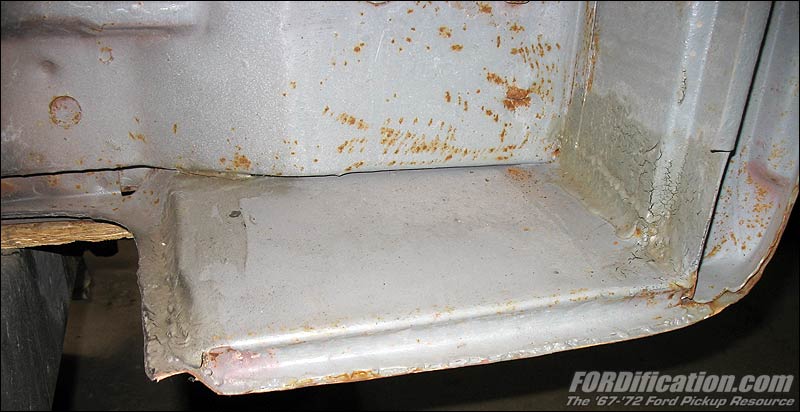
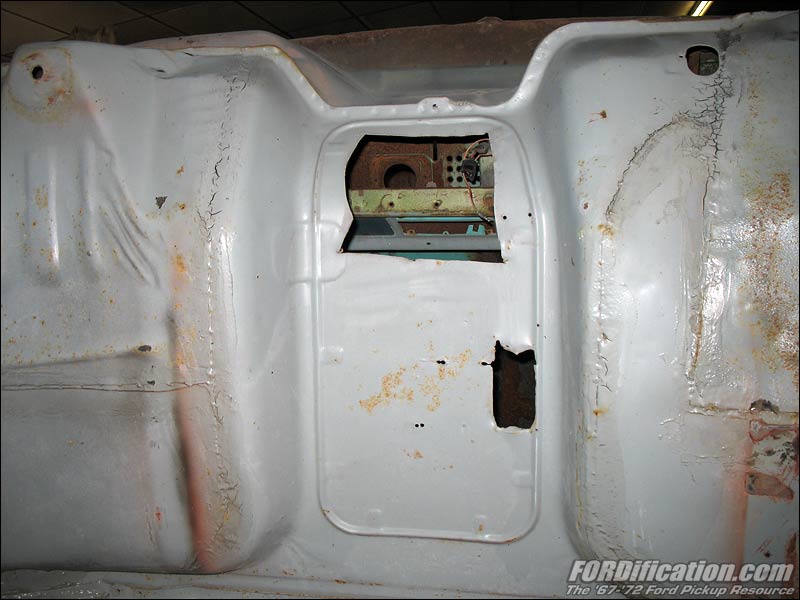
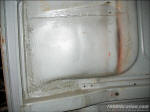
Fig. 05 - Here's the right-side floorpan area. You can see
the replaced floorpan and cab mount, and the tar he
used to seal the seams, which he then primered over. |
|
 |
 |
|
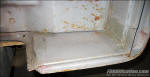
Fig. 06 - When the front cab mounts were replaced, a large
washer was welded over the mounting hole to coincide
with the bolt size. He did the same modification to
the cab's frame mount. |
|
 |
|
Fig. 07 - Here's a view of the front side of the rear cab
corners. The PO fabricated some flat sheetmetal
which looks fairly good. |
|
 |
|
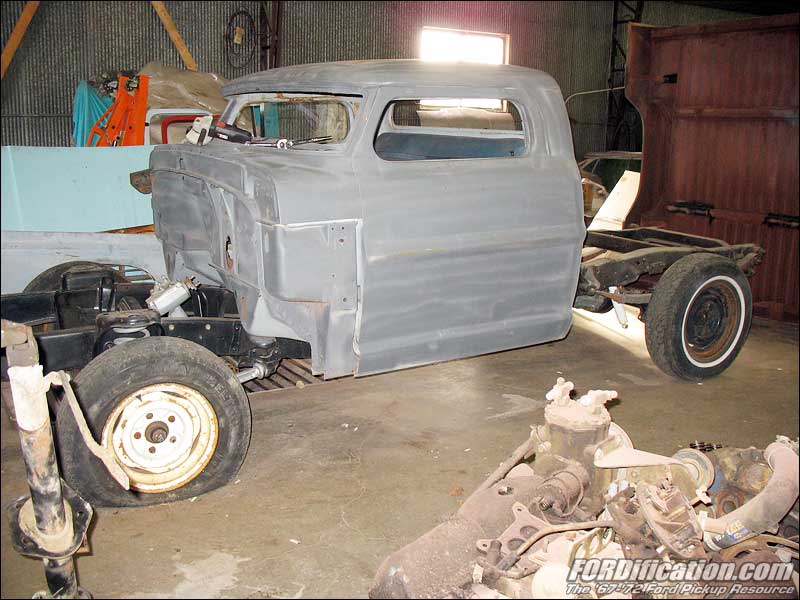
Fig. 08 - The transmission hump has been butchered, but I
was planning on cutting it out and installing a
bolt-on hump anyway. |
|
|
Fig. 09 - Yeah, it got pretty dusty in the shop while
sanding...good thing I was using a respirator!
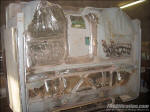
Fig. 10 - After the dust settled a bit, I took this shot,
showing the afternoon's progress. |
I attached a knotted-wire wheel to the angle grinder and
went to work stripping out the tar sealer...and let me tell
you, it was a dirty job! I alternated between the wire wheel
and the 3M composite stripping wheel to get the floorpans
down to bare metal. I worked pretty steadily for most of the
afternoon, getting the bottom side not quite half done, and
at this point I decided to take a smoke break. (Yeah, I
know....doesn't make a whole lot of sense to remove the
respirator, which is designed to protect my lungs, and then
light up a cigarette, right? Oh well...)
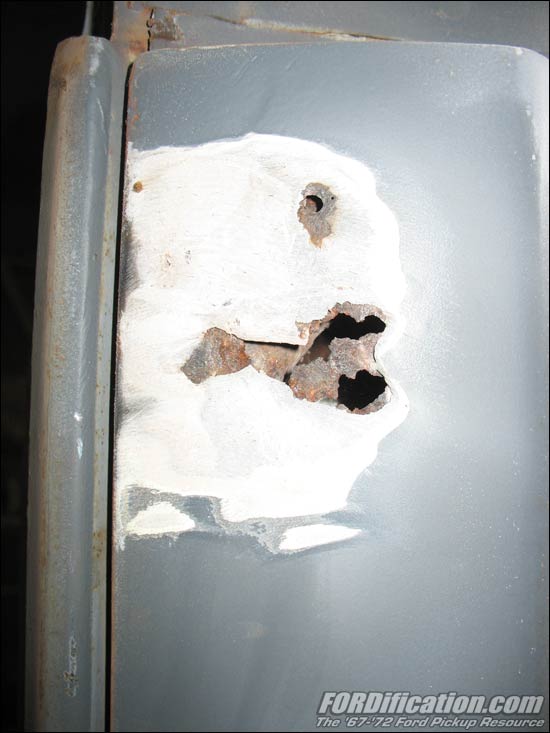
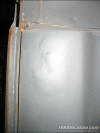
Anyway, while I was enjoying my break I was walking around
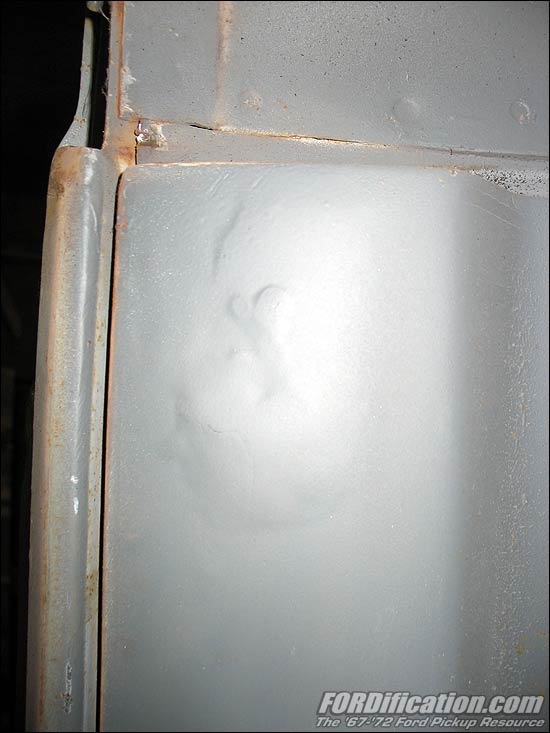
the truck checking things out, and noticed some bubbling
under the primer on the driver's door (Fig. 11). I had the
3M stripper disc in the grinder and hit it to the bubble,
knowing that I'd probably find rust....but still hopeful it
was minor. No such luck. Not only was it rusted through in
that spot (and I had to get through nearly 1/2" of body
filler to get to it!), but continuing to strip down this
door I found that the whole lower half of the door,
everything below the bump, is rusted out and beat to hell. I
have no idea why the previous owner took such great care
chopping the top and doors, only to then use a gallon of
filler on a rusted-out door. |
|
 |
|
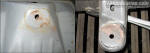
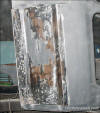
Fig. 11 - I noticed this bubbling under the primer on the
driver's door and my heart sunk, knowing what it
meant....RUST! |
|
|
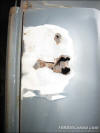 |
|
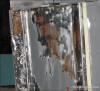
Fig. 12 - I hit the stripper wheel to the bubble, and after
getting through 1/2" of body filler, I found
this. |
|
|
 |
|
Fig. 13 - I continued with the stripper wheel only to find
that the lower skin of this door is almost
virtually trashed! |
|
|
 |
|
Fig. 14 - Here's a view of the stripped-down door. You can
see that it's pretty bad under all the body
filler. |
|
|
 |
|
Fig. 15 - Here's the lower rear corner of the door. It
appears he brazed in a partial patch panel, but
then just slapped 1/2" of filler over the top of
the rest! WTF?? |
|
|
 |
|
Fig. 16 - I started cutting the skin off along the front
edge of the door, leaving about 7/16" of lip to
attach the patch panel to. Then I ran some tape
along the bump to use as a straight-edge for
cutting that section. |
|
|
Anyway, not only is the lower part of the skin rusted out,
but the front and rear corners are toast, and the whole
bottom 10" and rear 10" of the door looks like a relief map
of the Rocky Mountains. Basically, it means this door will
need a whole lower skin, everything from the top of the bump
down to the bottom lip.
Well, I
only allowed myself about 10 minutes of bitchin' and cussin'
before I decided to just deal with it....and I fired up the
air compressor and cut-off tool. I figured I might as well
as started getting the old skin off so that I could survey
the damage underneath. I decided to leave myself about a
7/16" lip around the skin perimeter, leaving the very edges
of the door alone. The inner door skin lip is about 1", so
I've got something to weld the new outer skin to. |
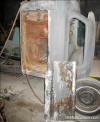
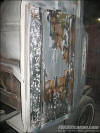
Fig. 17 - Here's a shot of the removed skin. It took about
30 minutes of careful cutting to get this removed from the
door. It never ceases to amaze me why the factory didn't
apply some form of rust protectant to the inner door. |
|
I've got a pair of '67 doors with good skins (I believe) to
use for the rust repair, so my next day at the shop will
consist of cutting one of them up for the patch panel.
Unfortunately, I'll probably have to spend the entire day
getting the patch panel cut and fitted properly, before I
can even start welding. And since I now have easy access to
the inner door, I'll be sandblasting as much as I can reach
and then coating it all with POR-15 prior to welding in the
patch panel. It's definitely going to be an interesting
experience! Stay tuned for more updates! |
|
 |

Want to link to
this site? Please save this banner to your hard drive to place on your
webpage.
The correct link to use is
http://www.fordification.com
|