|

|

You are here:
Home  How to Create Your Own Forum Avatar
 |
|
 |
 |
 |
|
|
|
How
to Create Your Own Forum Avatar |
|
 |
|
Using an avatar in a web forum helps to set your personal
identity and make your posts easy to find at a glance, while at
the same time can reflect your personality or show off your
ride. However, many computer-challenged folks aren't quite up to
speed with how to create a useable avatar, so I was asked to
write this little tutorial to assist users in coming up with
something unique and creative.
For
this tutorial, I'll be using Adobe Photoshop...but virtually any
decent graphics editor will suffice. The steps will differ with
other software packages, but you should be able to pick up
enough information here to make it work with whatever graphics
editor you have. I'm assuming you at least have the basic
knowledge of how to use your graphics program...I'm only going
to be explaining the basics here, there are numerous websites to
go to which give you great tutorials on how to further your
graphics skills. Also, many of the screenshots used in this
tutorial are full-size, which means they're going to be large
files to view. If you're on a dial-up account, please be patient
while they download.
NOTE: If you simply want to resize an existing graphic
(without any cropping or special effects) then can skip this
particular tutorial and go to the
How to Resize Graphics for
Posting tutorial. On that page you
can also download a very basic (but effective) image
resizing program that might fit your limited needs.
Here
are a few examples of avatars used by current FORDification
forum members, just for the visual:

FORDification |

Comet |

willowbilly |

1968Ranger |

Redcap |

flyboy2610 |
As you can see, the avatars can be various sizes, but only up to
a maximum of 80 x 80 pixels and a total file size of 6144 bytes
(6.1K) for use on the FORDification forums.
Choosing a picture to use for your avatar requires a little
forethought. Since the avatar will be more than likely be
square, you must keep in mind that by the time you shrink a
picture down to 80 pixels wide, much of the detail will be lost,
so a nice panoramic view of the Grand Canyon probably wouldn't
be a good idea. Also, trying to fit a wide shot into a square
means that you're probably going to end up with white space on
top and bottom, as in '1968Ranger' shown above. However, if the
extra space doesn't bother you, then it's no problem. Otherwise,
even with a wide picture, with a little creative cropping, you
can come up with something uniquely yours.
|
|
So let's get started........... |
|
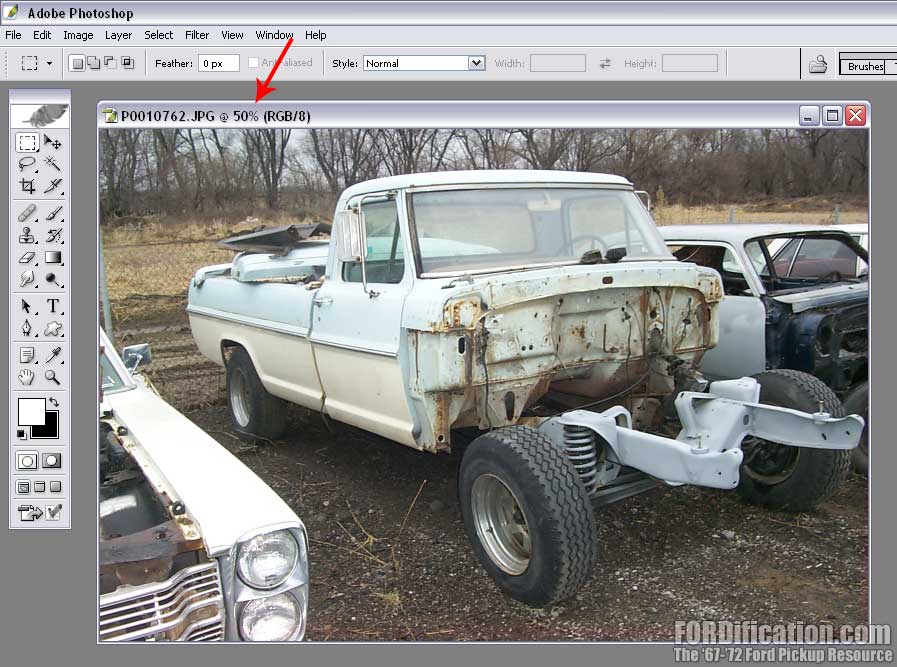
Open
Photoshop on your computer. You should see a window that looks a
lot like Fig. 1. Virtually all procedures and actions will be
used either with tools selected from the Toolbar or from options
listed in the Dropdown Menus. With Photoshop open, go ahead and
find the picture and open it up. |

Fig.
1 |
|
For
this tutorial, I've selected a shot of my recent acquisition, a
'67 F250 Camper Special, taken with my digital camera. With the
picture open, you can see in the photo's title bar the image's
name, plus the fact that the picture is being displayed at 50%,
since it's a large picture and wouldn't normally fit on the
screen. |

Fig.
2 |
|
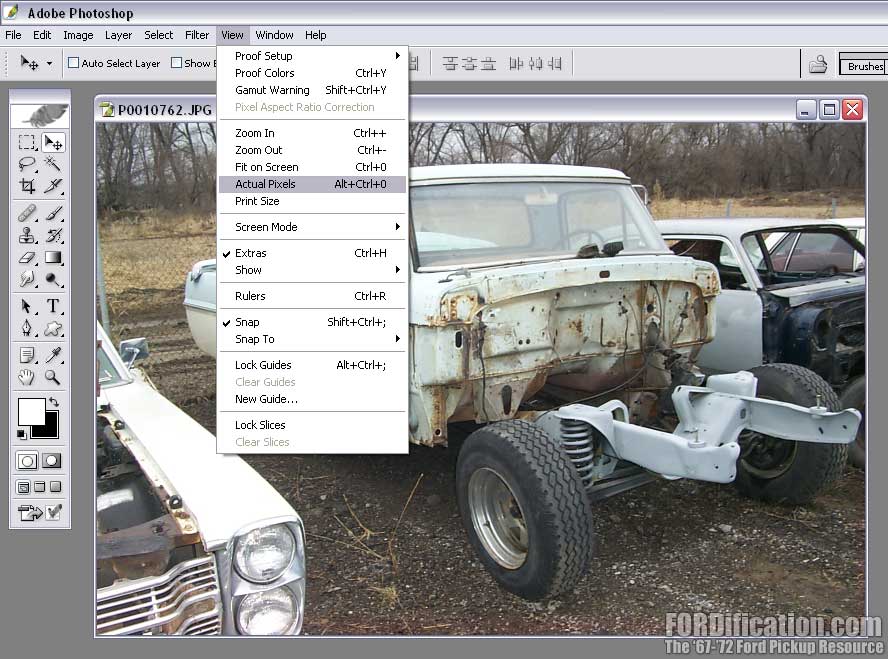
The
first order of business is to shrink it down enough where we can
at least view it at 100% and still have it fit onscreen, so we
can see all the details and make our adjustments. (If your
picture already fits the screen at 100%, you can skip ahead to
the next step.) From the dropdown menus, select View -Actual
Pixels (Fig. 3). The image will be very large and probably
won't fit your screen. Now choose Image - Image Size from
the dropdown menus. You should see a pop-up window that looks
like Fig. 4. Make sure the option labeled Constrain
Proportions is checked. For adjusting the image size, you
can choose between pixels and percent. Make sure you making
adjustments in pixels. Enter in a number for the width that will
fit on your screen, which depends on your monitor resolution.
Since a majority of user's monitors are set at 1024 x 768
pixels, you need to select a number lower than 1024. Just type
in 800, for example, and hit OK. Now you should see your full
image on the screen, with '100%' showing in the image's title
bar. |

Fig.
3

Fig.
4 |
|
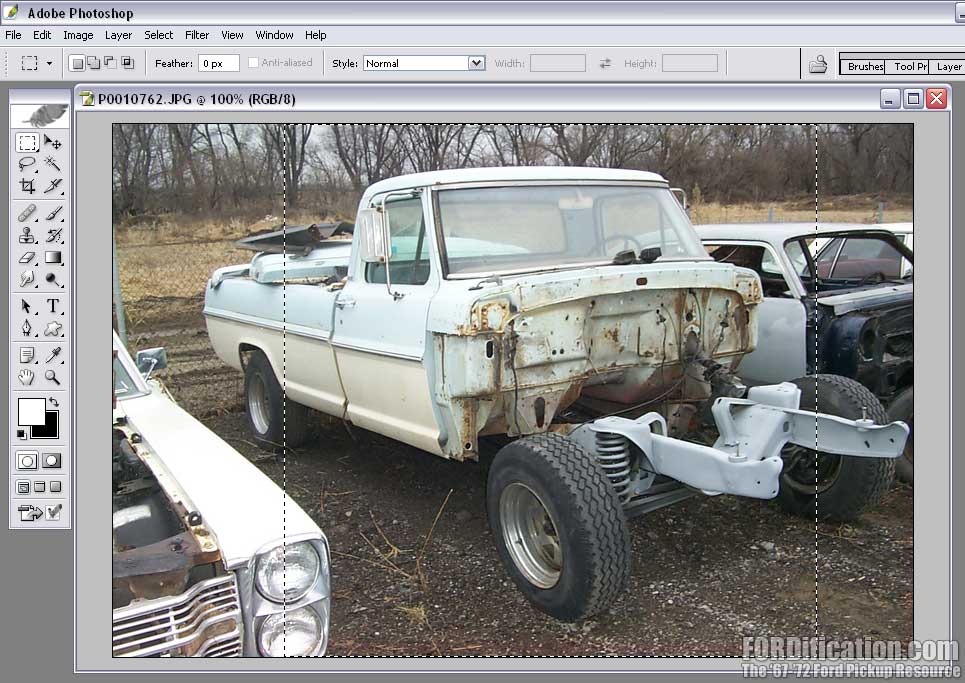
Now,
using the Rectangular Marquee tool in your toolbar, you can drag
across your picture to select the portion of the image you want
to use. Since for our purposes we're creating a square 80 x 80
pixels, if you hold the Shift button down on your keyboard while
you're making your selection, the dotted line selection will
remain a perfect square. After making your selection, while the
dotted line is still active, you can move it around to get it
centered where you want. Once you have the Marquee where you
want it, choose Image - Crop from the dropdown menus to
discard everything outside the Marquee selection. Then to get
rid of the Marquee selection, choose Select - Deselect
from the dropdown menus. You'll end up with something that looks
like Fig. 6. |

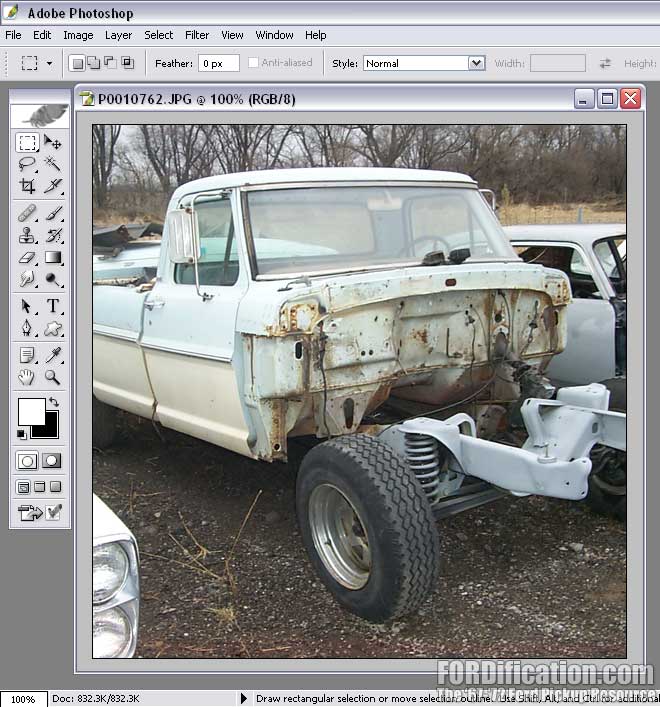
Fig.
5

Fig.
6 |
|
Now
all that remains is to size it down to 80 pixels in width.
Choose Image - Image Size in the dropdown menus. You should
again see the same popup window as shown in Fig. 4. Making sure
the 'Constrain Proportions' is still selected and that you're
making your adjustments in pixels and not percentages, enter '80' in
the width field and choose OK. Your image is now 80 pixels x 80
pixels, shown in Fig. 7 at full size. |

Fig.
7 |
|
While you could now upload your avatar and use it as-is, it
might be nice to touch it up a bit. You'll notice that when the
image was sized down, it got a little blurry. Let's sharpen it
up a bit. From the dropdown menus choose Select - Select All to
get the marquee back around the perimeter of your avatar. Then
choose Filter - Sharpen. This will sharpen it up quite a bit to
bring out more details, but often that's a bit TOO much. If
you'd like to hit a happy medium between sharpened and
unsharpened, choose Edit - Fade Sharpen and use the slider to
adjust the sharpness level. Fig. 8 shows what a 50% sharpen
looks like. Not a major adjustment, but just enough to show
details without becoming pixelated. |

Fig. 8 |
|
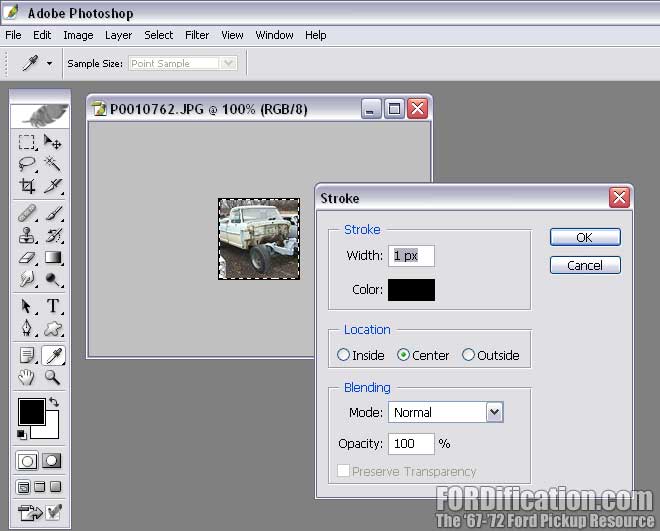
Another nice touch is to add a 1-pixel black border around the
edge of your avatar. From the dropdown menus choose Select -
Select All. Now choose Image - Stroke. In the popup
window set the stroke width at 1 pixel and the color to black,
and the hit OK. |

Fig.
9 |
|
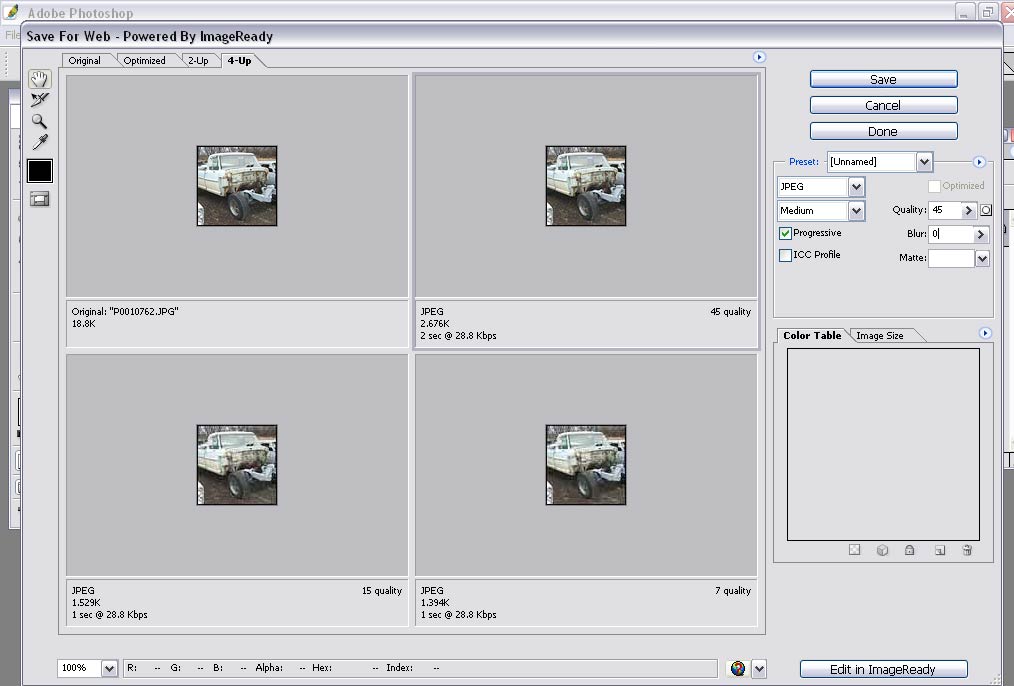
Now
you just need to save your new avatar. Newer versions of
Photoshop have a built-in compression feature, which can
dramatically trim the file size of your pictures, which makes
for faster downloads once it's on the web. From the dropdown
menus, choose File - Save for Web. You'll see a popup
window which allows you to choose the amount of compression and
to see what your image will look like at various degrees of
compression (Fig. 10). You can see that the original 80 x 80
image was 18.8K, but by compressing the image, the exact same
image is down to 2.6K with very little image degradation. It's
not as important with very small files like these avatars, but
with much larger images, the amount of savings will make very
dramatic differences in file sizes and download times. Choose
the level of compression that looks best to you, hit the Save
button, name your file, and then hit Save one more
time....and that's it! You're done!
Your
new avatar now ready to upload to the forums for use with your
posts. Congrats! |

Fig. 10

Fig. 11 |
|
 |
|