as far as the shoes i would put them back on the way they came off and transfer the hardware as it should be. mayeb they go on the other side of the truck. i cant remember if the long shoe pad goes in front or back. but i bet the factory diagrams show the right way.
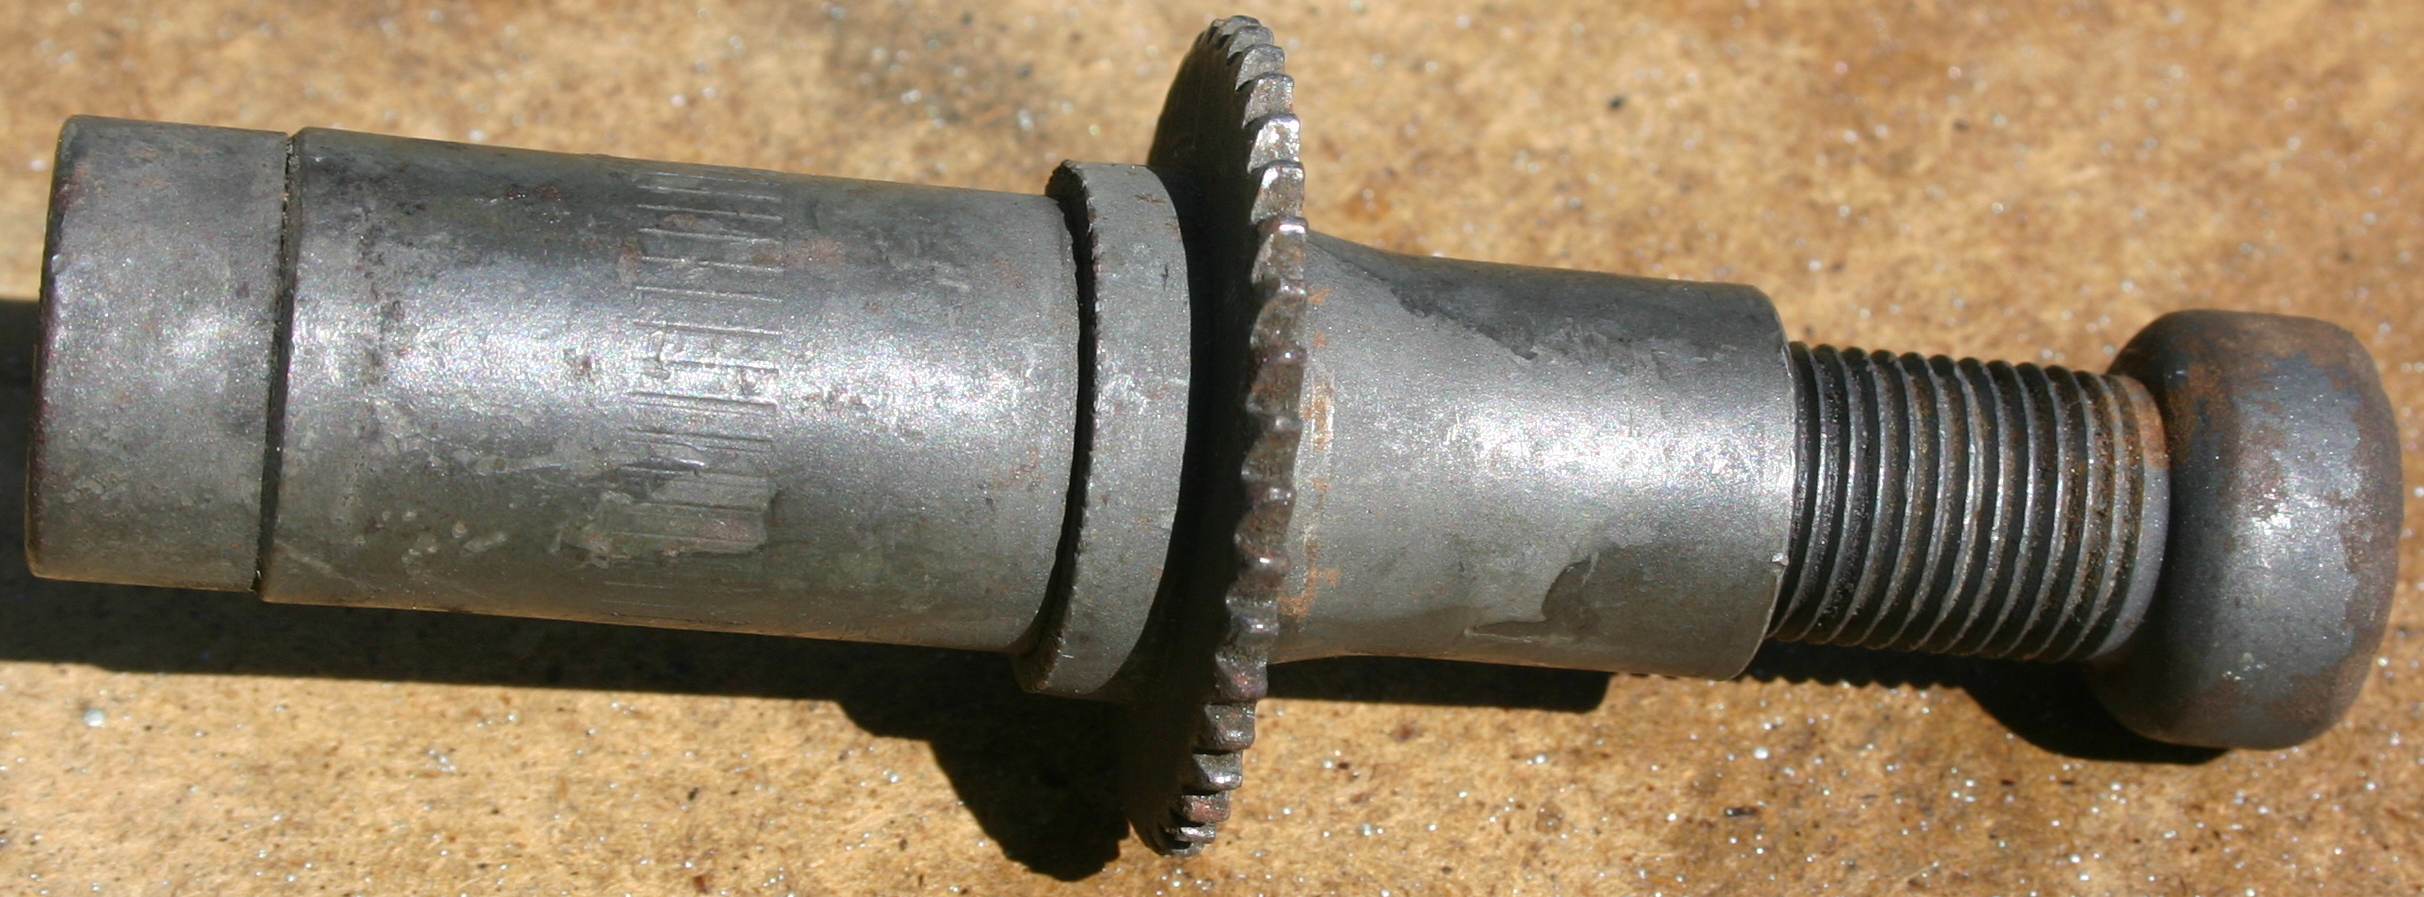
as far as shoulder bolts for the axles. the shoulder is used when threads are not needed for a hole. the shoulder will act partly as a larger spacer if you will to fill the hole in the axle flange. as the flange is not threaded it doesnt need threads. i am not sure that new botls would really need to be used but the old onse could have streched over the years so it could be a good idea.
i do know you can cut bolts off if they are too long. when yo udo cut them off the ends of the threads have to be file a slight bit to get them cleaned up so they will thread into a hole.
what to do and where to get new botls. i dont know. surely the botls might be able to be had from a newer dana 60 from a later model truck supply house of some sort. around here we have a place called midland truck part. it is similar to inland truck parts in calfornia. you coudl try looking into that name outthere fo rthose botls or a botl kit or soemthing like that.
1972 F250 12"x2.5" Bendix rear drum brake rebuild: advice?
Moderator: FORDification
-
fordman
- 100% FORDified!

- Posts: 22329
- Joined: Sun Aug 28, 2005 8:17 pm
- Location: Kansas, Ottawa
- Contact:
-
70_F100

- Moderator

- Posts: 2999
- Joined: Mon Oct 22, 2007 11:23 am
- Location: North Carolina, Kernersville
Re: 1972 F250 Dana 60 12"x2.5" rear drum brake rebuild: advice?
Robroy, I would just re-use those flange bolts. The shoulder is there to help center the axle to the hub. Just clean them up and torque them to specs, and you should be good to go. If you should run across some replacements at a later date, you could simply change them out one-by-one. No reason to let that slow down progress.
As far as shoe location, the shoe with the SHORTER lining ALWAYS goes to the front. The thickness of the lining DOES NOT dictate which shoe goes where.
As far as shoe location, the shoe with the SHORTER lining ALWAYS goes to the front. The thickness of the lining DOES NOT dictate which shoe goes where.
Wise men talk because they have something to say; fools talk because they have to say something.--Plato
Why is it that there's seldom time to fix it right the first time, but there's always time to fix it right the second time???
That's not an oil leak That's SWEAT from all that HORSEPOWER!!
Why is it that there's seldom time to fix it right the first time, but there's always time to fix it right the second time???
That's not an oil leak
-
FreakysFords

- Blue Oval Fanatic

- Posts: 815
- Joined: Mon Mar 09, 2009 9:58 pm
- Location: Gadsden Alabama
- Contact:
Re: 1972 F250 Dana 60 12"x2.5" rear drum brake rebuild: advice?
Shorter = Primary and is "generally" thicker. Primary = front.
Looking for my post now. Sorry if I mislead!
Also there should be differences in the holes punched into the shoe brackets (should be a sheet on this with the brakes, and I "think" I remember you posting a scan of yours).
Sorry for the short reply, eyes making it hard to focus on screen atm.
Frank
Looking for my post now. Sorry if I mislead!
Also there should be differences in the holes punched into the shoe brackets (should be a sheet on this with the brakes, and I "think" I remember you posting a scan of yours).
Sorry for the short reply, eyes making it hard to focus on screen atm.
Frank
Darlin 69 Ranger 390 4v, PS, DS II, disc front, 3G alternator, 67 mirror.
-
robroy

- 100% FORDified!
- Posts: 3768
- Joined: Sun Jul 06, 2008 4:36 pm
- Location: California, Salinas
Re: 1972 F250 Dana 60 12"x2.5" rear drum brake rebuild: advice?
Good morning Fordman, 70_F100 and Frank, thanks for your superb replies!
I also called Williams Equipment Company, a rear end and axle shop here in Salinas, yet they weren't able to help.
I think you're on to something though--I'll try some more drivetrain shops for these bolts.
Fordman, 70_F100 and Frank, thanks for your most excellent replies!
Robroy
I'll be sure to transfer the hardware! As for putting them back on the way they came off, I don't have 100% confidence that they were installed correctly before. Yet I believe that recent replies to this thread have removed all ambiguity, so I think I'm okay now.fordman wrote:as far as the shoes i would put them back on the way they came off and transfer the hardware as it should be.
That's a good idea! I'll glance at those diagrams.fordman wrote:mayeb they go on the other side of the truck. i cant remember if the long shoe pad goes in front or back. but i bet the factory diagrams show the right way.
Okay, understood!fordman wrote:as far as shoulder bolts for the axles. the shoulder is used when threads are not needed for a hole. the shoulder will act partly as a larger spacer if you will to fill the hole in the axle flange. as the flange is not threaded it doesnt need threads. i am not sure that new botls would really need to be used but the old onse could have streched over the years so it could be a good idea.
That's a good point, although my bolt-cutting projects haven't turned out nicely enough before to use for something like axle retention. Thanks for mentioning this though!fordman wrote:i do know you can cut bolts off if they are too long. when yo udo cut them off the ends of the threads have to be file a slight bit to get them cleaned up so they will thread into a hole.
That's a great idea Fordman! I asked the Ford dealer to look in their computer at the 1980 F250 with a Dana 60 rear end, in case they had a listing for axle retention bolts there, yet their computer told them the bolts were unavailable. They also tried 1989 with the same result. That said, I got the distinct feeling that they were defeated before they began; they weren't motivated to help with classic Ford parts.fordman wrote:what to do and where to get new botls. i dont know. surely the botls might be able to be had from a newer dana 60 from a later model truck supply house of some sort. around here we have a place called midland truck part. it is similar to inland truck parts in calfornia. you coudl try looking into that name outthere fo rthose botls or a botl kit or soemthing like that.
I also called Williams Equipment Company, a rear end and axle shop here in Salinas, yet they weren't able to help.
I think you're on to something though--I'll try some more drivetrain shops for these bolts.
Okay! This is probably what I'll do for the time being, although one or two of the existing bolts have imperfect threads.70_F100 wrote:Robroy, I would just re-use those flange bolts. The shoulder is there to help center the axle to the hub. Just clean them up and torque them to specs, and you should be good to go.
That makes sense! Frank also mentioned this earlier, yet my stubborn attitude regarding using new fasteners made me forget this truth for a few days--thanks for reminding me.70_F100 wrote:If you should run across some replacements at a later date, you could simply change them out one-by-one. No reason to let that slow down progress.
Okay, understood! Now that you mention this, I remember hearing a rule like that before, years ago.70_F100 wrote:As far as shoe location, the shoe with the SHORTER lining ALWAYS goes to the front. The thickness of the lining DOES NOT dictate which shoe goes where.
Okay! Thanks for clarifying.FreakysFords wrote:Shorter = Primary and is "generally" thicker. Primary = front.
No problem Frank! I'm so green that I tend to take things super literally, and easily misinterpret things. I think it's all cleared up now though!FreakysFords wrote:Looking for my post now. Sorry if I mislead!
Indeed--you're right! And the sheet agrees with the current consensus, so I'm okay now!FreakysFords wrote:Also there should be differences in the holes punched into the shoe brackets (should be a sheet on this with the brakes, and I "think" I remember you posting a scan of yours).
That's OK Frank! I appreciate your reply and have all the information I need to make some great progress.FreakysFords wrote:Sorry for the short reply, eyes making it hard to focus on screen atm.
Fordman, 70_F100 and Frank, thanks for your most excellent replies!
Robroy
-
robroy
- 100% FORDified!
- Posts: 3768
- Joined: Sun Jul 06, 2008 4:36 pm
- Location: California, Salinas
Re: 1972 F250 Dana 60 12"x2.5" rear drum brake rebuild: advice?
Good morning!
Earlier I remember reading from Frank that I might consider replacing the differential oil now, since that's what lubricates the wheel bearings. I certainly like this idea!
I've read that the old oil may be removed either by siphoning it out, or by loosening the differential cover. I like the idea of loosening the cover better, since I've never been good at siphoning thick liquids, and I'd like a chance to inspect the differential's condition! I don't want to work on the differential now, yet to satisfy my curiosity, I'd like to know how toasted it is.
This Morning's Question:
Robroy
Earlier I remember reading from Frank that I might consider replacing the differential oil now, since that's what lubricates the wheel bearings. I certainly like this idea!
I've read that the old oil may be removed either by siphoning it out, or by loosening the differential cover. I like the idea of loosening the cover better, since I've never been good at siphoning thick liquids, and I'd like a chance to inspect the differential's condition! I don't want to work on the differential now, yet to satisfy my curiosity, I'd like to know how toasted it is.
This Morning's Question:
- Is there any reason to remove the differential oil before putting the brakes back together? Perhaps because a thorough job includes the messy task of flushing the differential oil out of the axle tubes, and thus risking brake shoe contamination?
Robroy
-
70_F100
- Moderator
- Posts: 2999
- Joined: Mon Oct 22, 2007 11:23 am
- Location: North Carolina, Kernersville
Re: 1972 F250 Dana 60 12"x2.5" rear drum brake rebuild: advice?
Robroy, it doesn't really matter whether you drain it before or after the brake replacement.
The tubes extend far enough that you shouldn't have any issues with contaminating the shoes/linings.
Whenever I flush a differential, I always use CRC Brakleen (the original formula in the red can). It may take 3-4 cans to clean it thoroughly, but the stuff cleans well and dries pretty quickly.
As a side note, whenever I replace bearings on a floating axle (like the D-60), I always pack the bearings well, just like front wheel bearings (you're already aware of that), then once the differential is full, I jack up each side of the truck independently so that the differential lube gets to the bearings sooner.
Wise men talk because they have something to say; fools talk because they have to say something.--Plato
Why is it that there's seldom time to fix it right the first time, but there's always time to fix it right the second time???
That's not an oil leak That's SWEAT from all that HORSEPOWER!!
Why is it that there's seldom time to fix it right the first time, but there's always time to fix it right the second time???
That's not an oil leak
-
robroy
- 100% FORDified!
- Posts: 3768
- Joined: Sun Jul 06, 2008 4:36 pm
- Location: California, Salinas
Re: 1972 F250 Dana 60 12"x2.5" rear drum brake rebuild: advice?
Good afternoon 70_F100, thanks for your superb reply!
Knowing that the order isn't super important, I think I'll wait until the truck's sitting on its wheels again before climbing under there to pull the differential cover off. It seems like it will be less likely to cause me to do some unexpected bench-presses that way (less likely to fall)!
Thanks again for your excellent reply 70_F100!
Robroy
Okay, perfect!70_F100 wrote:Robroy, it doesn't really matter whether you drain it before or after the brake replacement.
Excellent. Thanks for letting me know!70_F100 wrote:The tubes extend far enough that you shouldn't have any issues with contaminating the shoes/linings.
Okay! I don't happen to have the red-can CRC product at the moment, but I do have some off-brand brake cleaner that I'll try.70_F100 wrote:Whenever I flush a differential, I always use CRC Brakleen (the original formula in the red can). It may take 3-4 cans to clean it thoroughly, but the stuff cleans well and dries pretty quickly.
I can see the sense in doing that--thanks for pointing it out!70_F100 wrote:As a side note, whenever I replace bearings on a floating axle (like the D-60), I always pack the bearings well, just like front wheel bearings (you're already aware of that), then once the differential is full, I jack up each side of the truck independently so that the differential lube gets to the bearings sooner.
Knowing that the order isn't super important, I think I'll wait until the truck's sitting on its wheels again before climbing under there to pull the differential cover off. It seems like it will be less likely to cause me to do some unexpected bench-presses that way (less likely to fall)!
Thanks again for your excellent reply 70_F100!
Robroy
-
70_F100
- Moderator
- Posts: 2999
- Joined: Mon Oct 22, 2007 11:23 am
- Location: North Carolina, Kernersville
Re: 1972 F250 Dana 60 12"x2.5" rear drum brake rebuild: advice?
The off-brand stuff works pretty well, too.robroy wrote:Okay! I don't happen to have the red-can CRC product at the moment, but I do have some off-brand brake cleaner that I'll try.70_F100 wrote:Whenever I flush a differential, I always use CRC Brakleen (the original formula in the red can). It may take 3-4 cans to clean it thoroughly, but the stuff cleans well and dries pretty quickly.
Robroy
The main thing I've found is that the non-chlorinated (green can) CRC product doesn't clean nearly as well as the red can.
The stuff that Advance sells that comes in the black-and-gold can works quite well, and is my second preference to the CRC red-can product.
Wise men talk because they have something to say; fools talk because they have to say something.--Plato
Why is it that there's seldom time to fix it right the first time, but there's always time to fix it right the second time???
That's not an oil leak That's SWEAT from all that HORSEPOWER!!
Why is it that there's seldom time to fix it right the first time, but there's always time to fix it right the second time???
That's not an oil leak
-
robroy
- 100% FORDified!
- Posts: 3768
- Joined: Sun Jul 06, 2008 4:36 pm
- Location: California, Salinas
Re: 1972 F250 Dana 60 12"x2.5" rear drum brake rebuild: advice?
Good afternoon 70_F100, thanks for your excellent reply!
Today's Update:
Yesterday (Monday), I rolled down to NAPA to do a visual comparison between their new auto-adjuster kit, UP 80849, and my existing hardware. Unfortunately the adjuster hardware kits for both sides (RH=UP 80849; LH=UP 80848) were made in China, so I wasn't able to buy either.
Yet the visual comparison indicated that my current LH hardware is in decent shape; it would probably be a waste to replace it.
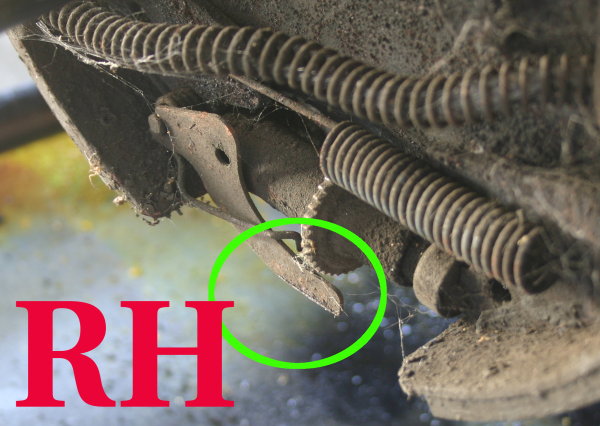
The right-hand auto-adjuster hardware, on the other hand, is clearly problematic! You can see how both the lower portion of the lever, and the part on the end of the cable, have been ground away--this is undoubtedly what caused the deep groove in that drum!
So there's no doubt that I'll need the full kit for the left-hand side!
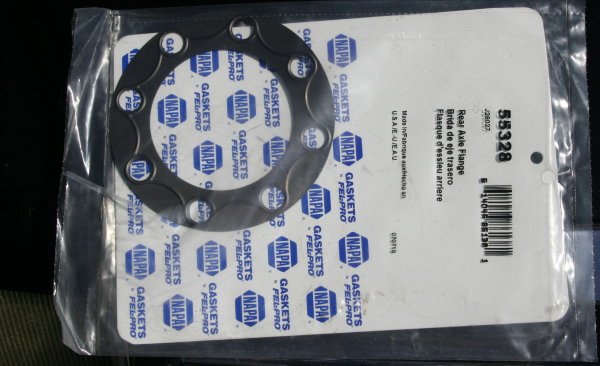
While there, I picked up a pair of USA-made axle flange seals (FPG 55328) for $3.05 each.
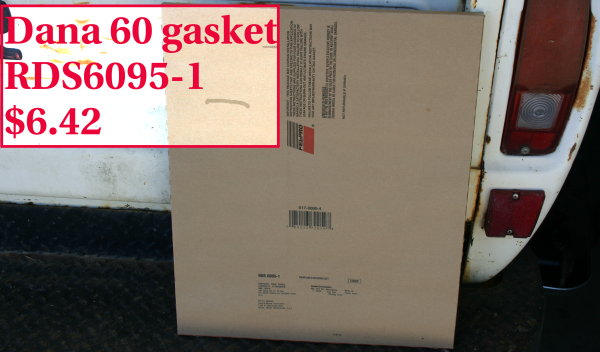
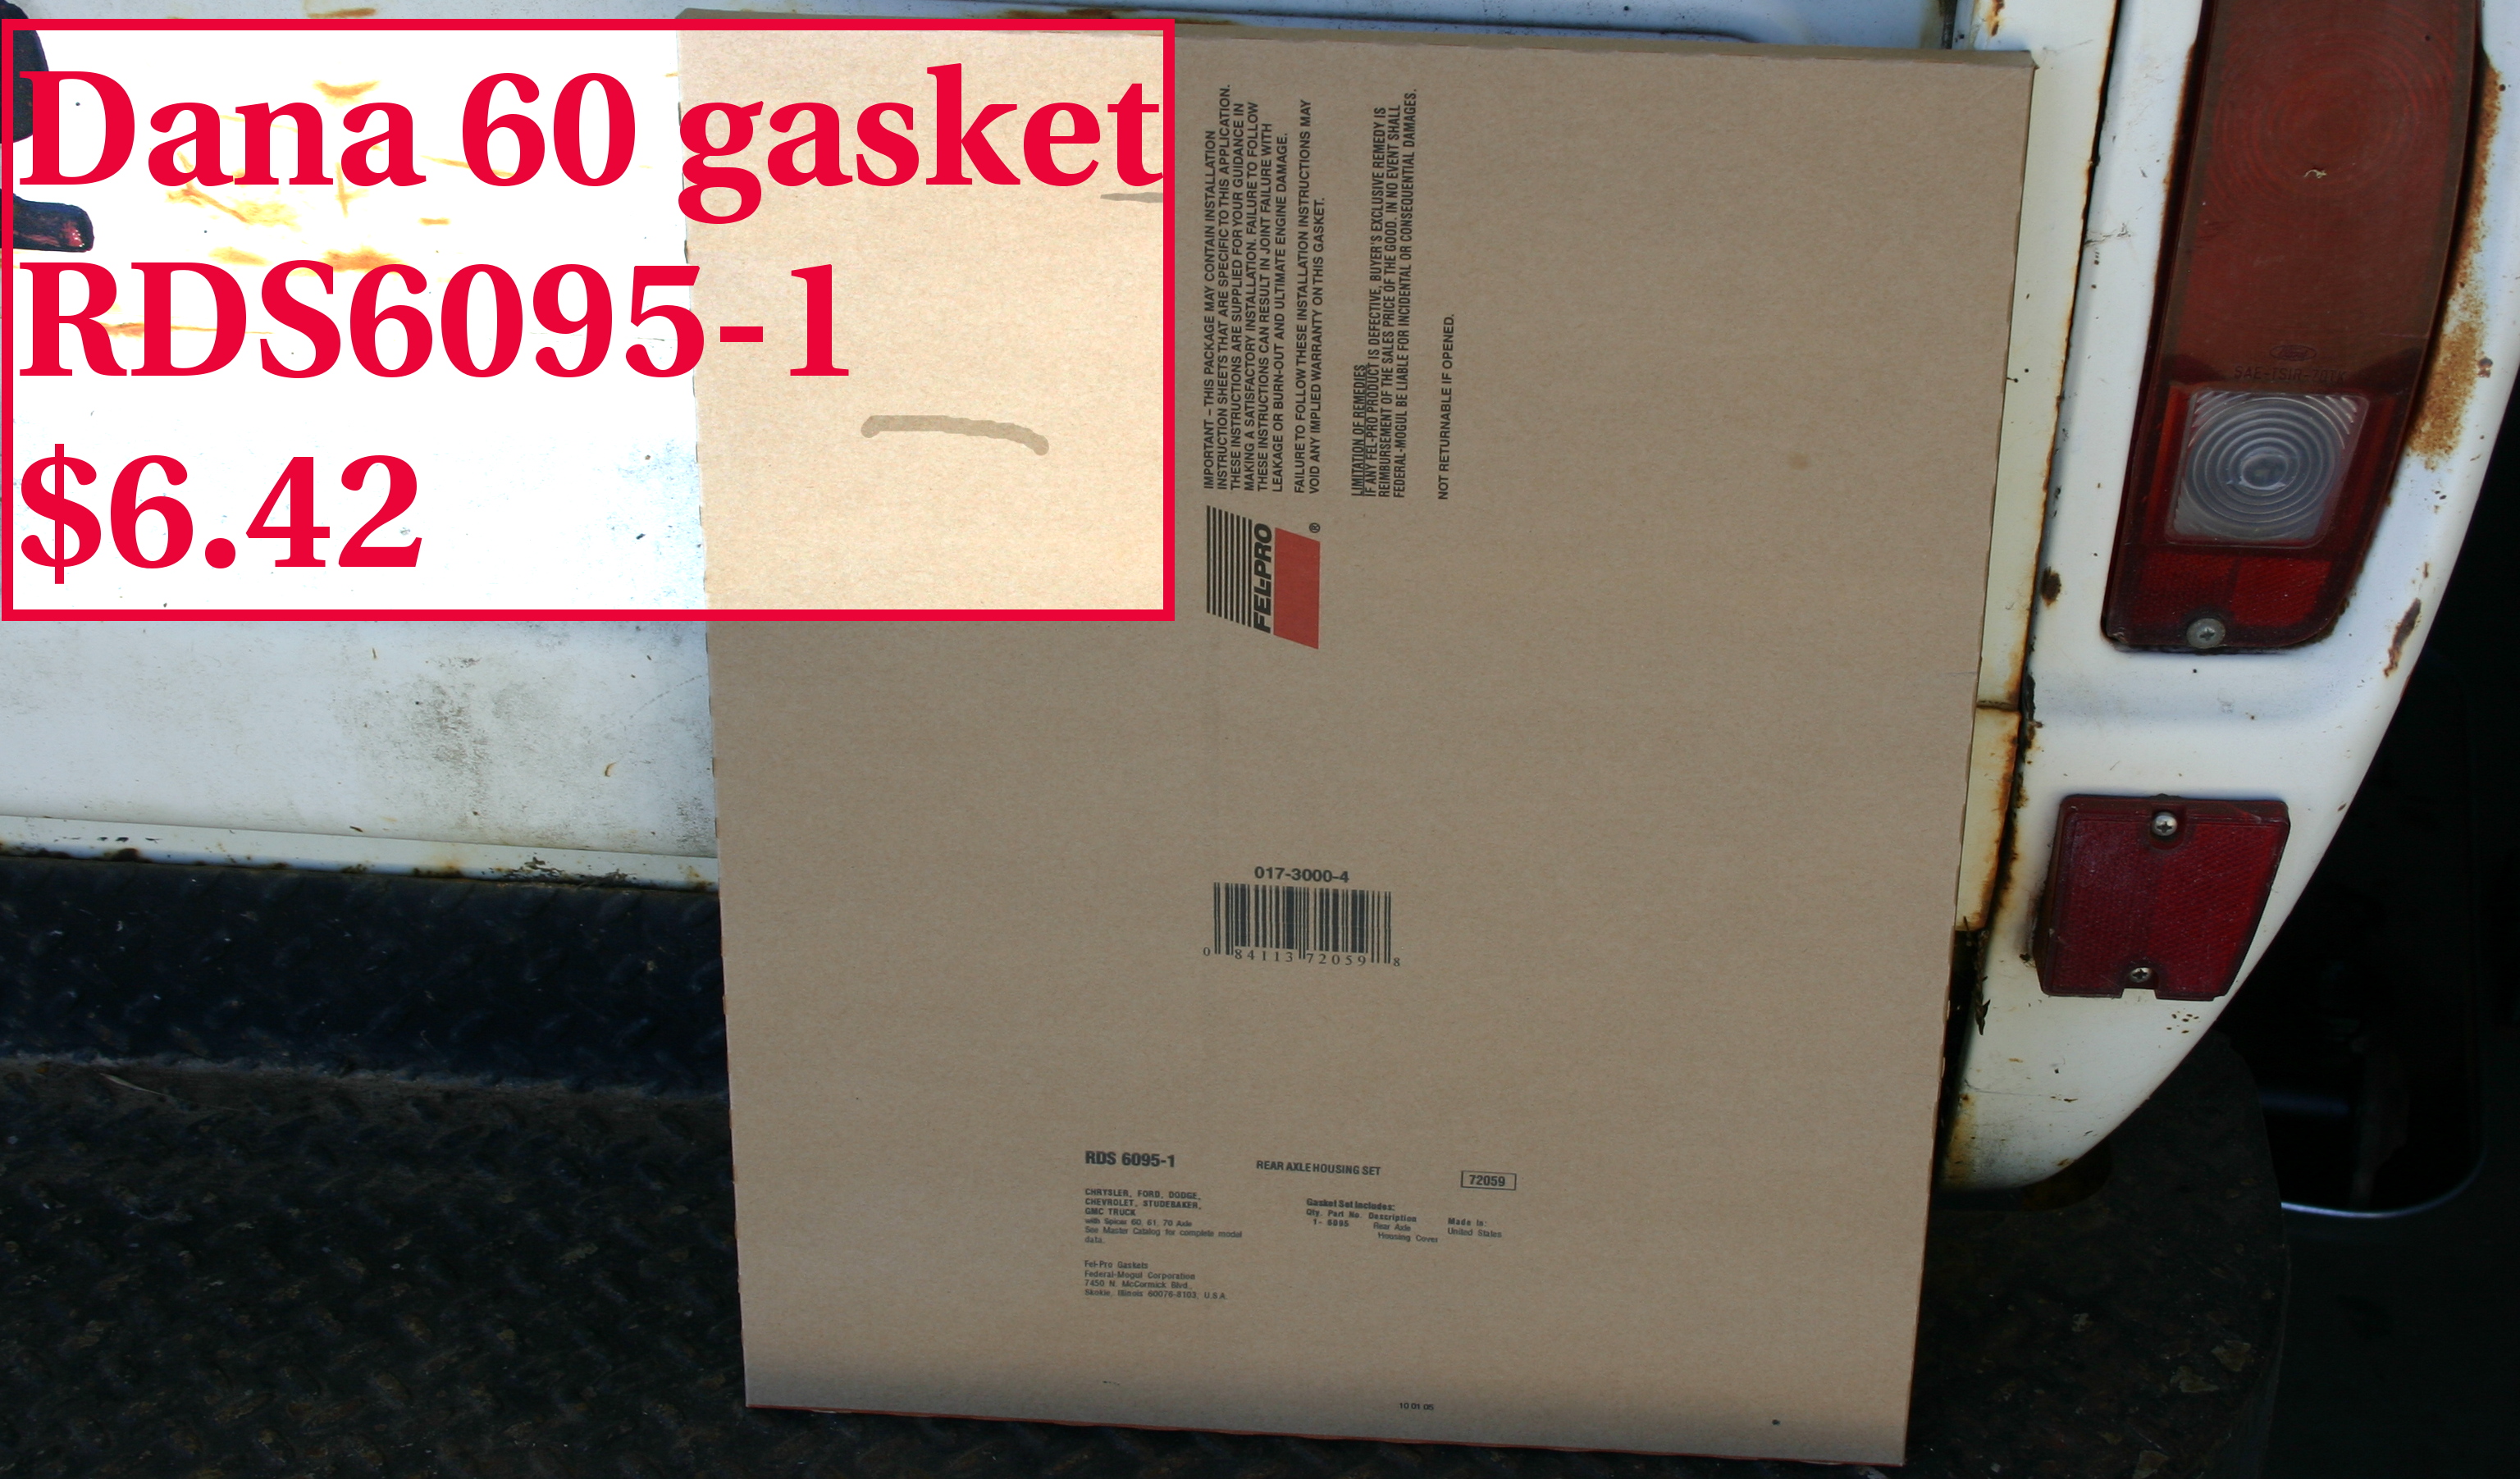
And in preparation to flush the differential out, I picked up a USA-made Dana 60 cover gasket (RDS 6095-1 for $6.42).
I still need to find a decent auto-adjuster kit for the right-hand side! I'll try Elmer's next, since they seem to have access to Wagner brake parts--so far those have had more favorable origins.
70_F100, thanks for your fantastic reply!
Robroy
That's interesting! I believe I've seen both types before in the auto parts, so I'll try to the red can whenever possible. Thanks for letting me know about this!70_F100 wrote:The off-brand stuff works pretty well, too.
The main thing I've found is that the non-chlorinated (green can) CRC product doesn't clean nearly as well as the red can.
Great to know, thanks!70_F100 wrote:The stuff that Advance sells that comes in the black-and-gold can works quite well, and is my second preference to the CRC red-can product.
Today's Update:
Yesterday (Monday), I rolled down to NAPA to do a visual comparison between their new auto-adjuster kit, UP 80849, and my existing hardware. Unfortunately the adjuster hardware kits for both sides (RH=UP 80849; LH=UP 80848) were made in China, so I wasn't able to buy either.
Yet the visual comparison indicated that my current LH hardware is in decent shape; it would probably be a waste to replace it.
The right-hand auto-adjuster hardware, on the other hand, is clearly problematic! You can see how both the lower portion of the lever, and the part on the end of the cable, have been ground away--this is undoubtedly what caused the deep groove in that drum!


So there's no doubt that I'll need the full kit for the left-hand side!
While there, I picked up a pair of USA-made axle flange seals (FPG 55328) for $3.05 each.

And in preparation to flush the differential out, I picked up a USA-made Dana 60 cover gasket (RDS 6095-1 for $6.42).
I still need to find a decent auto-adjuster kit for the right-hand side! I'll try Elmer's next, since they seem to have access to Wagner brake parts--so far those have had more favorable origins.
70_F100, thanks for your fantastic reply!
Robroy
Last edited by robroy on Sun Jun 20, 2010 2:48 pm, edited 1 time in total.
-
robroy
- 100% FORDified!
- Posts: 3768
- Joined: Sun Jul 06, 2008 4:36 pm
- Location: California, Salinas
Re: 1972 F250 Dana 60 12"x2.5" rear drum brake rebuild: advice?
Good afternoon!
I called around earlier this week and found a source for some Carlson automatic adjusting kits, which are USA-made, but I'll have to special-order them. I spoke to Brake Supply Plus. I think it's worth the extra trouble and expense to have these USA-made parts, so I'll go this route.
Yet given the relative difficulty I've have finding USA-made kits, I'm uncertain about whether I should be ordering the kits for both sides and replacing all of the adjusting hardware at once, or whether the LH hardware's fine (I already know that the RH hardware's toasted).
Perhaps y'all can take a close look at these photos and supply your experienced opinions! All of these may be clicked upon for super large, detailed editions.
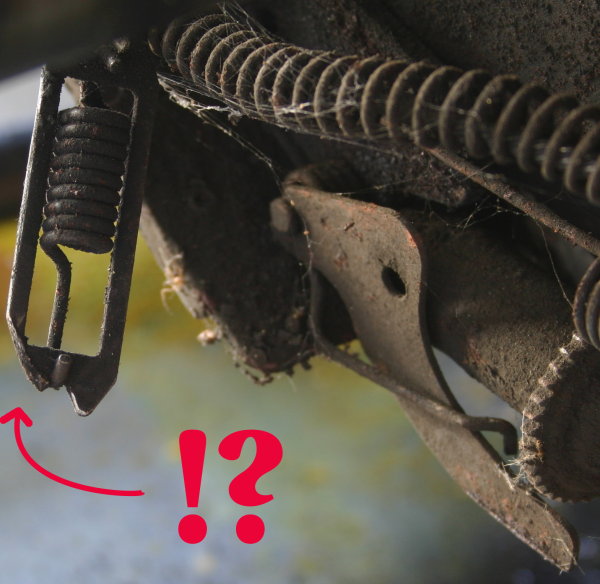
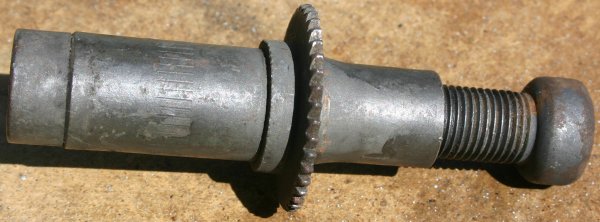
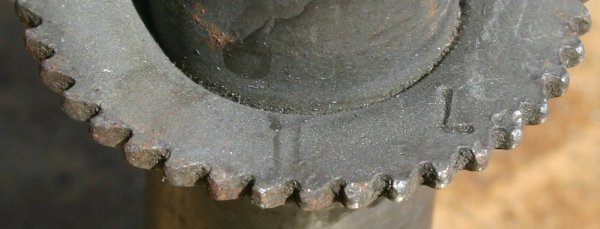
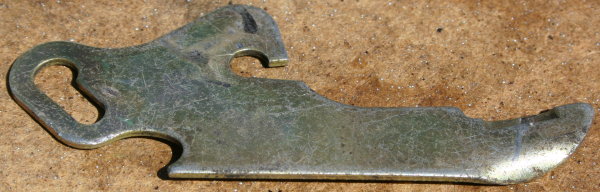
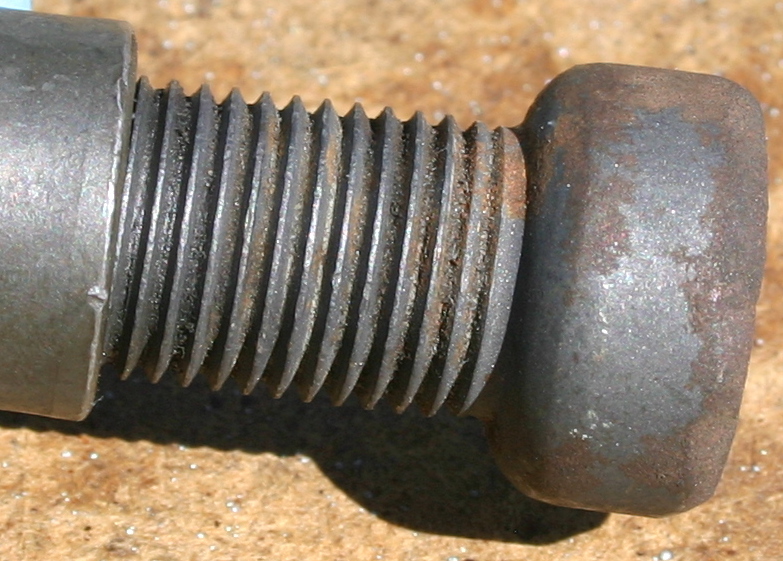
The screw looks fair to me; its teeth don't look new, but I'm not sure if they're worn enough to consider replacing them or not.

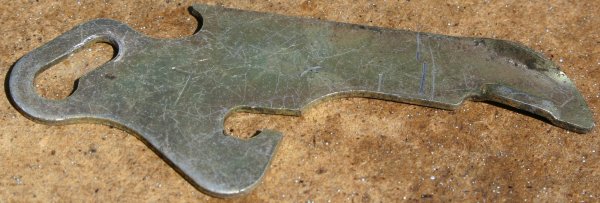
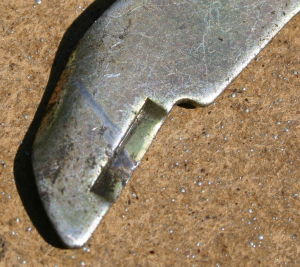
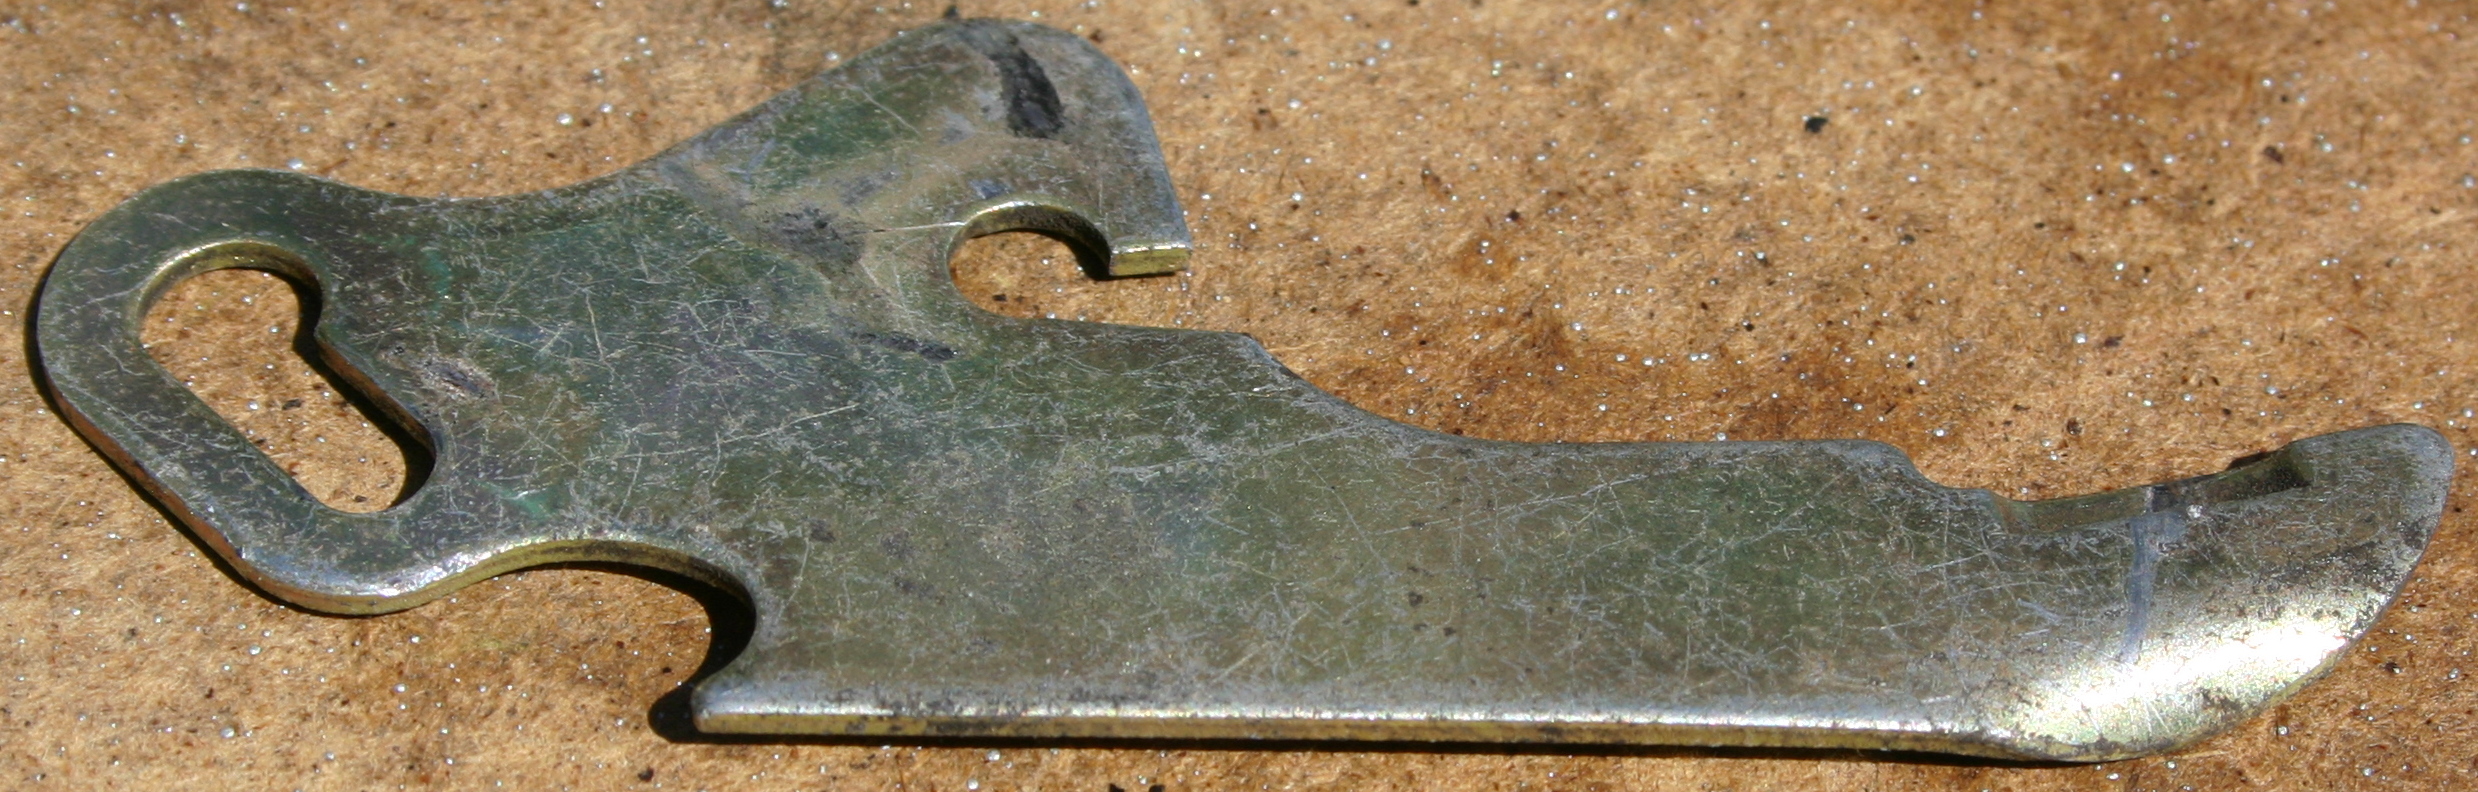
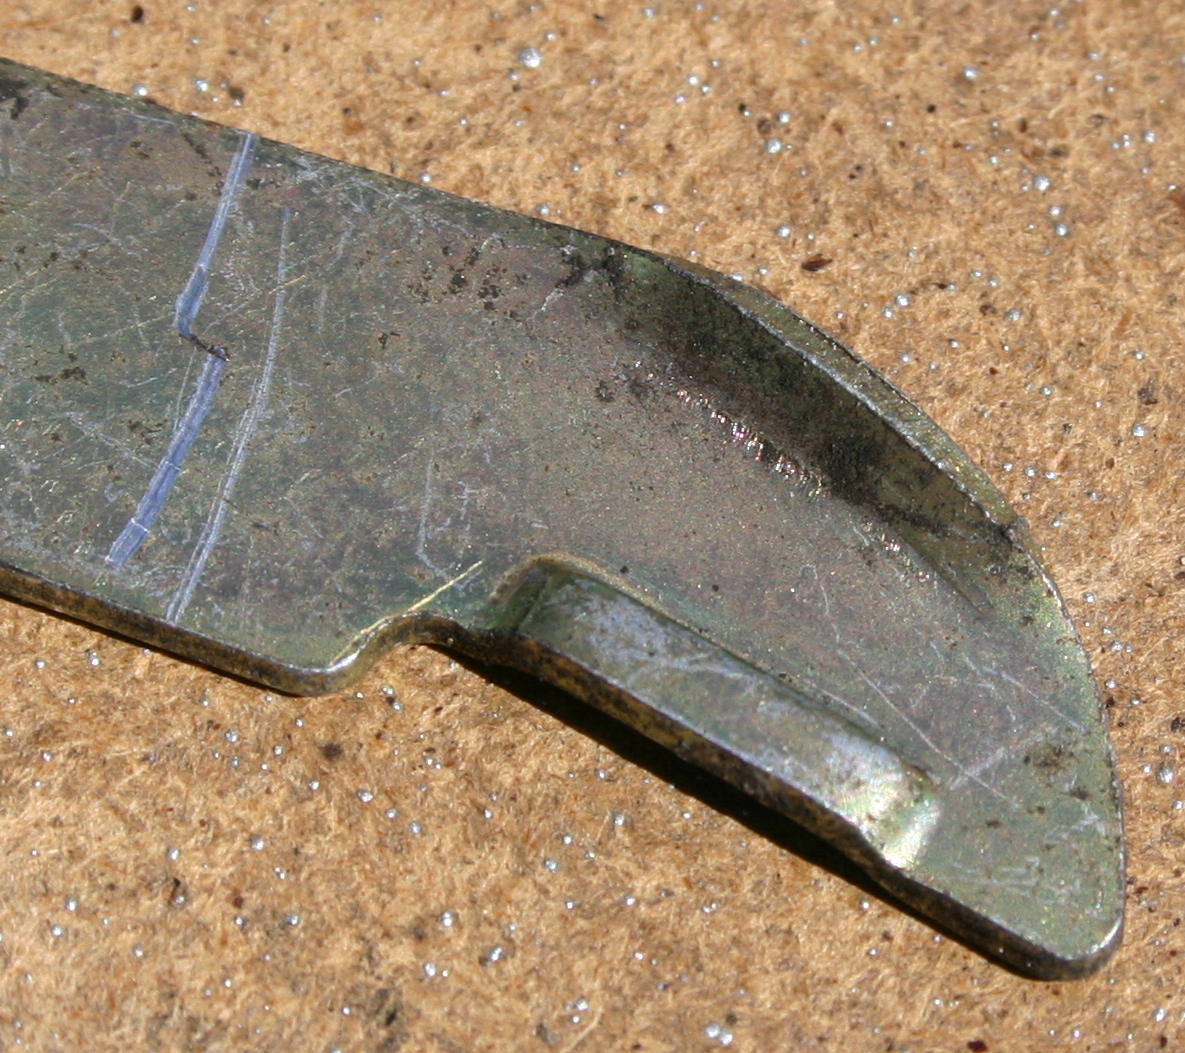
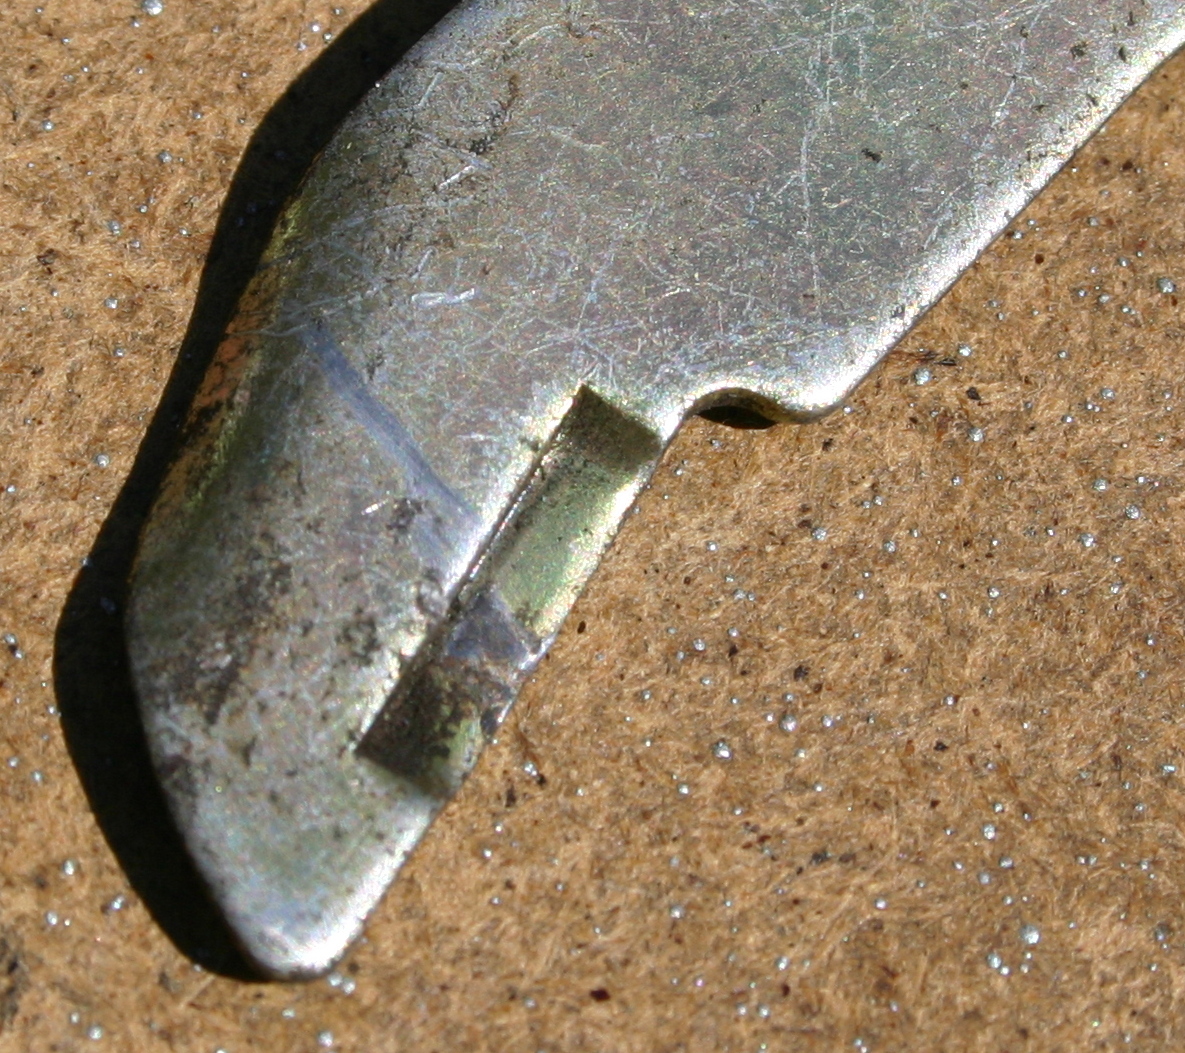
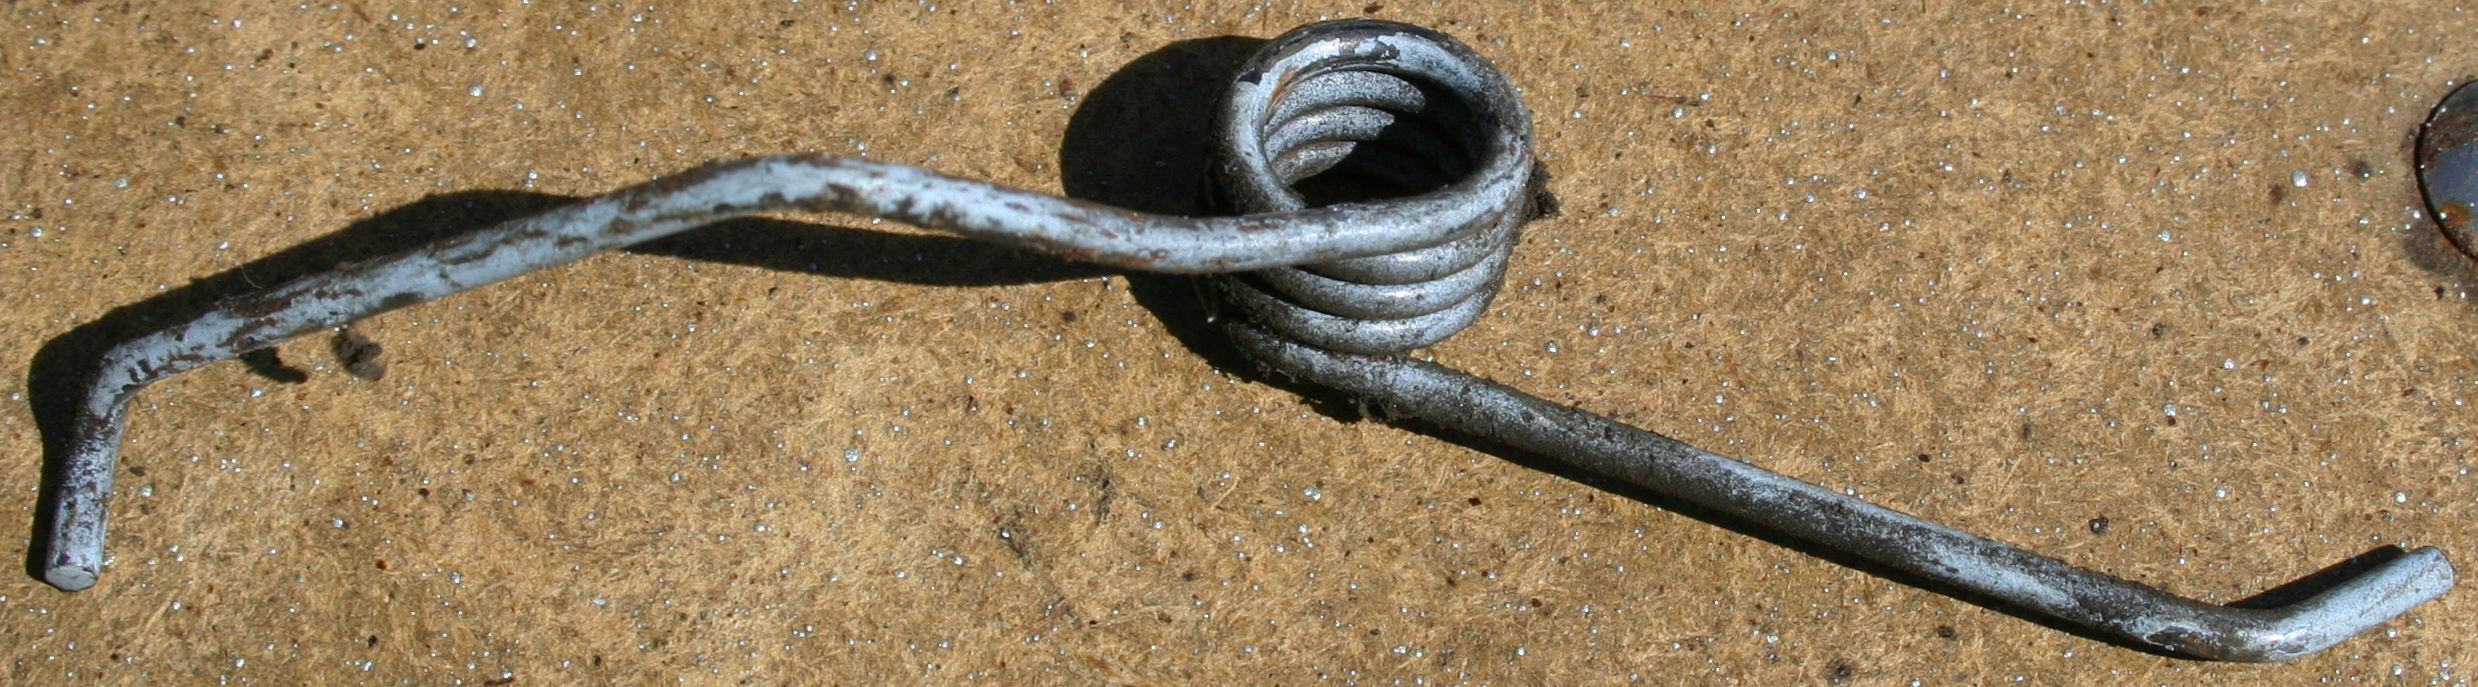
Here's the lever. It seems to have a slight bend in it that I'm not sure is by-design, but its overall condition seems good to me.

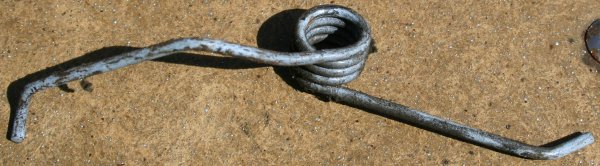
And here's the spring that sits under the lever. Other than being dusty, it looks pretty good to me. That said, I recognize that it's not possible to see a weakened spring!
Would y'all recommend the RH kit only, or based on the above photos, would it be prudent to replace the LH kit as well? I believe the kits are around $65 each, including the charge to special-order them.
Thanks so much for the outstanding guidance!
Robroy
I called around earlier this week and found a source for some Carlson automatic adjusting kits, which are USA-made, but I'll have to special-order them. I spoke to Brake Supply Plus. I think it's worth the extra trouble and expense to have these USA-made parts, so I'll go this route.
Yet given the relative difficulty I've have finding USA-made kits, I'm uncertain about whether I should be ordering the kits for both sides and replacing all of the adjusting hardware at once, or whether the LH hardware's fine (I already know that the RH hardware's toasted).
Perhaps y'all can take a close look at these photos and supply your experienced opinions! All of these may be clicked upon for super large, detailed editions.
The screw looks fair to me; its teeth don't look new, but I'm not sure if they're worn enough to consider replacing them or not.

Here's the lever. It seems to have a slight bend in it that I'm not sure is by-design, but its overall condition seems good to me.

And here's the spring that sits under the lever. Other than being dusty, it looks pretty good to me. That said, I recognize that it's not possible to see a weakened spring!
Would y'all recommend the RH kit only, or based on the above photos, would it be prudent to replace the LH kit as well? I believe the kits are around $65 each, including the charge to special-order them.
Thanks so much for the outstanding guidance!
Robroy
-
fordman
- 100% FORDified!
- Posts: 22329
- Joined: Sun Aug 28, 2005 8:17 pm
- Location: Kansas, Ottawa
- Contact:
Re: 1972 F250 Dana 60 12"x2.5" rear drum brake rebuild: advice?
i see nothing wron with the last photos in the last post. so you dont really need to replace that hardware. however over the years springs can become weaker as they are used. so getting a new sprign kit wouldnt hurt anything. i dont think you ned the adjustign hardware as the stuff you have looks fine. spring would be the only thing i would replace if you want to do it once and forget it.
-
robroy
- 100% FORDified!
- Posts: 3768
- Joined: Sun Jul 06, 2008 4:36 pm
- Location: California, Salinas
Re: 1972 F250 Dana 60 12"x2.5" rear drum brake rebuild: advice?
Good evening Fordman, thanks very much for checking out my photos and replying!
Thanks again for your excellent reply Fordman!
Robroy
Perfect, thanks!fordman wrote:i see nothing wron with the last photos in the last post. so you dont really need to replace that hardware.
Okay, understood! I know that this particular spring's sold separately; I'll ask about this when I go to specialty brake place on Monday.fordman wrote: however over the years springs can become weaker as they are used. so getting a new sprign kit wouldnt hurt anything. i dont think you ned the adjustign hardware as the stuff you have looks fine. spring would be the only thing i would replace if you want to do it once and forget it.
Thanks again for your excellent reply Fordman!
Robroy
-
robroy
- 100% FORDified!
- Posts: 3768
- Joined: Sun Jul 06, 2008 4:36 pm
- Location: California, Salinas
Re: 1972 F250 12"x2.5" Bendix rear drum brake rebuild: advice?
Good afternoon!
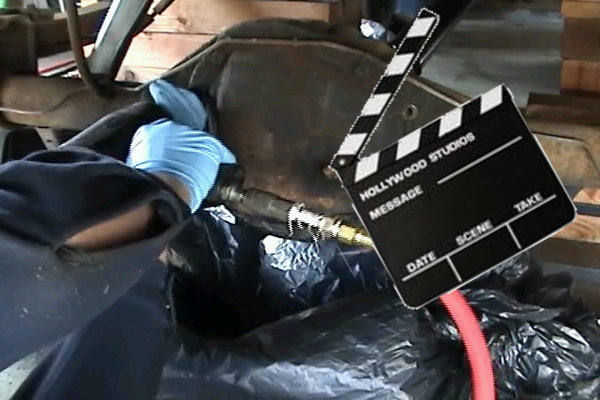
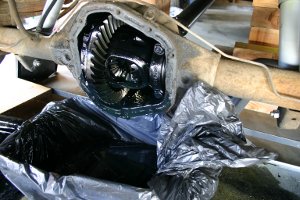
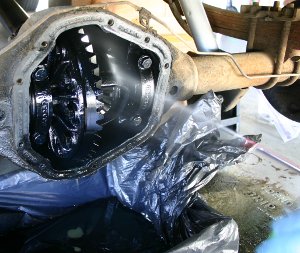
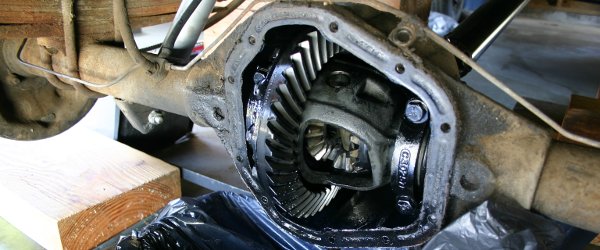
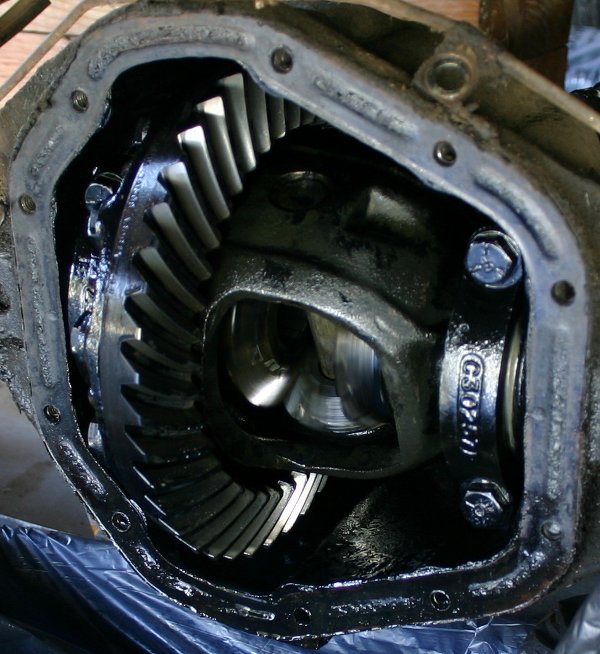
I pulled the Dana 60 cover off to drain the fluid earlier, and since this was the first time I'd ever seen inside of a differential, I video-recorded it for y'all to watch along with me!
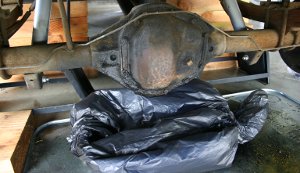
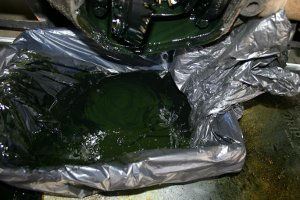
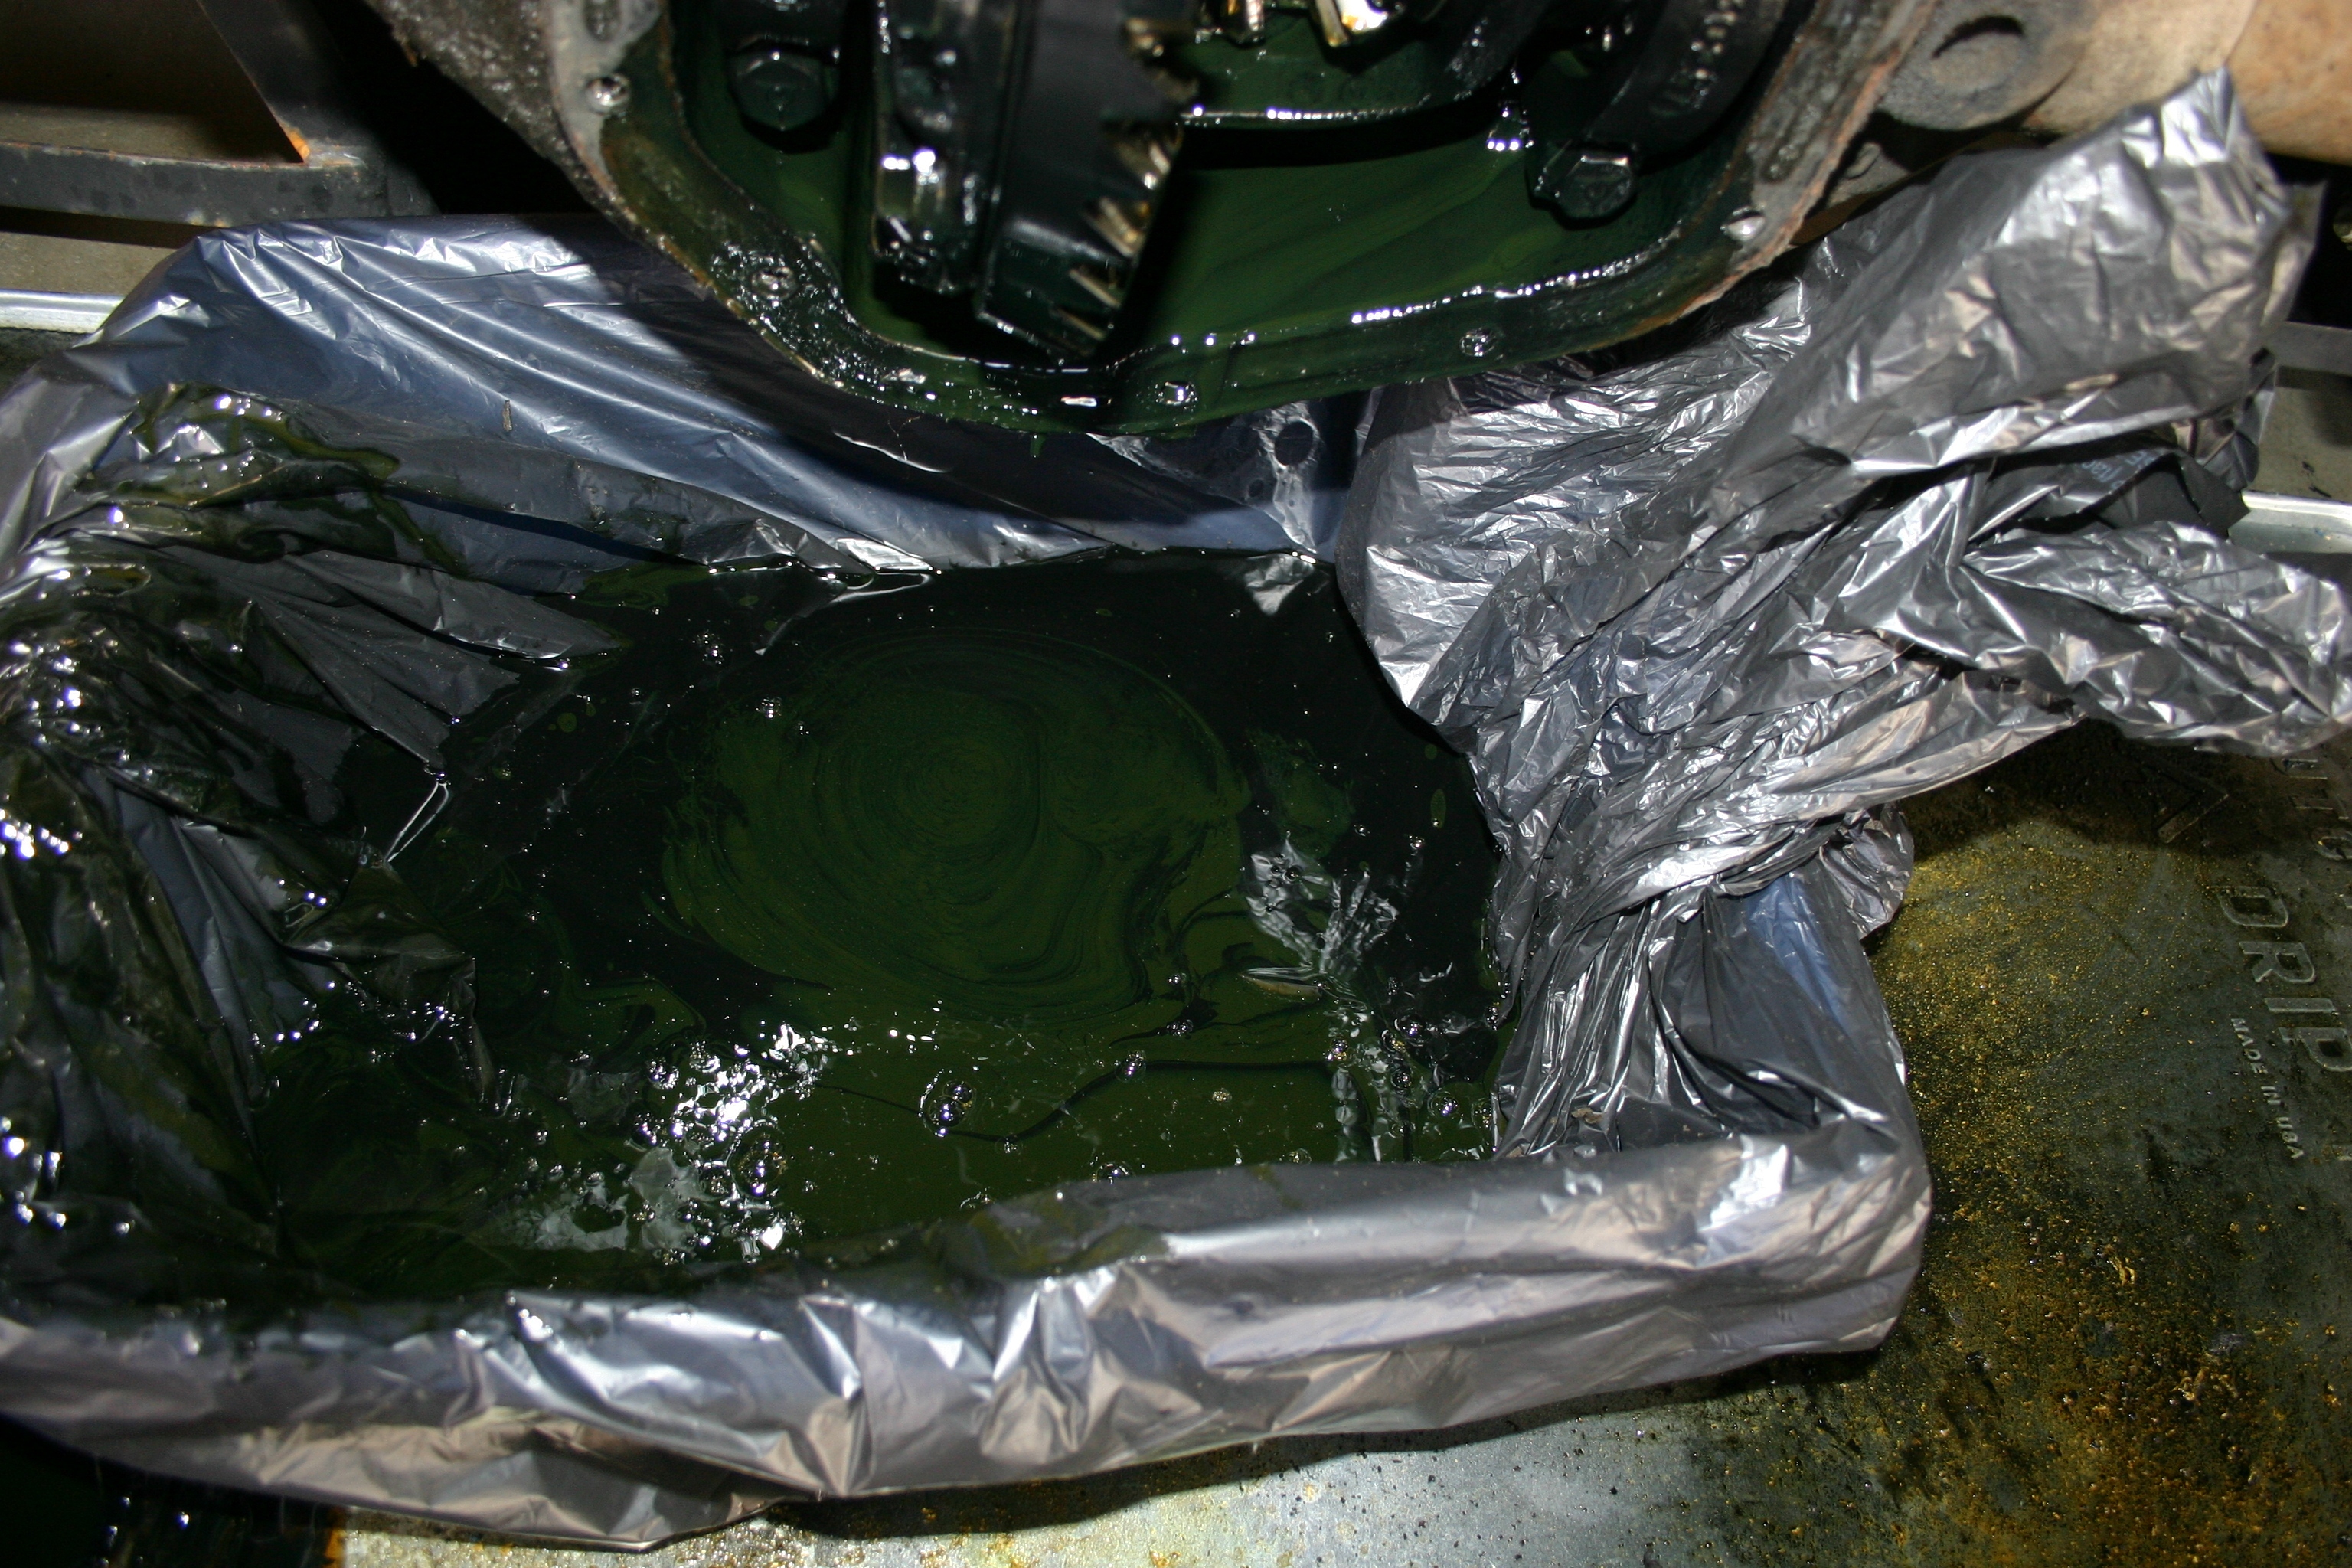
I grabbed a cat liter box and put it in a garbage sack to catch the gear oil; it seemed to work surprisingly well, although I haven't dealt with the clean-up yet.
And here's the video of the cover removal! As you know, the high quality H.264 format works only with up-to-date computers, while the WMV format will play anywhere.
H.264 (21MB) WMV (19MB)
I'm guessing that a visual inspection's best done once the gears have been flushed with brake cleaner, yet can your experienced eyes detect anything noteworthy?

I'm planning on letting it drain over night and doing the messy brake cleaner job tomorrow!
Thanks very much for all the superb guidance!
Robroy
I pulled the Dana 60 cover off to drain the fluid earlier, and since this was the first time I'd ever seen inside of a differential, I video-recorded it for y'all to watch along with me!
I grabbed a cat liter box and put it in a garbage sack to catch the gear oil; it seemed to work surprisingly well, although I haven't dealt with the clean-up yet.


And here's the video of the cover removal! As you know, the high quality H.264 format works only with up-to-date computers, while the WMV format will play anywhere.
H.264 (21MB) WMV (19MB)
I'm guessing that a visual inspection's best done once the gears have been flushed with brake cleaner, yet can your experienced eyes detect anything noteworthy?


I'm planning on letting it drain over night and doing the messy brake cleaner job tomorrow!
Thanks very much for all the superb guidance!
Robroy
-
70_F100
- Moderator
- Posts: 2999
- Joined: Mon Oct 22, 2007 11:23 am
- Location: North Carolina, Kernersville
Re: 1972 F250 12"x2.5" Bendix rear drum brake rebuild: advice?
Robroy, it looks pretty good inside. I can't immediately see any visible wear, and it doesn't appear that there is any metal in the lube.
However, there are a few things to look for that really can't be determined from photos:
1) Check the leading and trailing edges of the ring gear teeth for wear. The best way to do that is to feel the outer edges of the teeth (the longest edges). These should not feel sharp.
2) Check the spider gear differential shaft for wear. This would show up as movement of the shaft within the bore of the carrier and/or looseness of the pinion gears (spider gears) on the shaft.
3) Check the side gears and pinion gears for excessive clearance. There should be some movement and free play of the gears, but they should essentially run straight, with no "rocking" motion on the shaft or in the bores for the axle (side) gears.
4) Check the ring and pinion for excessive backlash. To do this, hold the pinion stationary, and move the ring gear back and forth. There should only be a few thousandths backlash between the ring and pinion. If you can't find a good way to hold the pinion tightly, take a bolt with a large washer and put it in the hole (top or bottom) on the right side of the ring gear, so that the washer contacts the ring gear in such a way as to "lock" the ring gear, and turn the pinion back and forth. Again, a few thousandths is what you're looking for.
Looking good, my friend!!!
Wise men talk because they have something to say; fools talk because they have to say something.--Plato
Why is it that there's seldom time to fix it right the first time, but there's always time to fix it right the second time???
That's not an oil leak That's SWEAT from all that HORSEPOWER!!
Why is it that there's seldom time to fix it right the first time, but there's always time to fix it right the second time???
That's not an oil leak
-
robroy
- 100% FORDified!
- Posts: 3768
- Joined: Sun Jul 06, 2008 4:36 pm
- Location: California, Salinas
Re: 1972 F250 12"x2.5" Bendix rear drum brake rebuild: advice?
Good evening 70_F100, thanks for your super generous reply!
This was surprising to me because while installing the differential's input yoke, I noticed that I could turn the yoke quite a bit in both directions before it seemed to "catch." Perhaps I could turn it as much as five degrees, if my memory's working properly.
Tomorrow I'll turn the drive shaft by hand while keeping an eye on the ring gear to see if it still looks like a minimal amount (a few thousandths) of play!
I invested some good hours this afternoon and made some progress!
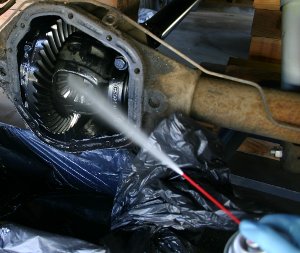
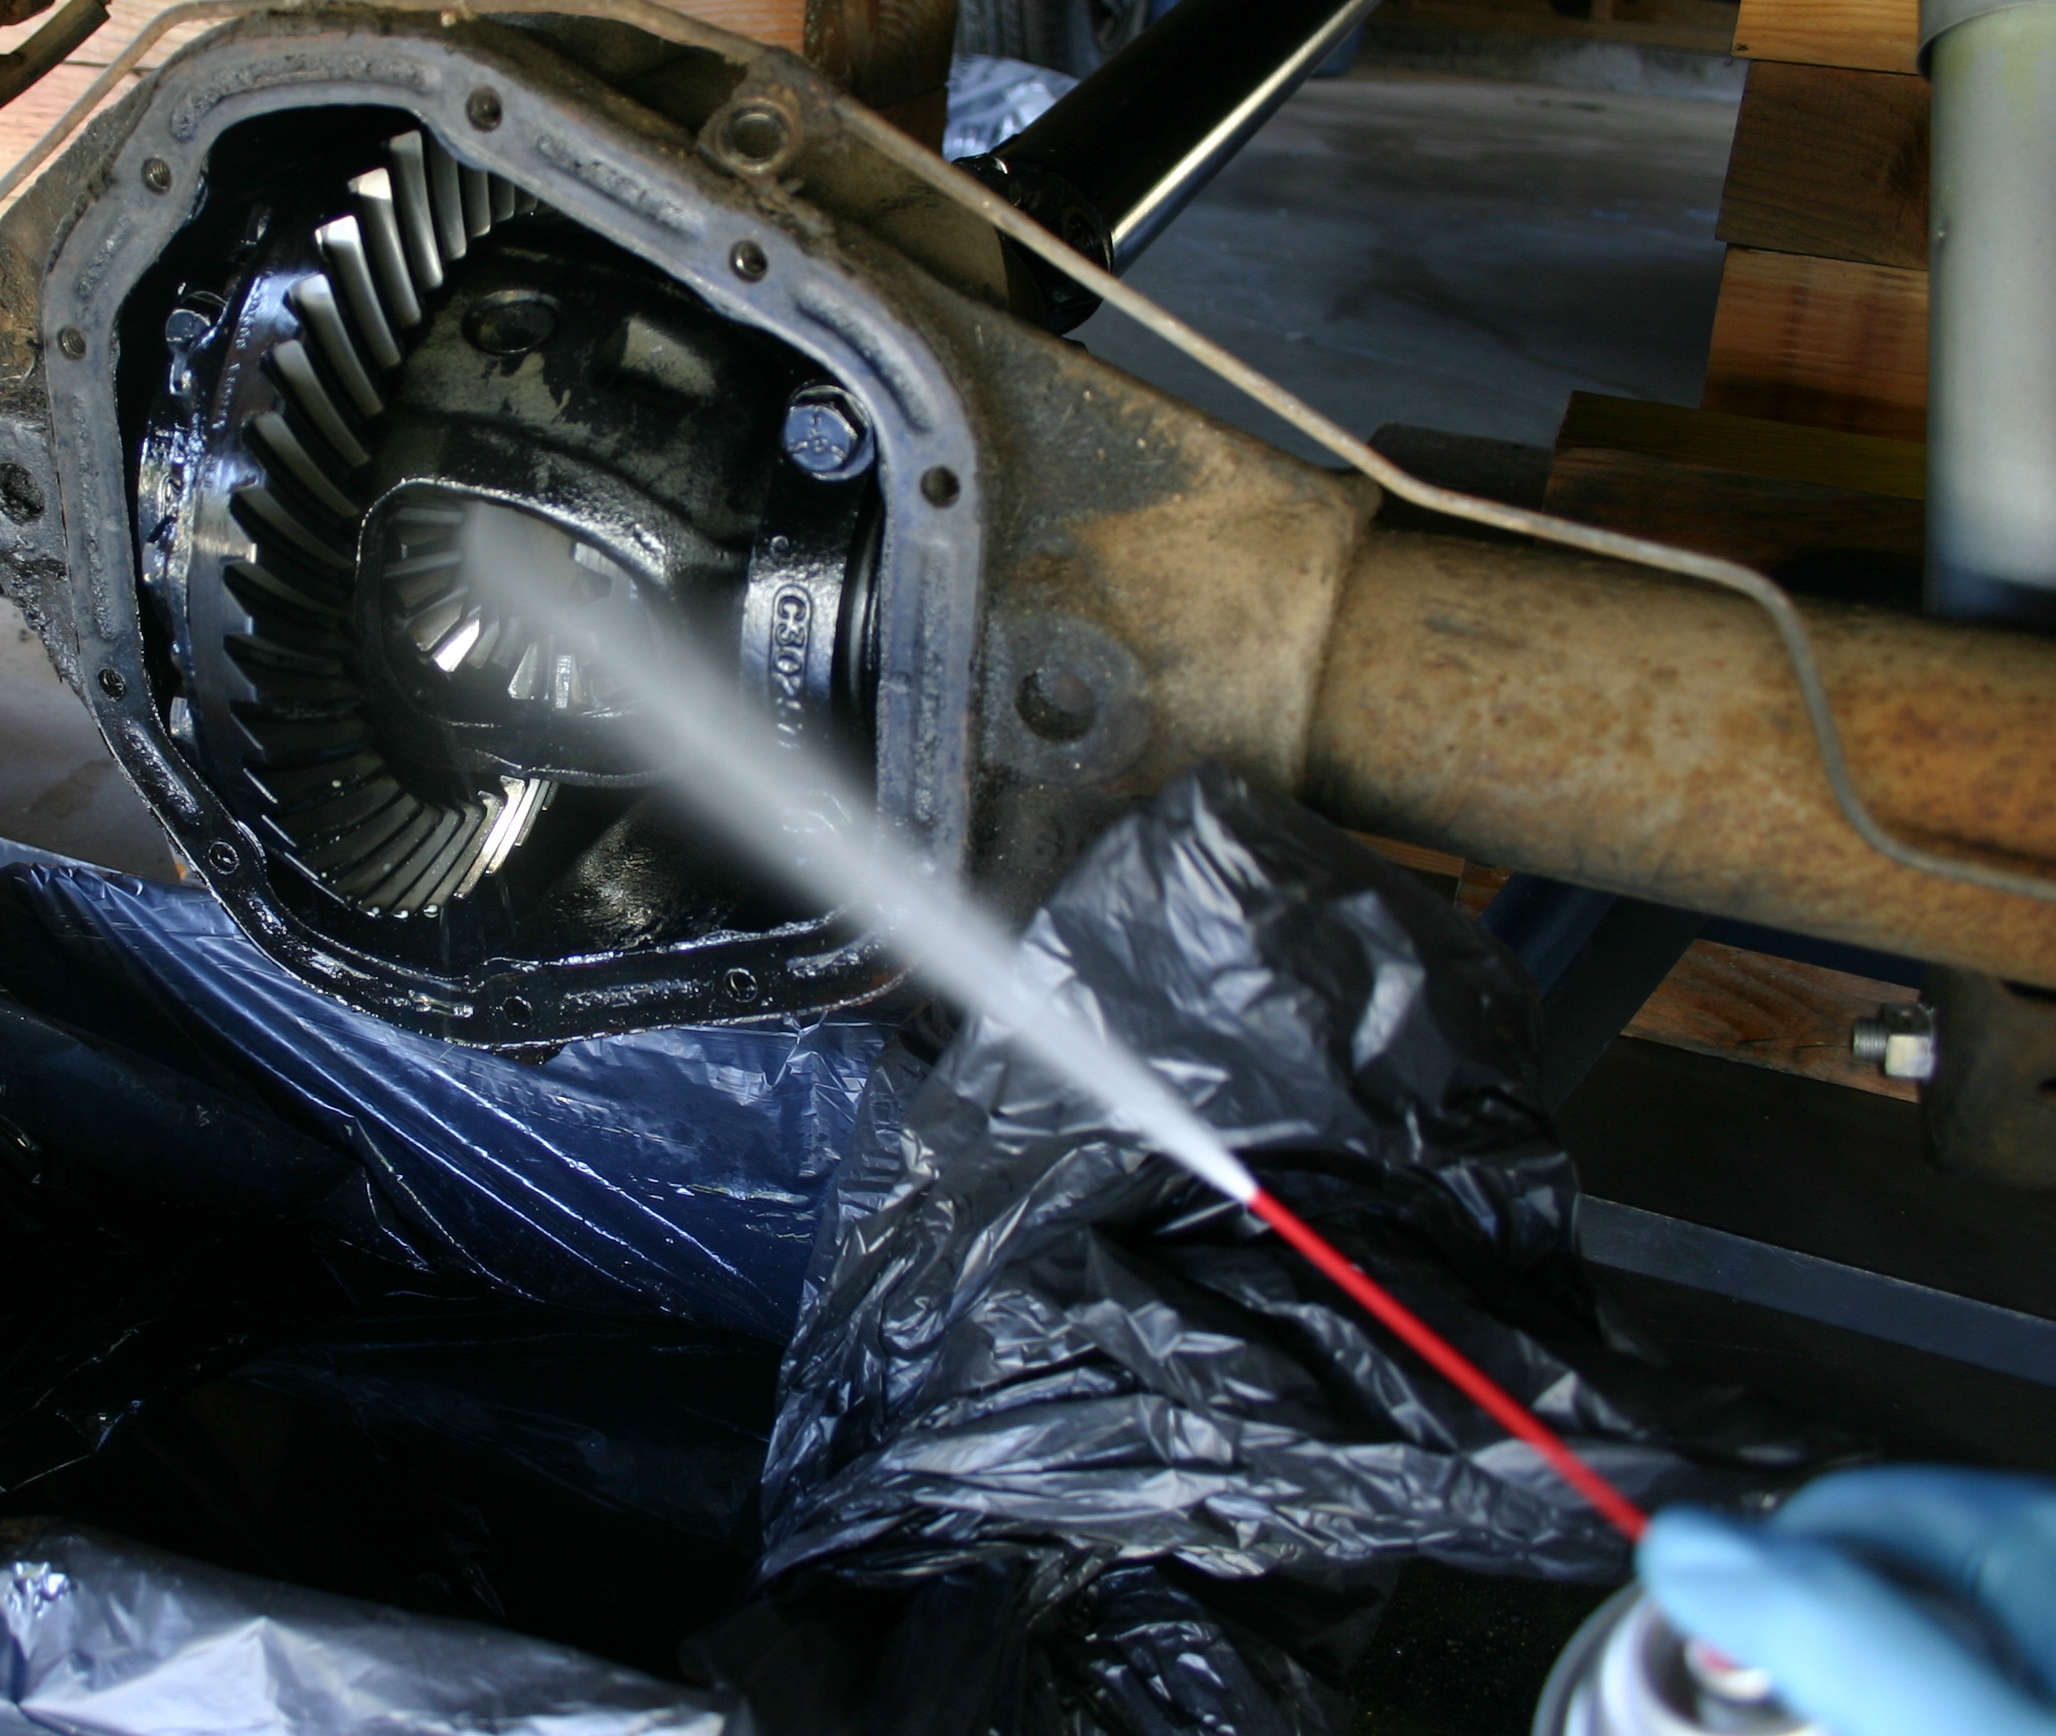
Here I'm spraying copious amounts of brake cleaner in the general direction of the differential.
Before beginning this, I prepared with the blue gloves I always wear, long sleeves, goggles, and a quality charcoal respirator. I knew I'd be using a significant amount of cleaner in there, and the small area under the truck tends to concentrate vapors--I didn't have much of an appetite for inhaling any more brake cleaner than was absolutely necessary!
I've been getting these decent under-truck photos by having the camera on a tri-pod (at its very shortest height setting) and using an infra-red shutter remote control. There's no way I'd normally have the coordination to take photos and spray brake cleaner at the same time, and I'm not nearly cruel enough to ask Kasie to climb under there for the sake of photo-documentation!
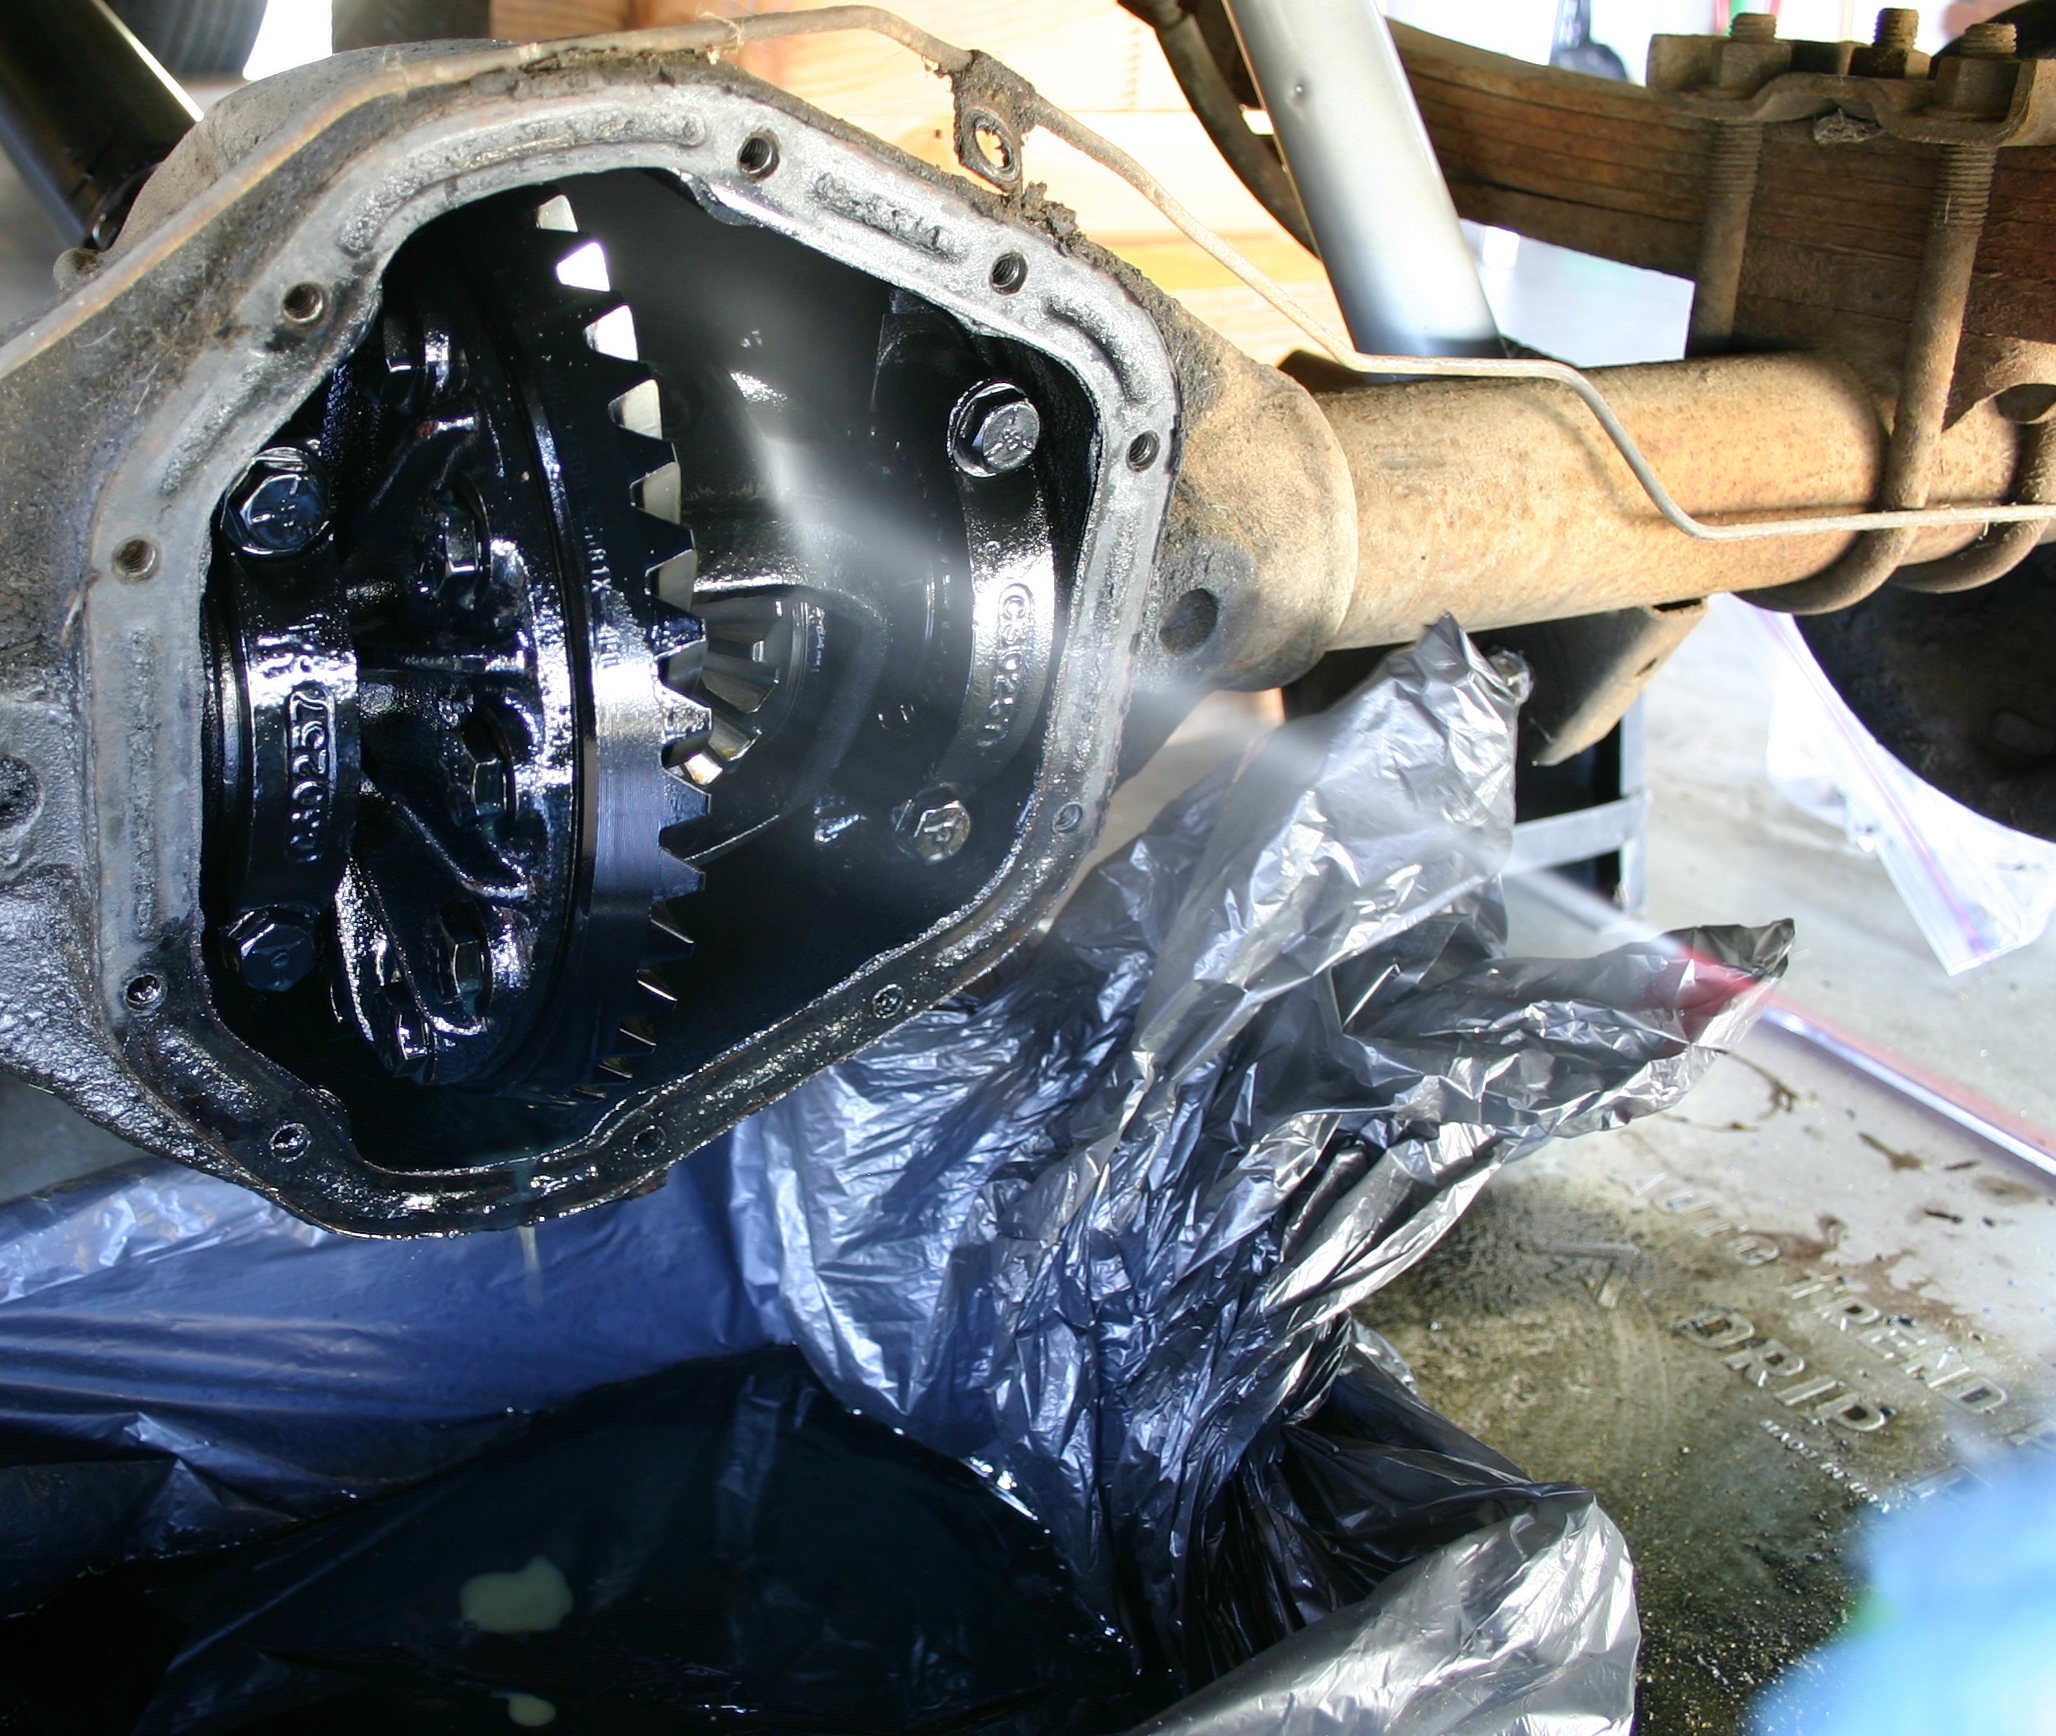
To aide the cleaner's coverage, I slipped an axle in the housing and used it to spin the differential gears around, while spraying.
Here's how it began to look without the uniform coat of gear oil.
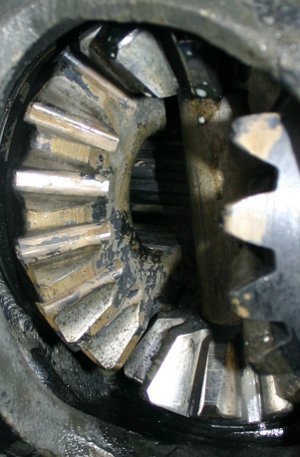
And here are a couple of ultra close-ups: the LH ring/pinion (on the left) and the ring (on the right).
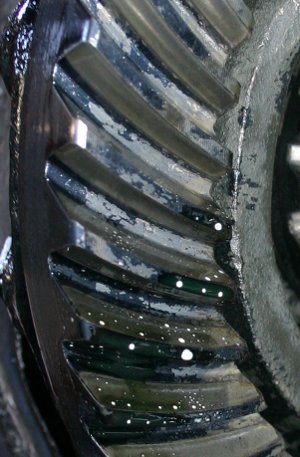
Of course I HAD to spin the gears with the camera set up for a long exposure! This gave me a sense of appreciation for how tough this rear end really is. Even spinning it by hand looked so dramatic; just imagine what it's like in there while driving around a corner at 55 MPH!
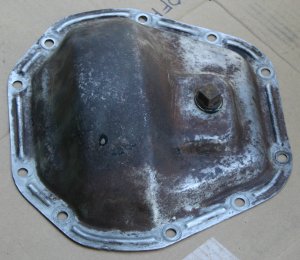
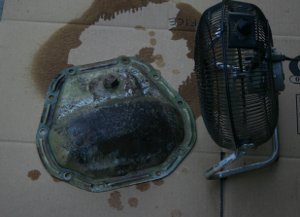
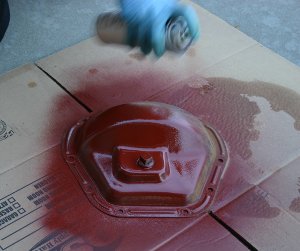
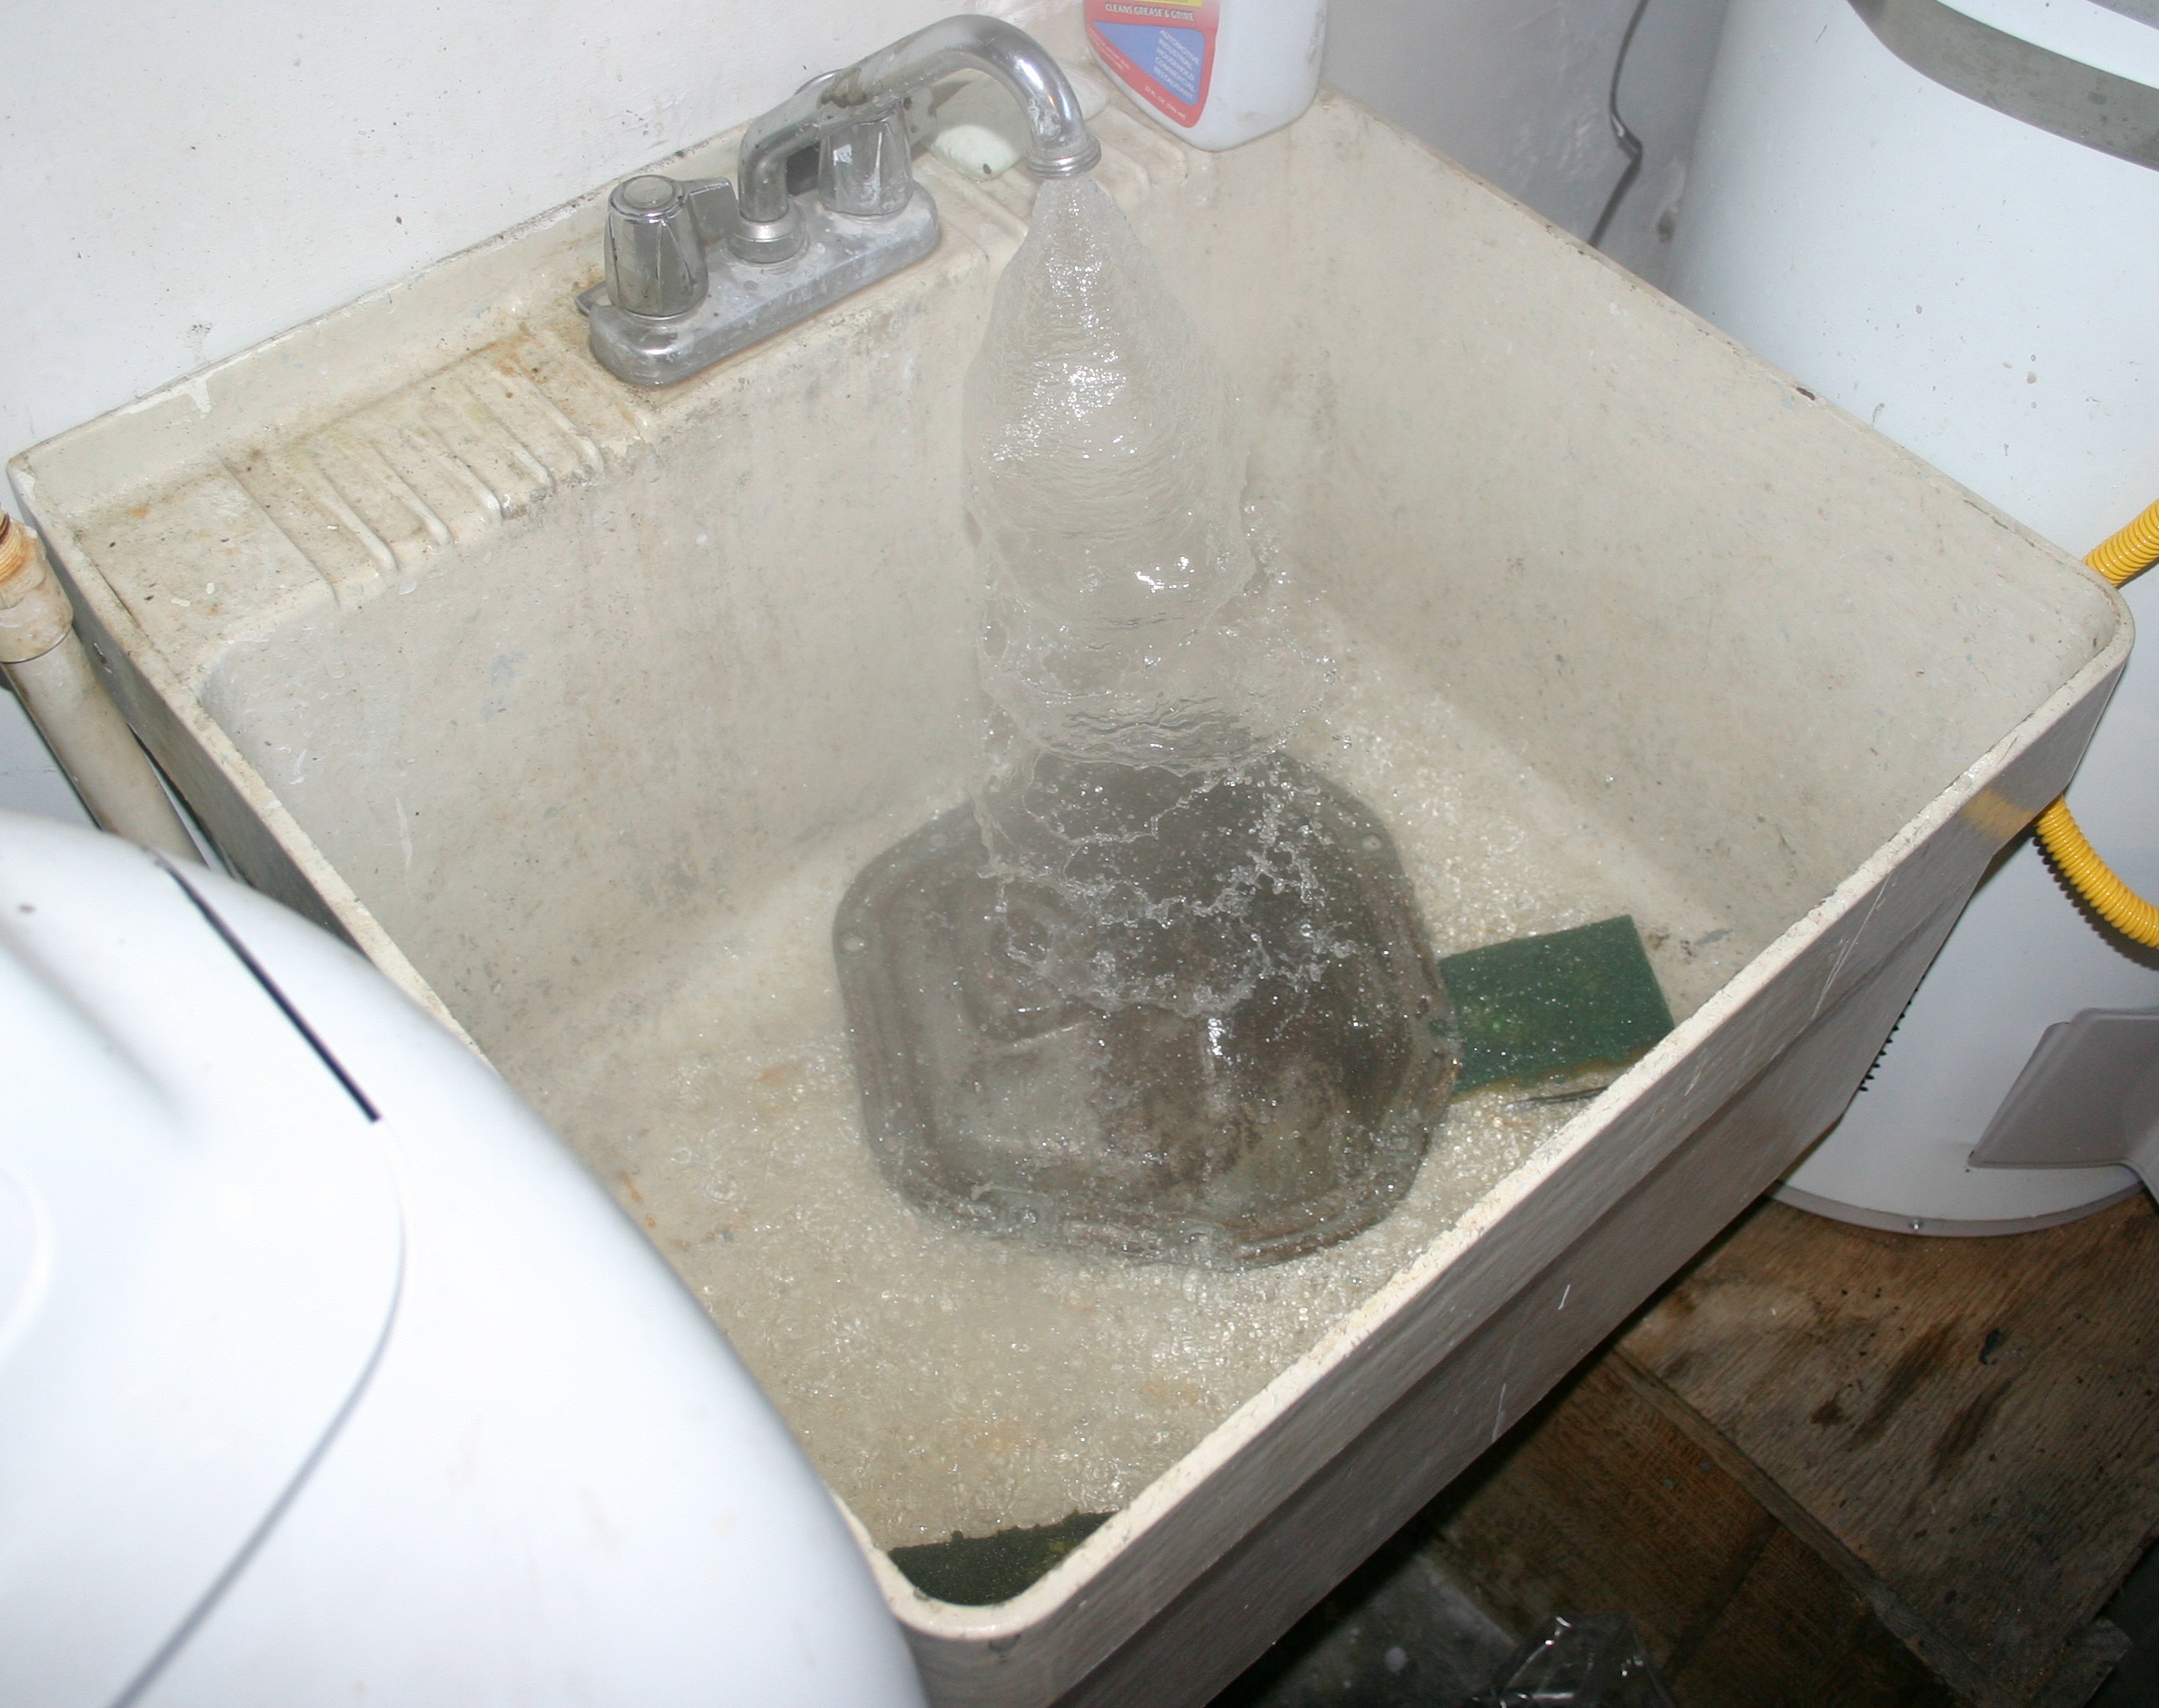
Next I turned my attention to the cover. It was N-A-S-T-Y! I spent an hour or more cleaning it up using every method at my disposal, although the most effective turned out to be dousing it with de-greaser and using a fresh Scotch-Brite pad with LOTS of "elbow grease," rinsing it with torrents of hot water, and repeating!
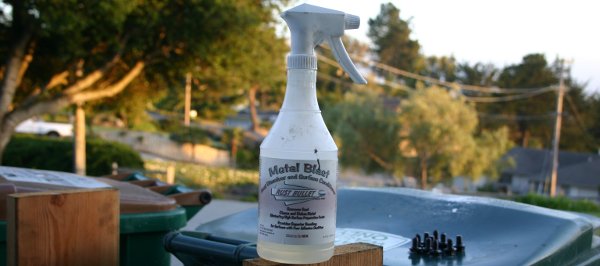
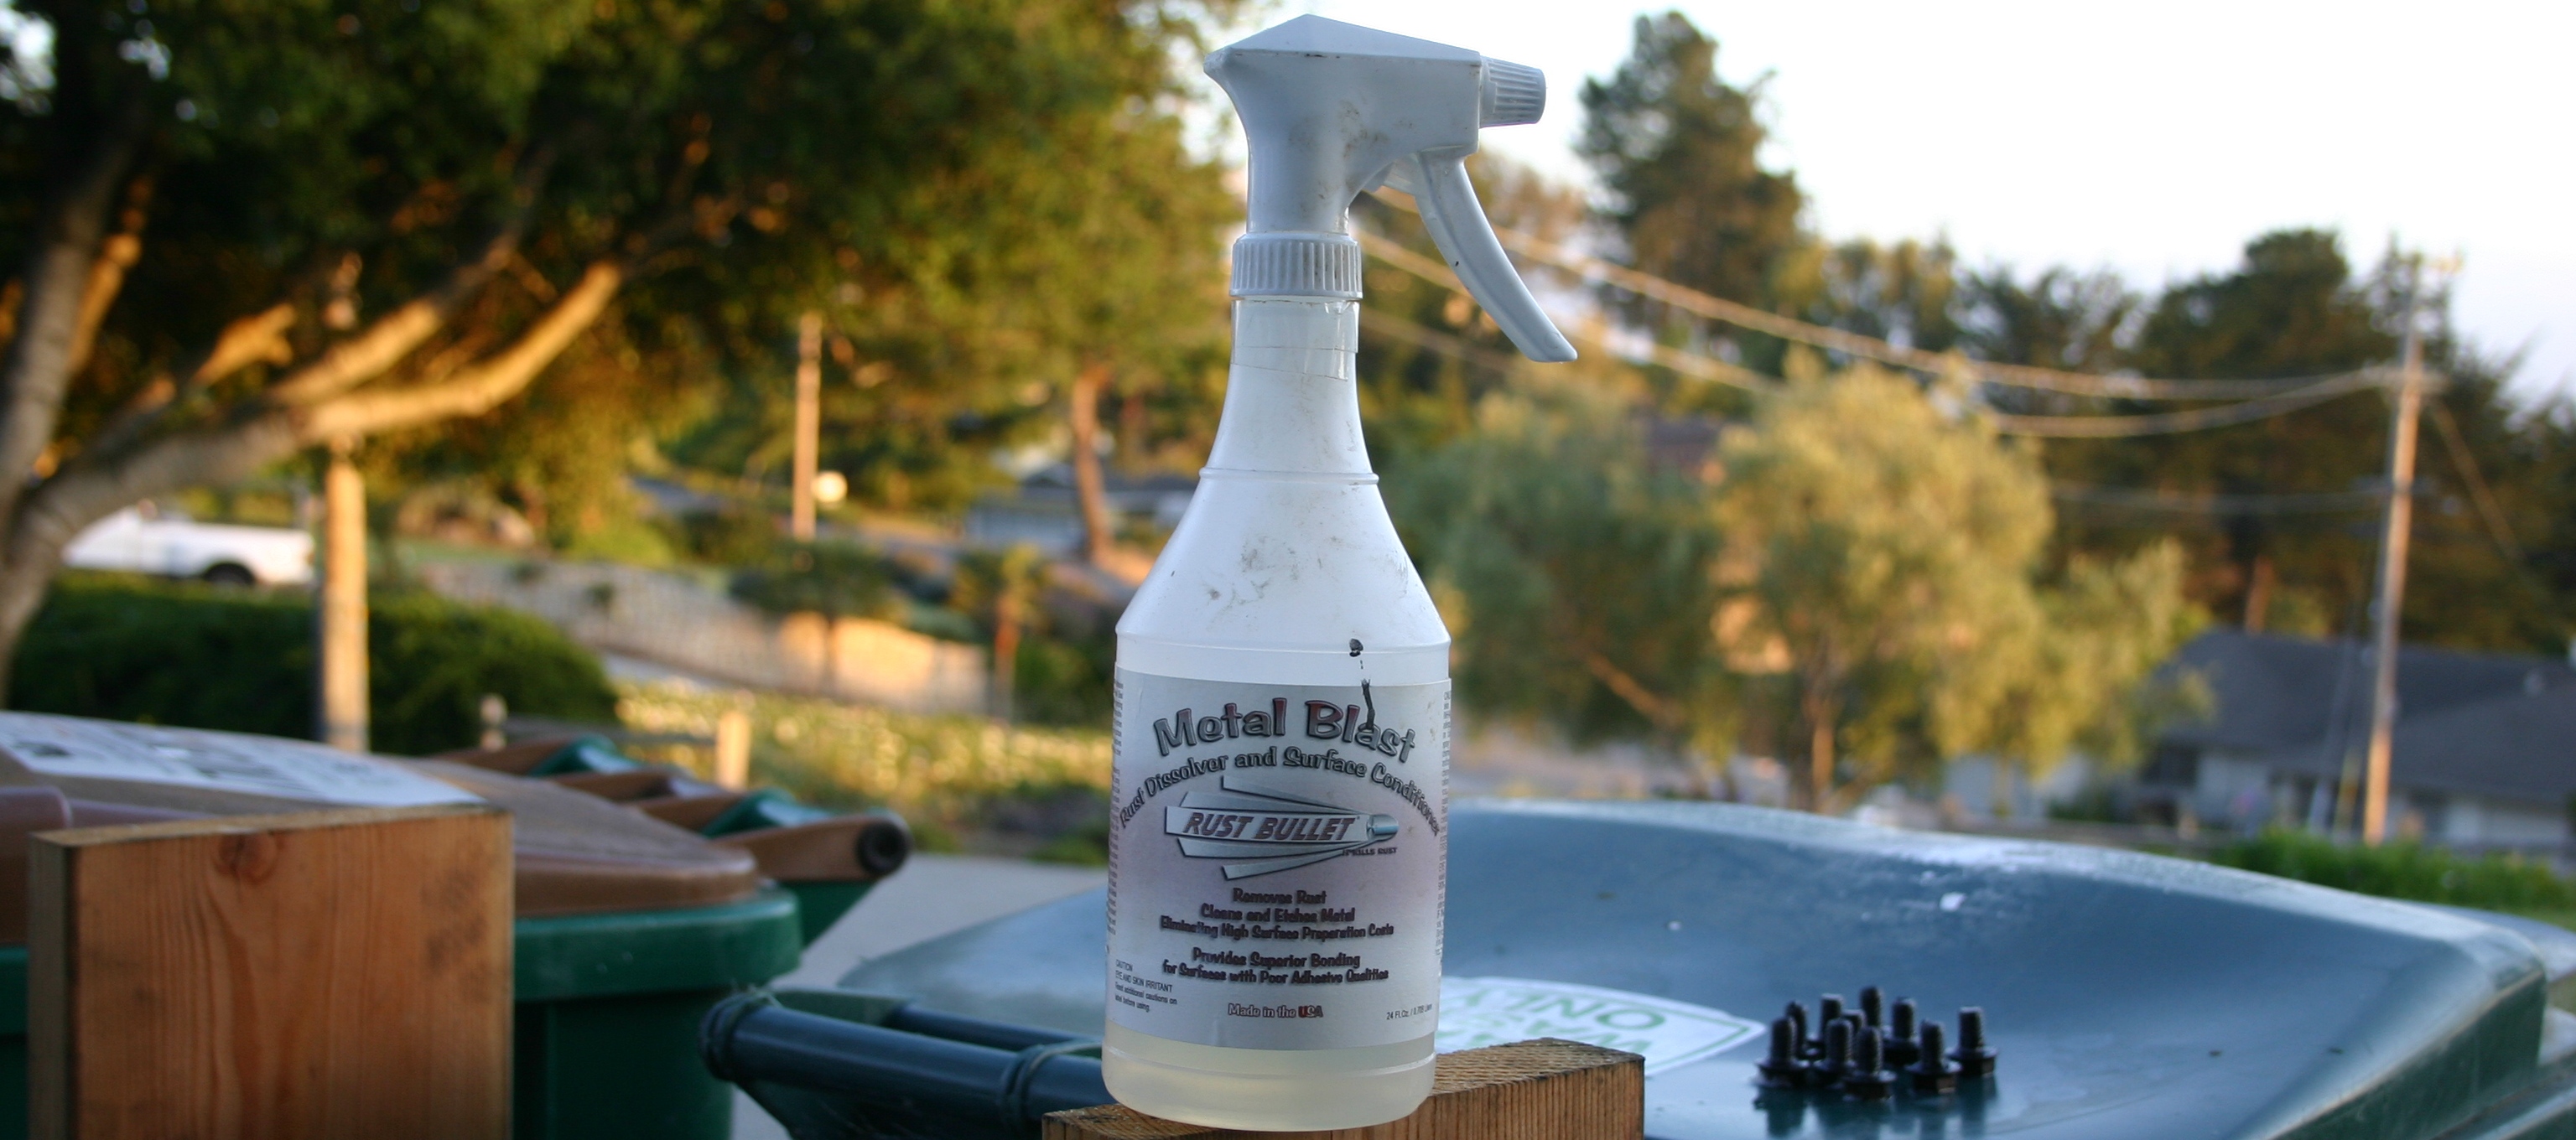
I got it just about as clean as it was going to get (by hand at least)! Then I thought, "What the heck," and hit it with some Rust Bullet Metal Blast, which as you know, is a phosphoric acid solution.
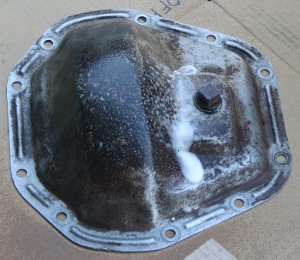

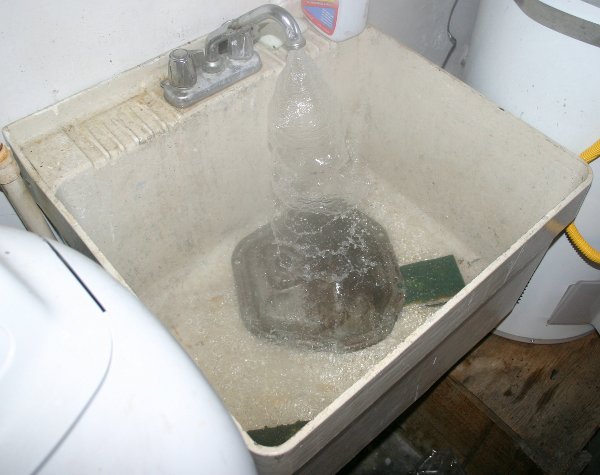
I let it sit that way for about five minutes (the directions said between two and twenty minutes was a good range), then doused it with hot water! The directions specifically call for hot water--perhaps it helps to wash off the acid more effectively. I'm truly fortunate to have this sink in the garage that's hooked directly up to the water heater; it produces scalding-hot water and lots of it!
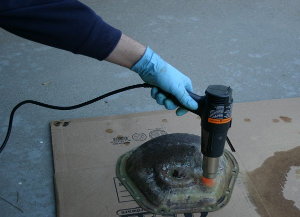
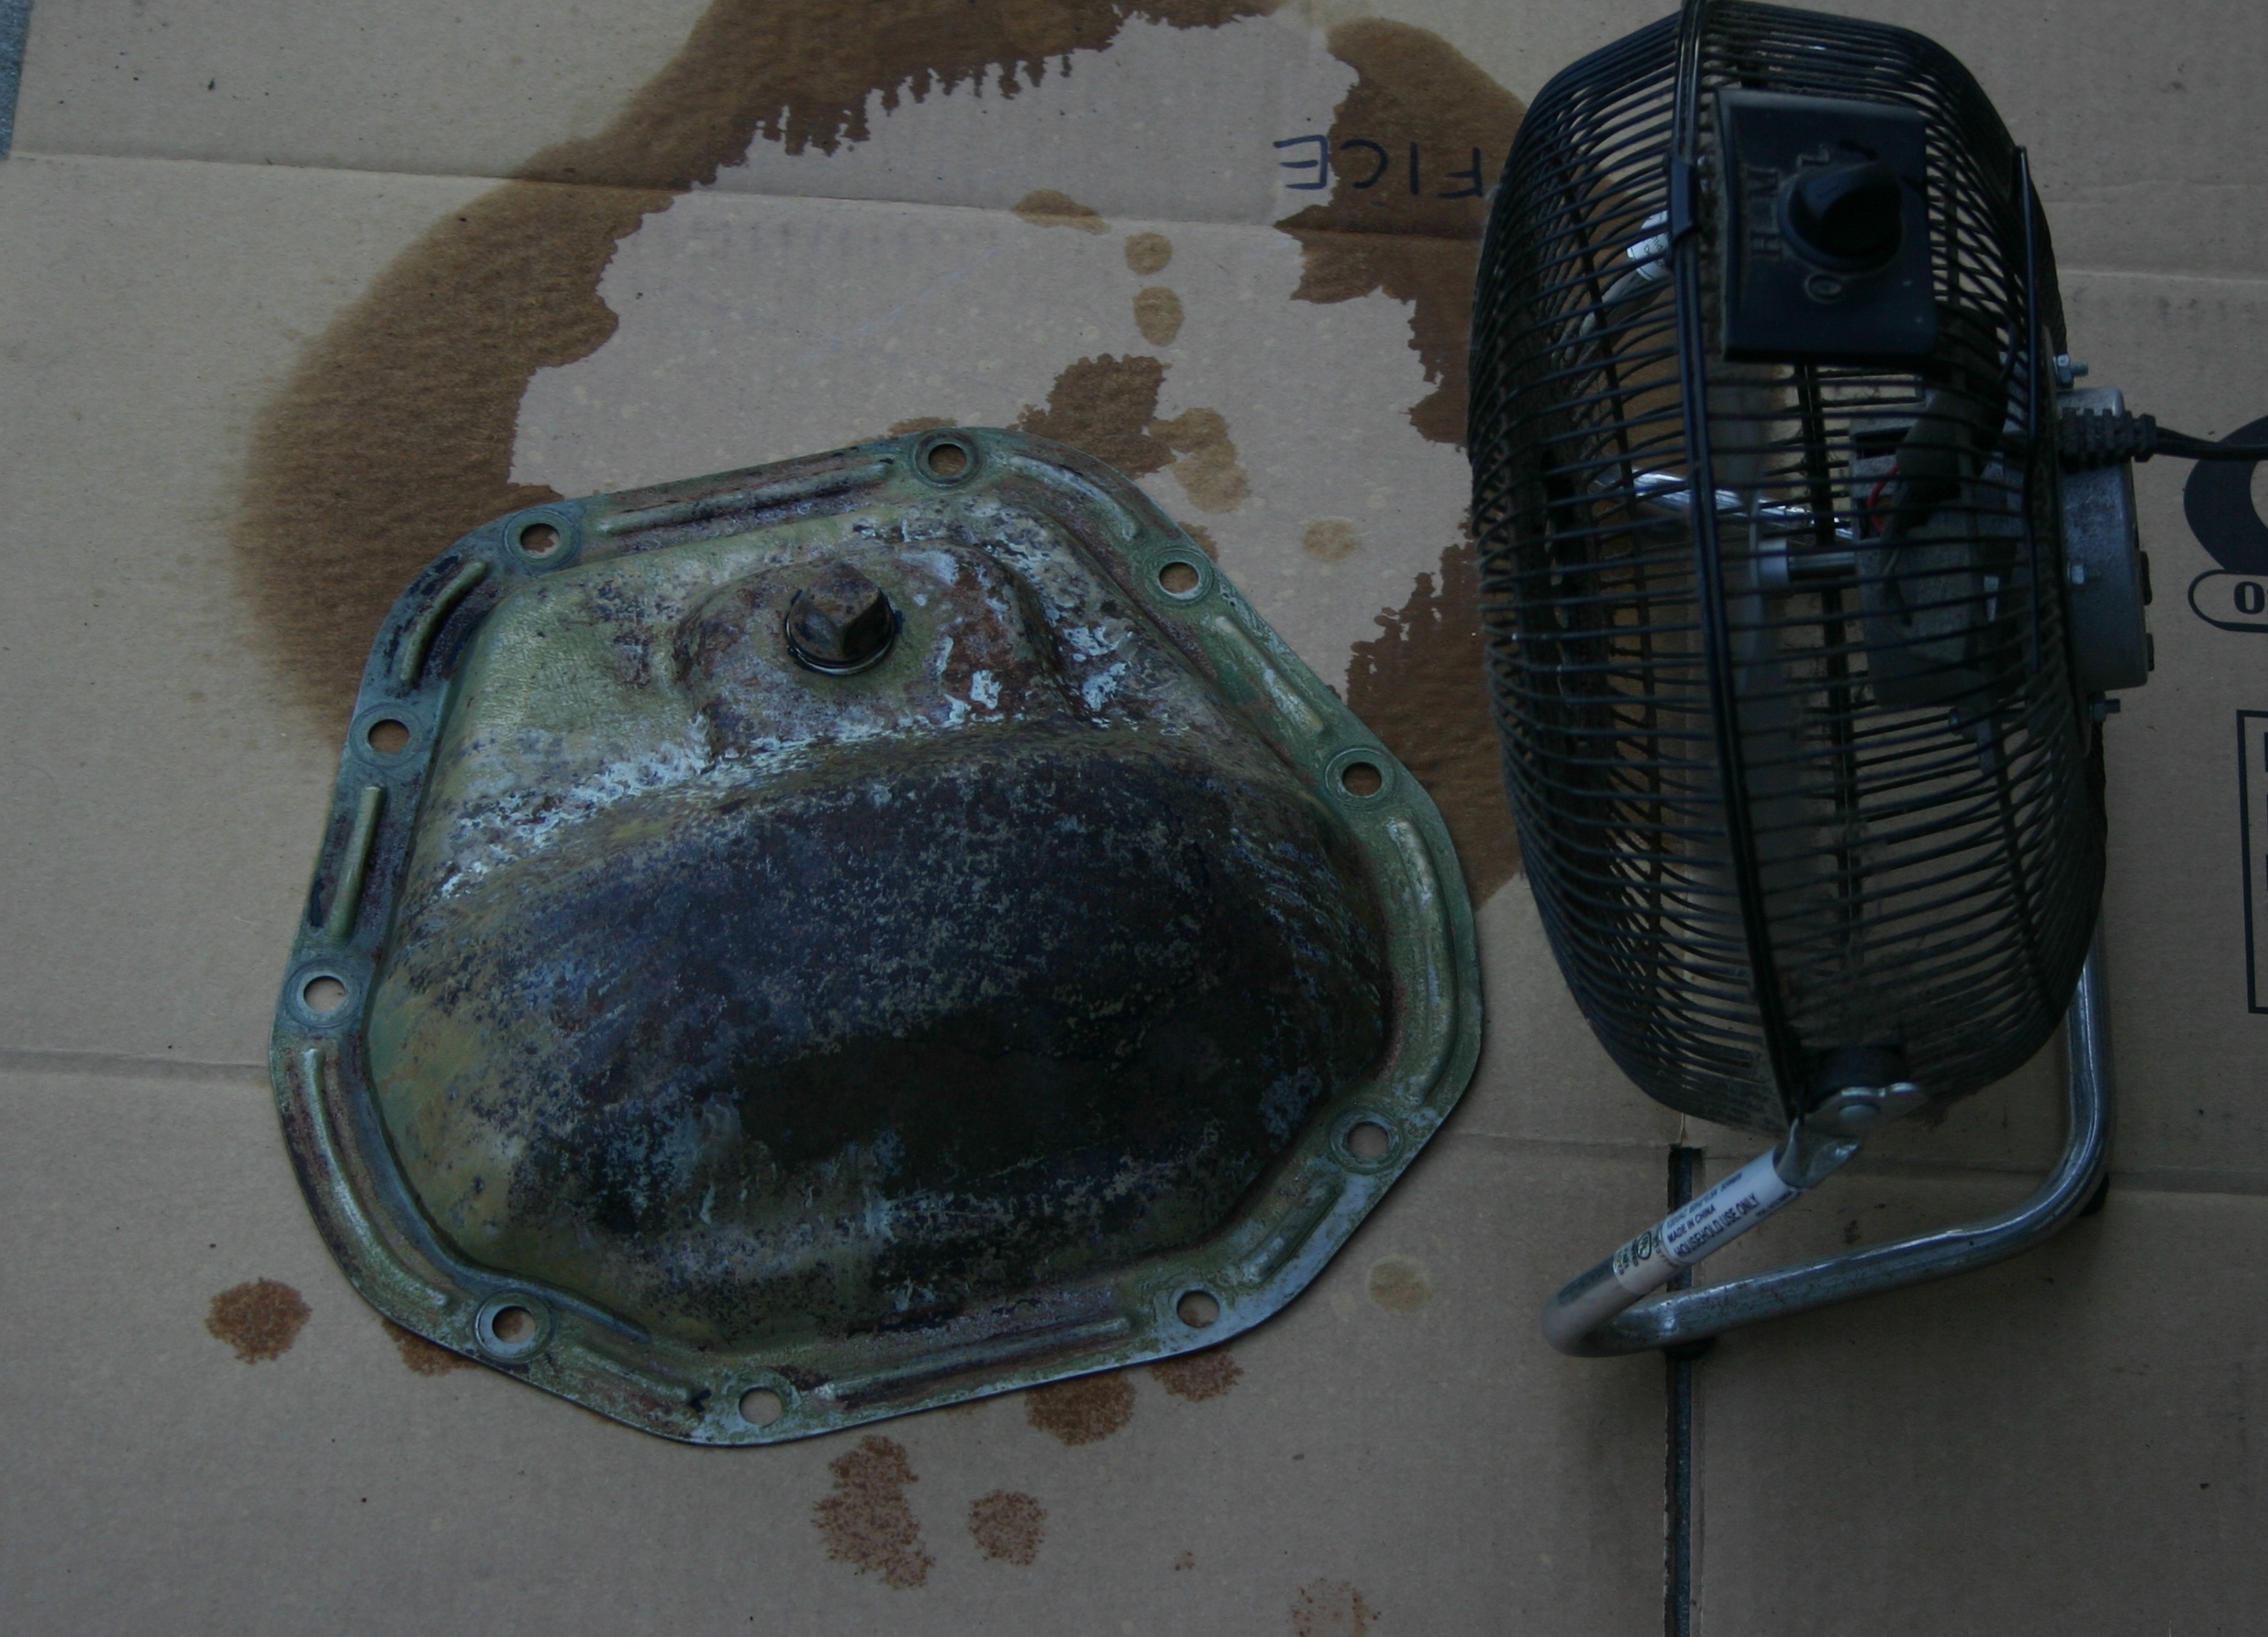
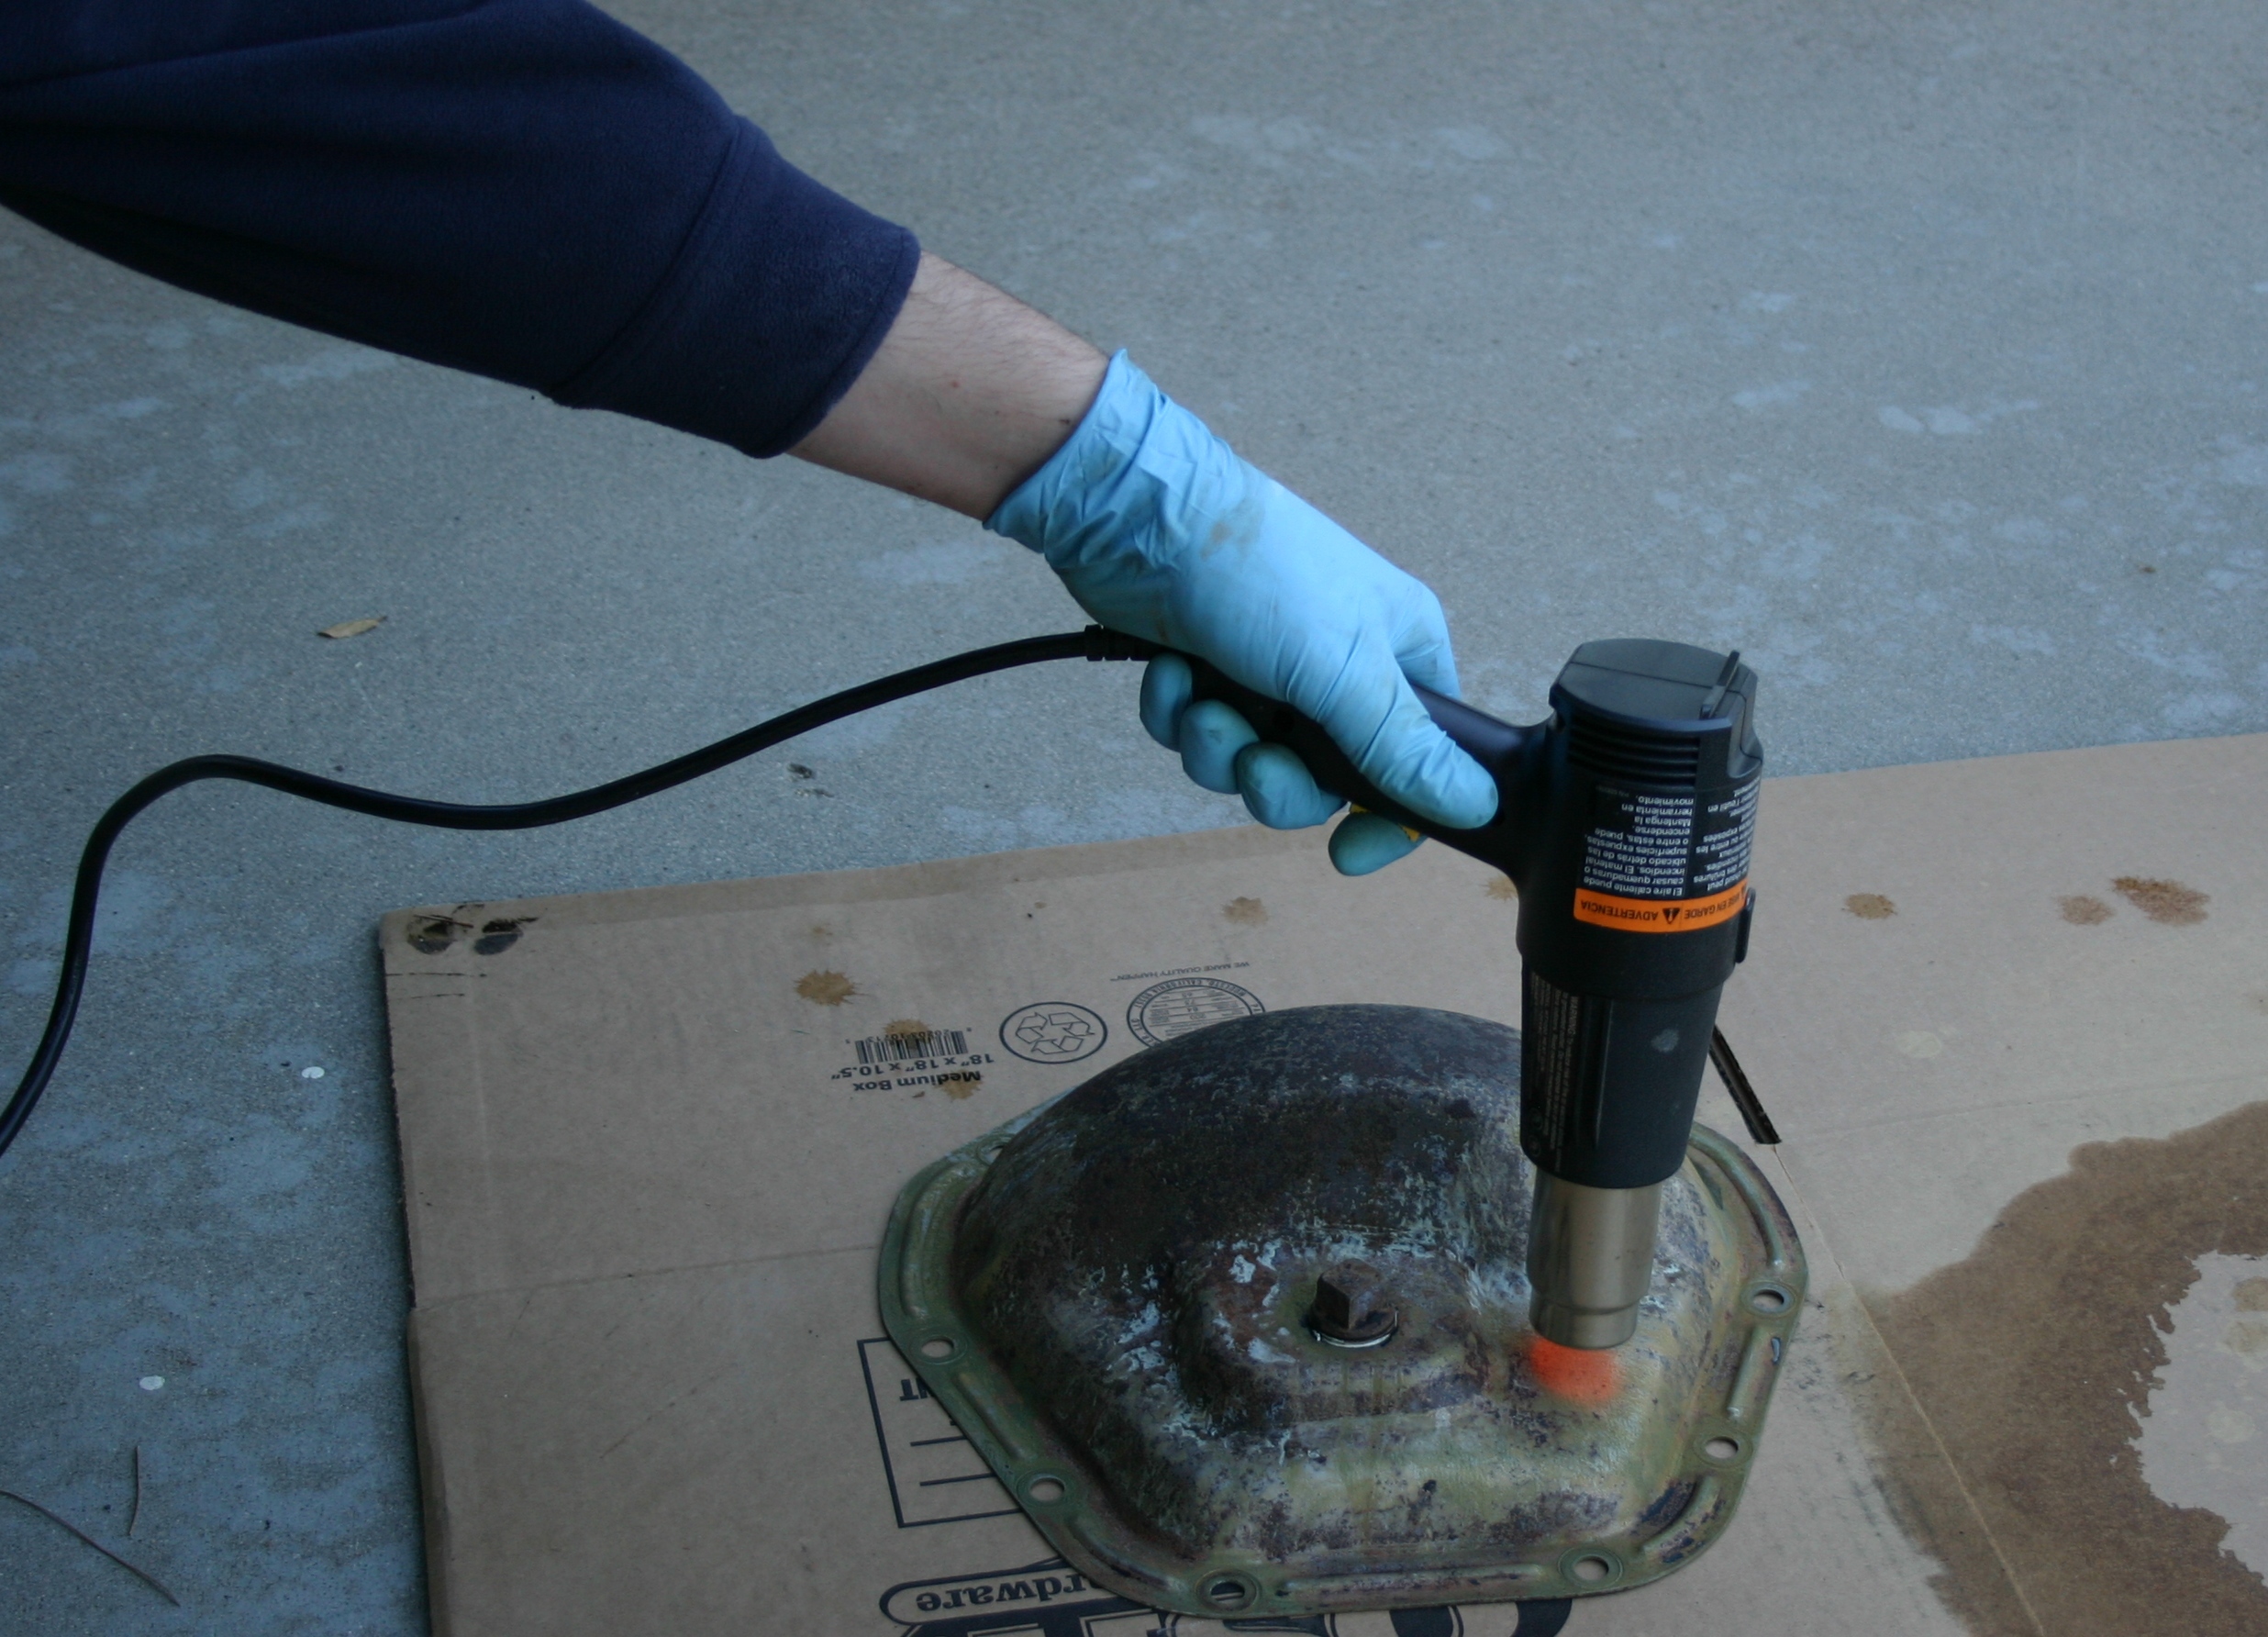
Naturally, I wanted to get it bone-dry before paint, and I wasn't patient enough to let it air-dry on its own! First I tried the fan (left), then I broke out the heavy artillery (right). Note that the orange light's reflecting off of the cover from the coils in the hot air gun; I didn't get the cover red-hot!
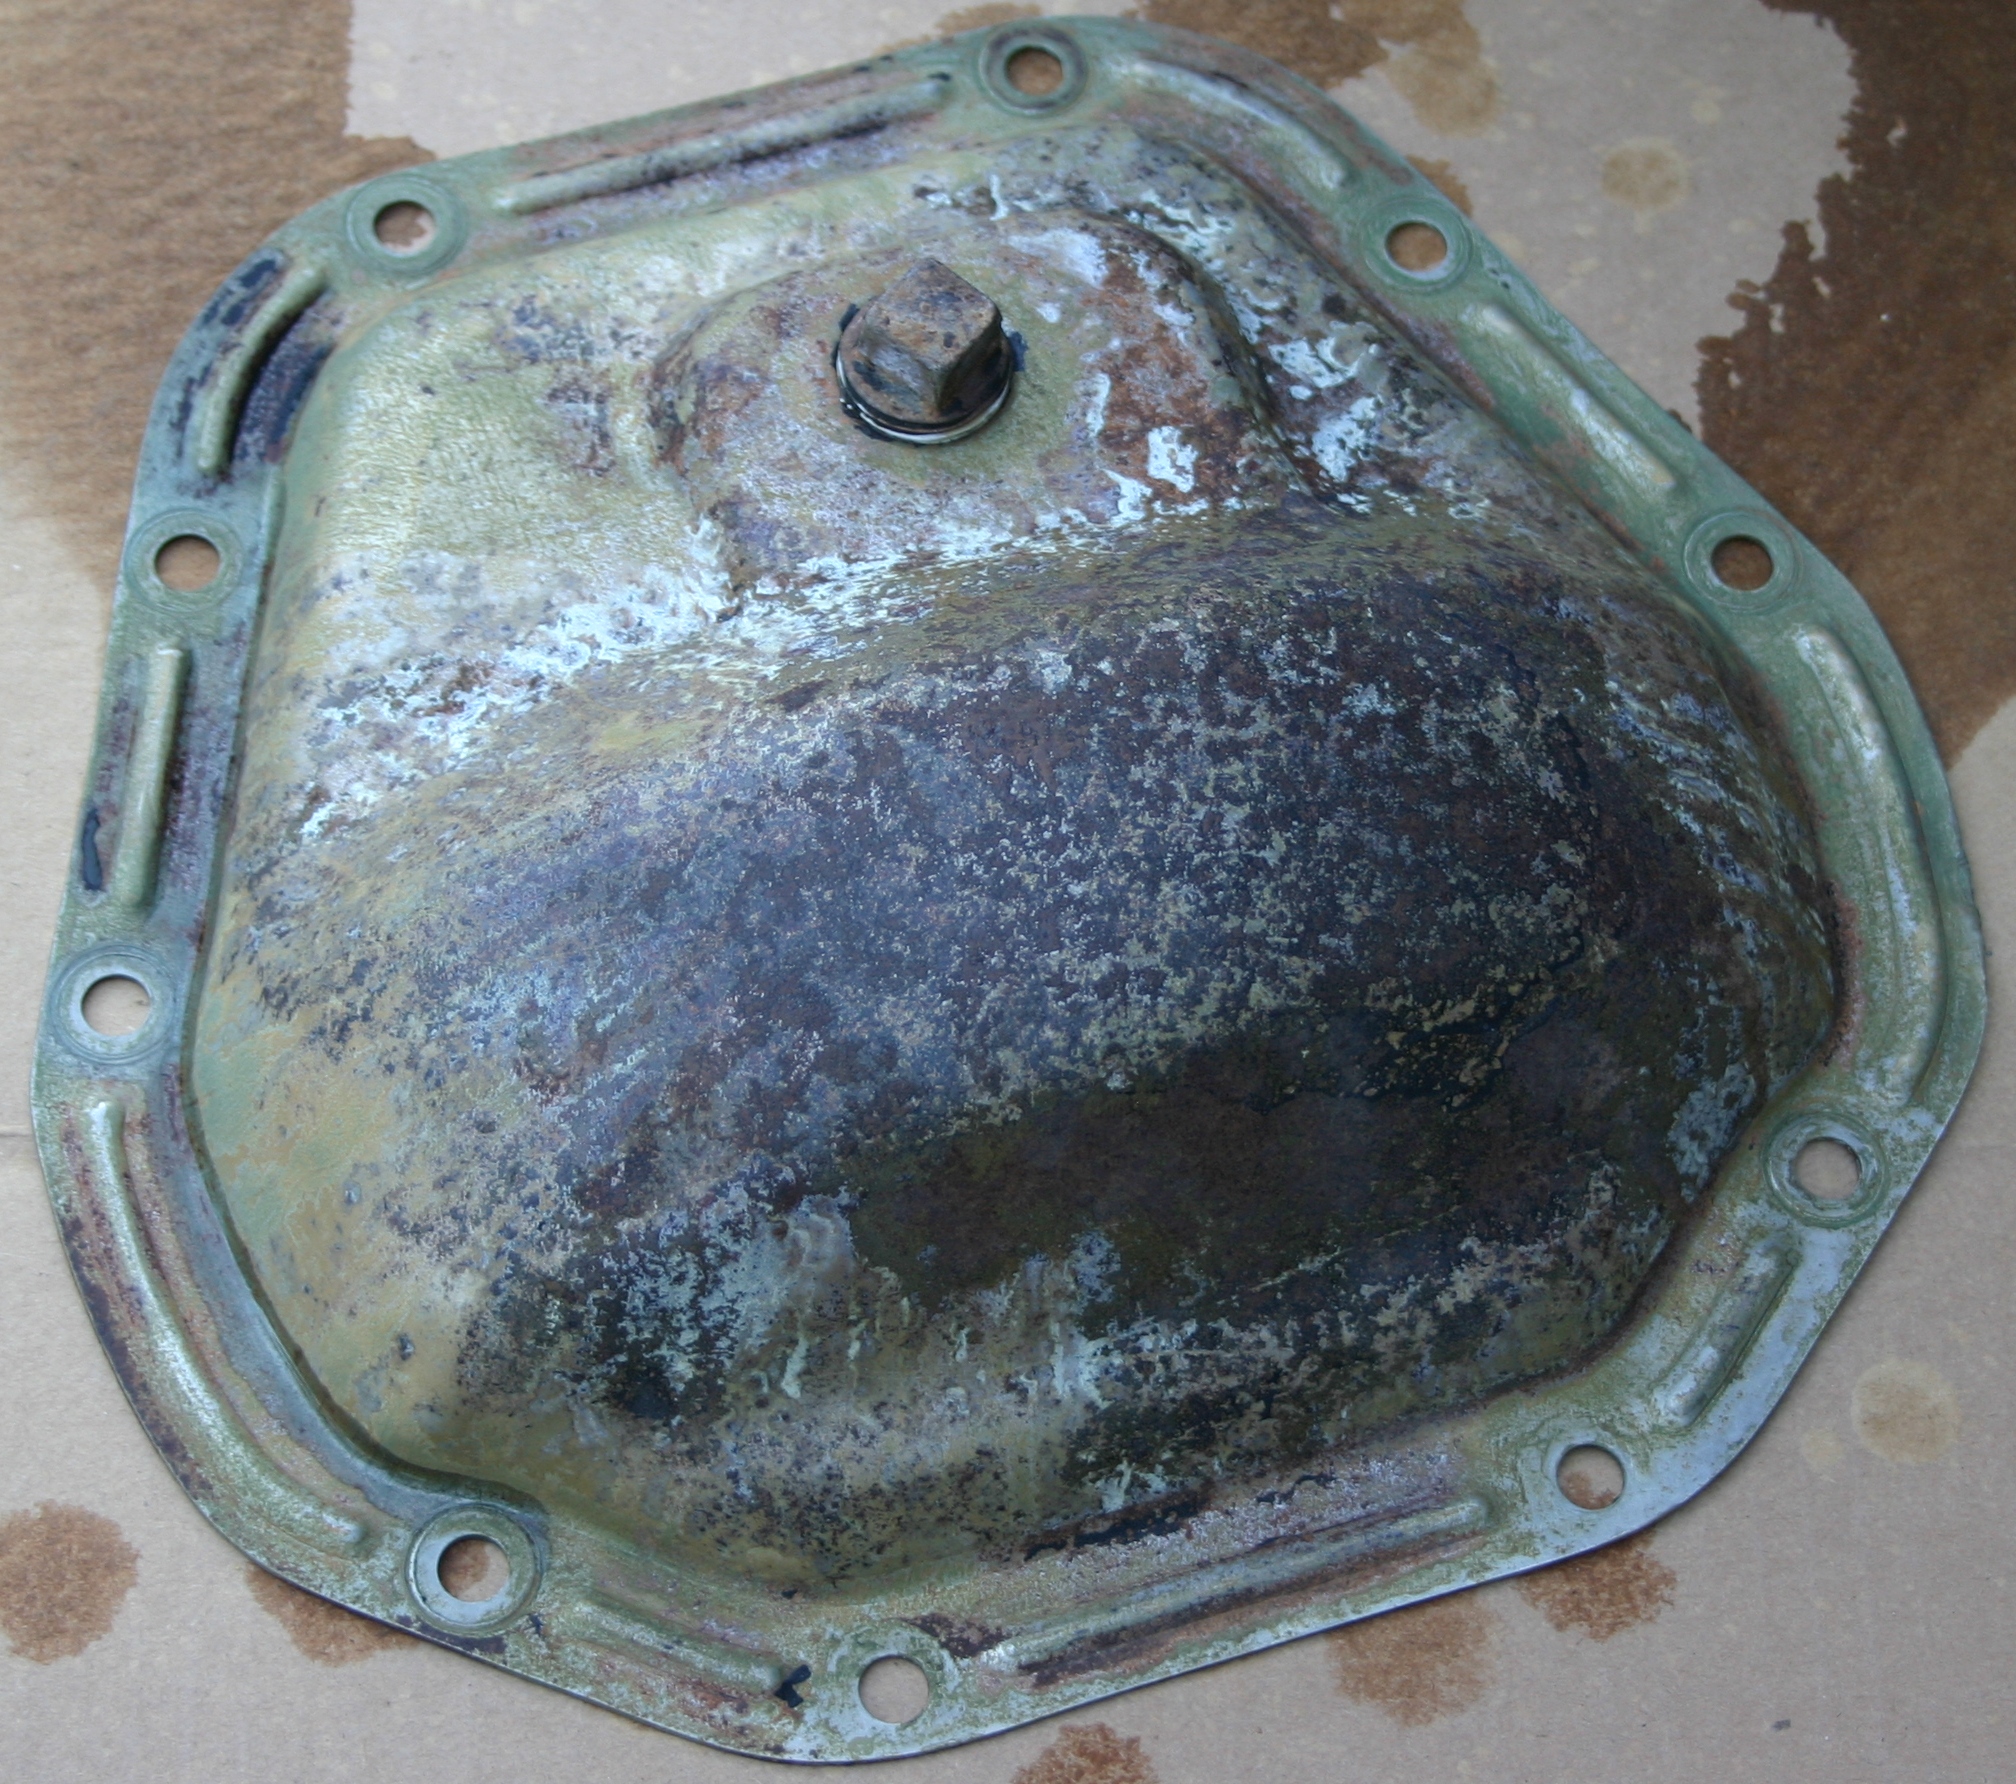
And here's it's cleaned, phosphoric acid treated, washed off, and bone dry. Ready for primer!

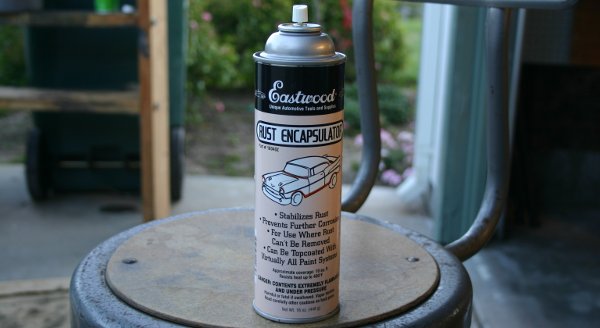
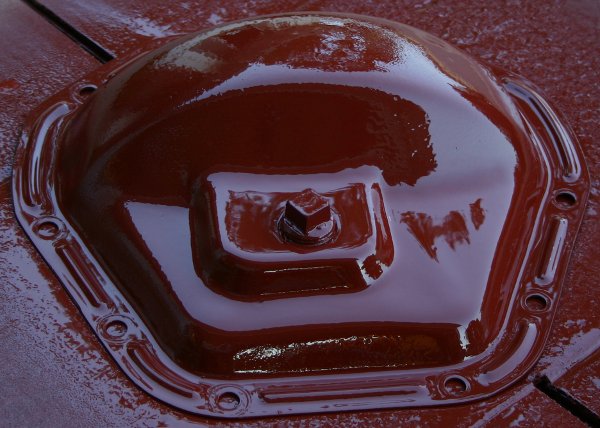
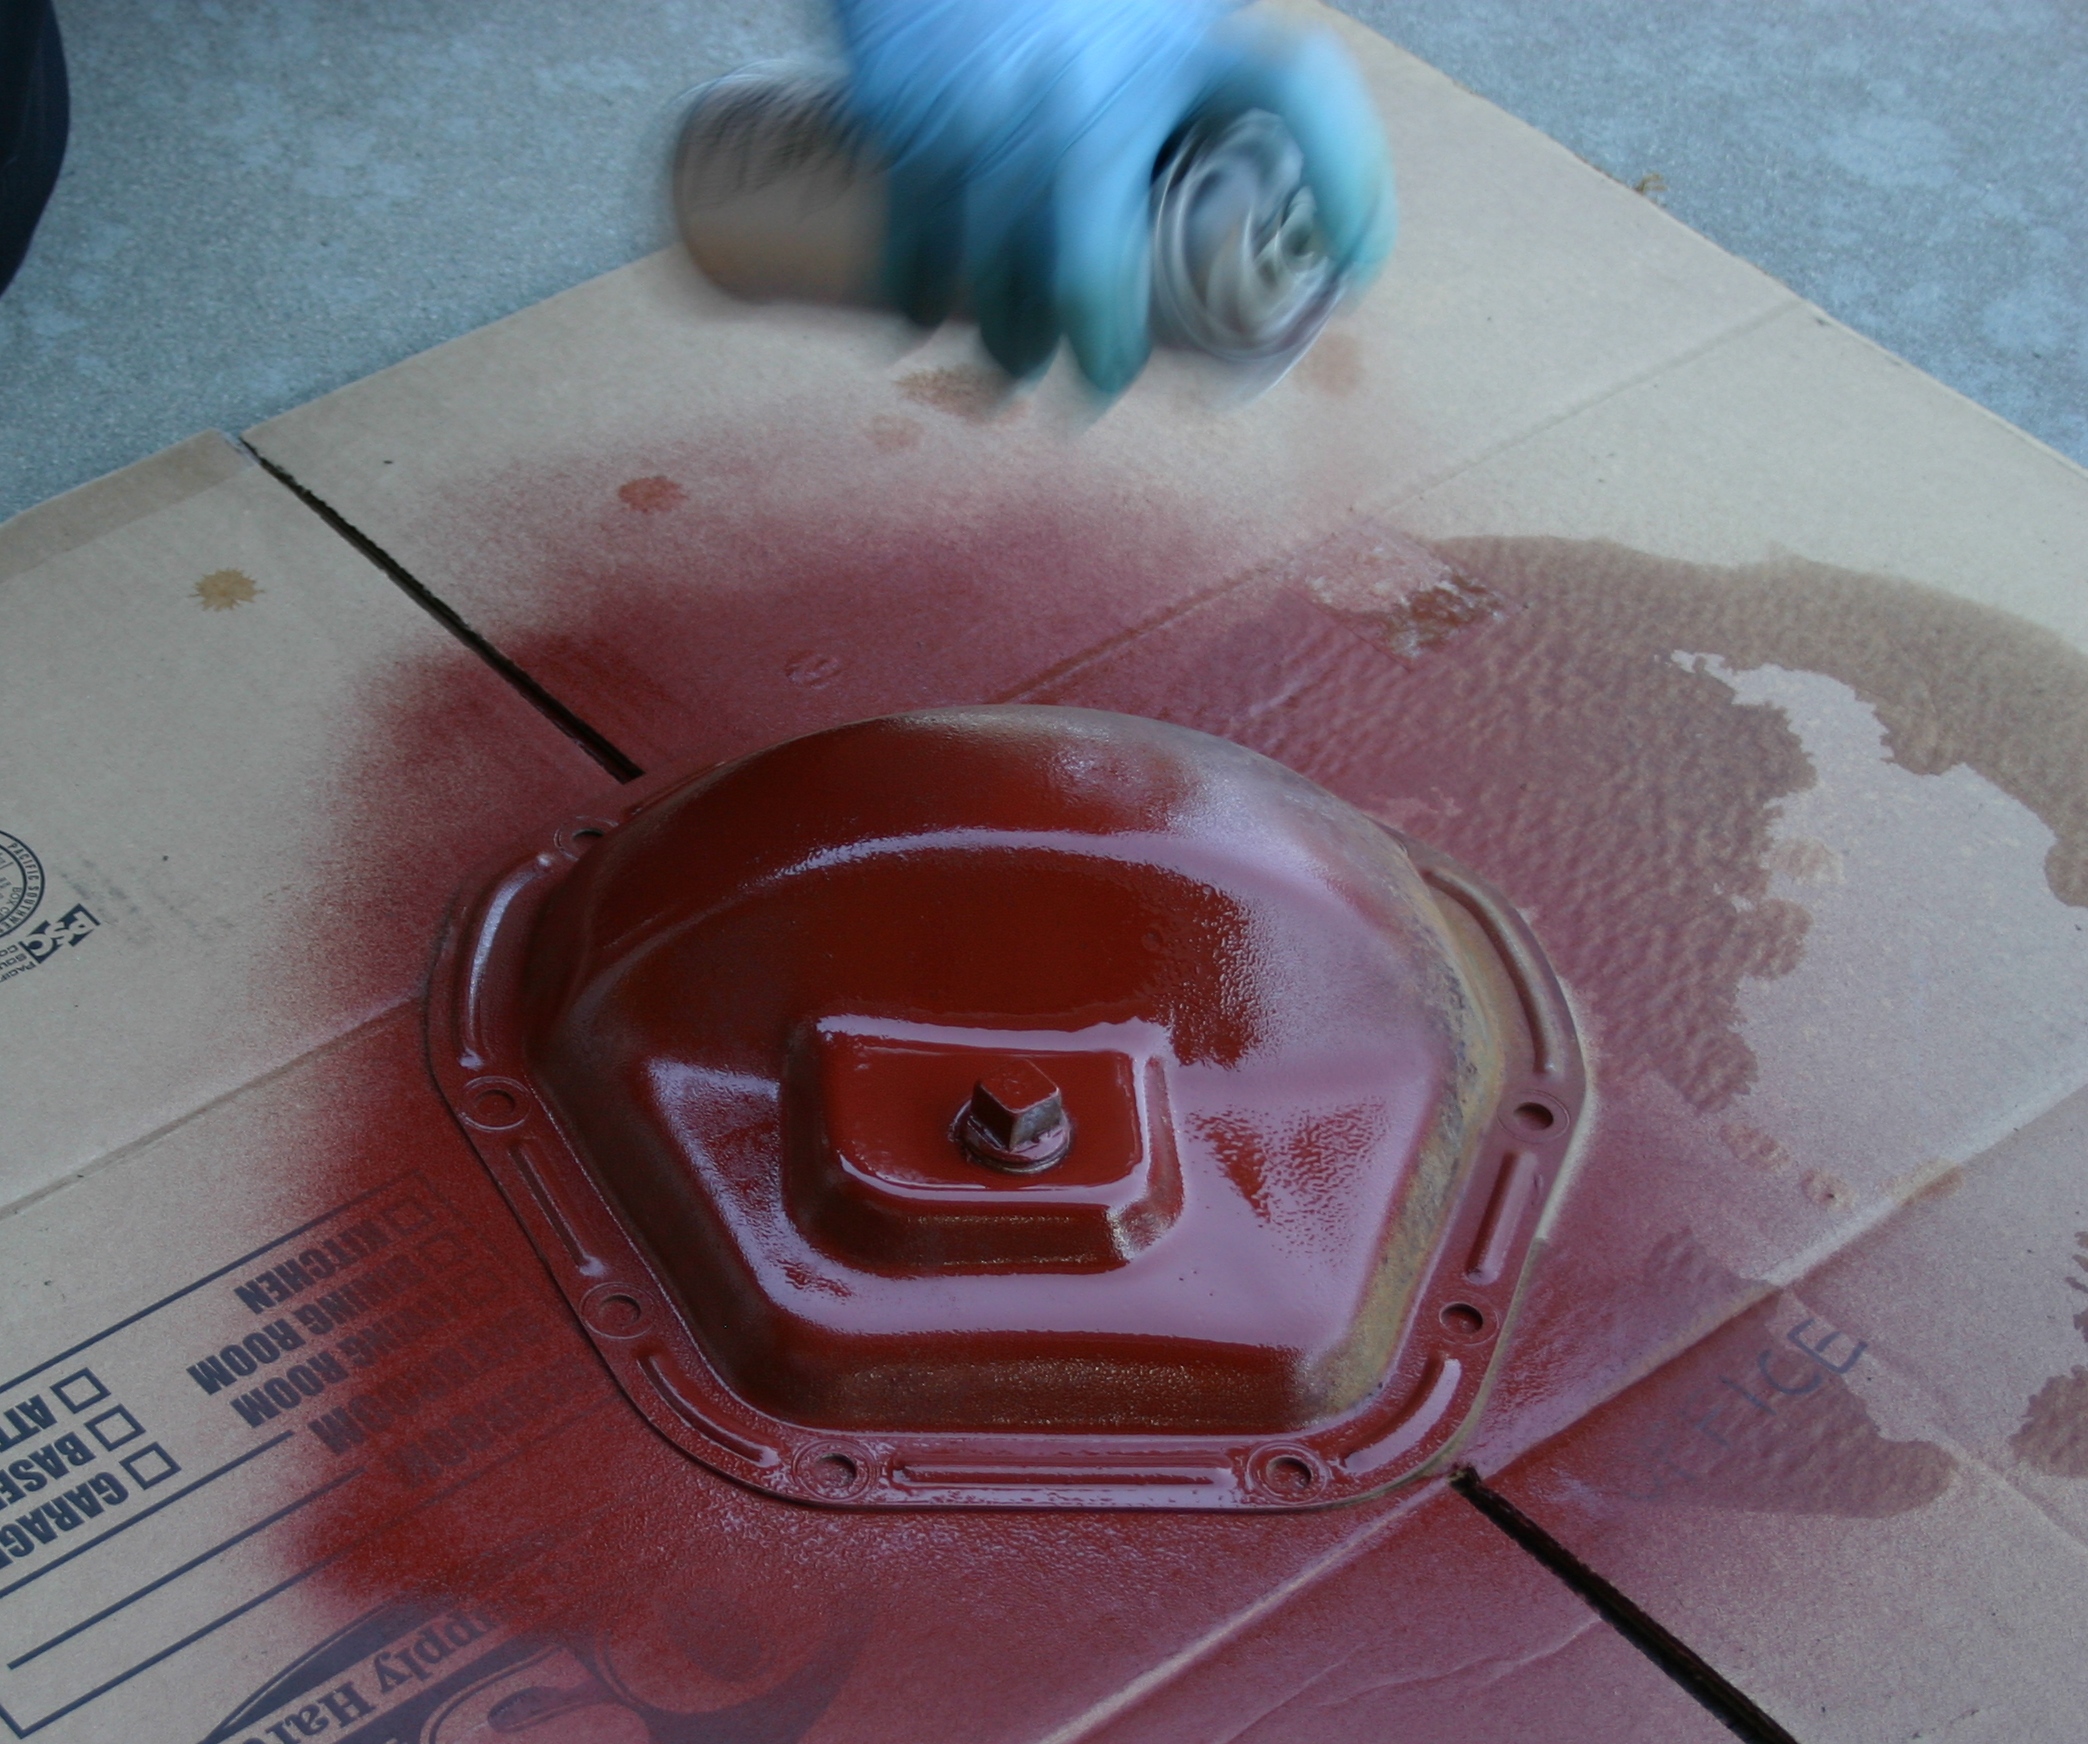
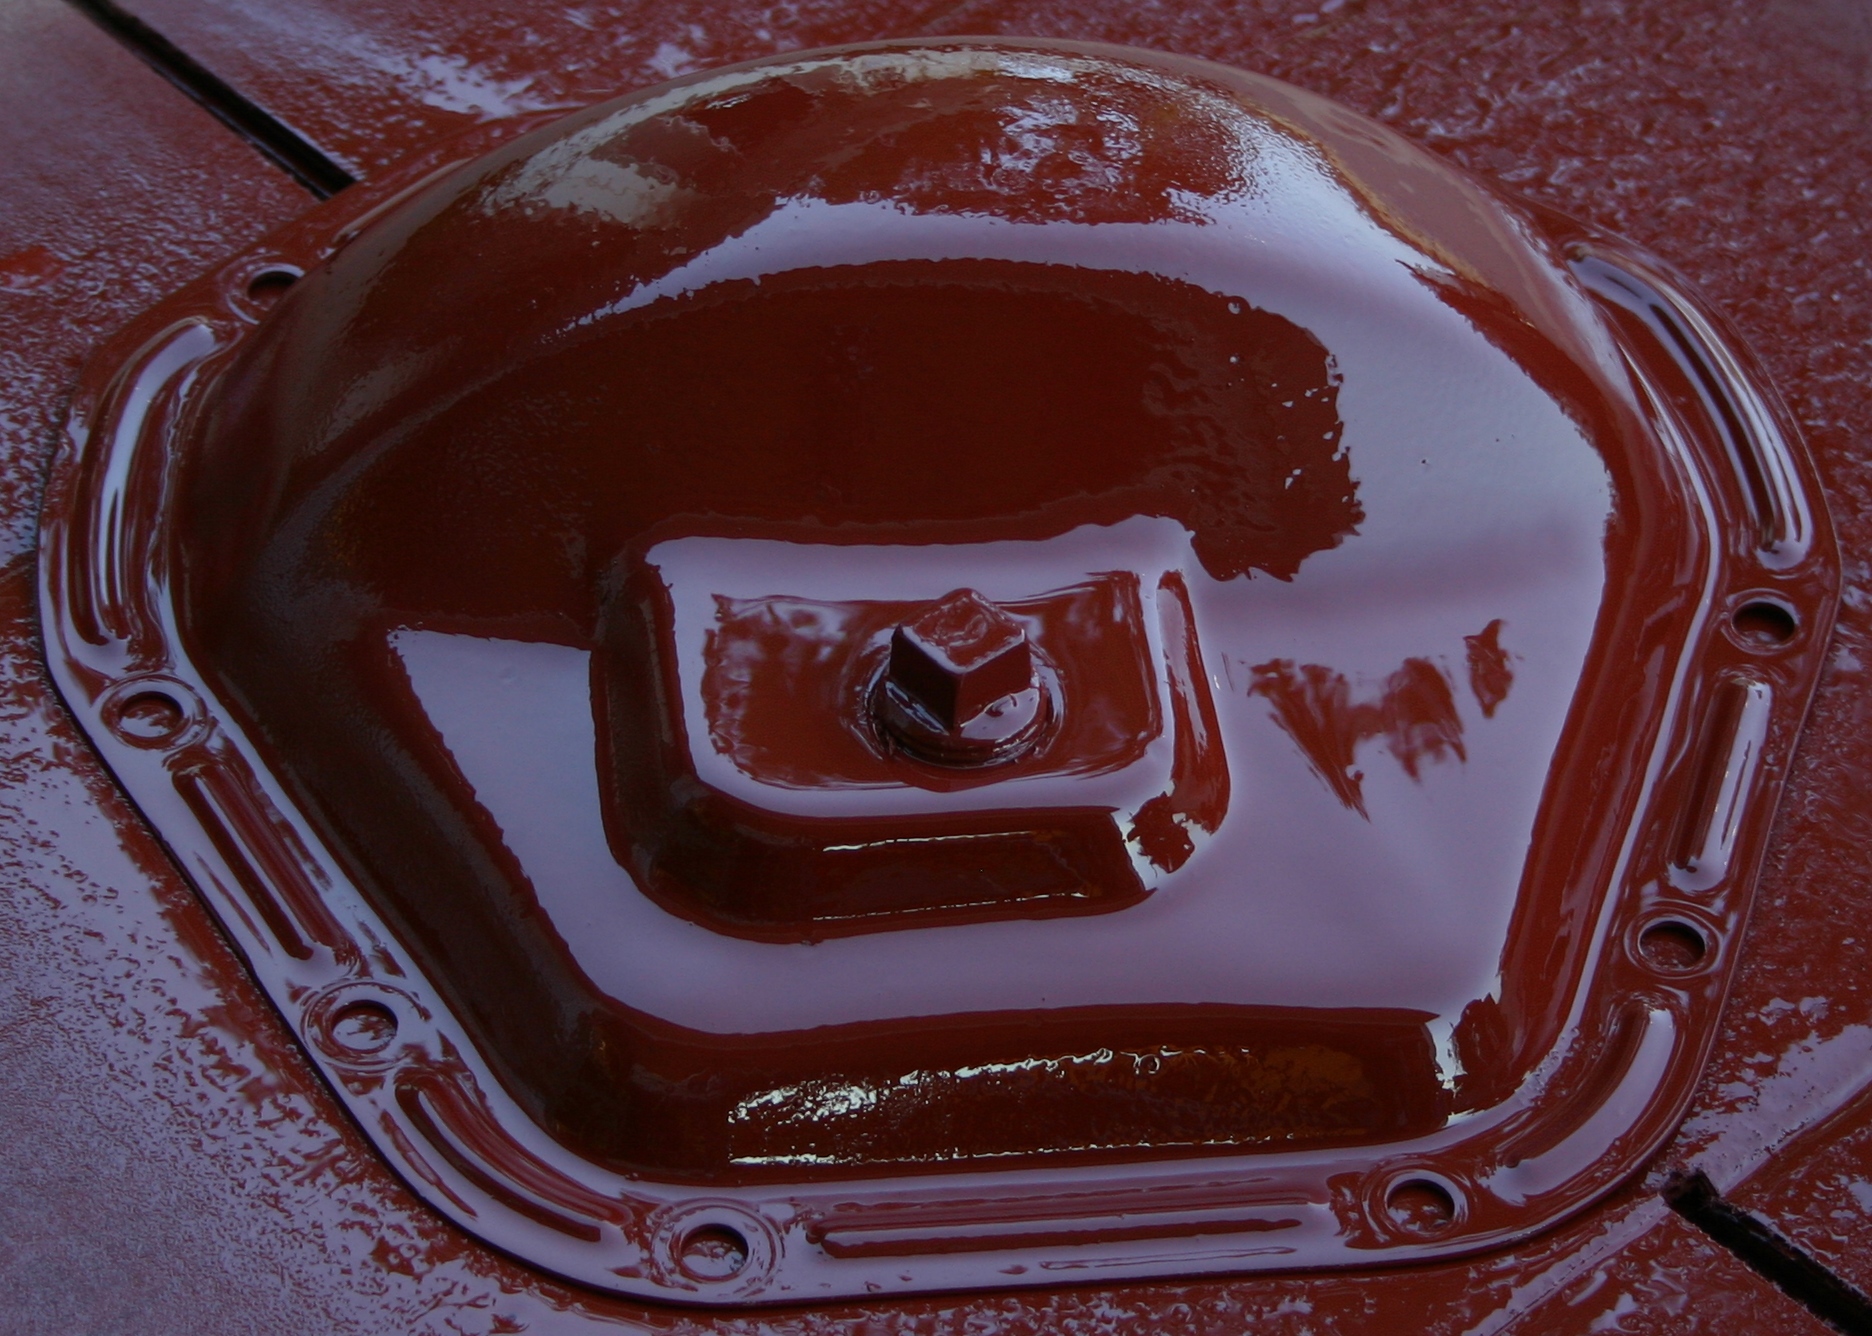
Since my hand-cleaning job left plenty of surface rust on the cover, I decided to use Eastwood's Rust Encapsulator as a primer (it's a primer by nature). It comes in both red and black. I like the red when I'll be top-coating with black, since it makes coverage visibly discernible. I haven't decided on black here though; I might top-coat with a white, then a yellow.
The Rust Encapsulator looks glossy here, yet it will dry matte.

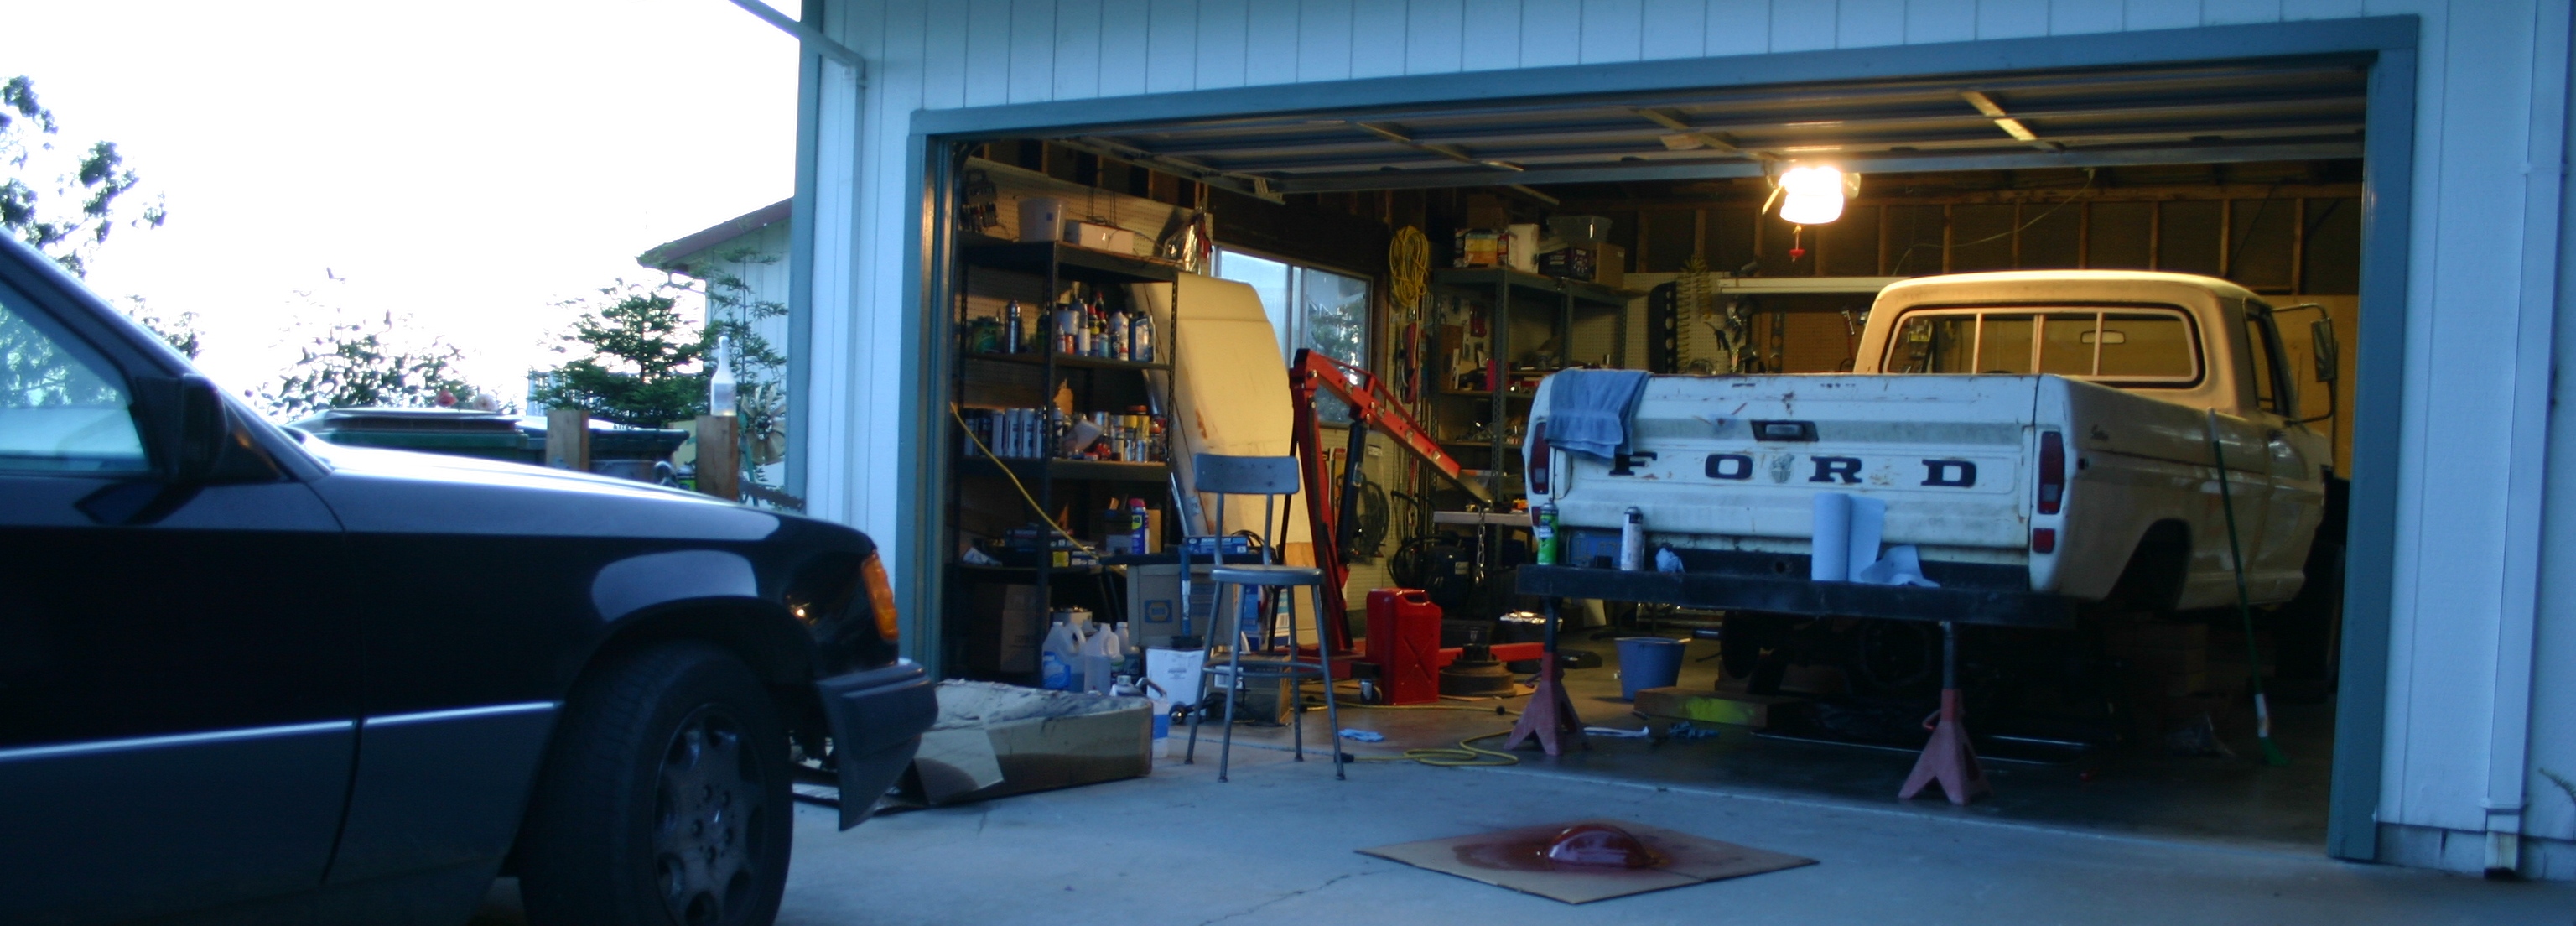
Here's a wide-angle of my fun zone, for general amusement.

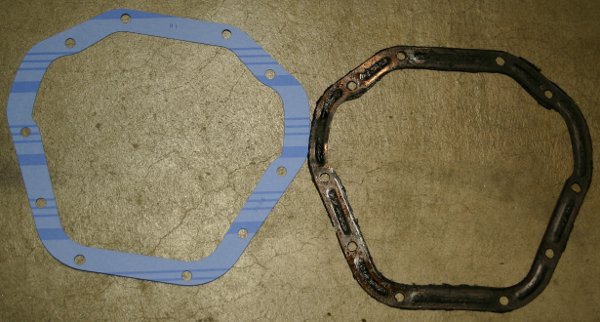
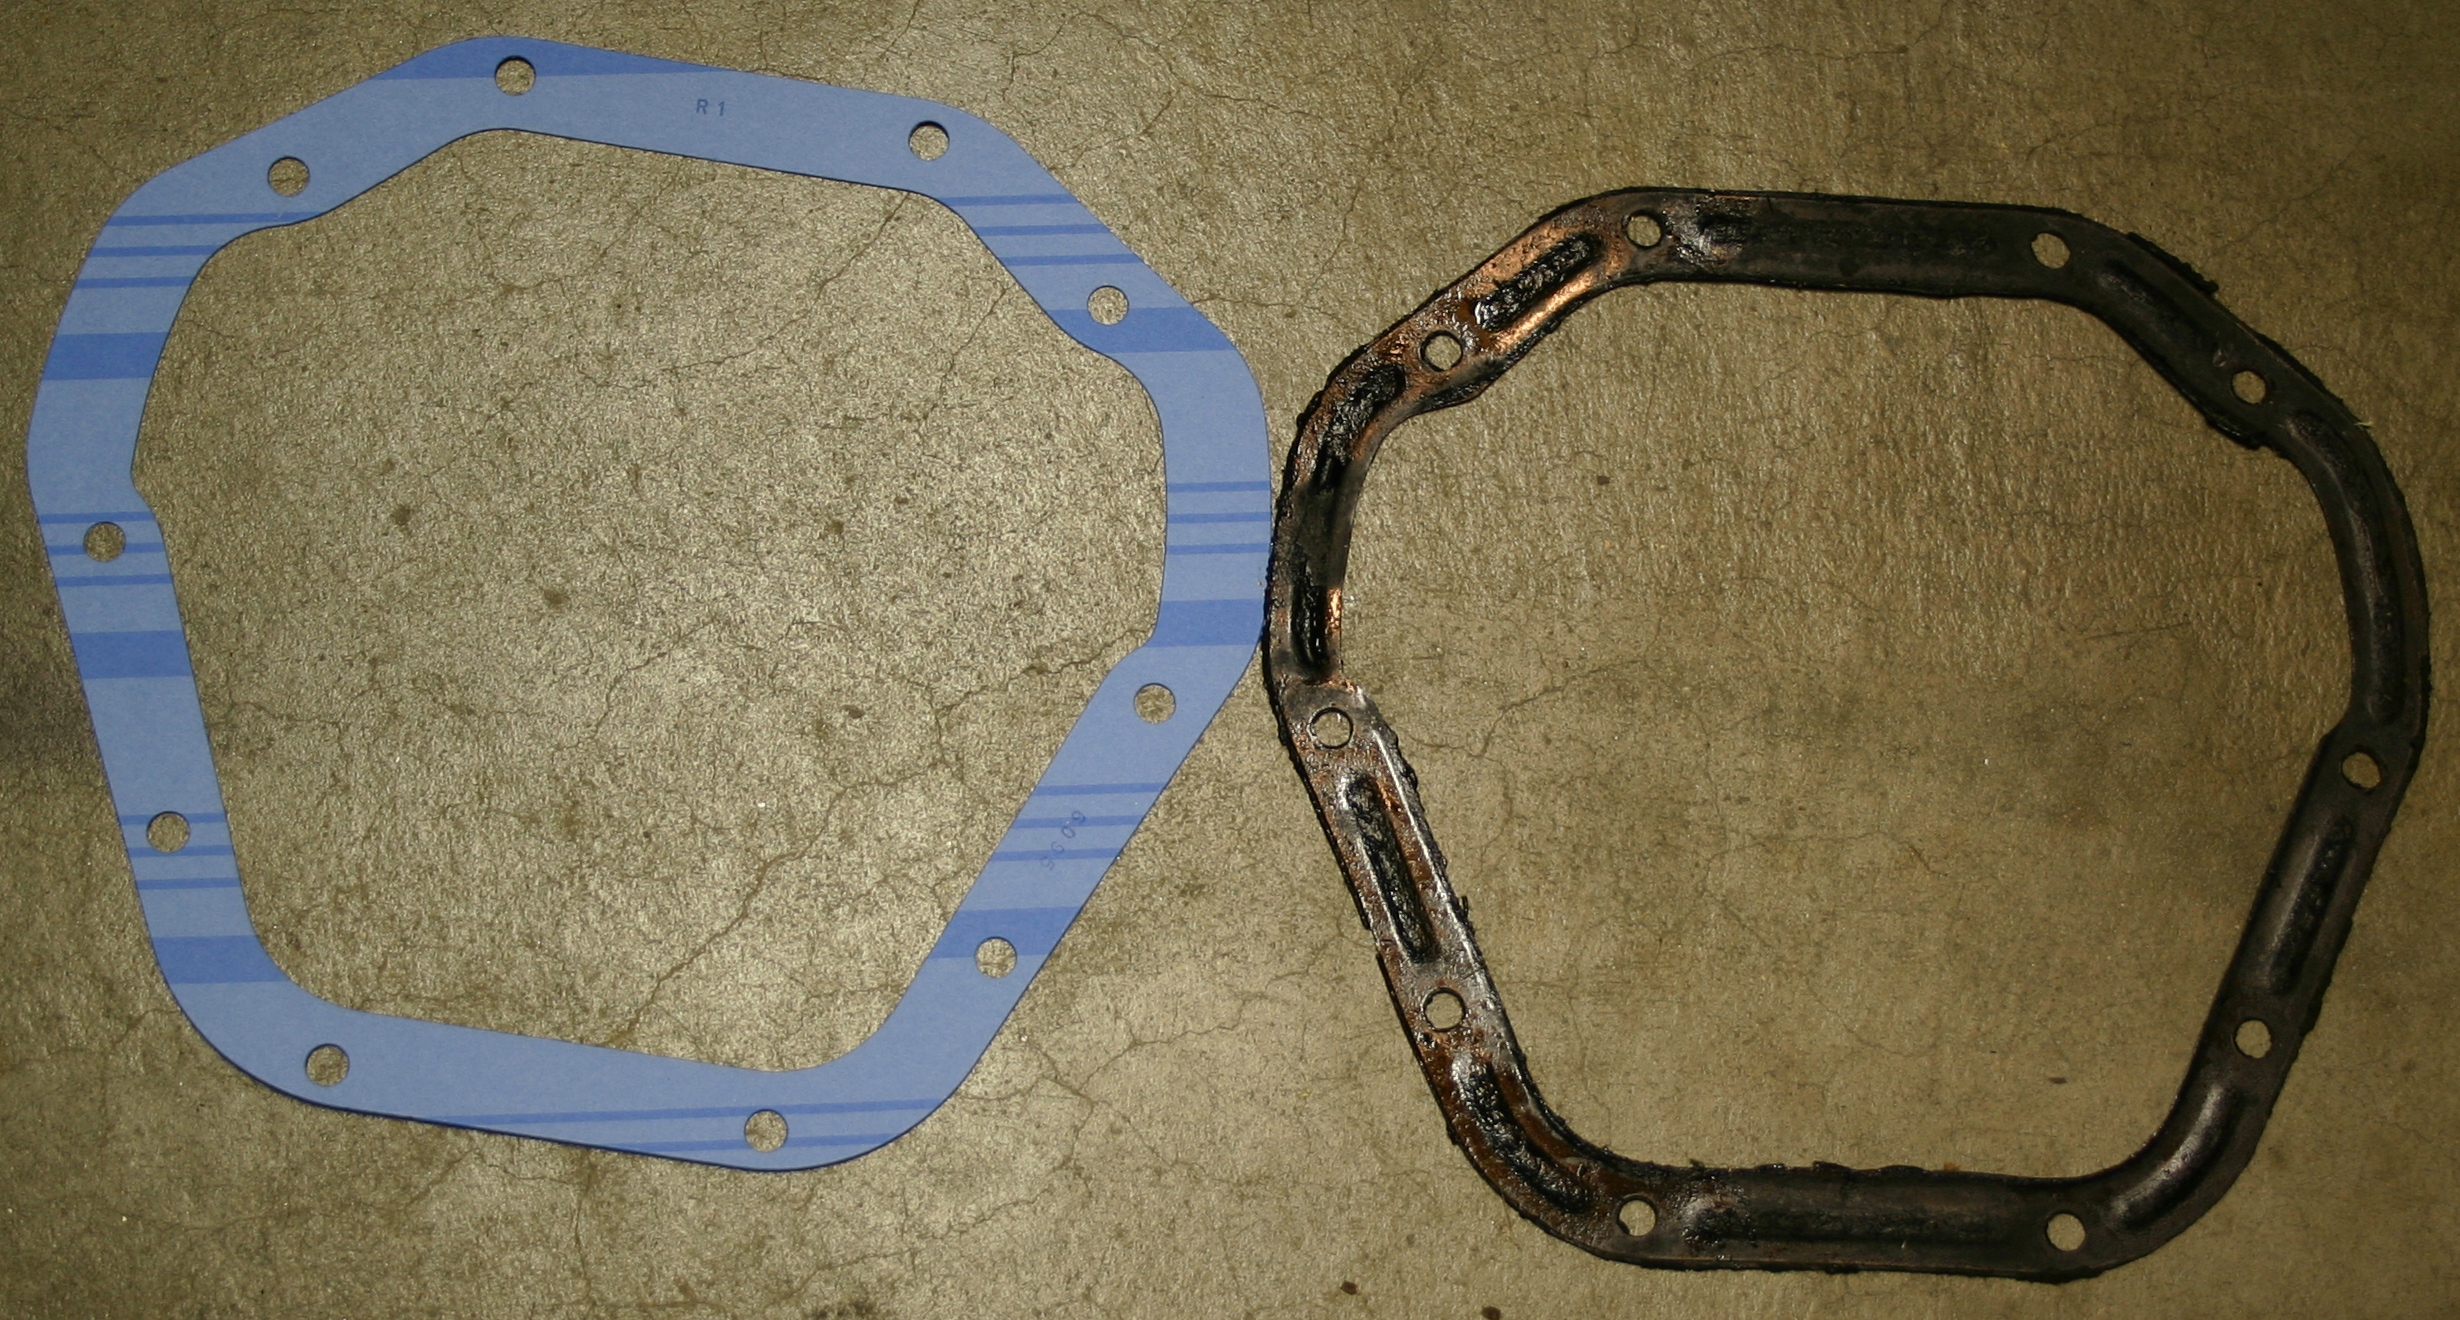
And here's a side-by-side comparison between the new RDS 6095-1 and the original Dana 60 gasket. It looks like a good match to me!
Today's Questions:
Robroy
Excellent! I didn't see any metal in the lube or the housing either.70_F100 wrote:Robroy, it looks pretty good inside. I can't immediately see any visible wear, and it doesn't appear that there is any metal in the lube.
I spent some time feeling all over the ring gear teeth, and didn't find anything that I'd call a sharp edge--perhaps I'm OK here!70_F100 wrote:However, there are a few things to look for that really can't be determined from photos:
1) Check the leading and trailing edges of the ring gear teeth for wear. The best way to do that is to feel the outer edges of the teeth (the longest edges). These should not feel sharp.
The shaft did have some play in it both within the bore of the carrier and with the pinion/spider gears, yet the play was very slight. It was just barely enough to feel (and hear); it must have been only a few thousandths.70_F100 wrote:2) Check the spider gear differential shaft for wear. This would show up as movement of the shaft within the bore of the carrier and/or looseness of the pinion gears (spider gears) on the shaft.
This seemed OK! There seemed to be a small amount of movement, yet it felt surprisingly tight; everything seemed to be running straight with no rocking motion!70_F100 wrote:3) Check the side gears and pinion gears for excessive clearance. There should be some movement and free play of the gears, but they should essentially run straight, with no "rocking" motion on the shaft or in the bores for the axle (side) gears.
To my surprise, the results of this test were also rather good; there appeared to be merely a few thousandths of play there! Yet I'm not certain if my test was proper. With my eyes on the drive shaft, I turned the ring gear back and forth just until the drive shaft began to move. I tried this a few times, and I could turn the ring gear only a tiny amount either way before hearing a clunk and seeing the drive shaft rotate.70_F100 wrote:4) Check the ring and pinion for excessive backlash. To do this, hold the pinion stationary, and move the ring gear back and forth. There should only be a few thousandths backlash between the ring and pinion. If you can't find a good way to hold the pinion tightly, take a bolt with a large washer and put it in the hole (top or bottom) on the right side of the ring gear, so that the washer contacts the ring gear in such a way as to "lock" the ring gear, and turn the pinion back and forth. Again, a few thousandths is what you're looking for.
This was surprising to me because while installing the differential's input yoke, I noticed that I could turn the yoke quite a bit in both directions before it seemed to "catch." Perhaps I could turn it as much as five degrees, if my memory's working properly.
Tomorrow I'll turn the drive shaft by hand while keeping an eye on the ring gear to see if it still looks like a minimal amount (a few thousandths) of play!
Thank you very much 70_F100!!! And thanks so much for those wonderful inspection steps--they were fun to carry out and very interesting, especially since this is the first differential I've opened up!70_F100 wrote:Looking good, my friend!!!
I invested some good hours this afternoon and made some progress!
Here I'm spraying copious amounts of brake cleaner in the general direction of the differential.
Before beginning this, I prepared with the blue gloves I always wear, long sleeves, goggles, and a quality charcoal respirator. I knew I'd be using a significant amount of cleaner in there, and the small area under the truck tends to concentrate vapors--I didn't have much of an appetite for inhaling any more brake cleaner than was absolutely necessary!
I've been getting these decent under-truck photos by having the camera on a tri-pod (at its very shortest height setting) and using an infra-red shutter remote control. There's no way I'd normally have the coordination to take photos and spray brake cleaner at the same time, and I'm not nearly cruel enough to ask Kasie to climb under there for the sake of photo-documentation!
To aide the cleaner's coverage, I slipped an axle in the housing and used it to spin the differential gears around, while spraying.
Here's how it began to look without the uniform coat of gear oil.

And here are a couple of ultra close-ups: the LH ring/pinion (on the left) and the ring (on the right).

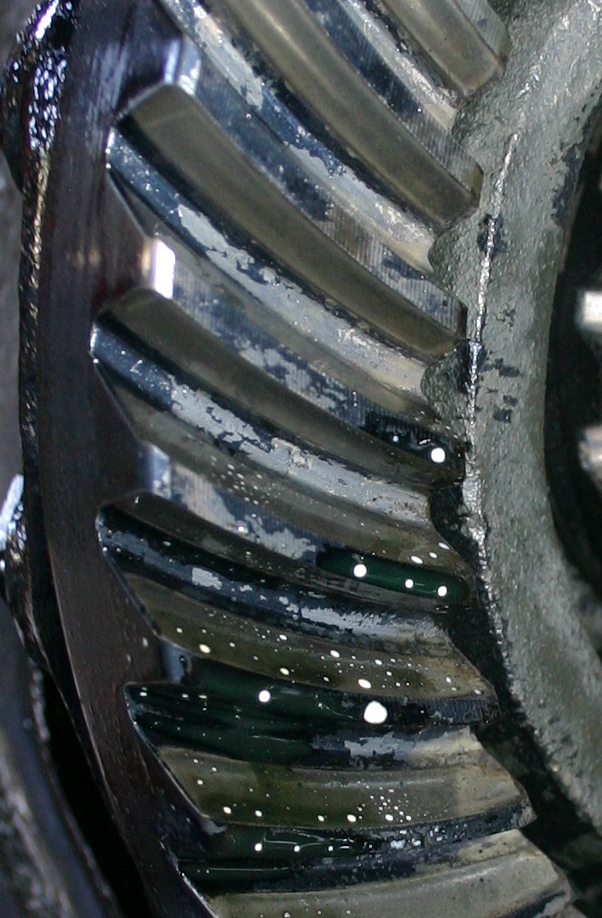
Of course I HAD to spin the gears with the camera set up for a long exposure! This gave me a sense of appreciation for how tough this rear end really is. Even spinning it by hand looked so dramatic; just imagine what it's like in there while driving around a corner at 55 MPH!

Next I turned my attention to the cover. It was N-A-S-T-Y! I spent an hour or more cleaning it up using every method at my disposal, although the most effective turned out to be dousing it with de-greaser and using a fresh Scotch-Brite pad with LOTS of "elbow grease," rinsing it with torrents of hot water, and repeating!
I got it just about as clean as it was going to get (by hand at least)! Then I thought, "What the heck," and hit it with some Rust Bullet Metal Blast, which as you know, is a phosphoric acid solution.


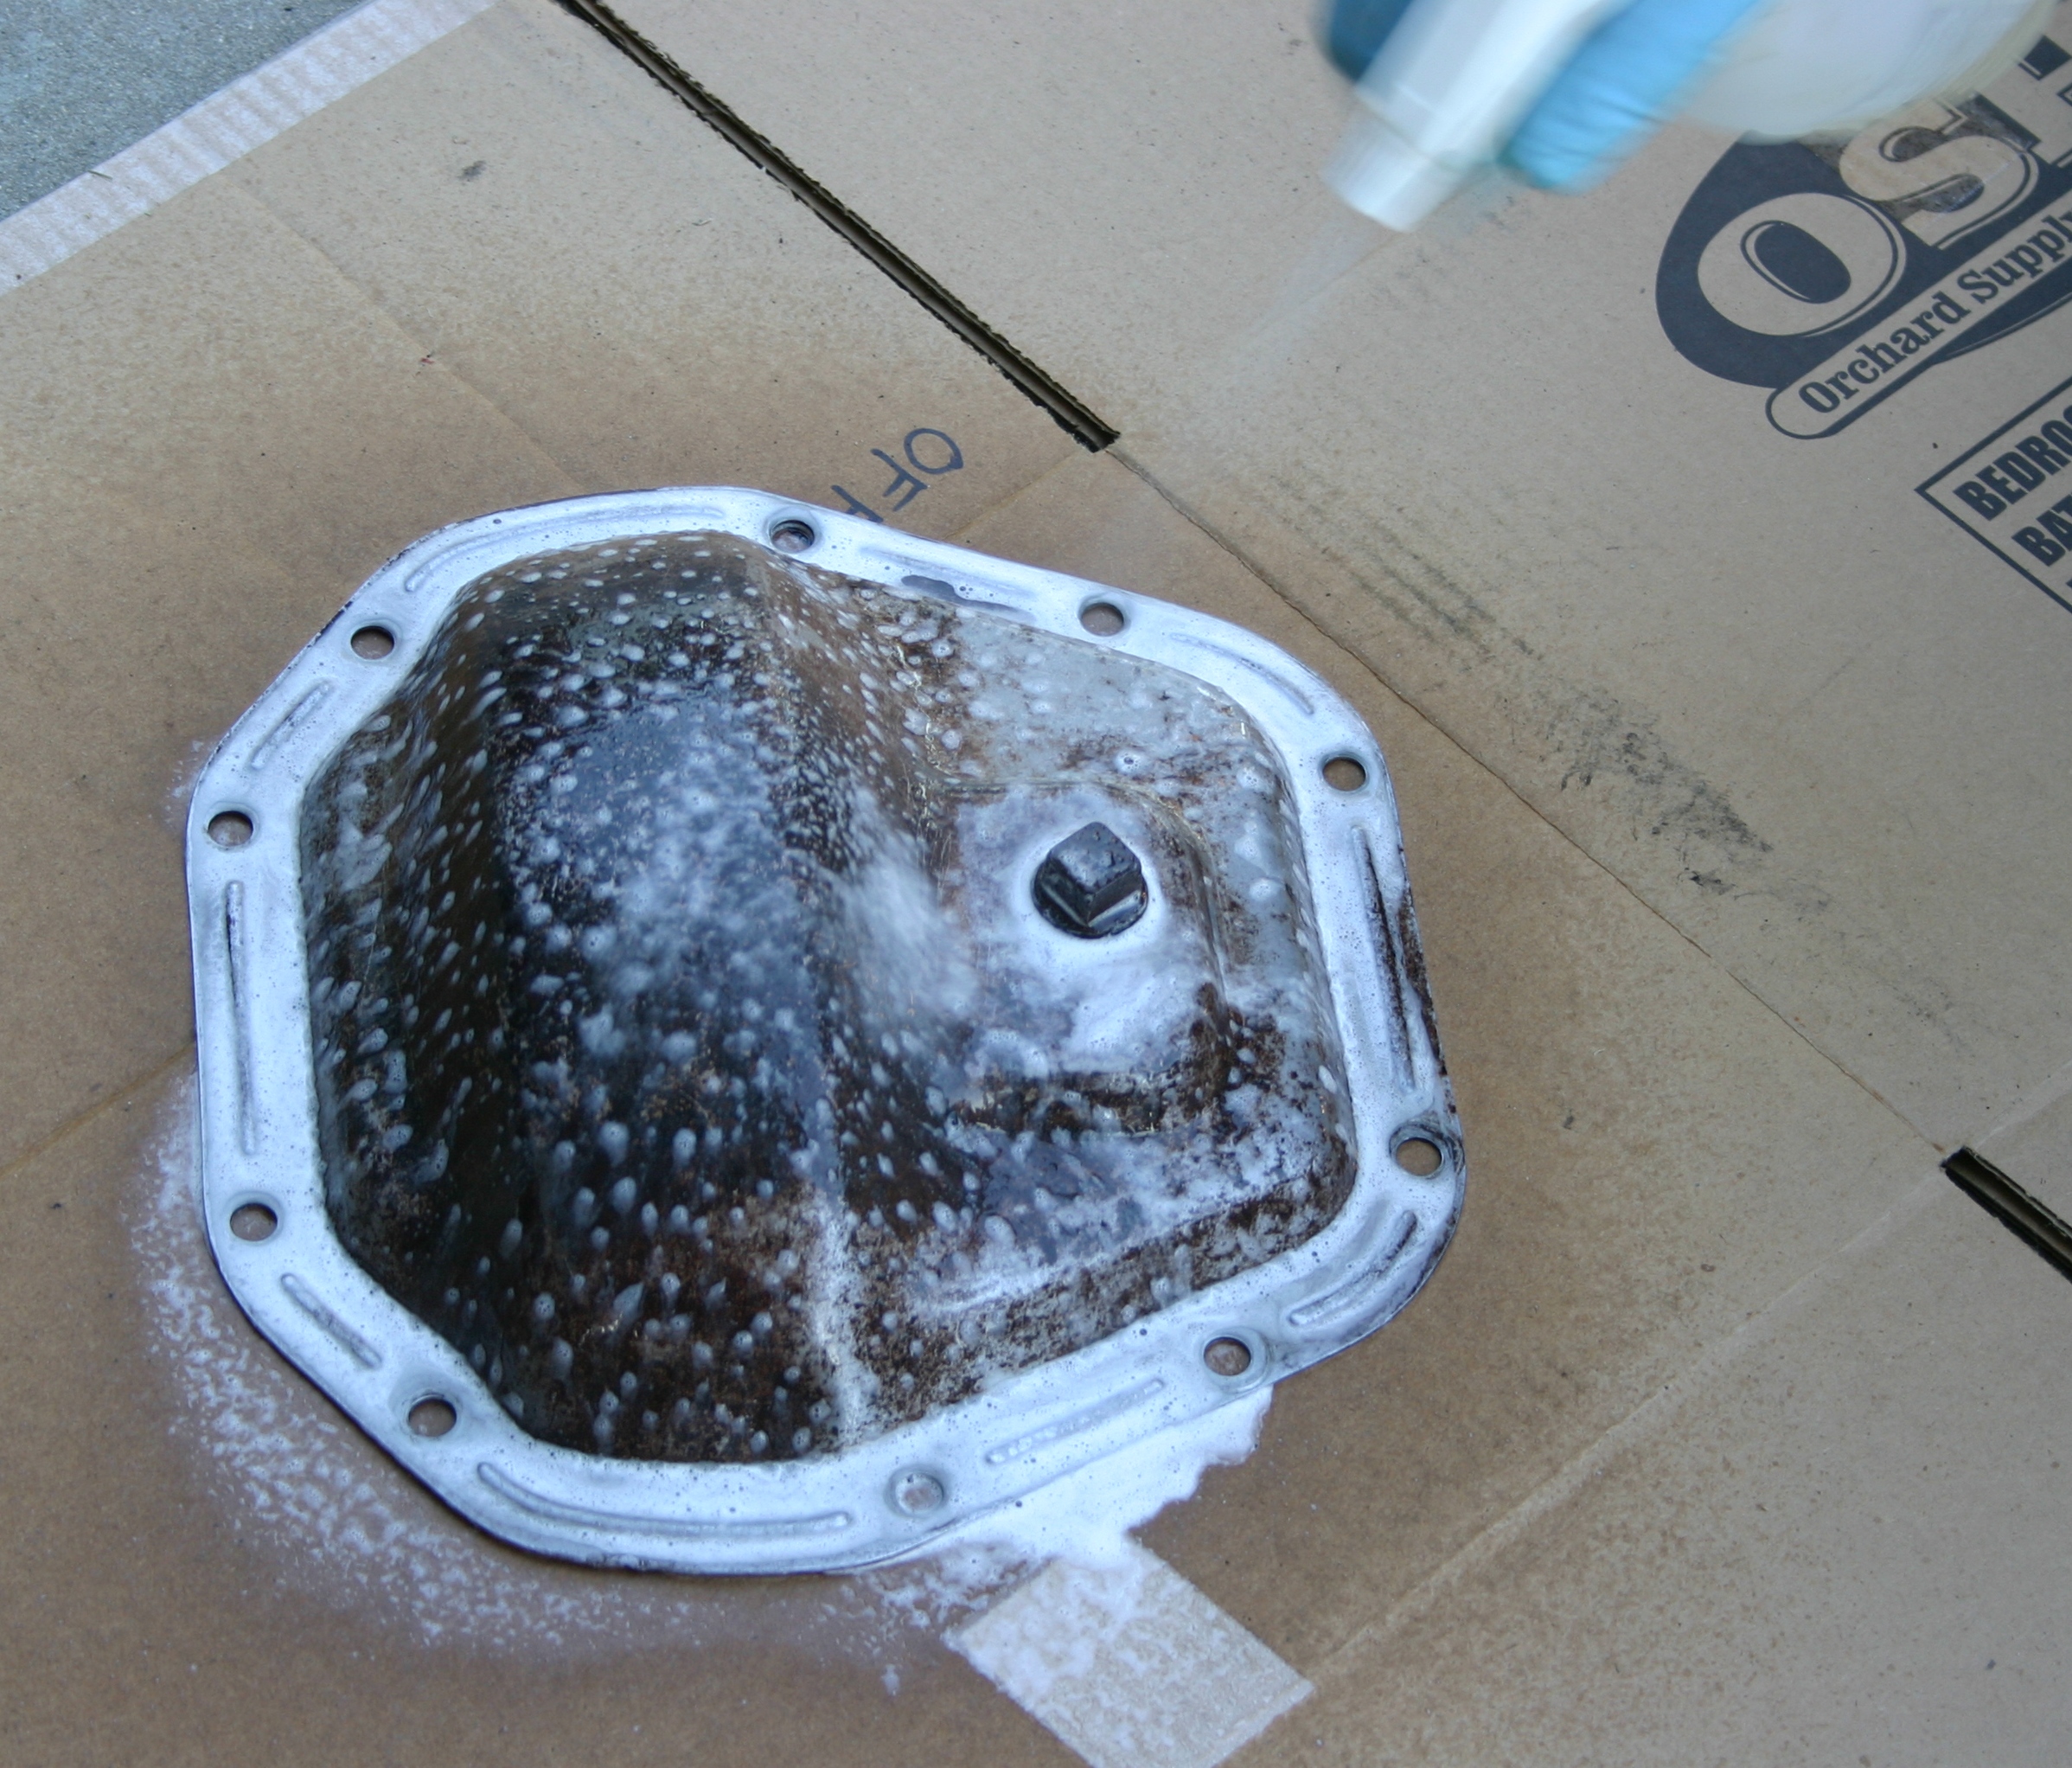
I let it sit that way for about five minutes (the directions said between two and twenty minutes was a good range), then doused it with hot water! The directions specifically call for hot water--perhaps it helps to wash off the acid more effectively. I'm truly fortunate to have this sink in the garage that's hooked directly up to the water heater; it produces scalding-hot water and lots of it!
Naturally, I wanted to get it bone-dry before paint, and I wasn't patient enough to let it air-dry on its own! First I tried the fan (left), then I broke out the heavy artillery (right). Note that the orange light's reflecting off of the cover from the coils in the hot air gun; I didn't get the cover red-hot!
And here's it's cleaned, phosphoric acid treated, washed off, and bone dry. Ready for primer!
Since my hand-cleaning job left plenty of surface rust on the cover, I decided to use Eastwood's Rust Encapsulator as a primer (it's a primer by nature). It comes in both red and black. I like the red when I'll be top-coating with black, since it makes coverage visibly discernible. I haven't decided on black here though; I might top-coat with a white, then a yellow.
The Rust Encapsulator looks glossy here, yet it will dry matte.


Here's a wide-angle of my fun zone, for general amusement.
And here's a side-by-side comparison between the new RDS 6095-1 and the original Dana 60 gasket. It looks like a good match to me!
Today's Questions:
- Shall I install that gasket "dry," or use some black Permatex-like sealant on it?
- I'm guessing that using medium-strength, blue thread-lock would be a good idea for the cover bolts; might something else be a better choice?
Robroy