You will want to use permatex.
I can't think of a reason why you would need thread locker, the permetex will hold the bolts in place nicely.
1972 F250 12"x2.5" Bendix rear drum brake rebuild: advice?
Moderator: FORDification
-
speed bump
- New Member

- Posts: 113
- Joined: Tue Feb 26, 2008 11:31 am
- Location: Butte Montana
Re: 1972 F250 12"x2.5" Bendix rear drum brake rebuild: advice?
71 3/4 ton 4x4 highboy
68 Mercury Monteray
68 Mercury Monteray
-
robroy

- 100% FORDified!

- Posts: 3768
- Joined: Sun Jul 06, 2008 4:36 pm
- Location: California, Salinas
Re: 1972 F250 12"x2.5" Bendix rear drum brake rebuild: advice?
Good evening Speed Bump, thanks for your great reply!
Today's Updates:
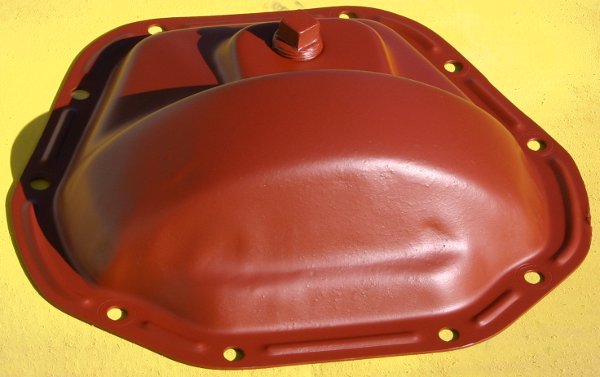
Today's weather was perfect yet again, so I invested a few hours! Here's a photo that I took around sun-down.

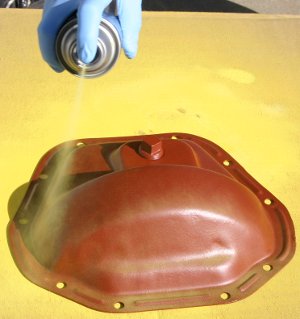
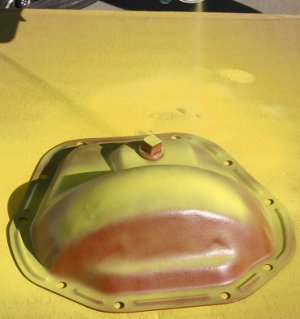
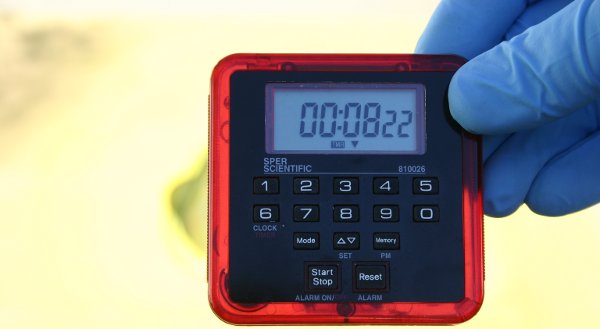
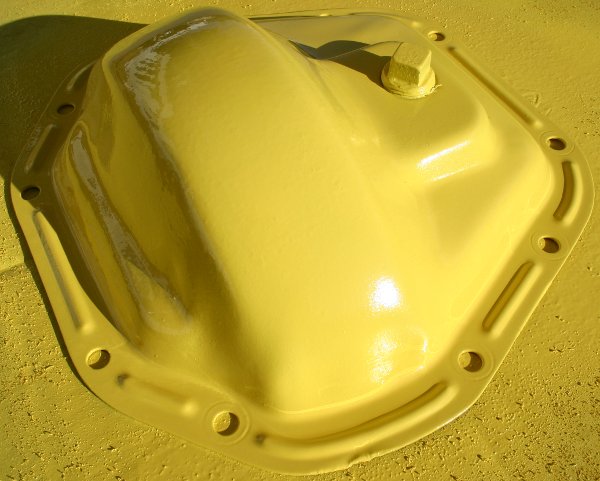
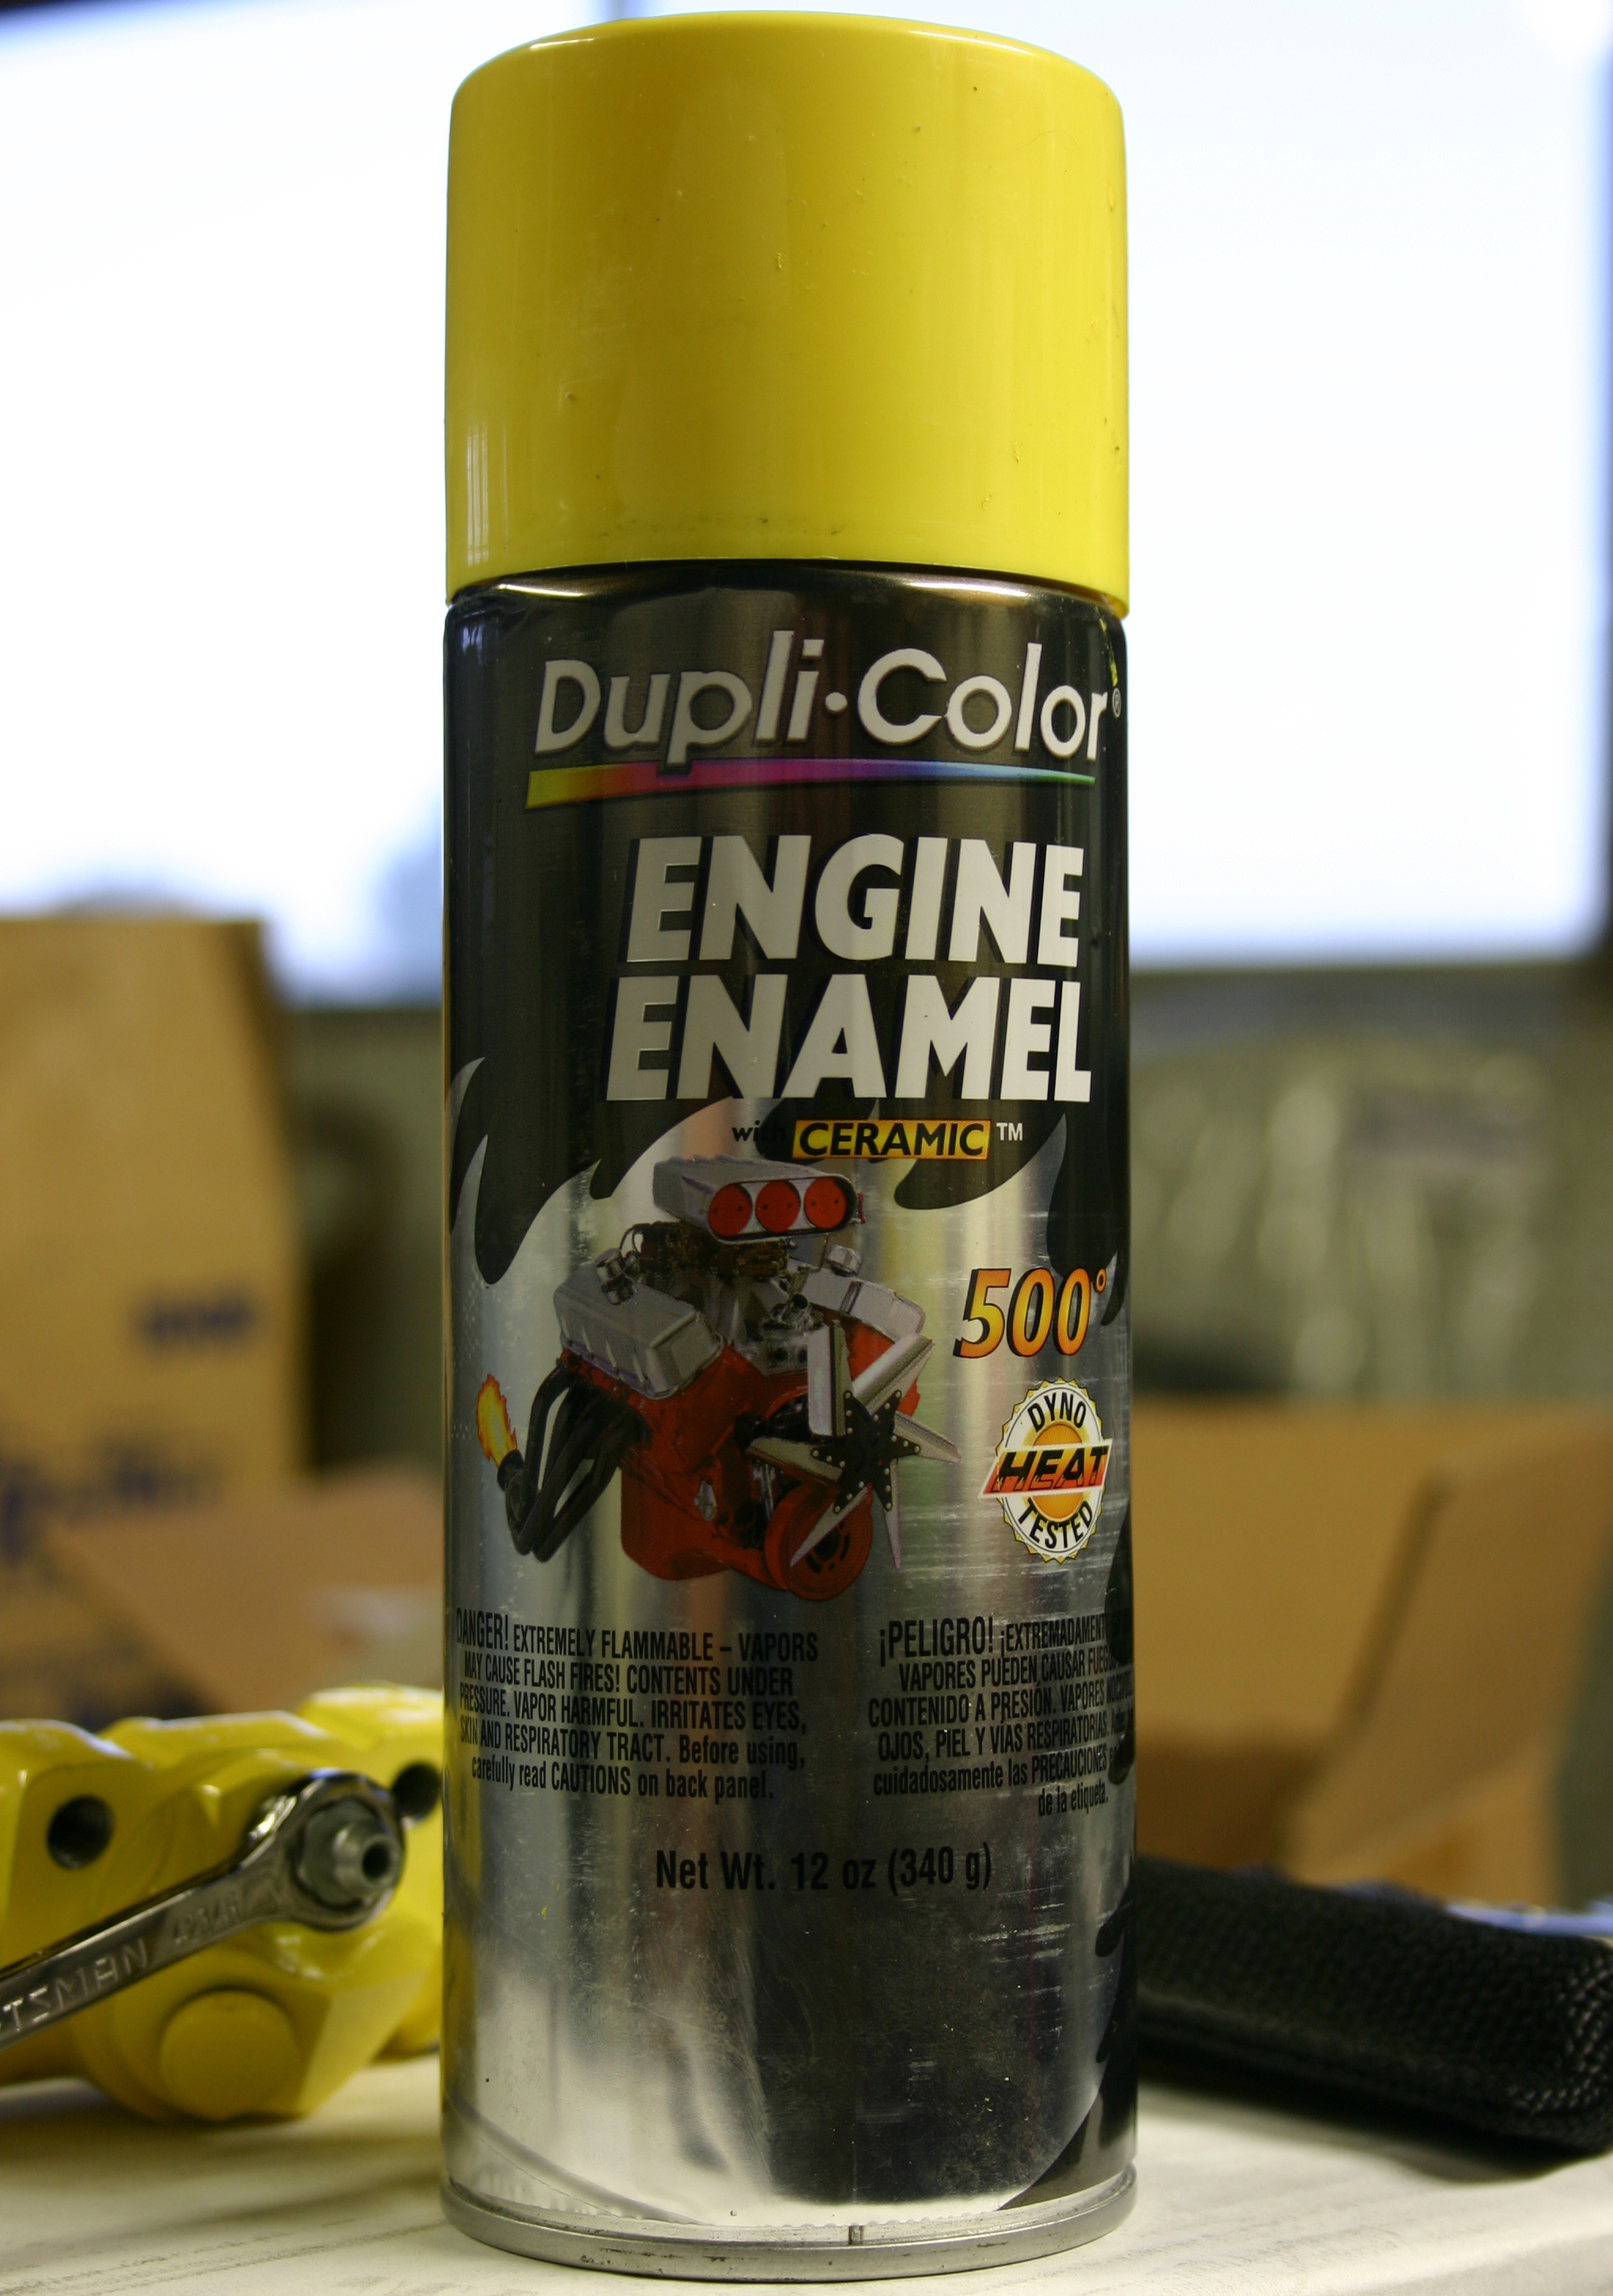
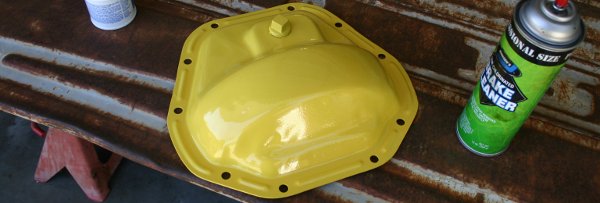
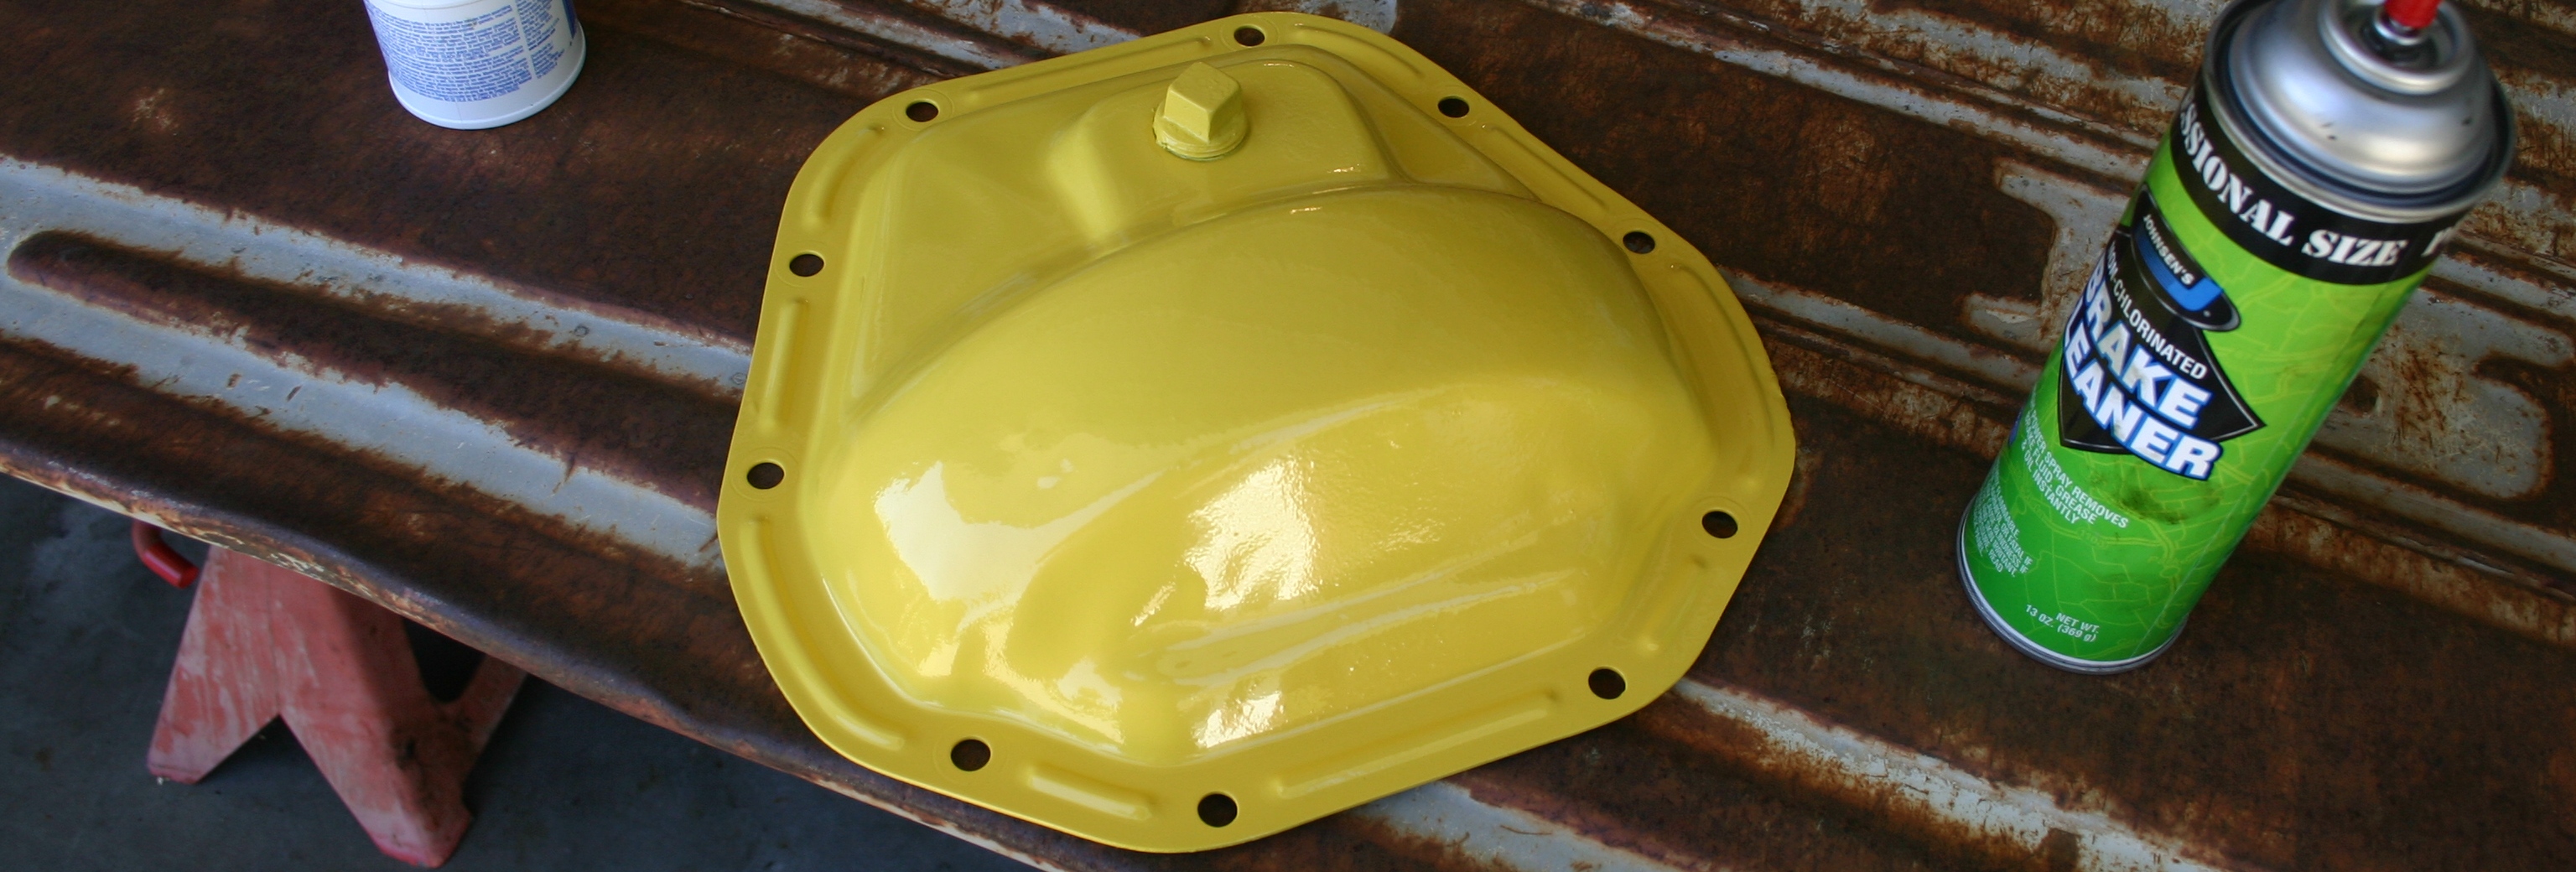
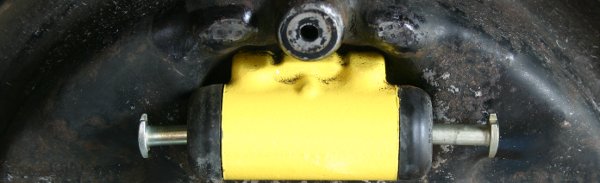
Here's how the differential cover looked after around 24 hours (the optimum time to top-coat, according to the Rust Encapsulator directions); you can see that it lost most of its gloss. I hit it with four thin coats of the same yellow paint I used on the wheel cylinders, spaced ten minutes apart (as directed). For being a yellow, the coverage of this paint is surprisingly good; it's rather opaque! Also shown is the timer I use to apply the coats at ideal intervals.
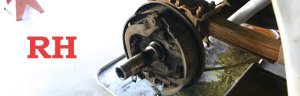
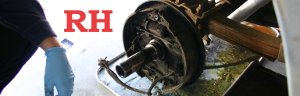
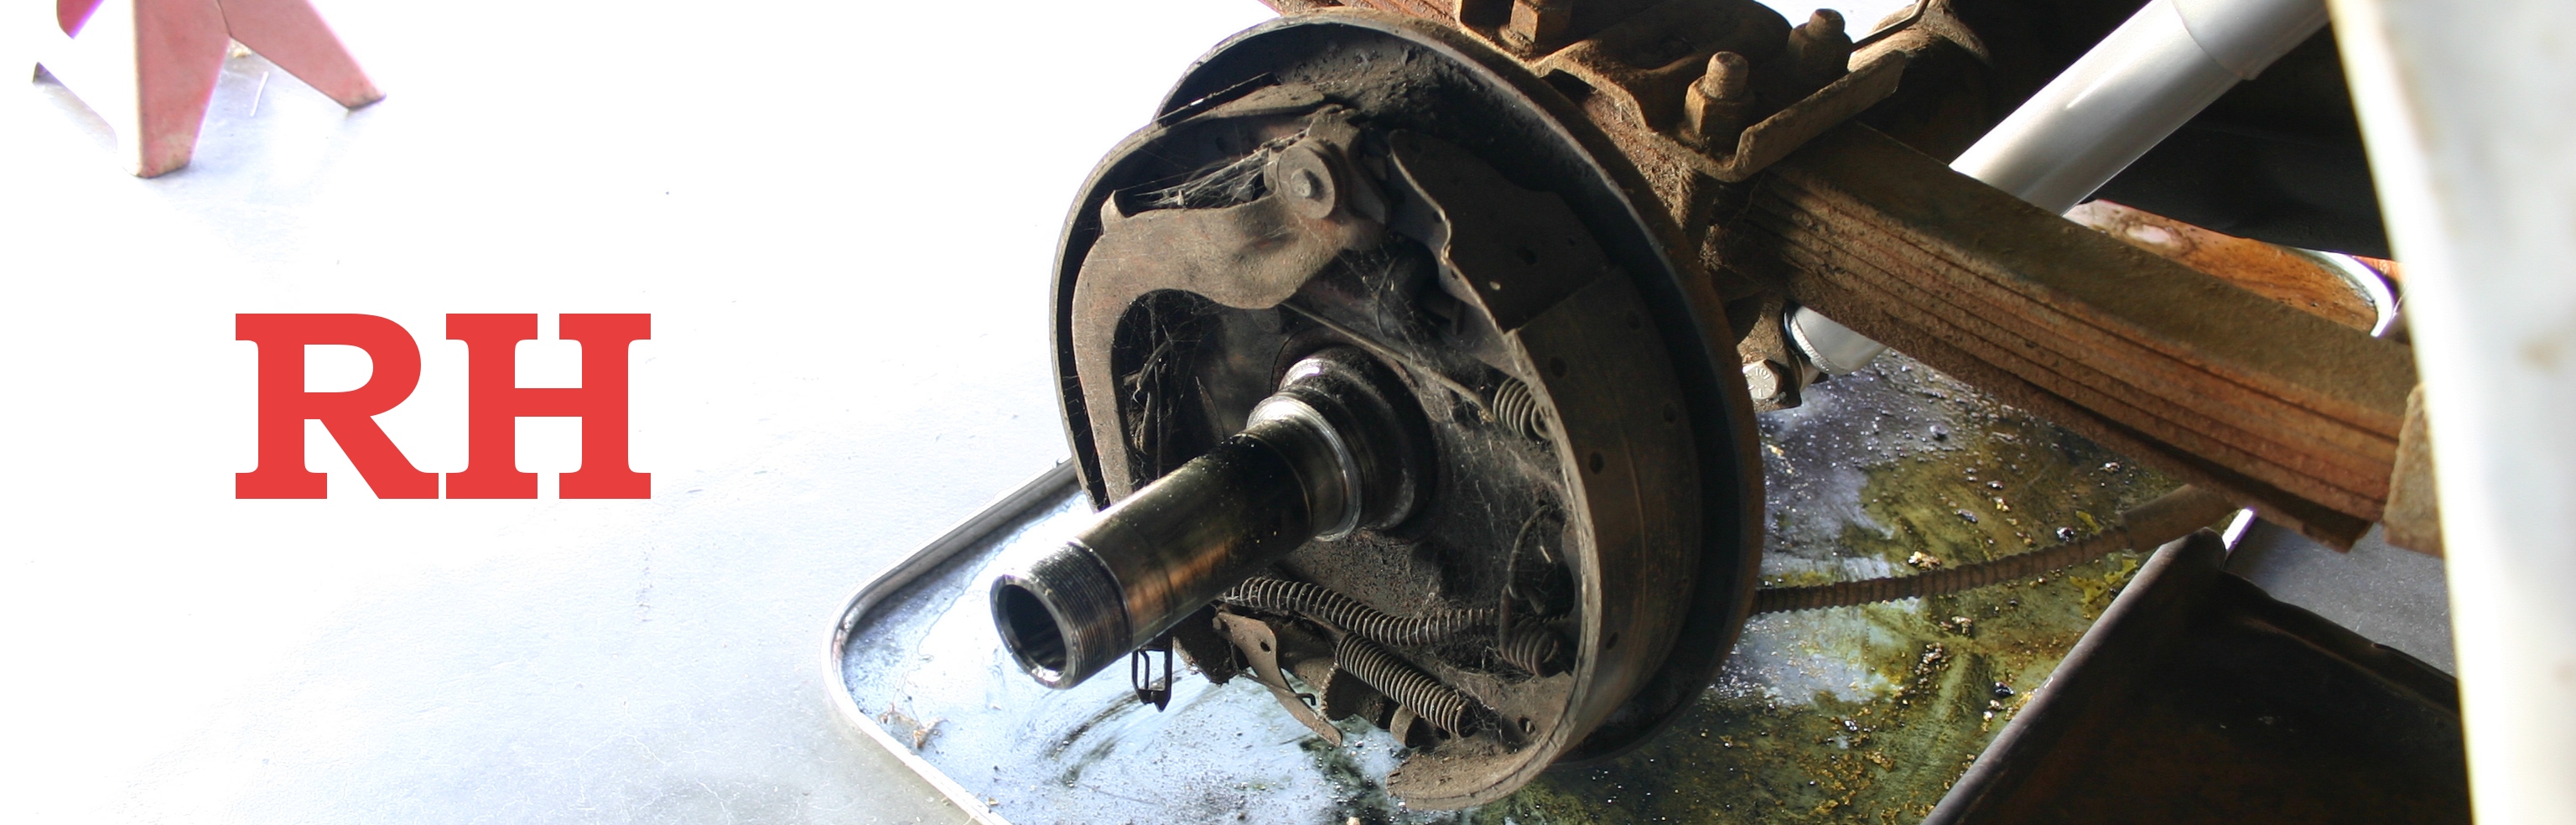
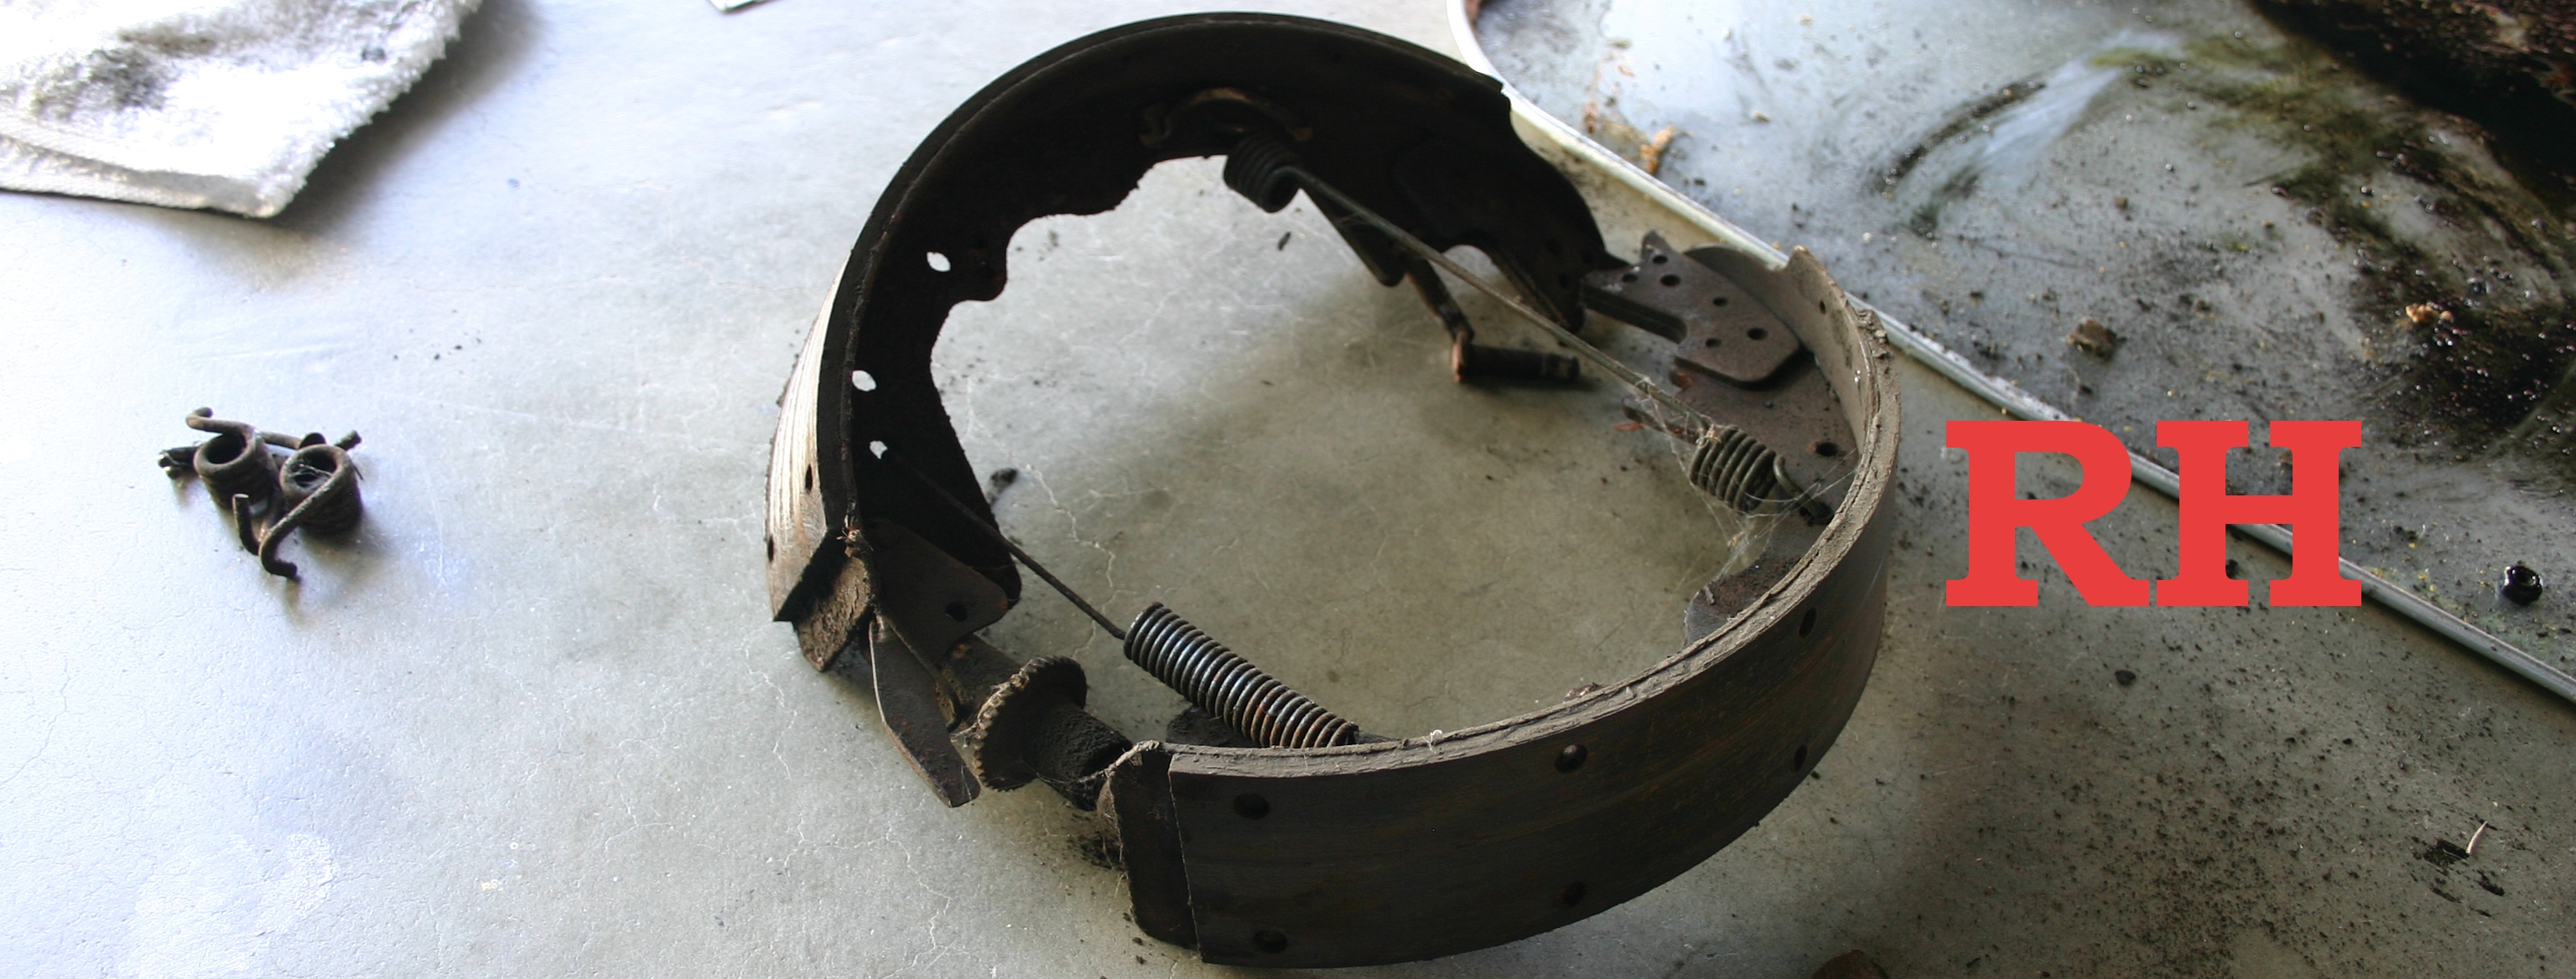
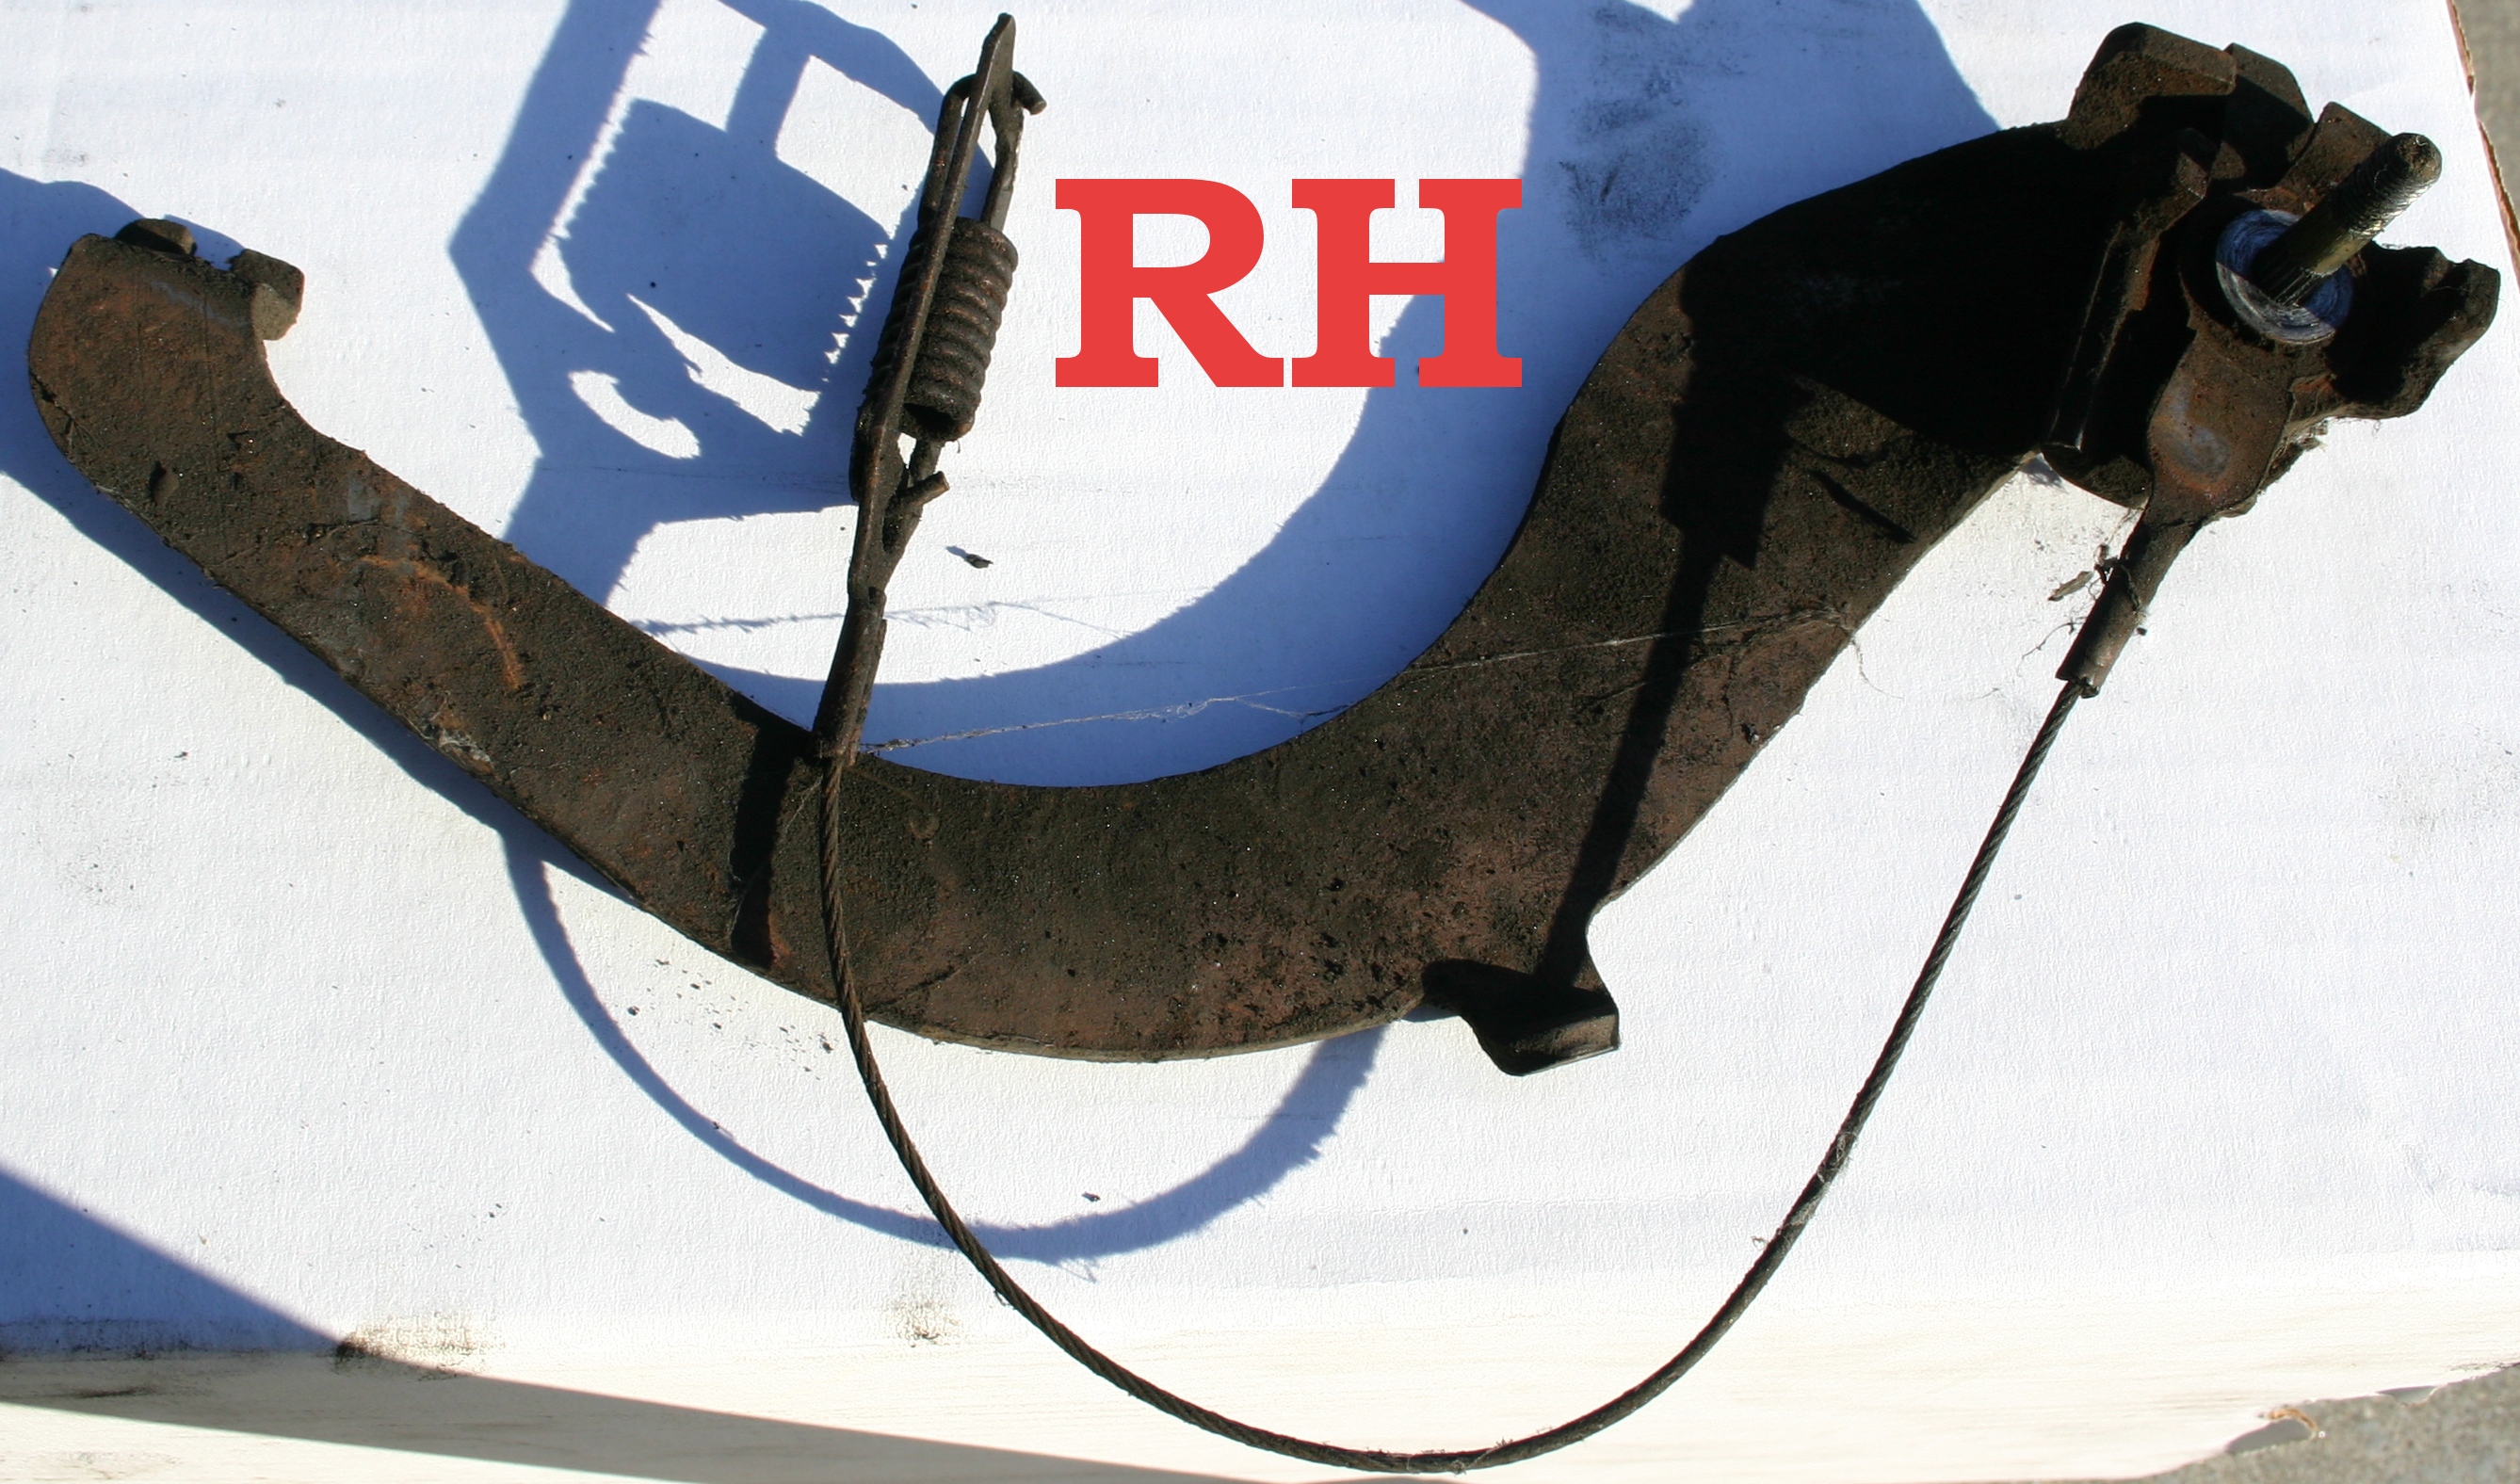
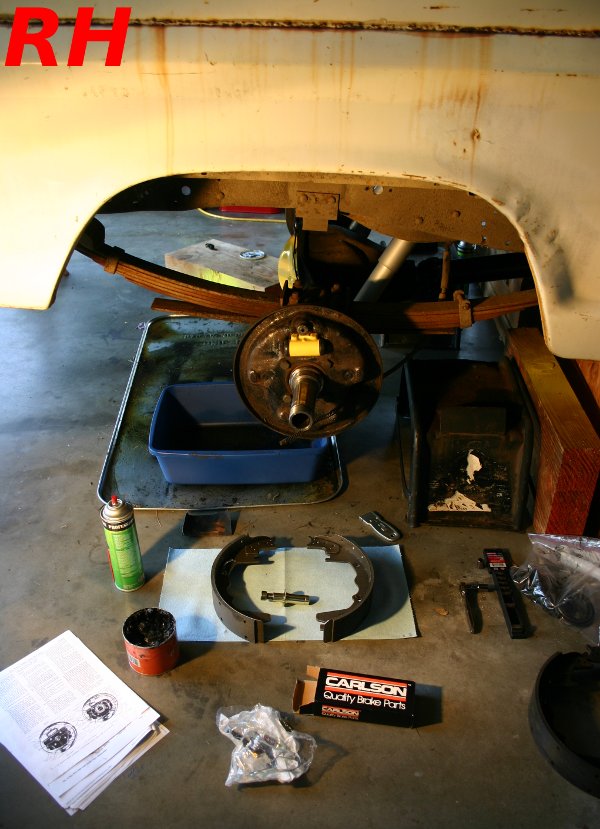
While waiting between coats I decided to pull the right-hand side apart. As is nearly always the case, y'all can click on any of these to see large, high definition versions. Since I already photo-documented the tear-down of the left-hand side, I don't want to make y'all too bored with huge photos of the right-hand side! Hence, I scaled most of them down more aggressively than before.
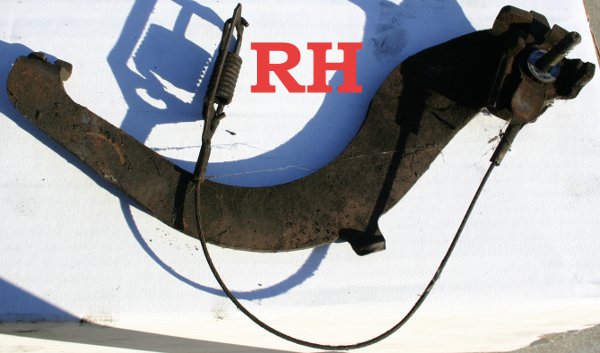
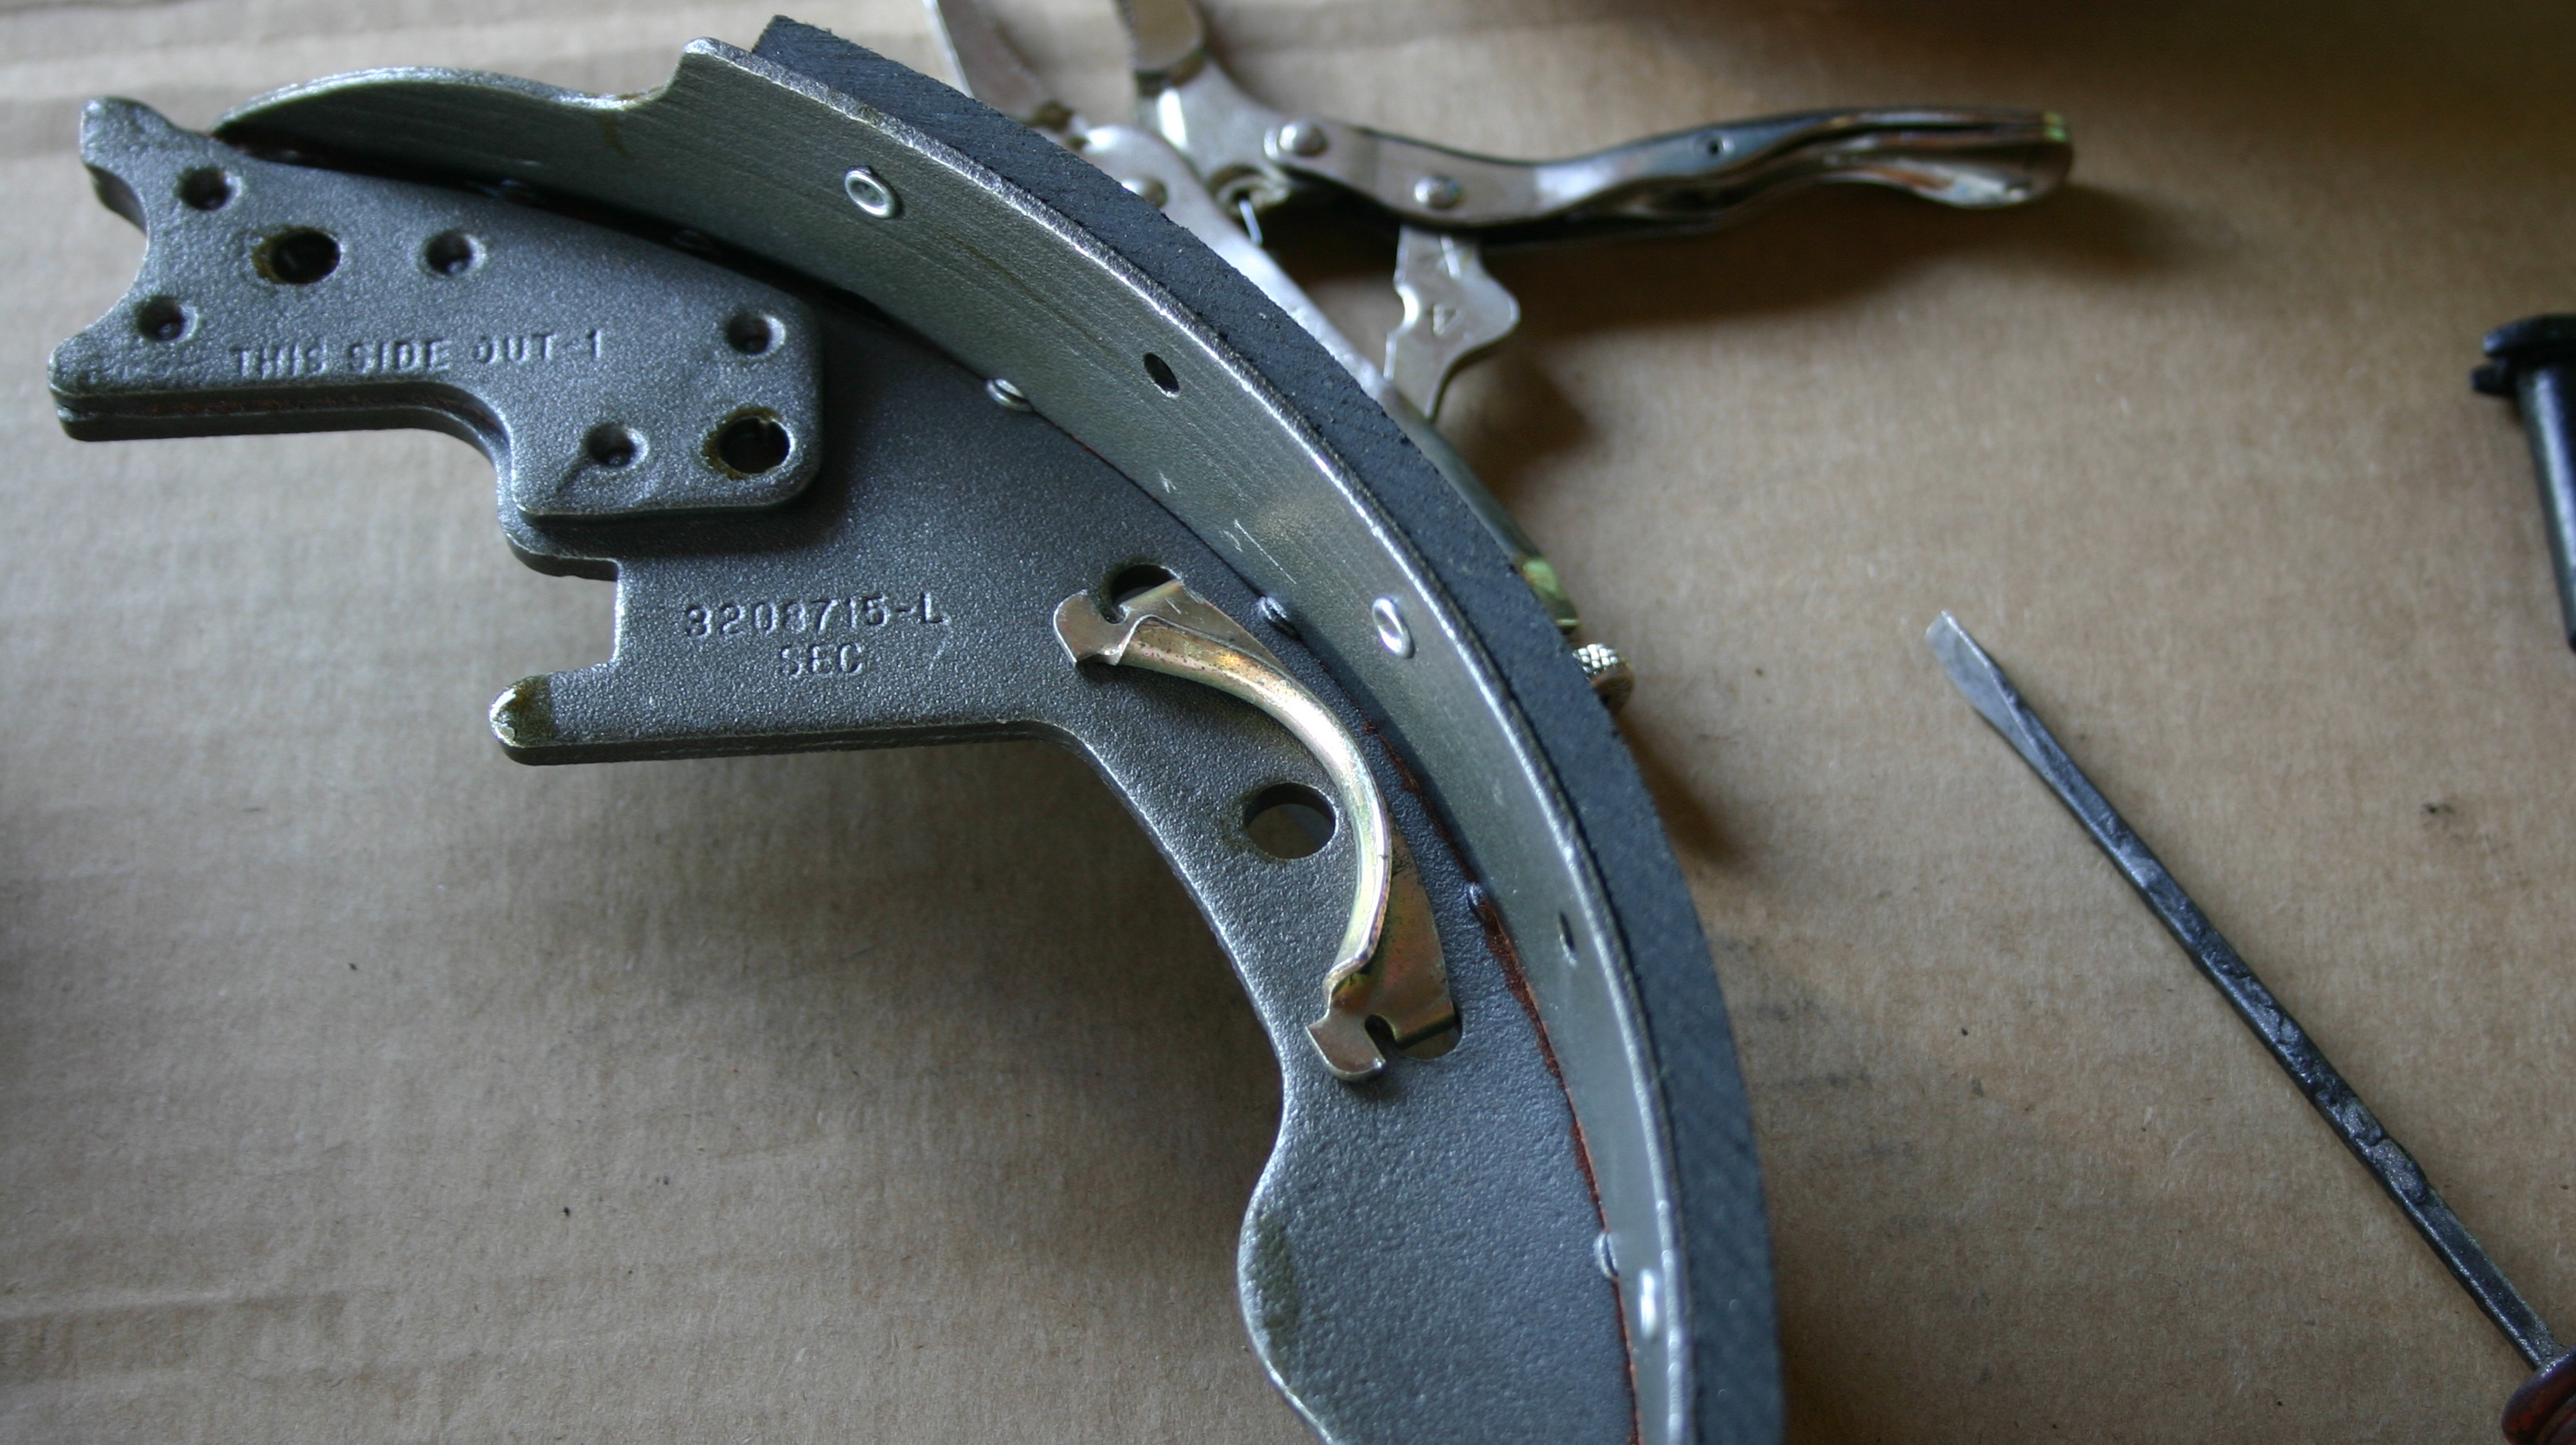
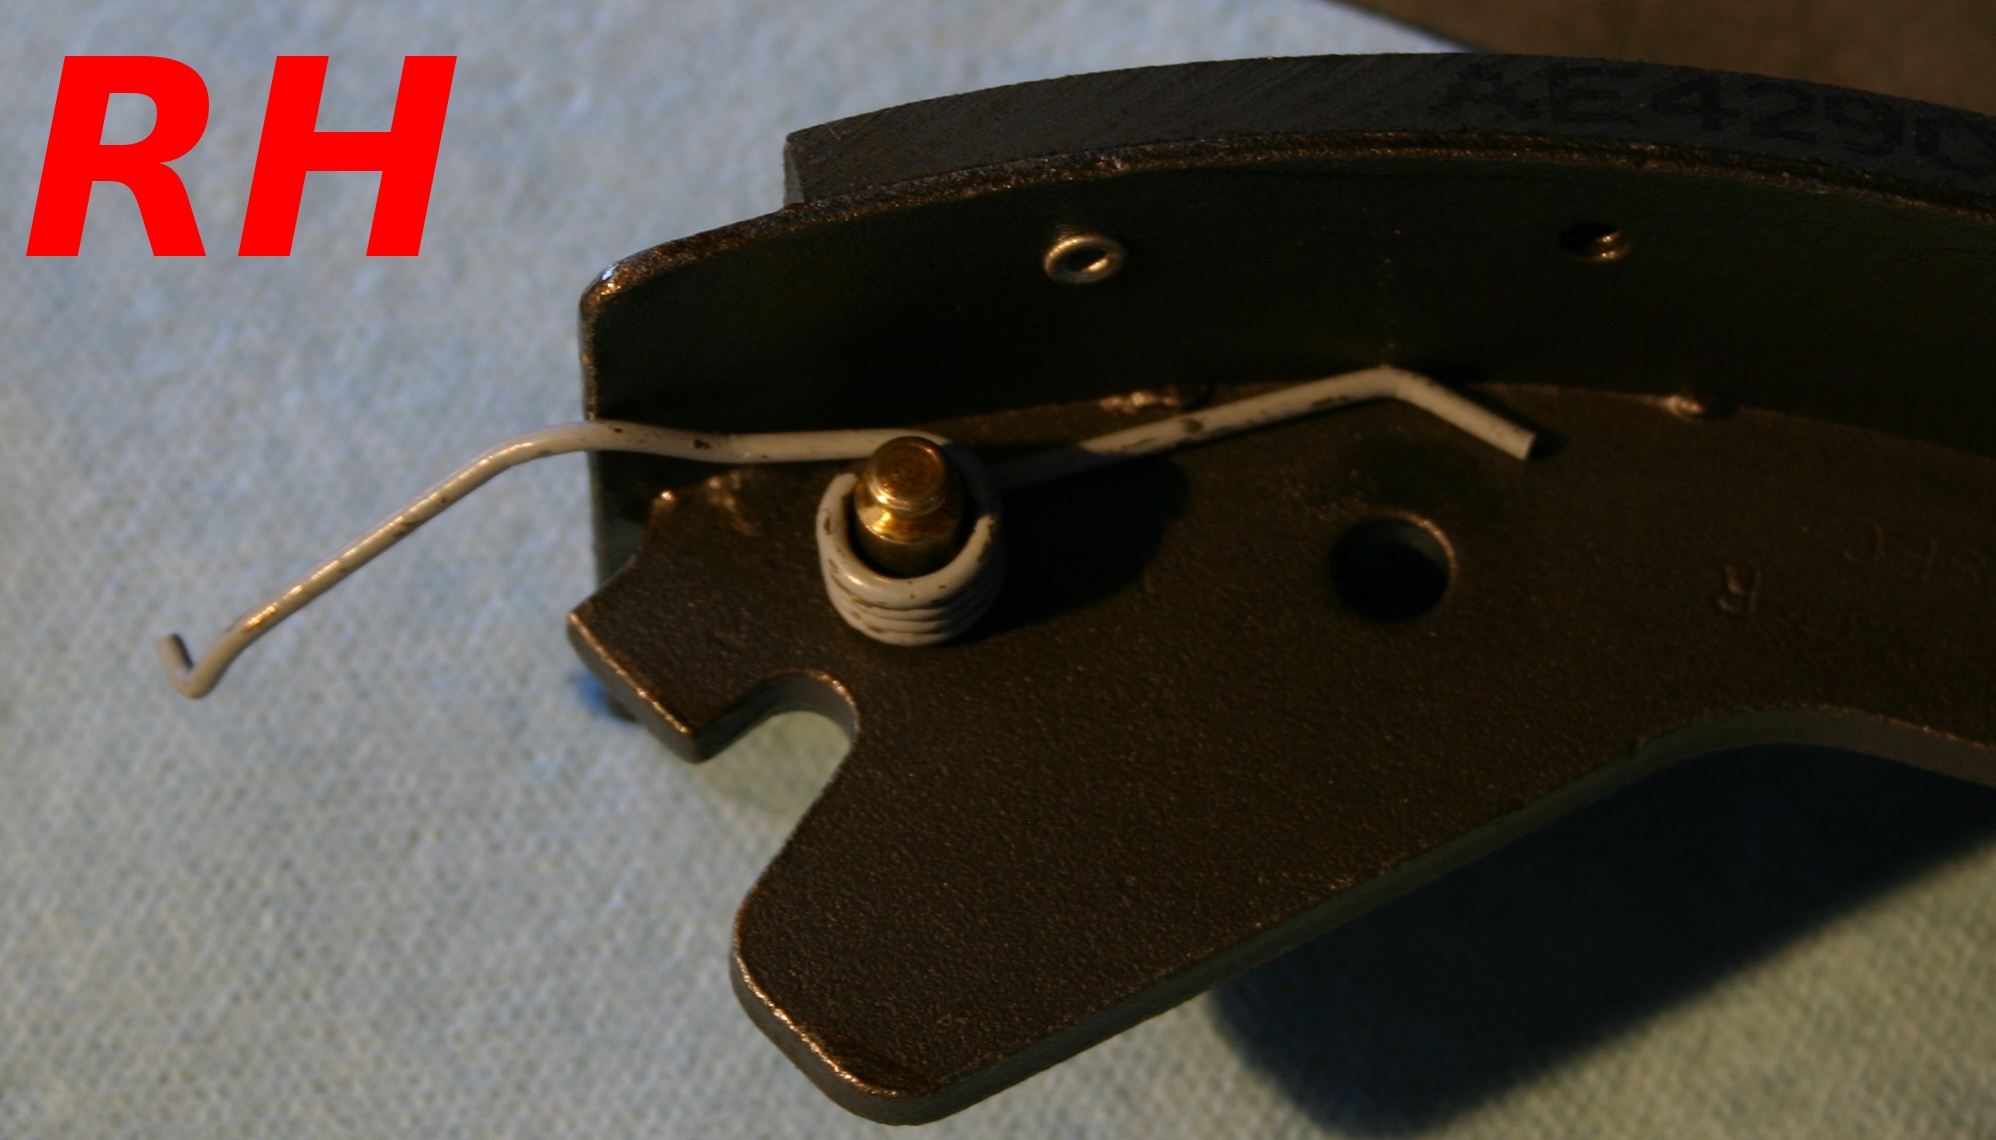
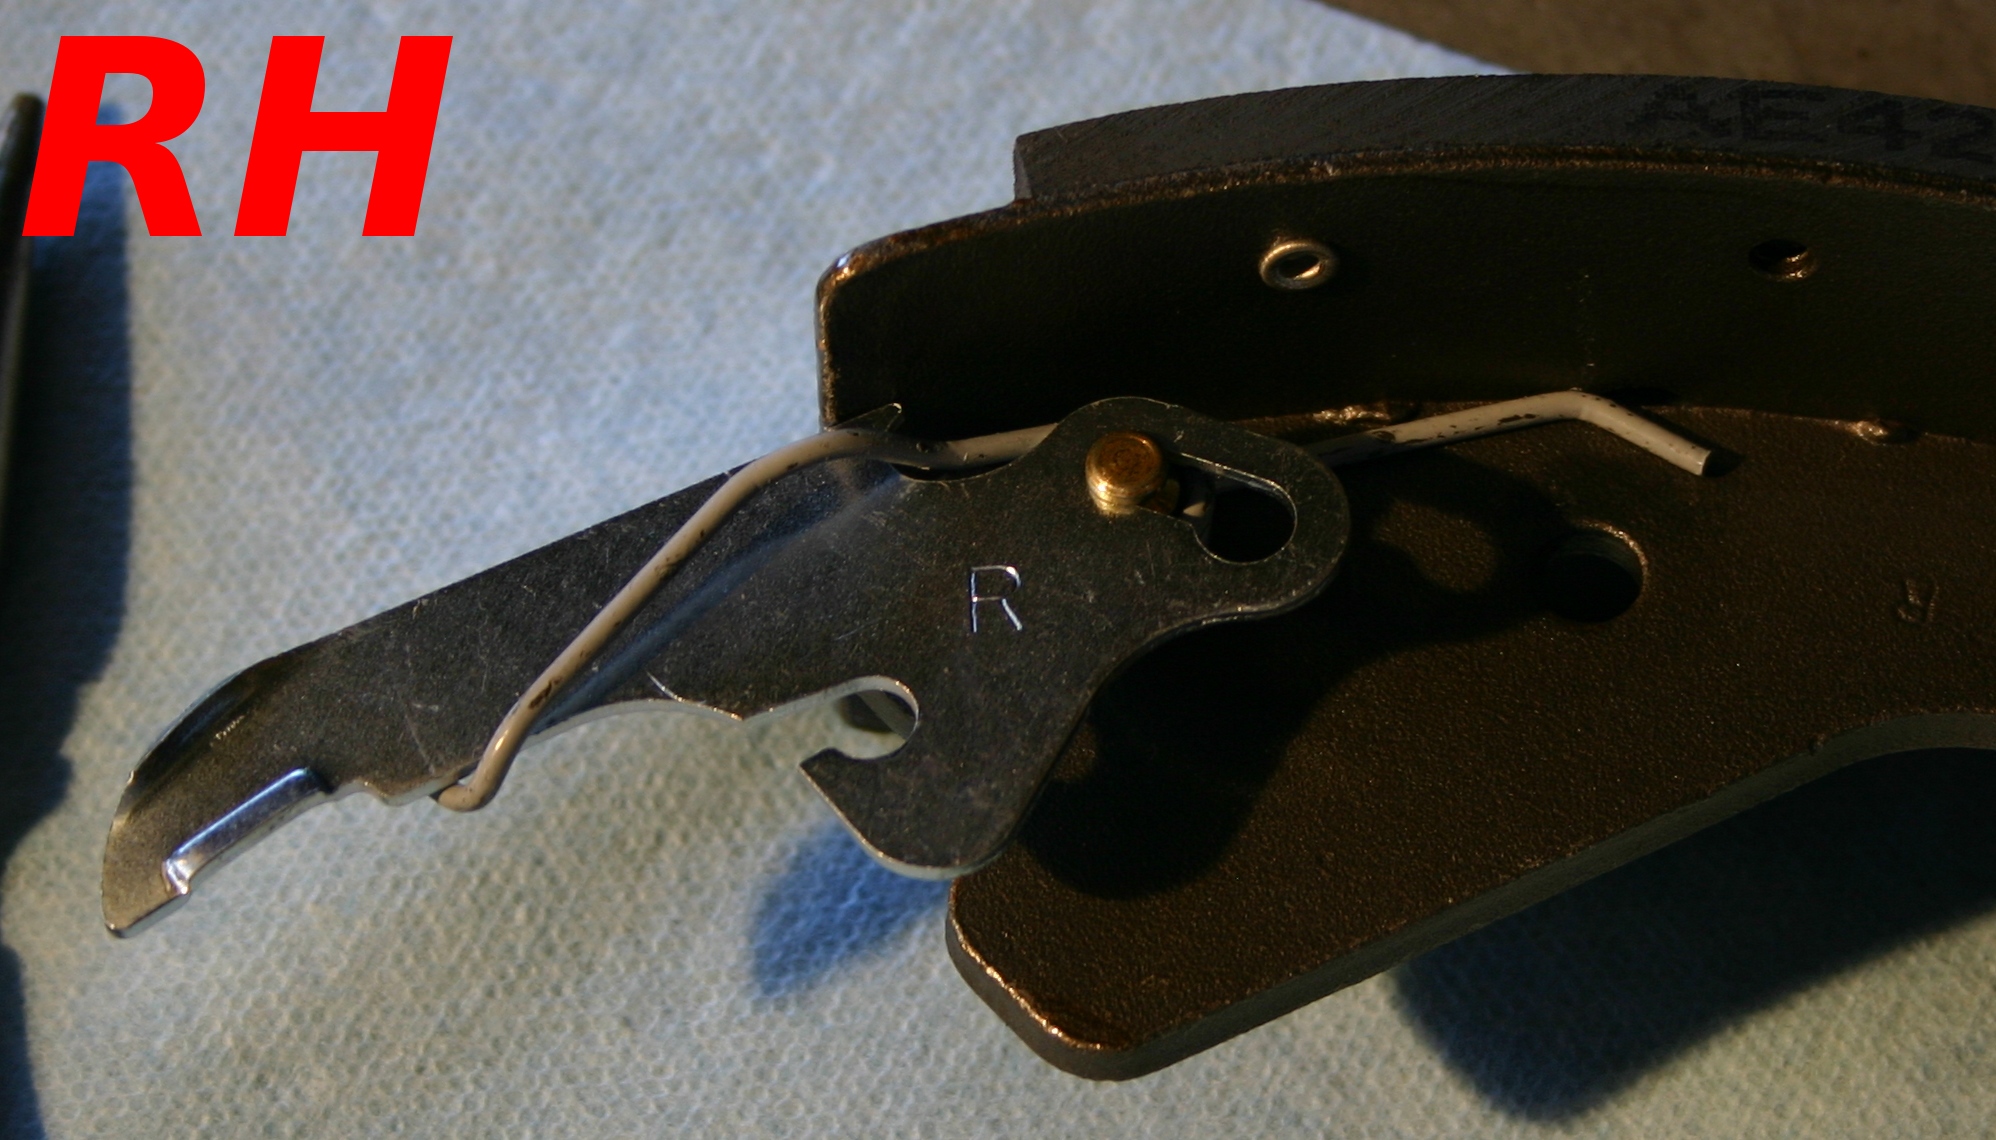
First I removed the tiny 7/16" pinch-nut that holds the parking brake lever in to the backing plate, and pulled the lever off (right). On the left is shown the assembly before I began today.
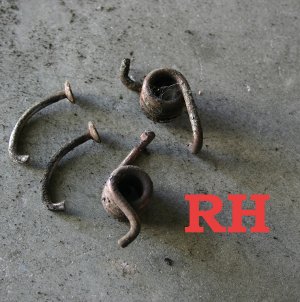
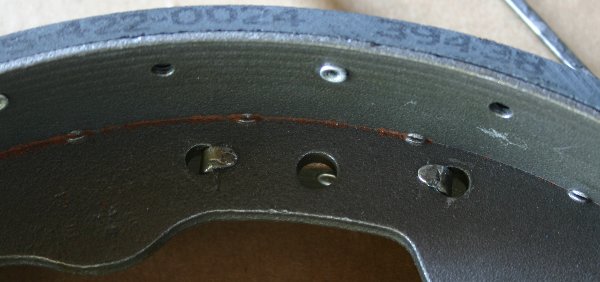
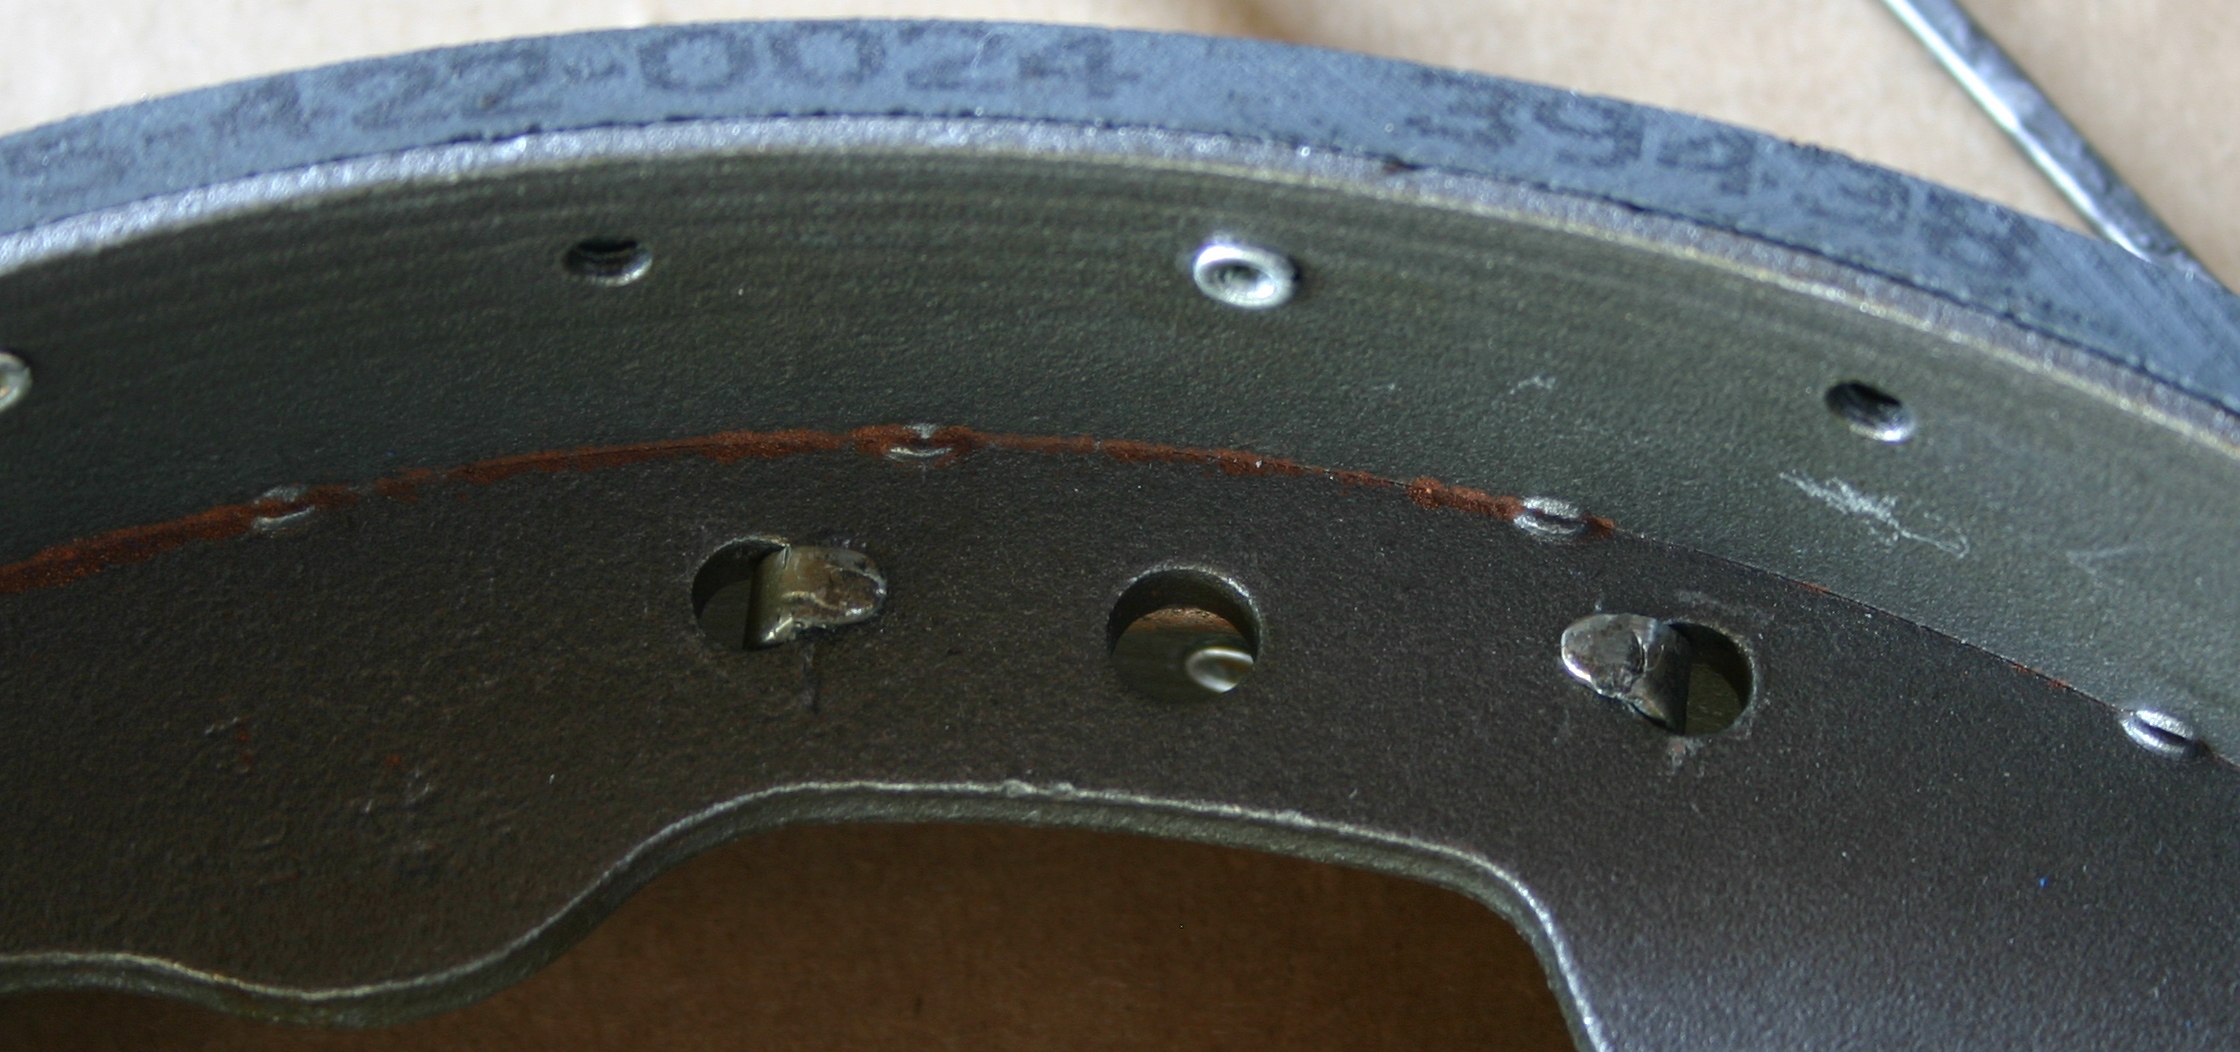
Then I pulled the brake shoe hold-down springs and nails off (left); like before, the shoes popped out like elephant ears (right).
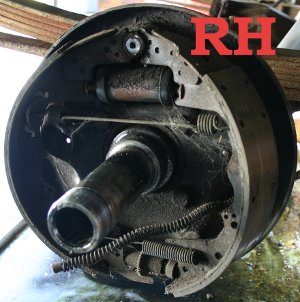
Here's the shoe assembly yanked off.

I took the parts outside in the sunlight to get quality photos of each of them, just for the satisfaction of potential curiosity.

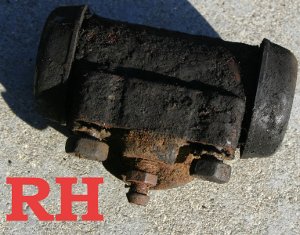
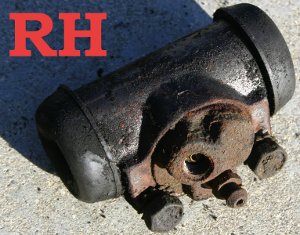
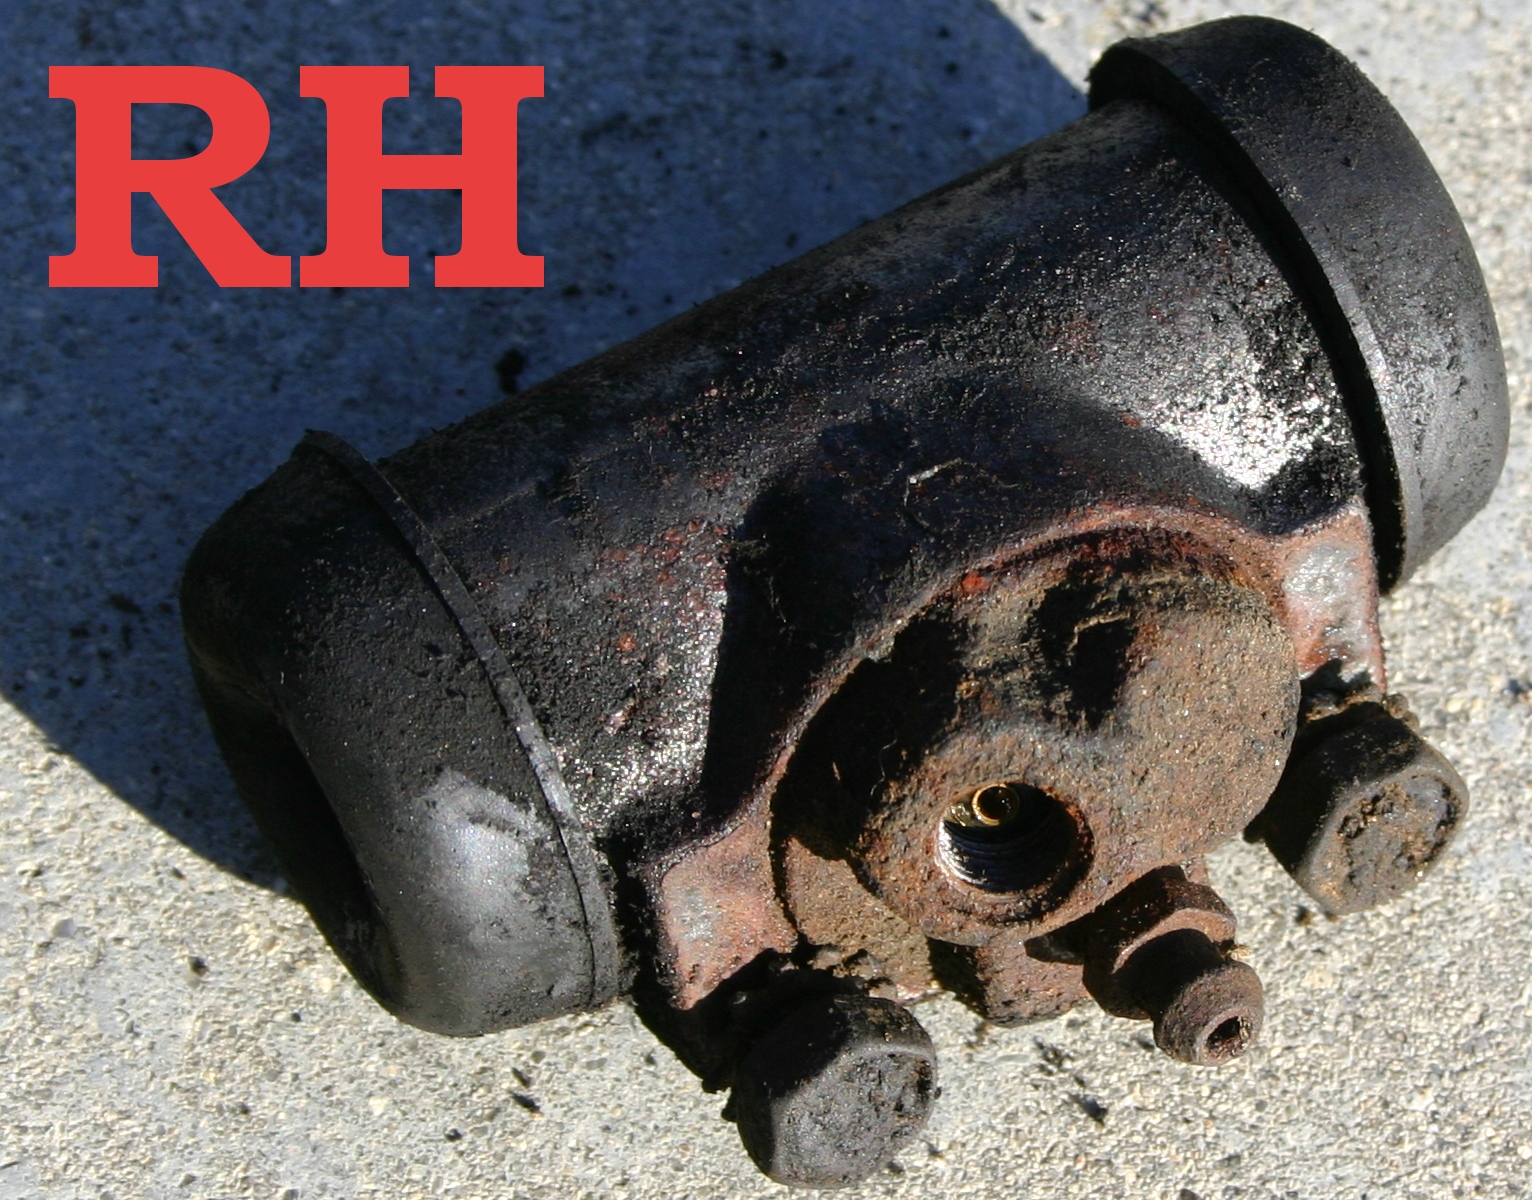
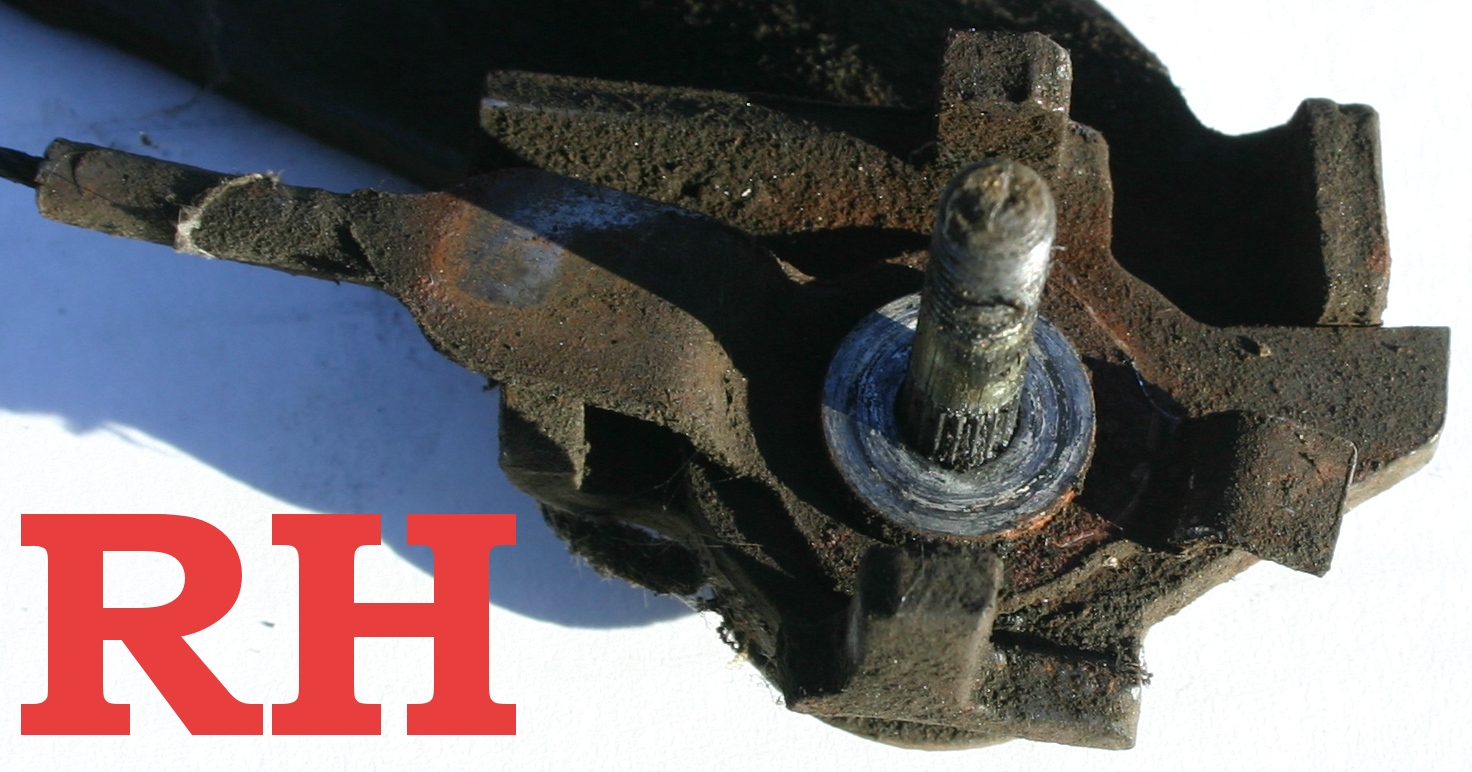
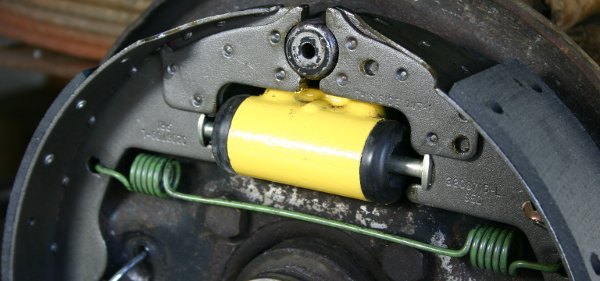
Here's the crusty wheel cylinder; I'm glad to have already prepared its replacement.
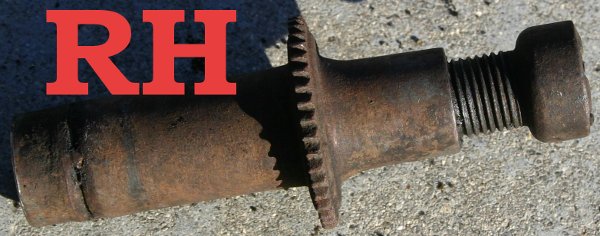
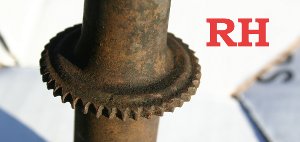
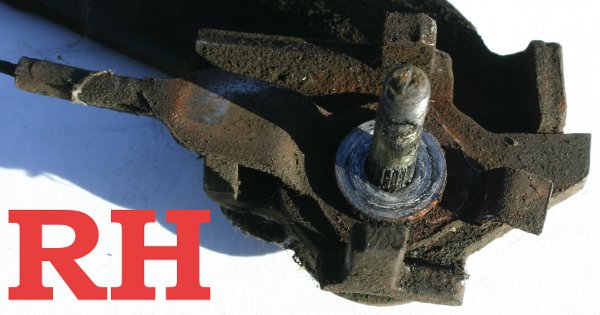
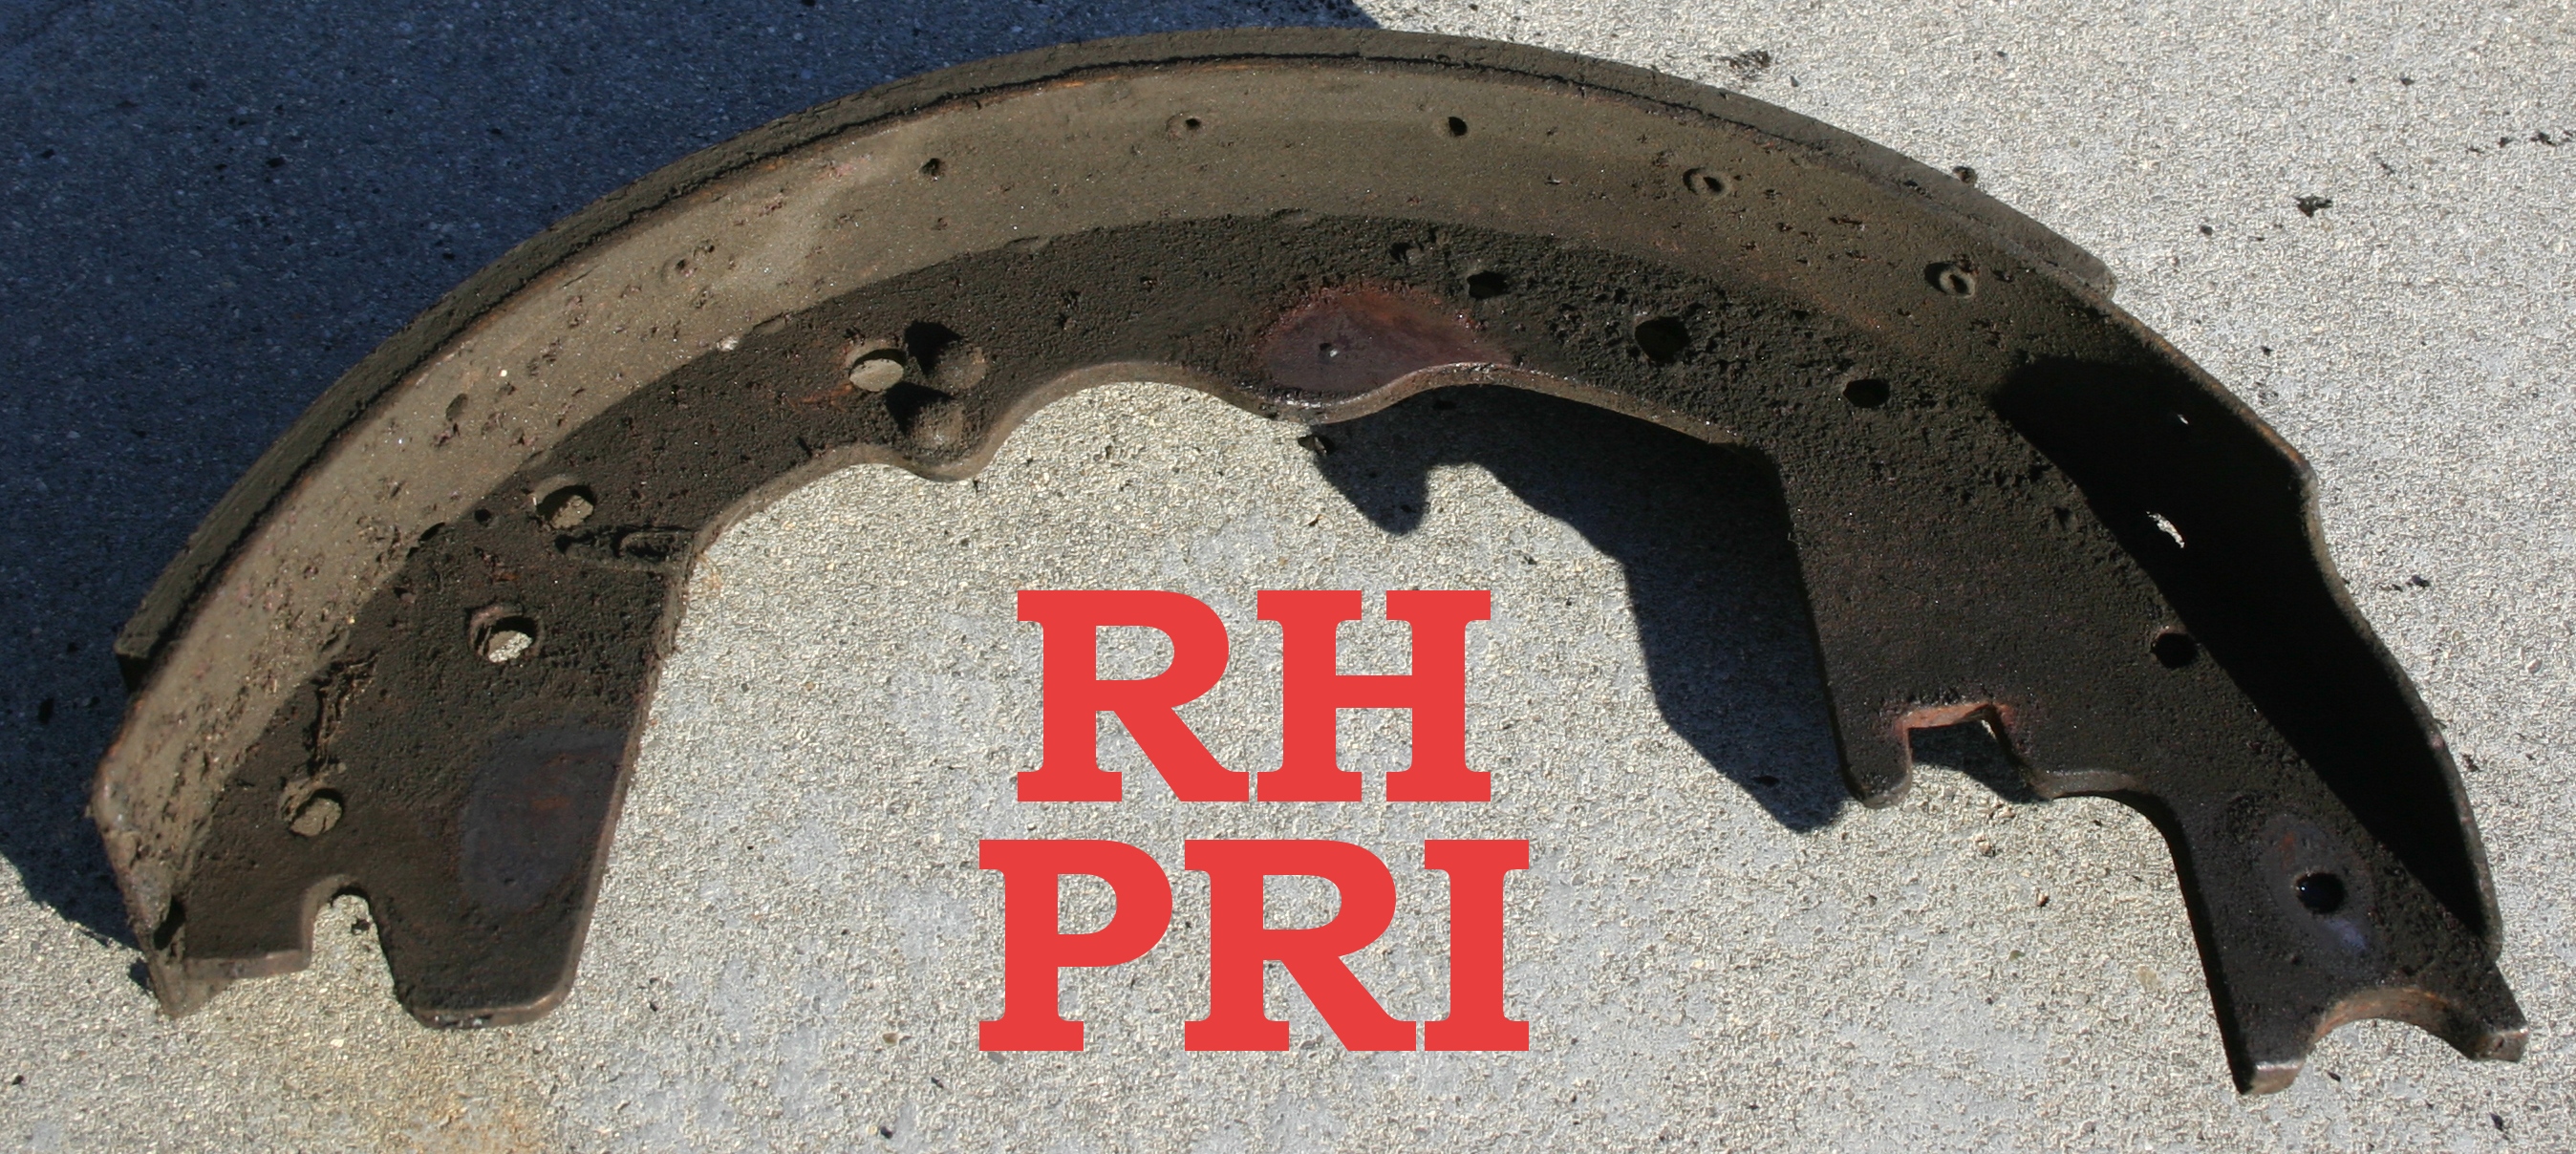
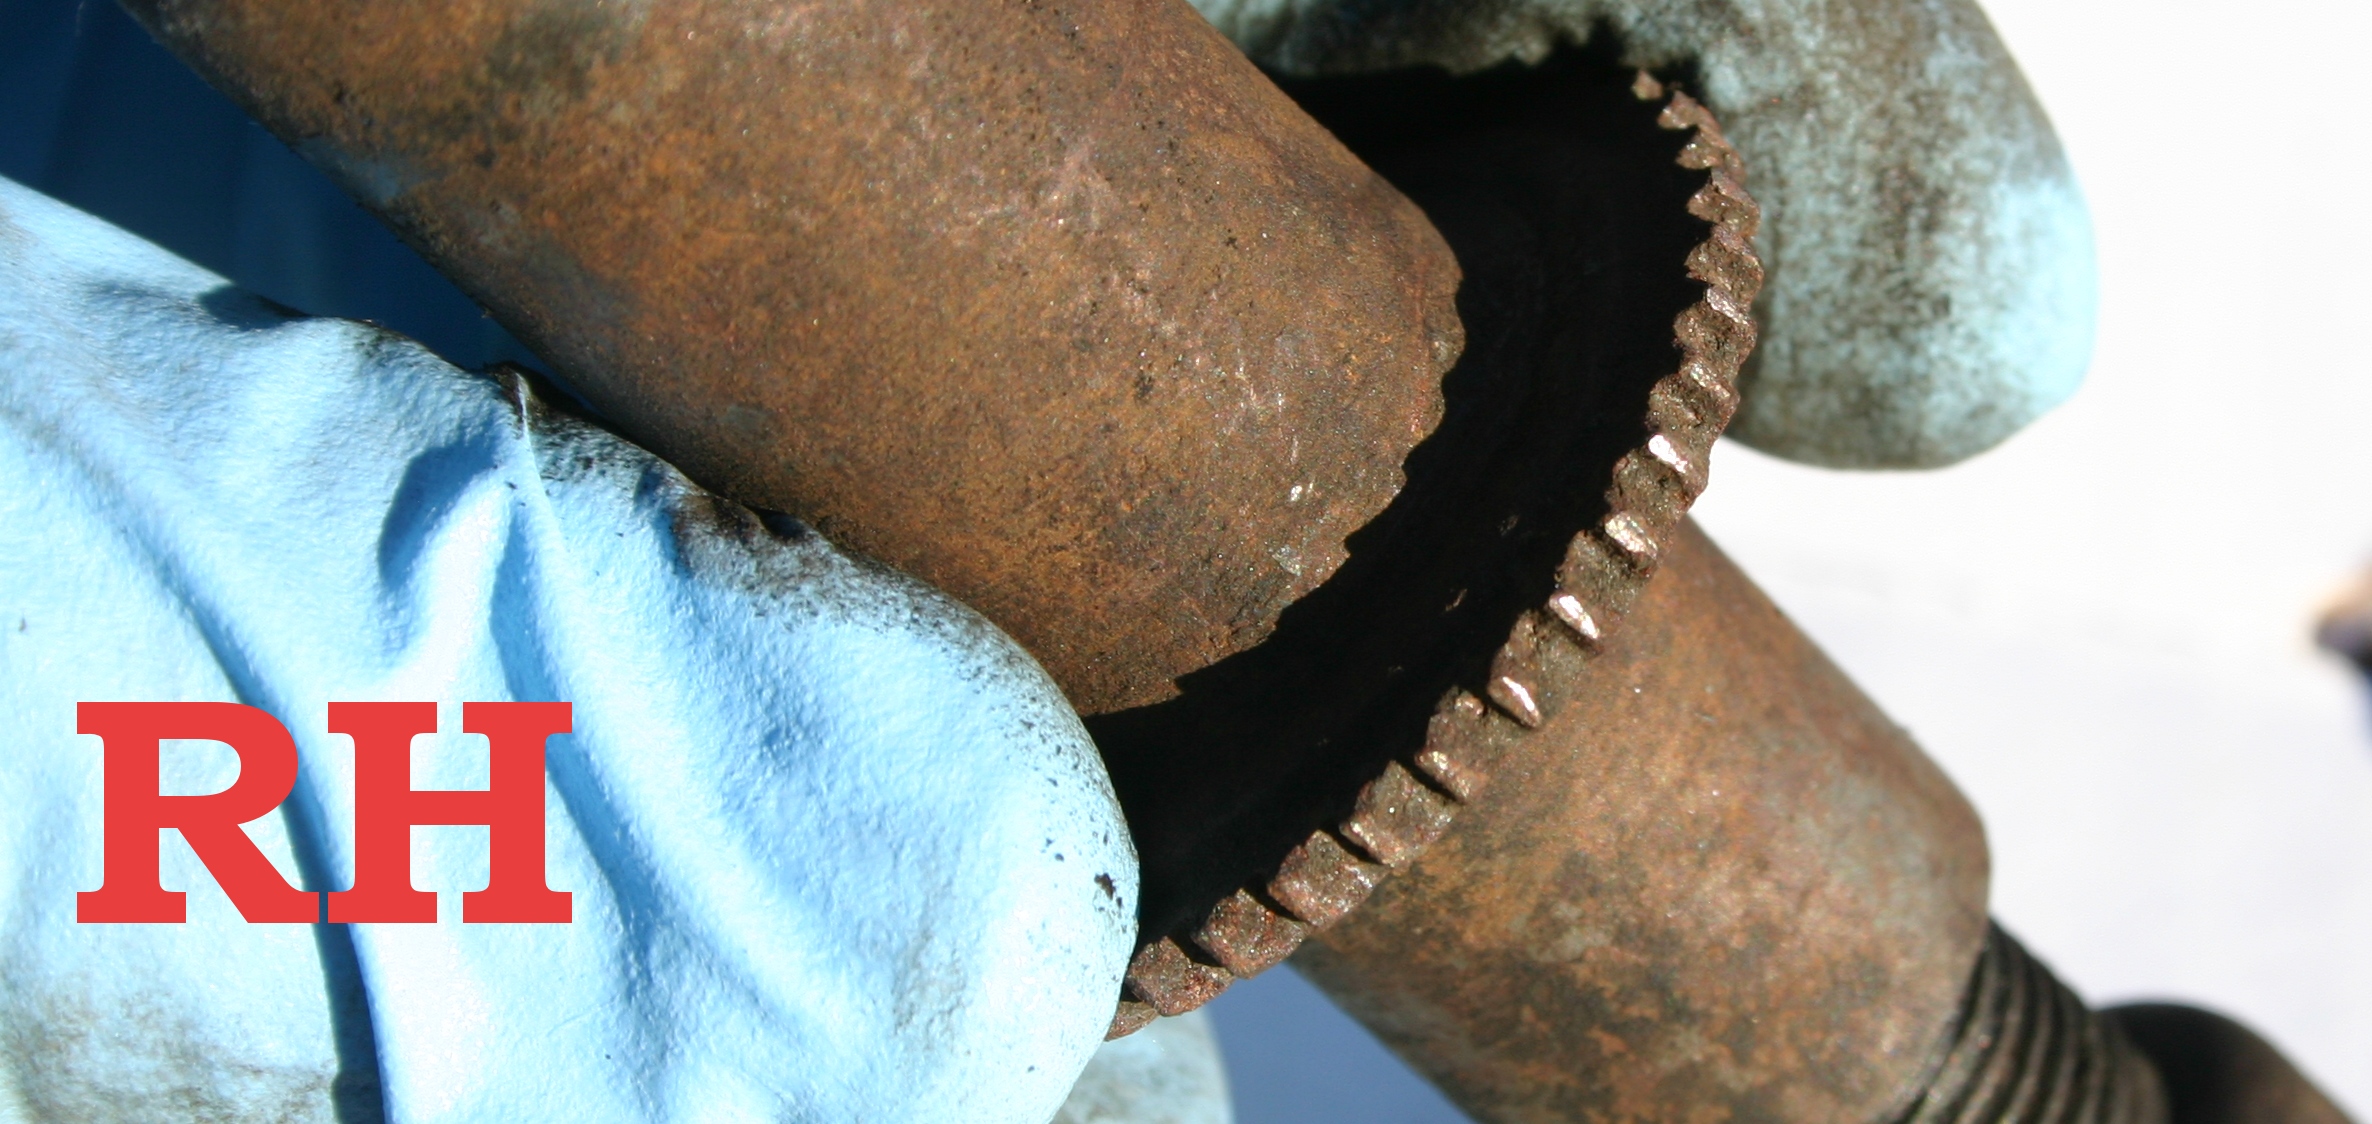
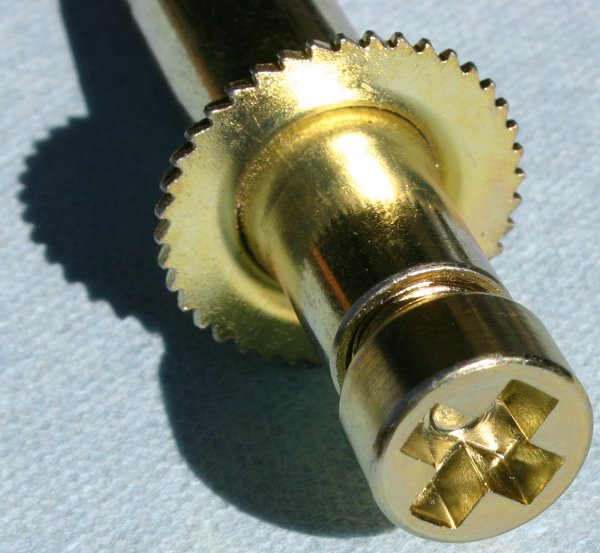
The teeth on the right-hand adjuster screw look a little less pretty than the left-hand side--I have a hunch that this part is much older. I'll go ahead and replace it with a complete, USA-made Carlson kit.
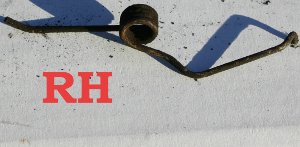
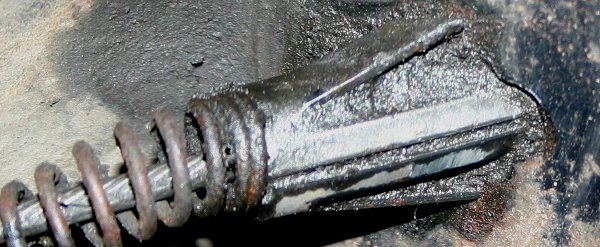
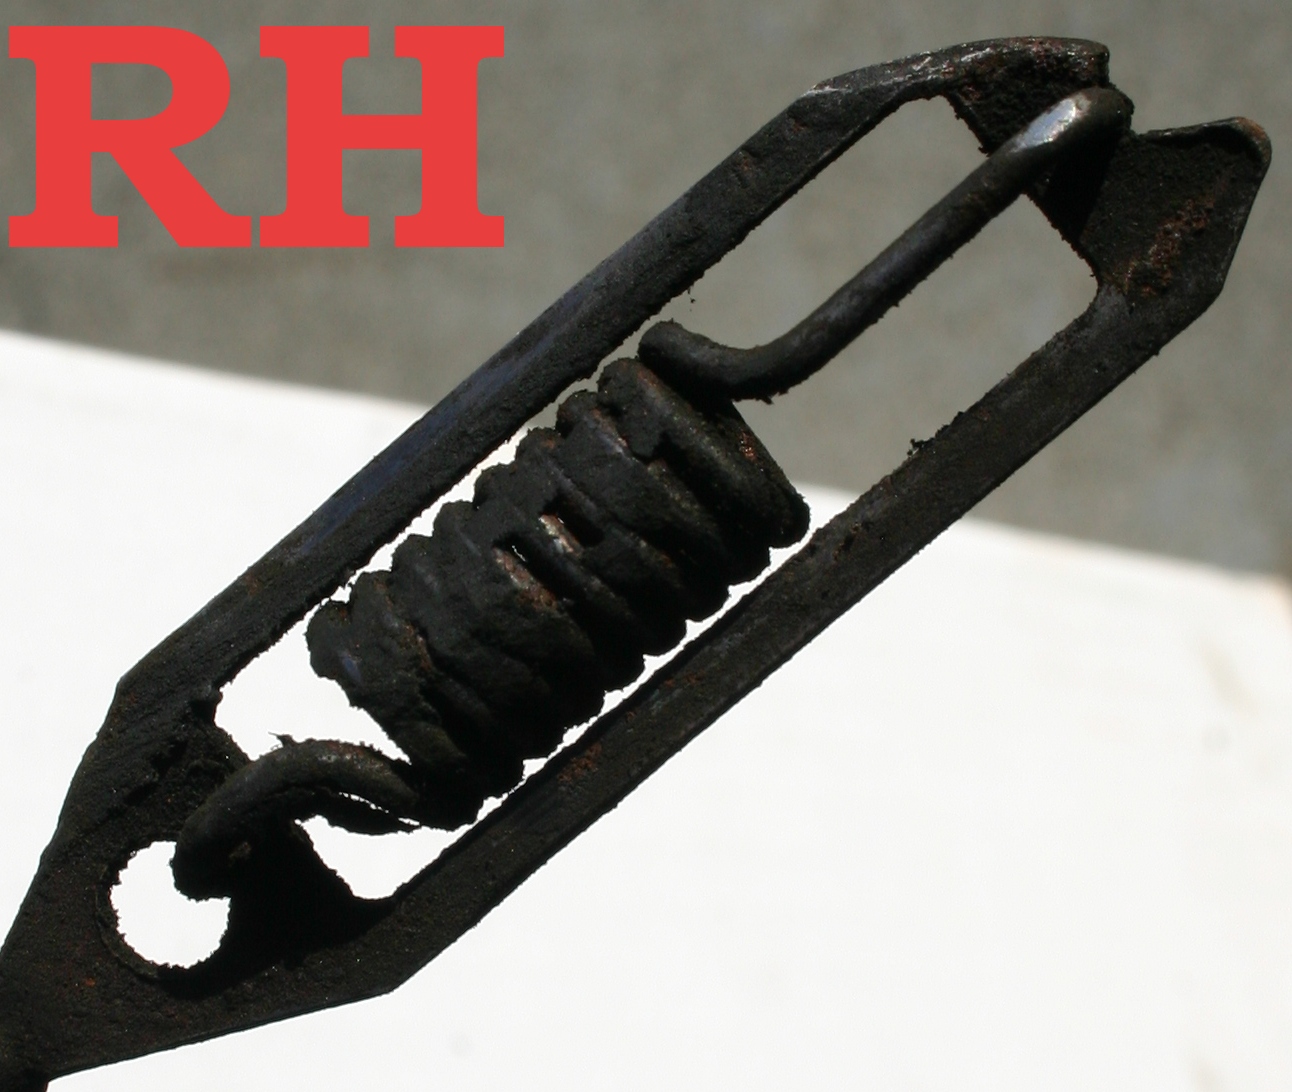
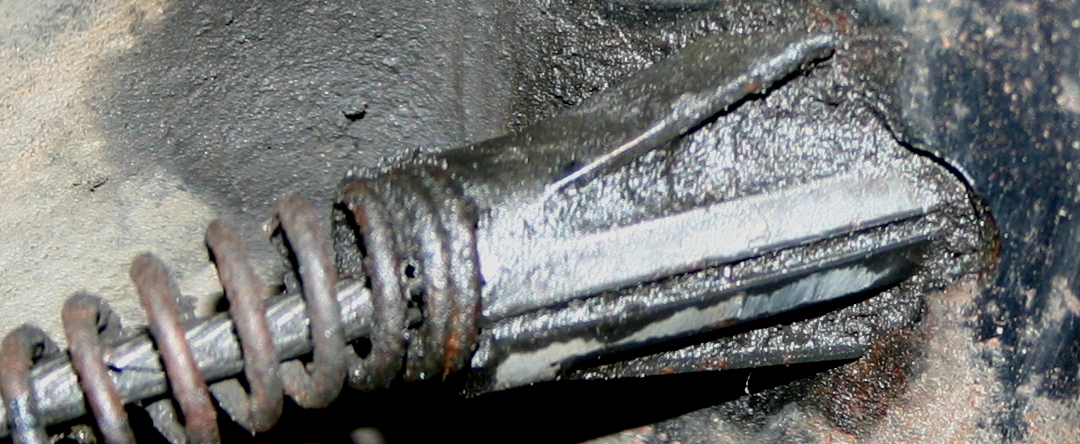
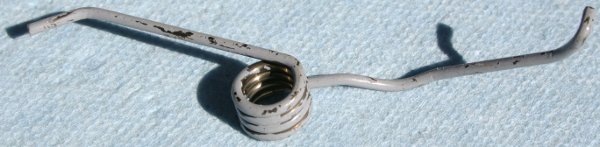
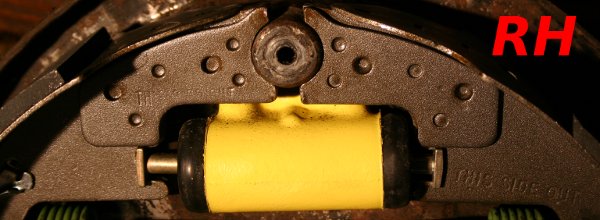
Here's the funny-looking spring that sits under the adjusting lever (left) and the little brake cylinder push-rods (right). I sure would like to replace these little push-rods, but I haven't seen them available so far!
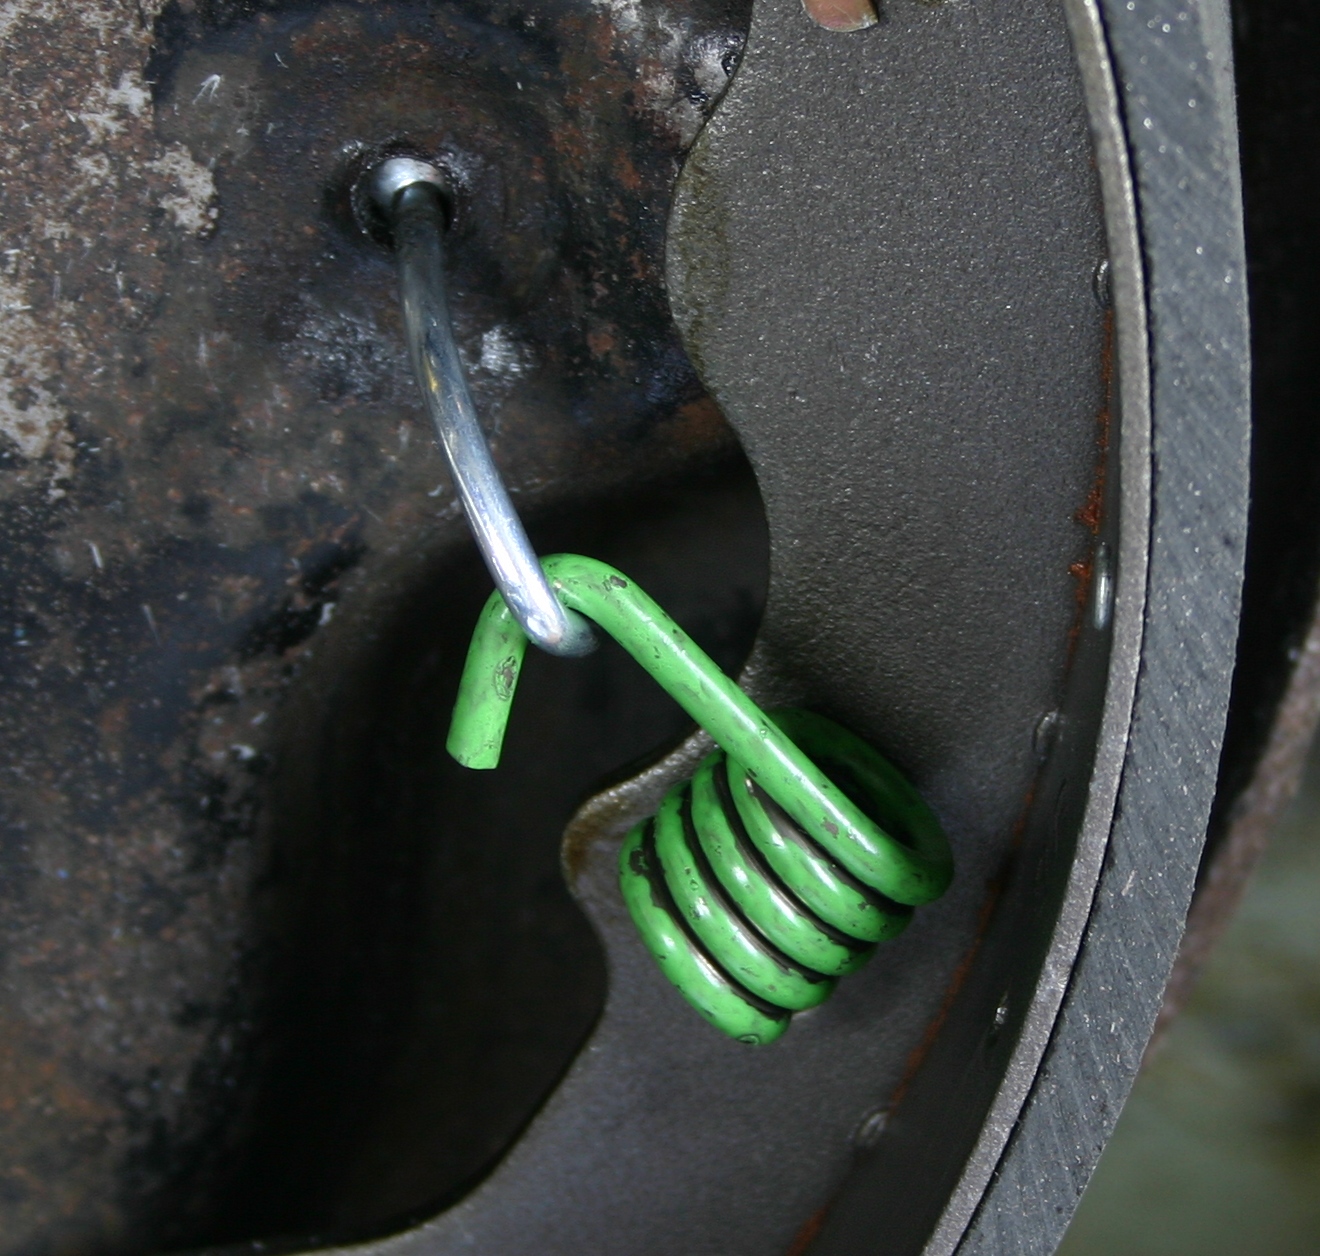
Here's the lower retracting spring (left), and the upper retracting spring (right).


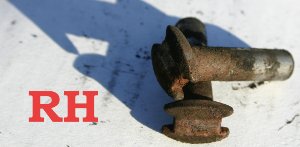
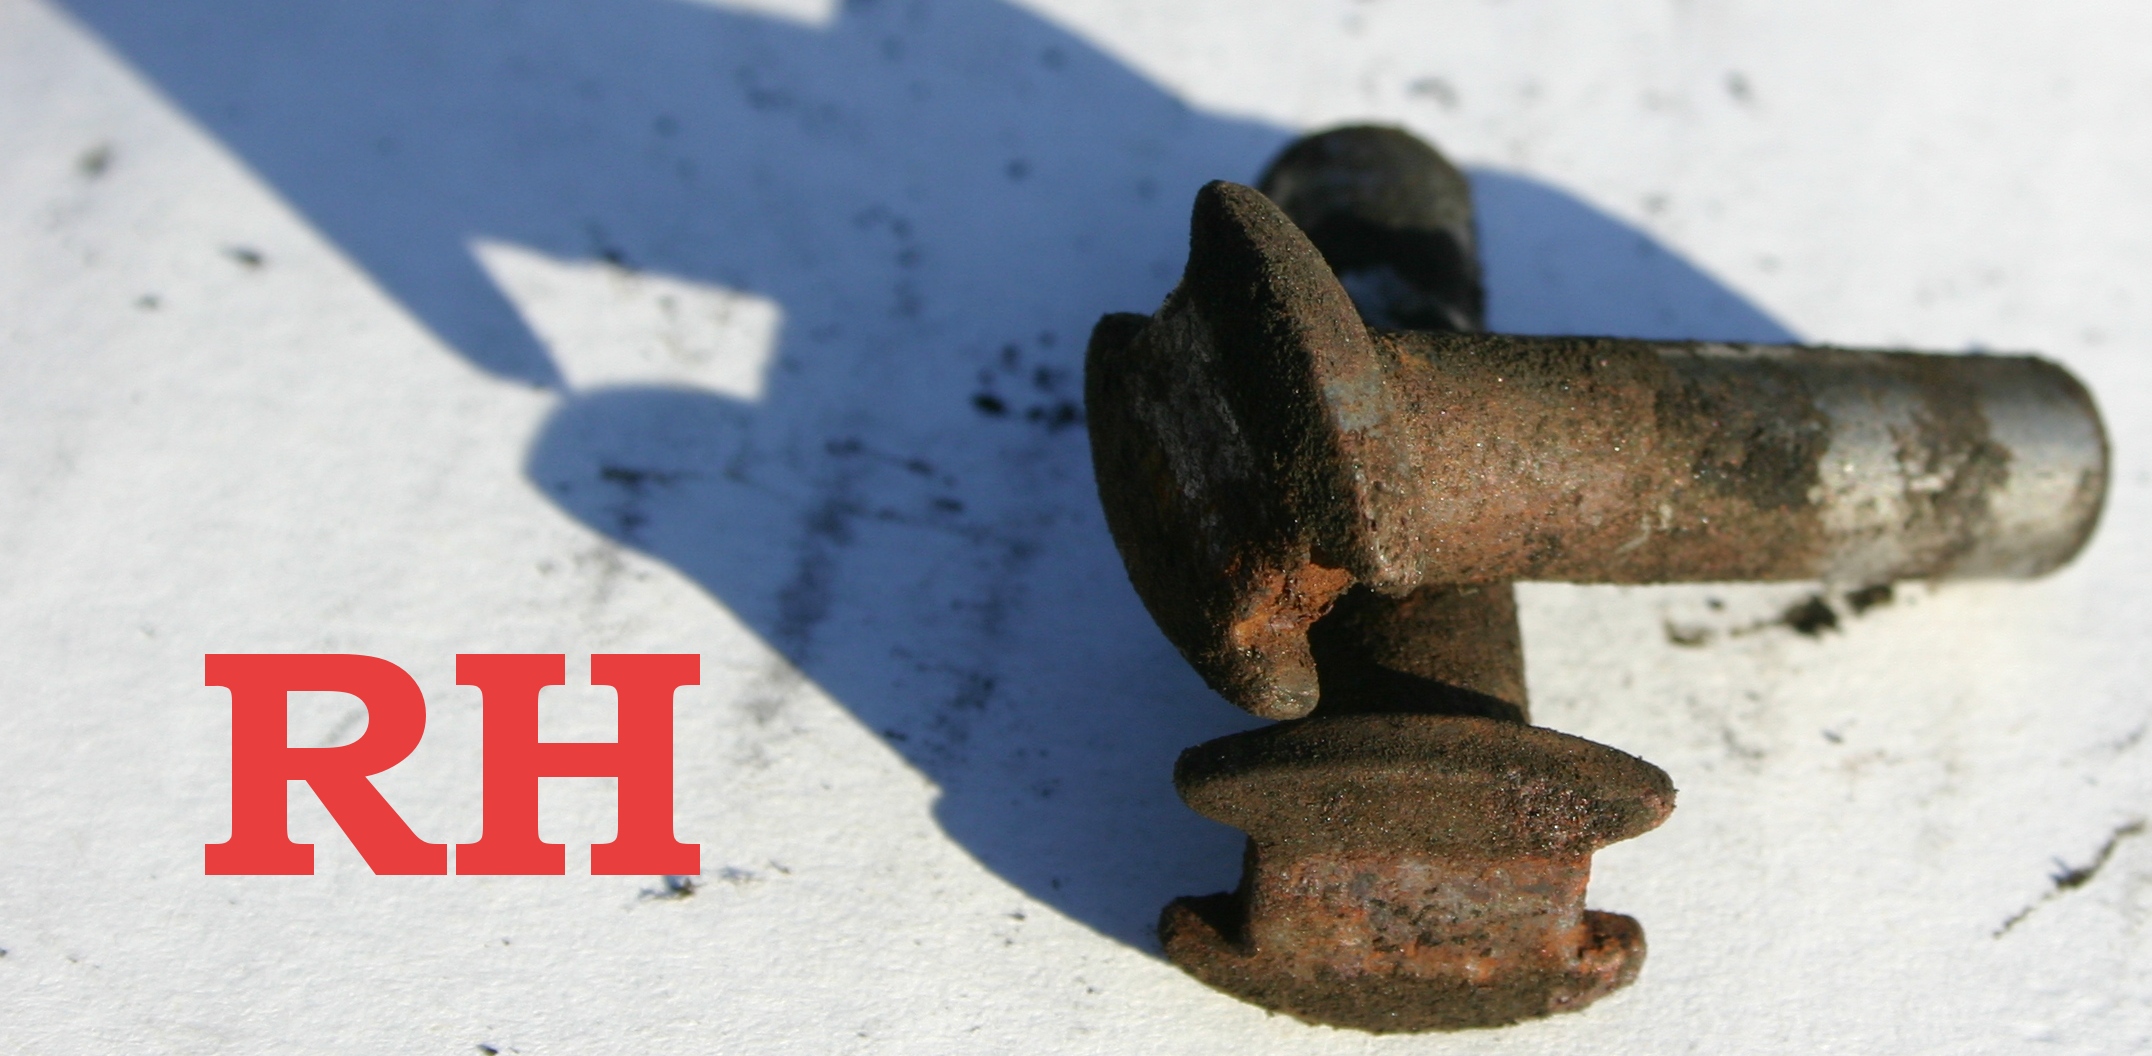
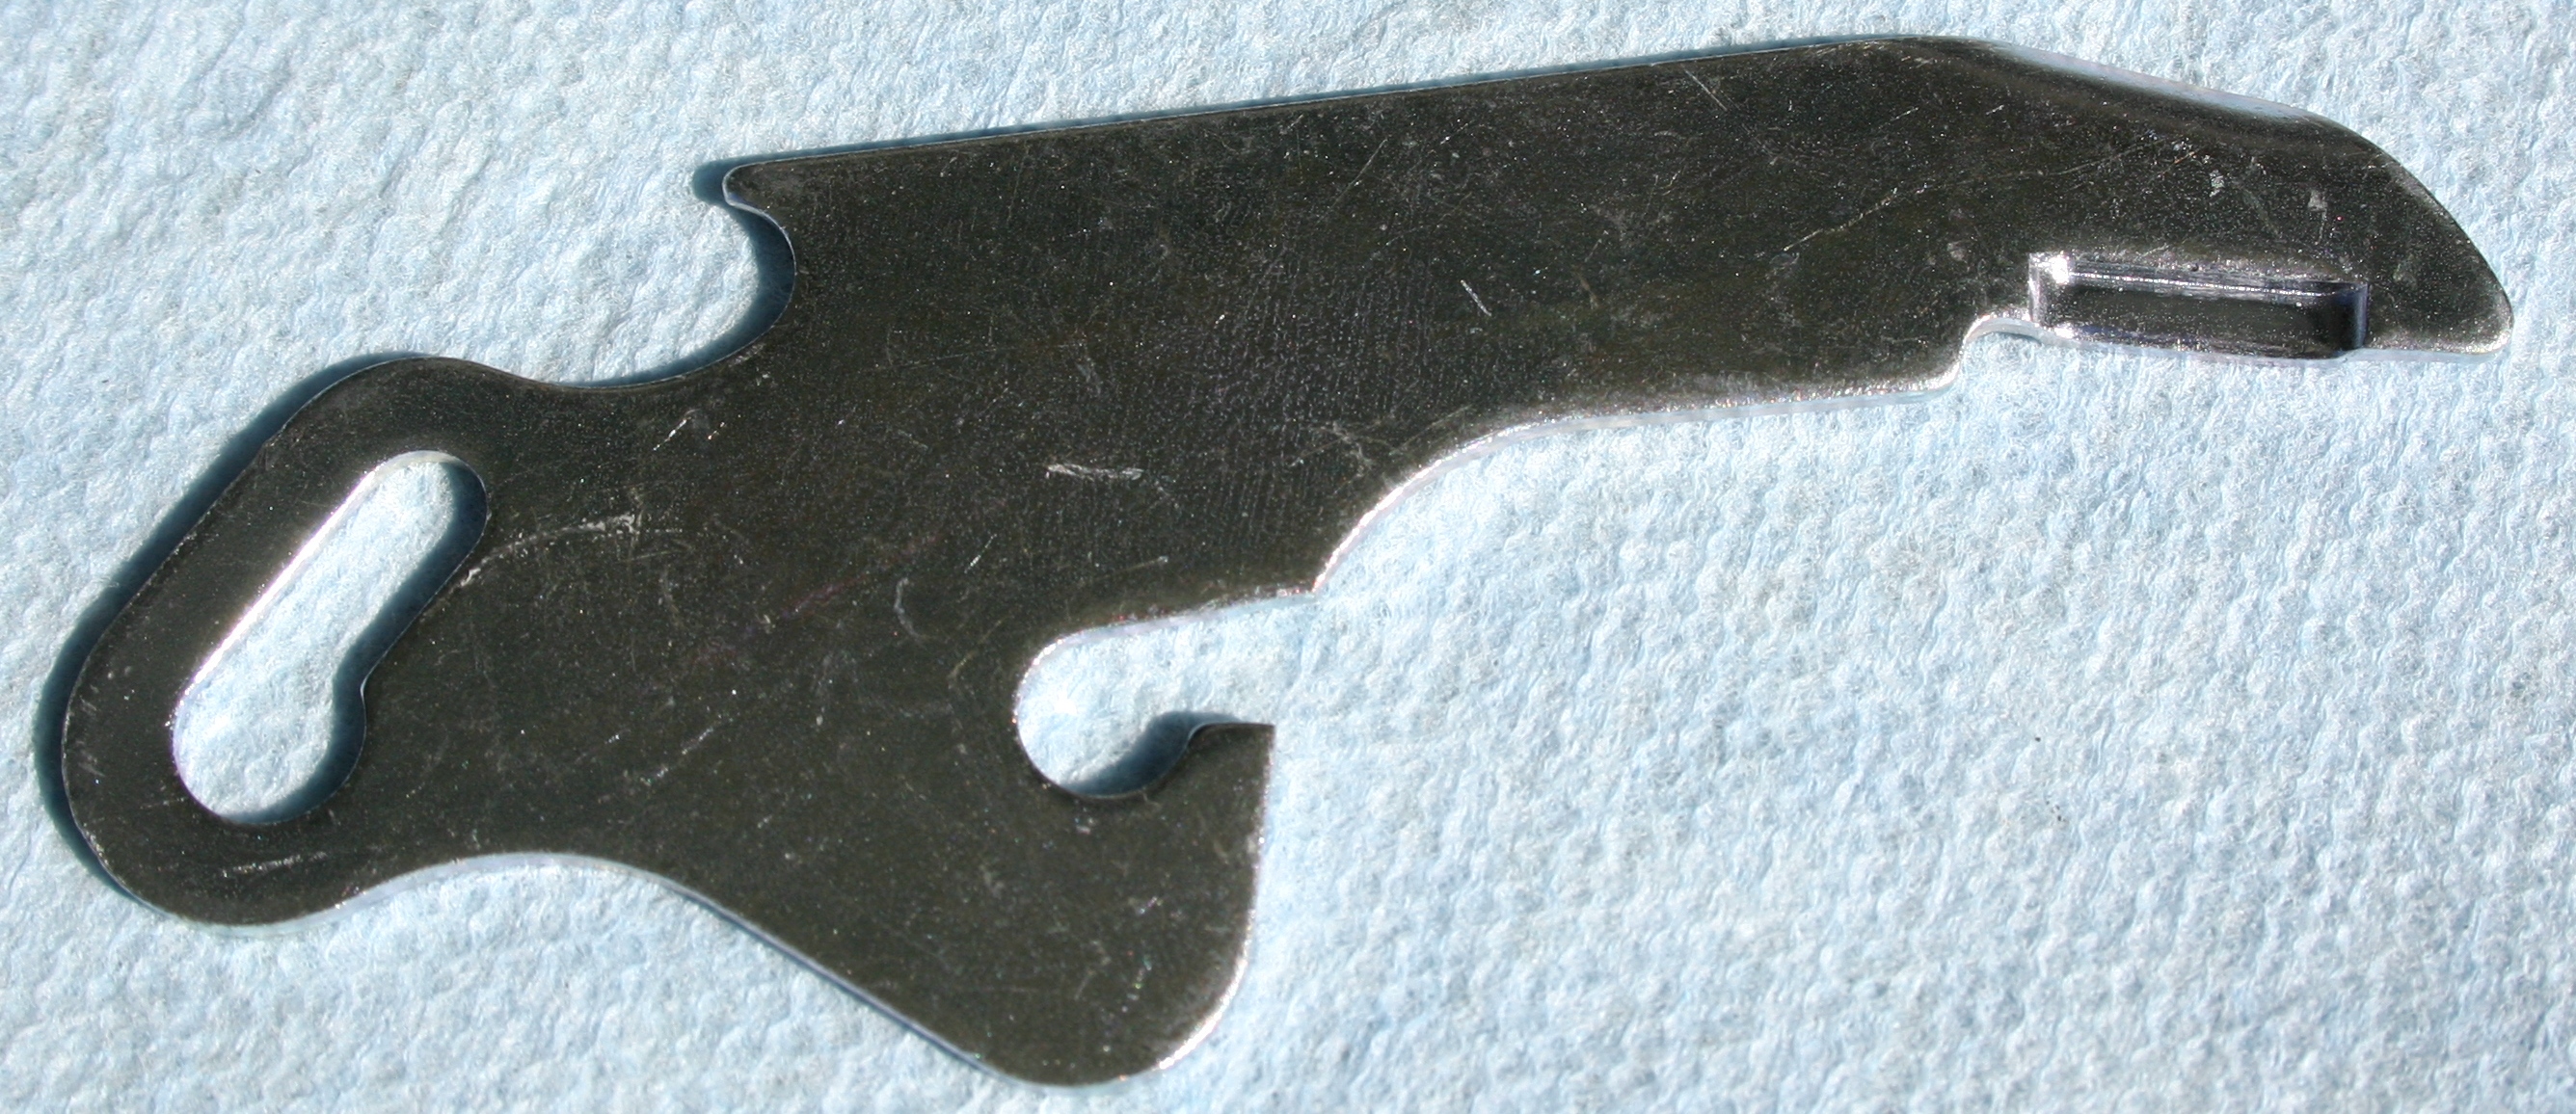
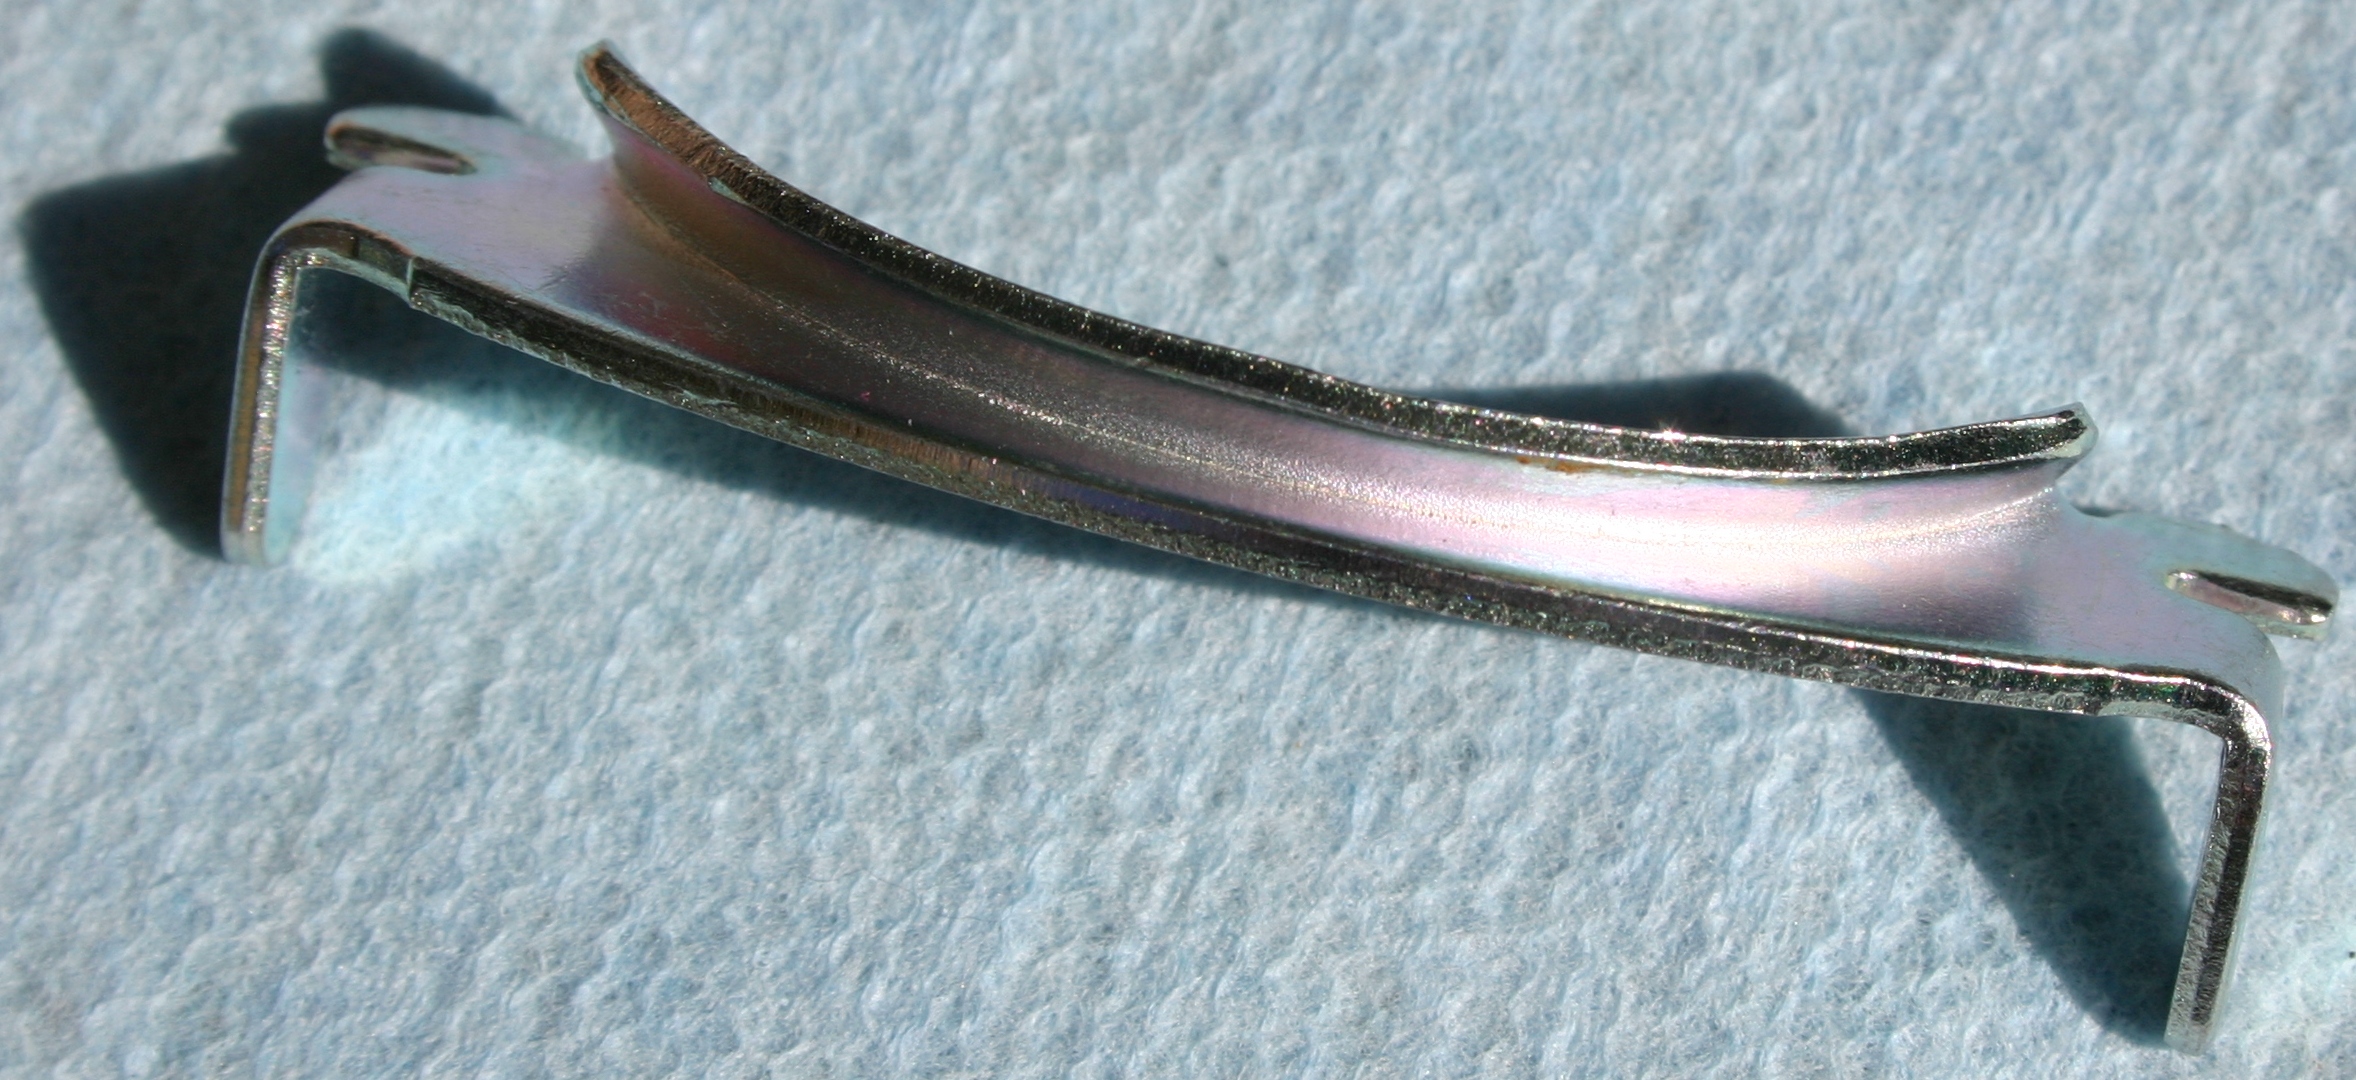
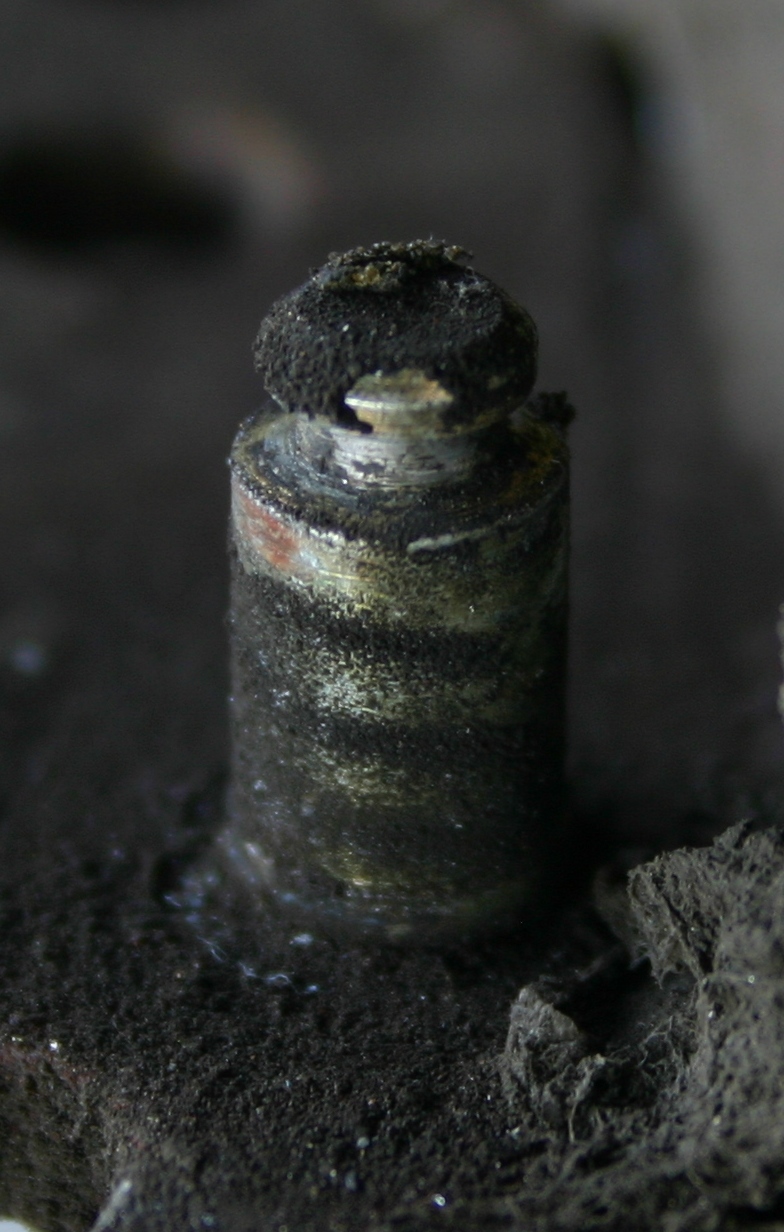
I'm not certain whether this adjusting lever was even the correct part in the first place, but one thing's for sure--it's toast now! You can see that a significant portion of it has been ground away. It's also bent up at its fulcrum.

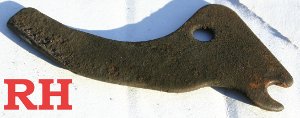


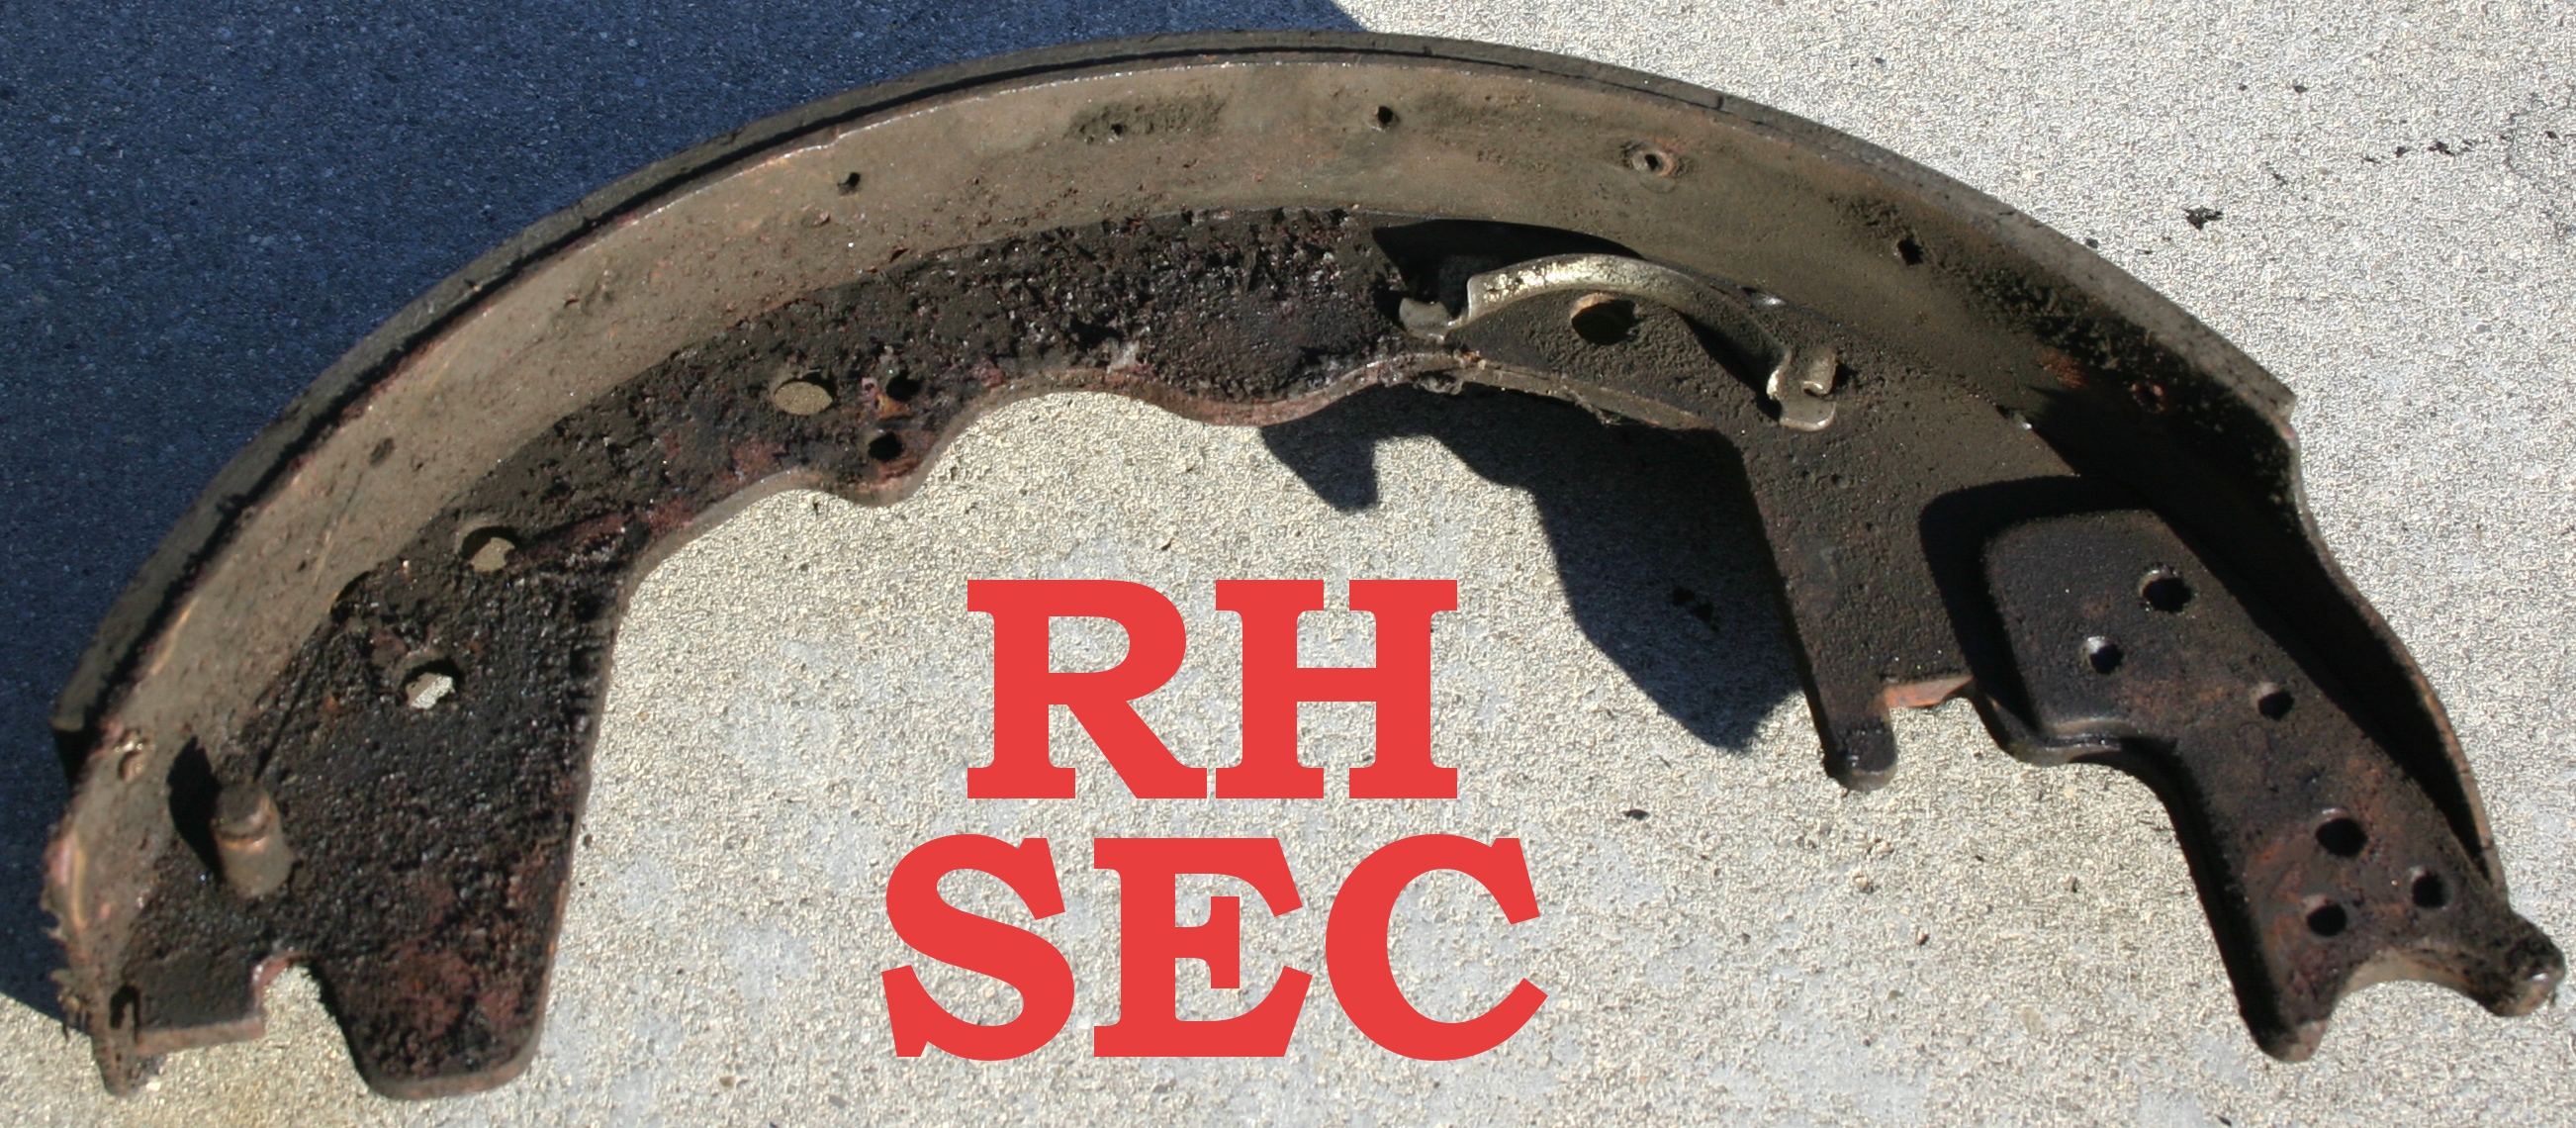
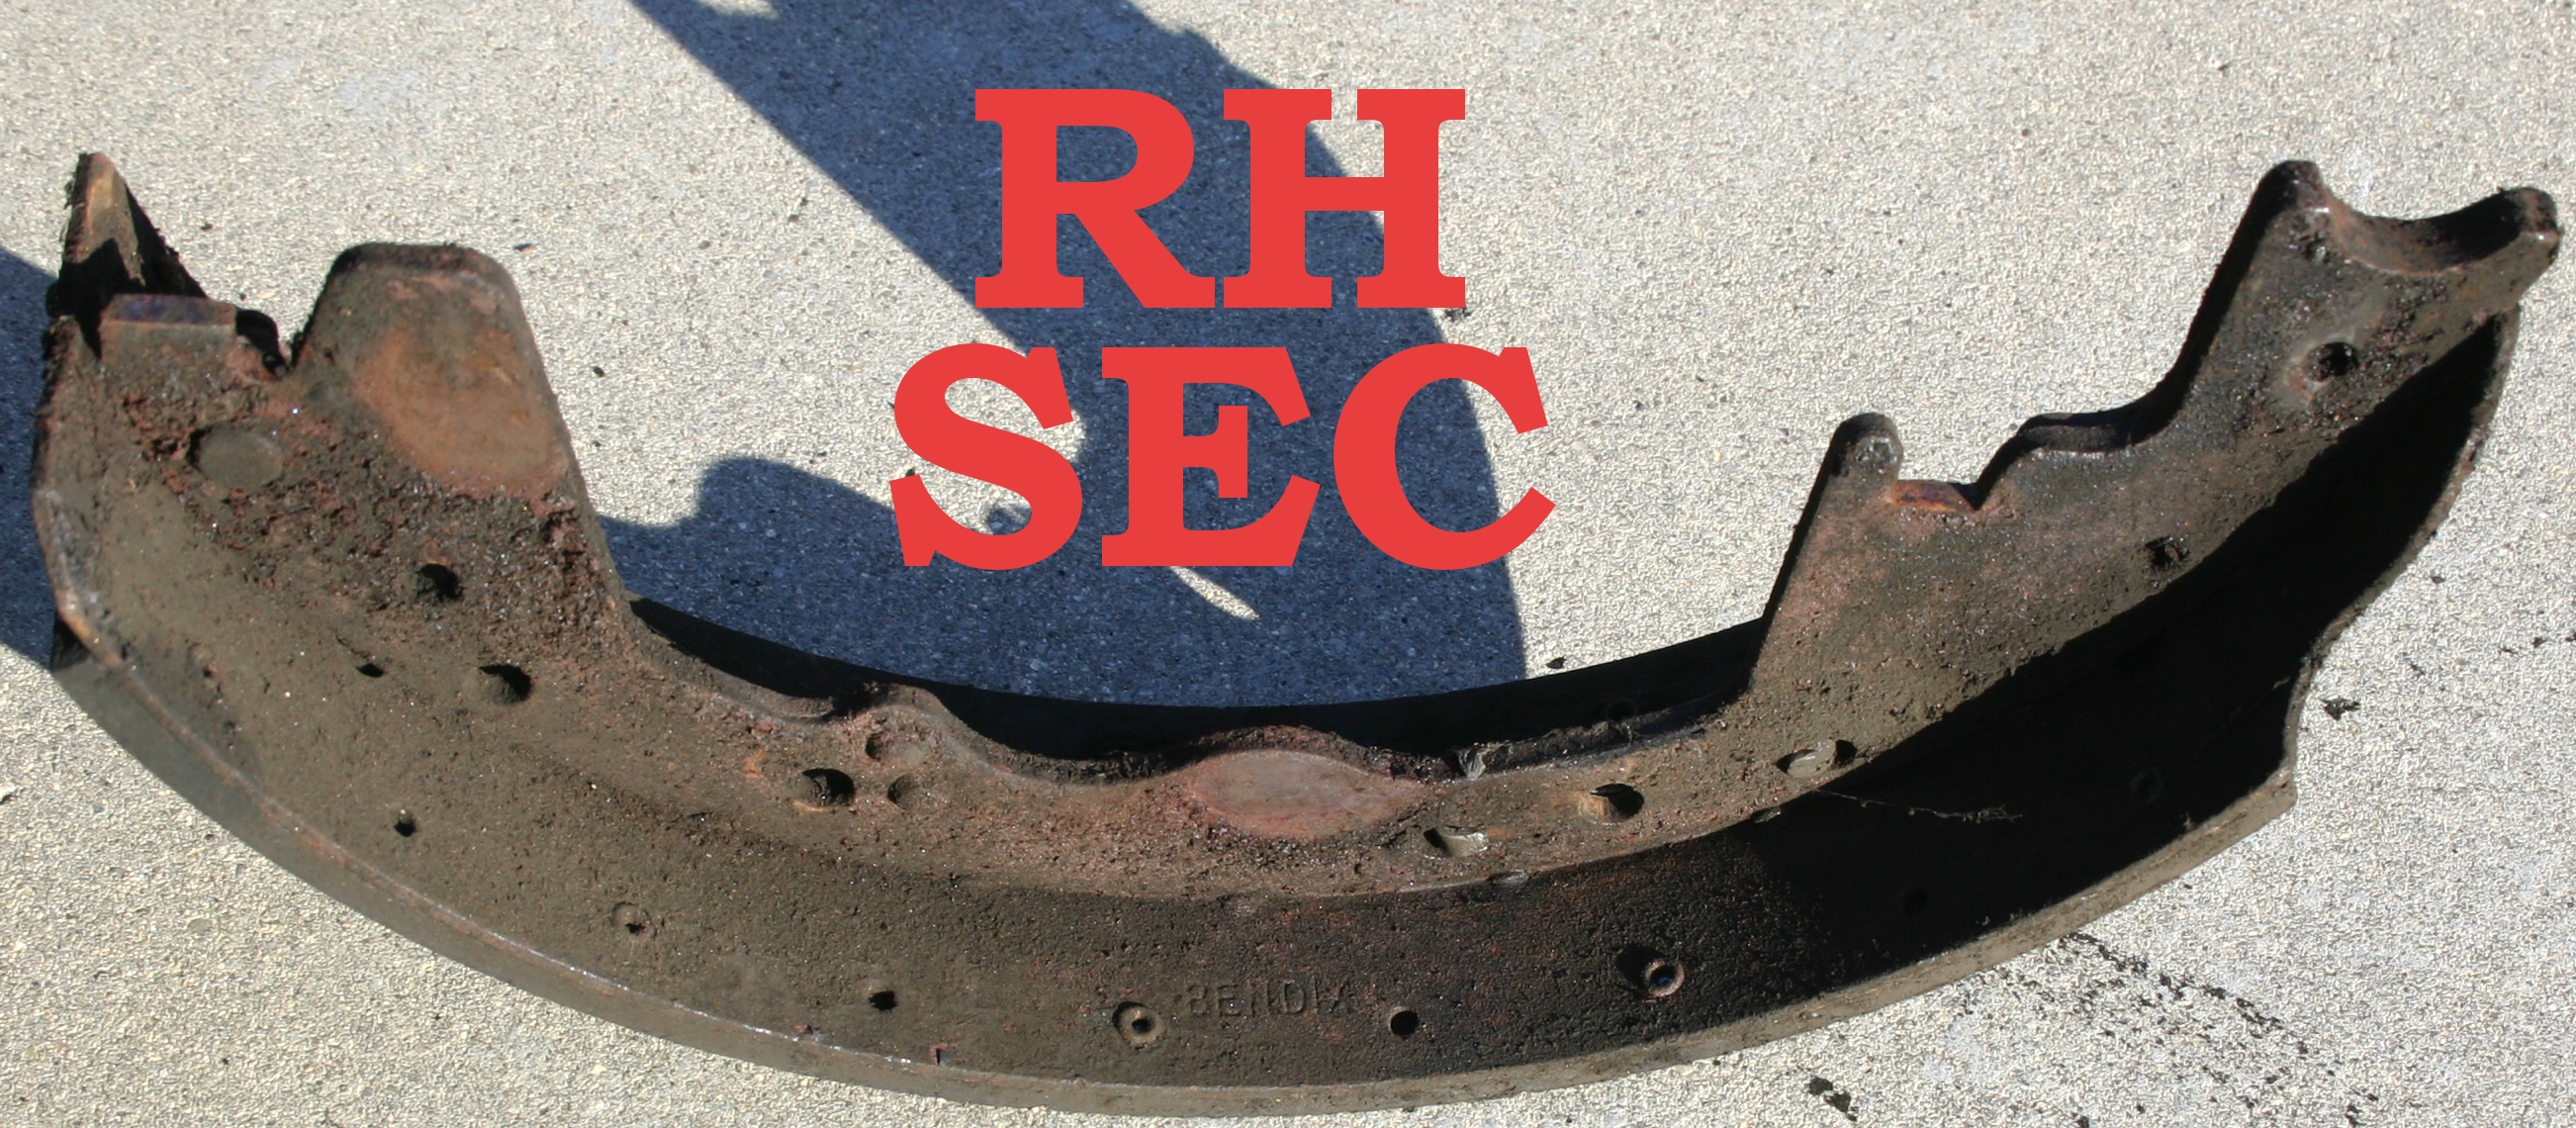
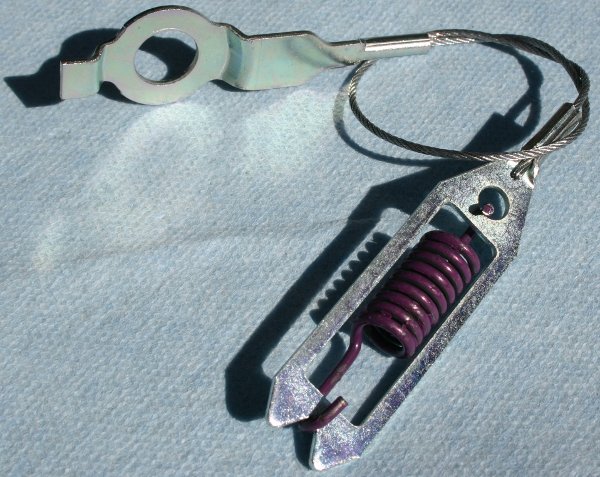
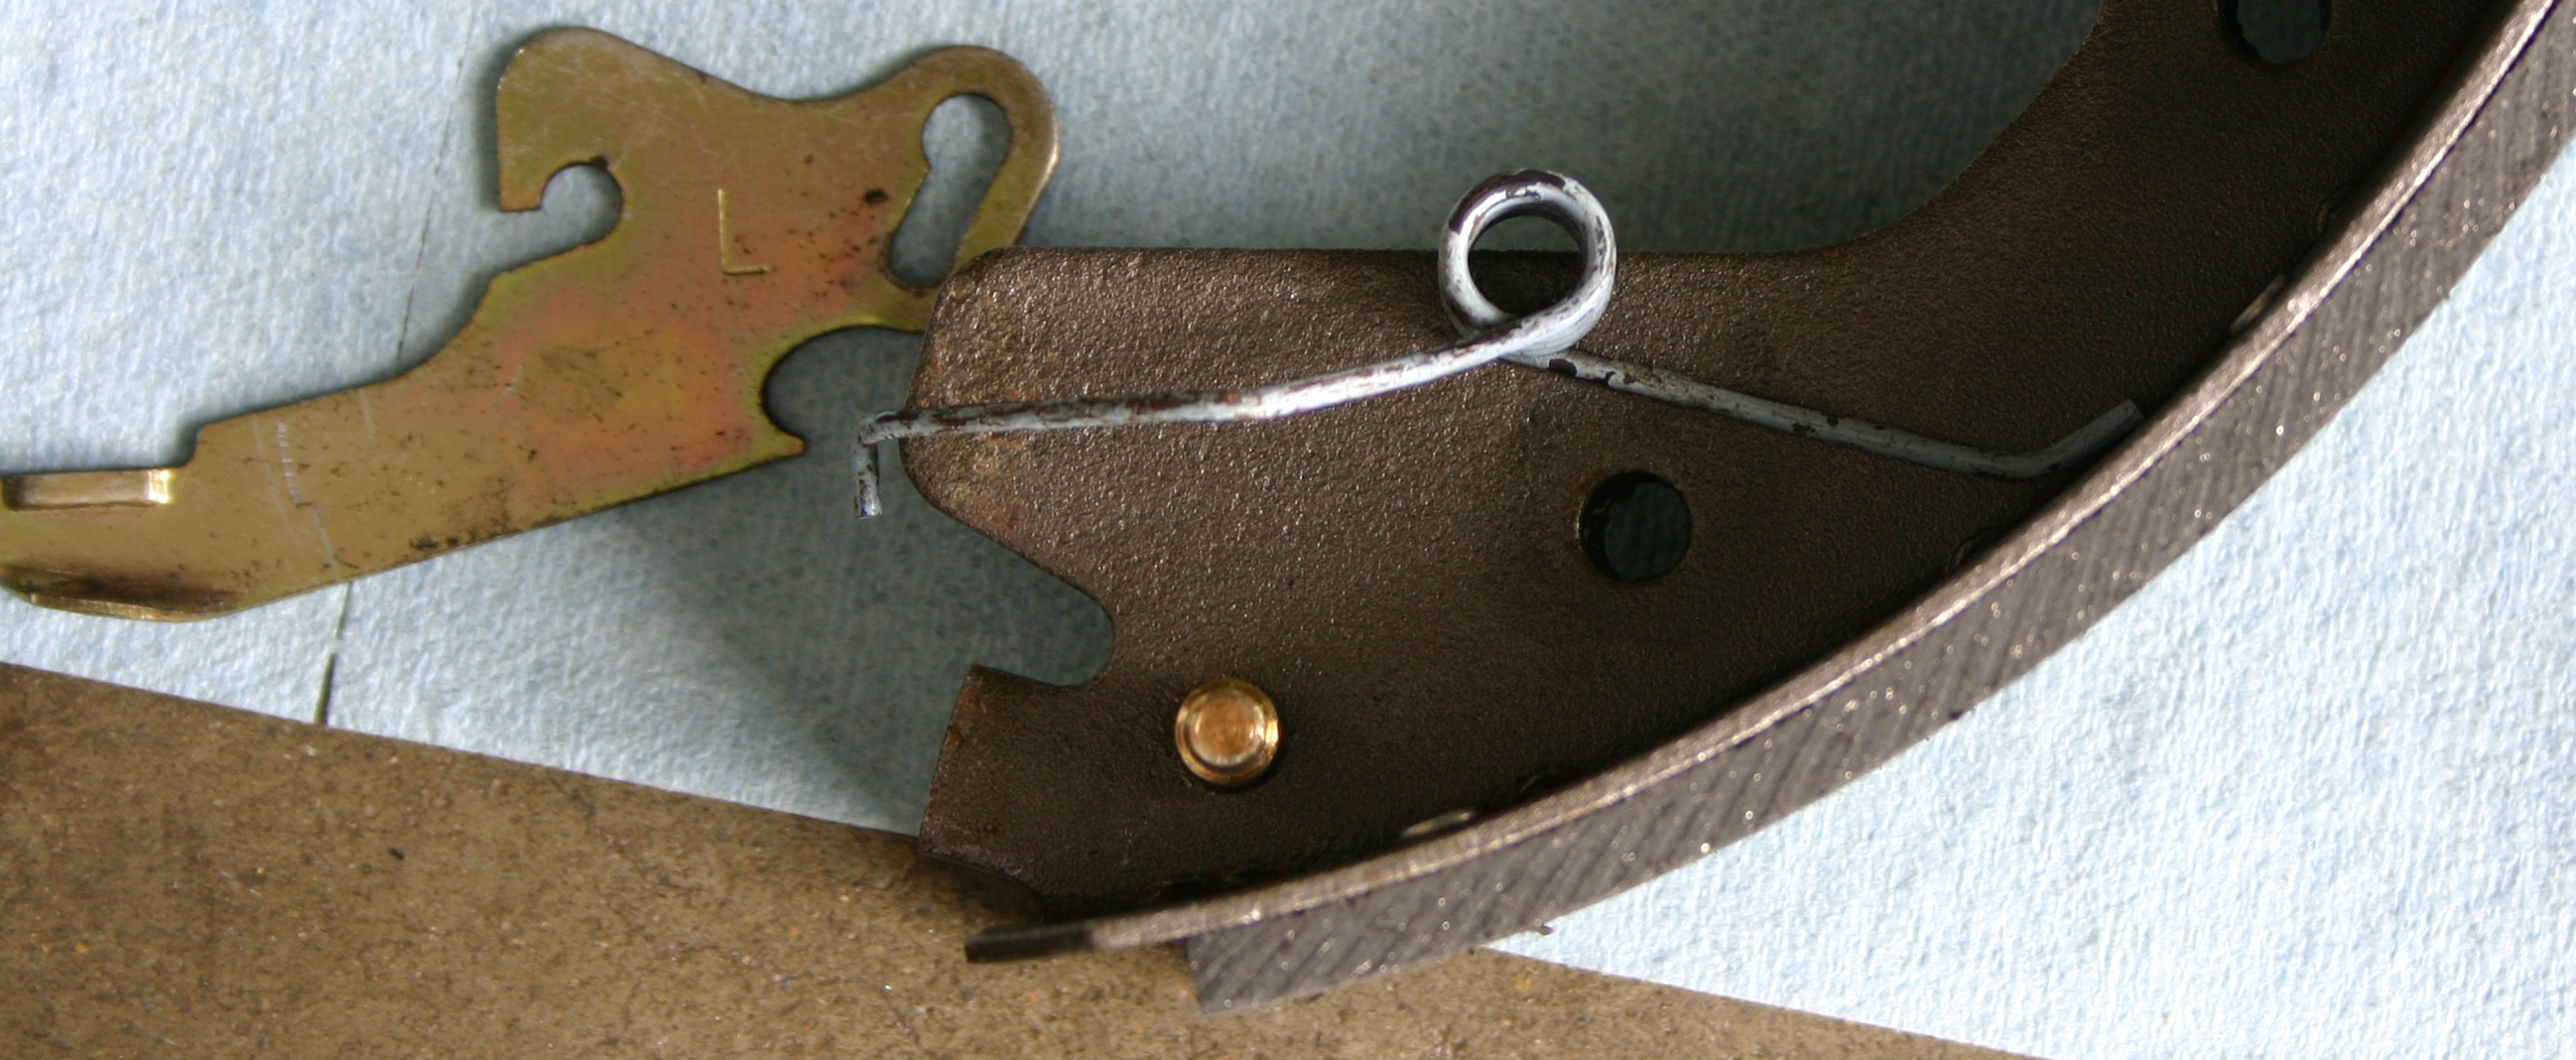
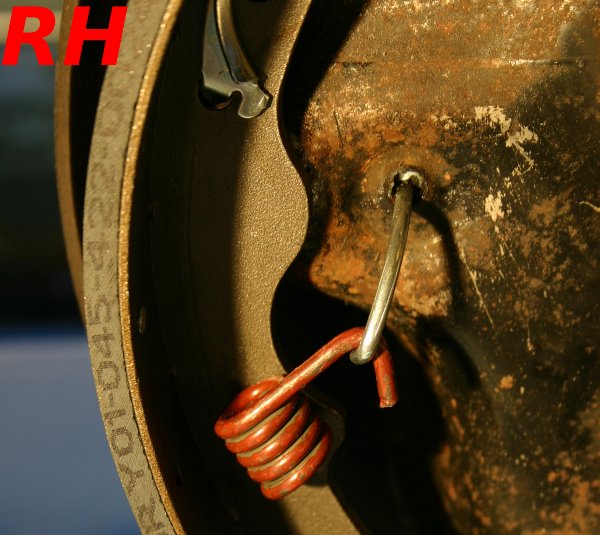
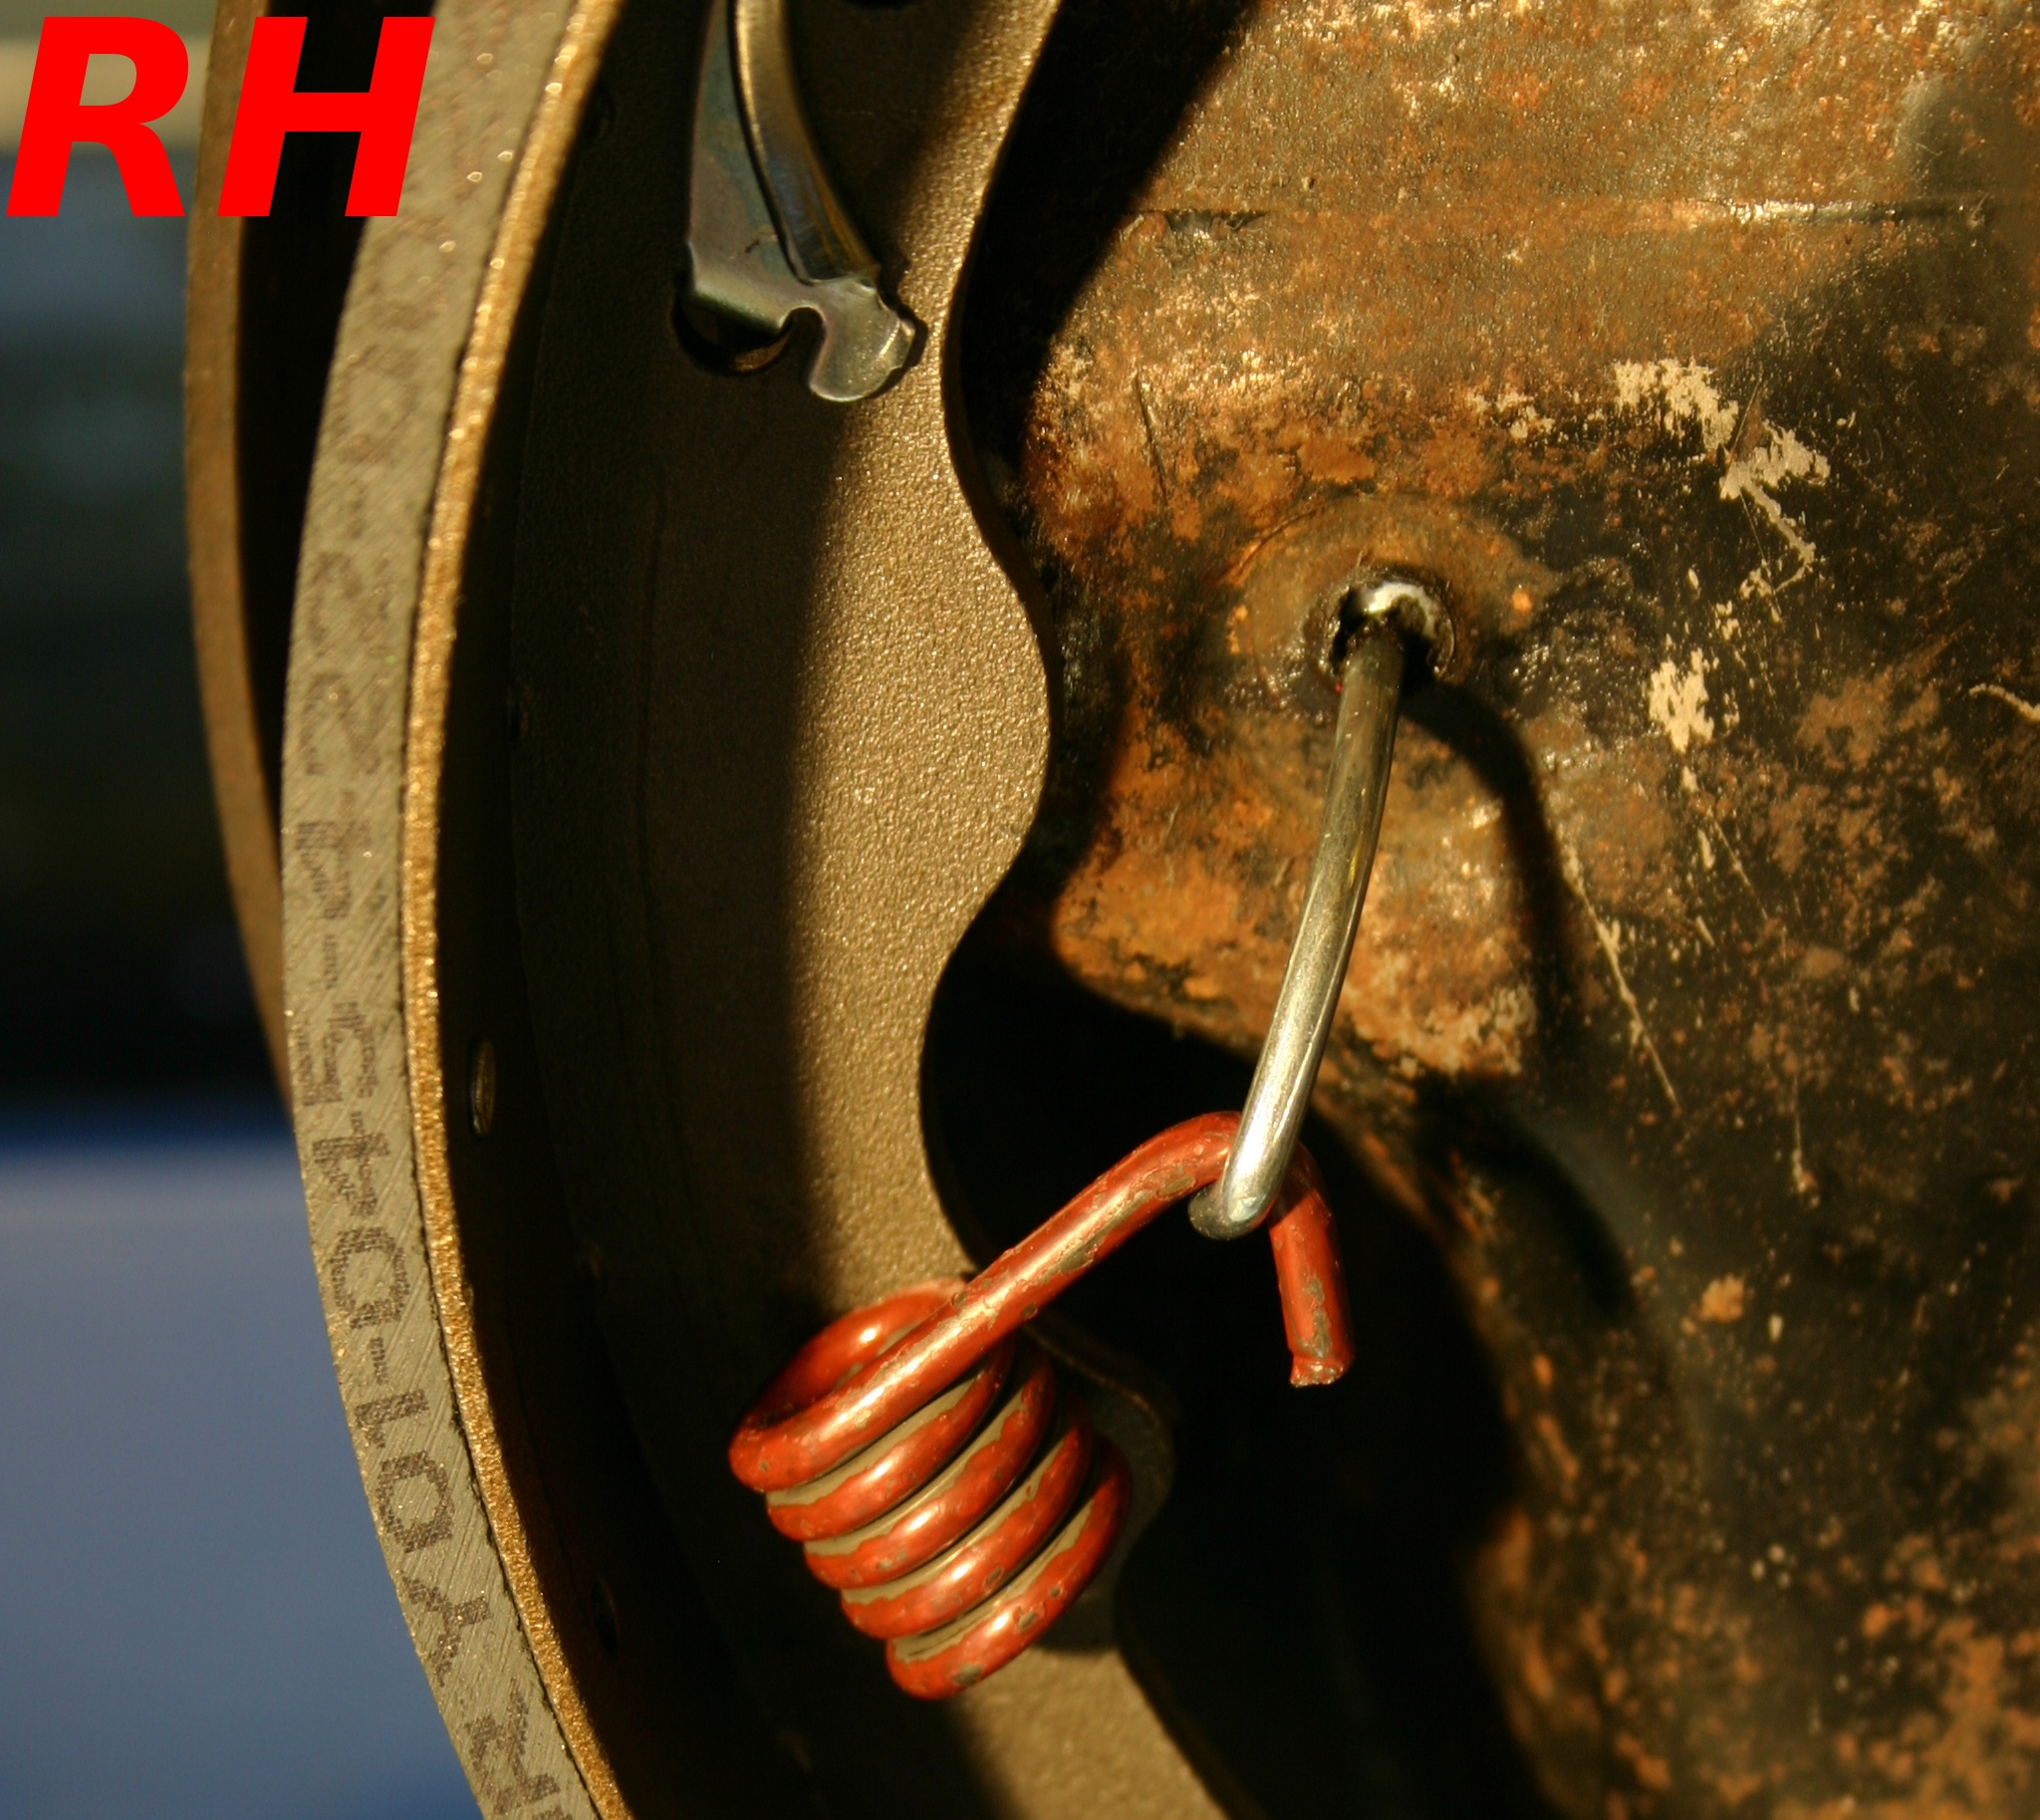
Here's the parking brake arm. You can see that this cable looks much older (more rusty) than the one on the other side--it has seen the last of its days in its current incarnation. You can also see that its over-travel spring housing has been artistically updated by an abusive relationship with the drum.

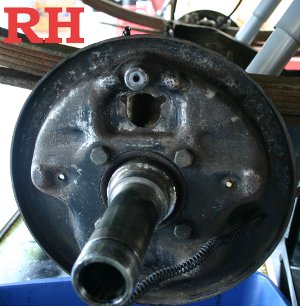
Then the backing plate got a bath in de-greaser!

I'm now considering pulling both backing plates off to clean them up and paint them, yet I don't want to invite too many more complications. For one, I believe there are seals behind them that I'll want to replace, and I don't have the seals. And for two, this parking brake cable clip looks rather permanent! I remember having to try super hard years ago to remove one of these clips, on another truck.
This Evening's Questions:
Robroy
Okay, thanks!speed bump wrote:You will want to use permatex.
Should the Permatex be applied to the bolt threads? Or will the ambient Permatex somehow retain the bolts?speed bump wrote:I can't think of a reason why you would need thread locker, the permetex will hold the bolts in place nicely.
Today's Updates:
Today's weather was perfect yet again, so I invested a few hours! Here's a photo that I took around sun-down.

Here's how the differential cover looked after around 24 hours (the optimum time to top-coat, according to the Rust Encapsulator directions); you can see that it lost most of its gloss. I hit it with four thin coats of the same yellow paint I used on the wheel cylinders, spaced ten minutes apart (as directed). For being a yellow, the coverage of this paint is surprisingly good; it's rather opaque! Also shown is the timer I use to apply the coats at ideal intervals.


While waiting between coats I decided to pull the right-hand side apart. As is nearly always the case, y'all can click on any of these to see large, high definition versions. Since I already photo-documented the tear-down of the left-hand side, I don't want to make y'all too bored with huge photos of the right-hand side! Hence, I scaled most of them down more aggressively than before.
First I removed the tiny 7/16" pinch-nut that holds the parking brake lever in to the backing plate, and pulled the lever off (right). On the left is shown the assembly before I began today.
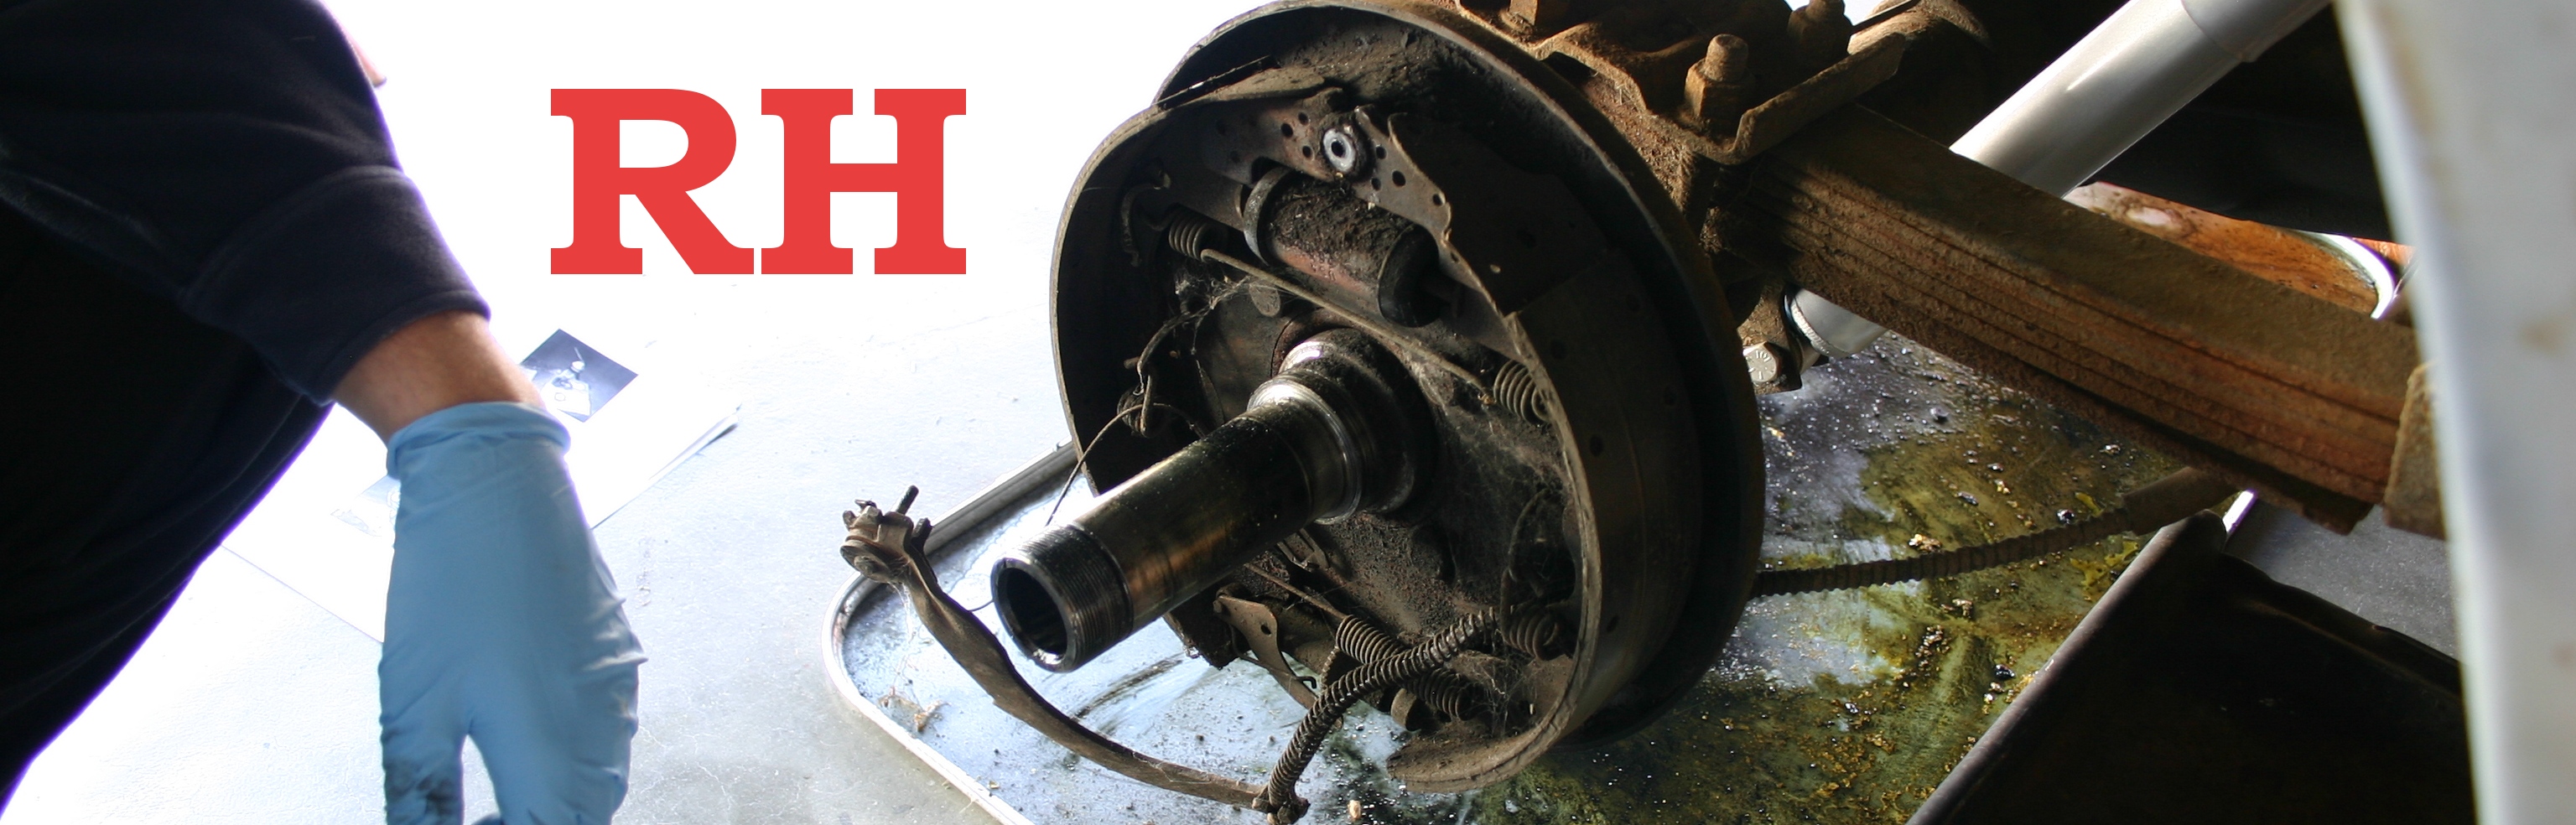
Then I pulled the brake shoe hold-down springs and nails off (left); like before, the shoes popped out like elephant ears (right).


Here's the shoe assembly yanked off.
I took the parts outside in the sunlight to get quality photos of each of them, just for the satisfaction of potential curiosity.

Here's the crusty wheel cylinder; I'm glad to have already prepared its replacement.

The teeth on the right-hand adjuster screw look a little less pretty than the left-hand side--I have a hunch that this part is much older. I'll go ahead and replace it with a complete, USA-made Carlson kit.


Here's the funny-looking spring that sits under the adjusting lever (left) and the little brake cylinder push-rods (right). I sure would like to replace these little push-rods, but I haven't seen them available so far!

Here's the lower retracting spring (left), and the upper retracting spring (right).


I'm not certain whether this adjusting lever was even the correct part in the first place, but one thing's for sure--it's toast now! You can see that a significant portion of it has been ground away. It's also bent up at its fulcrum.


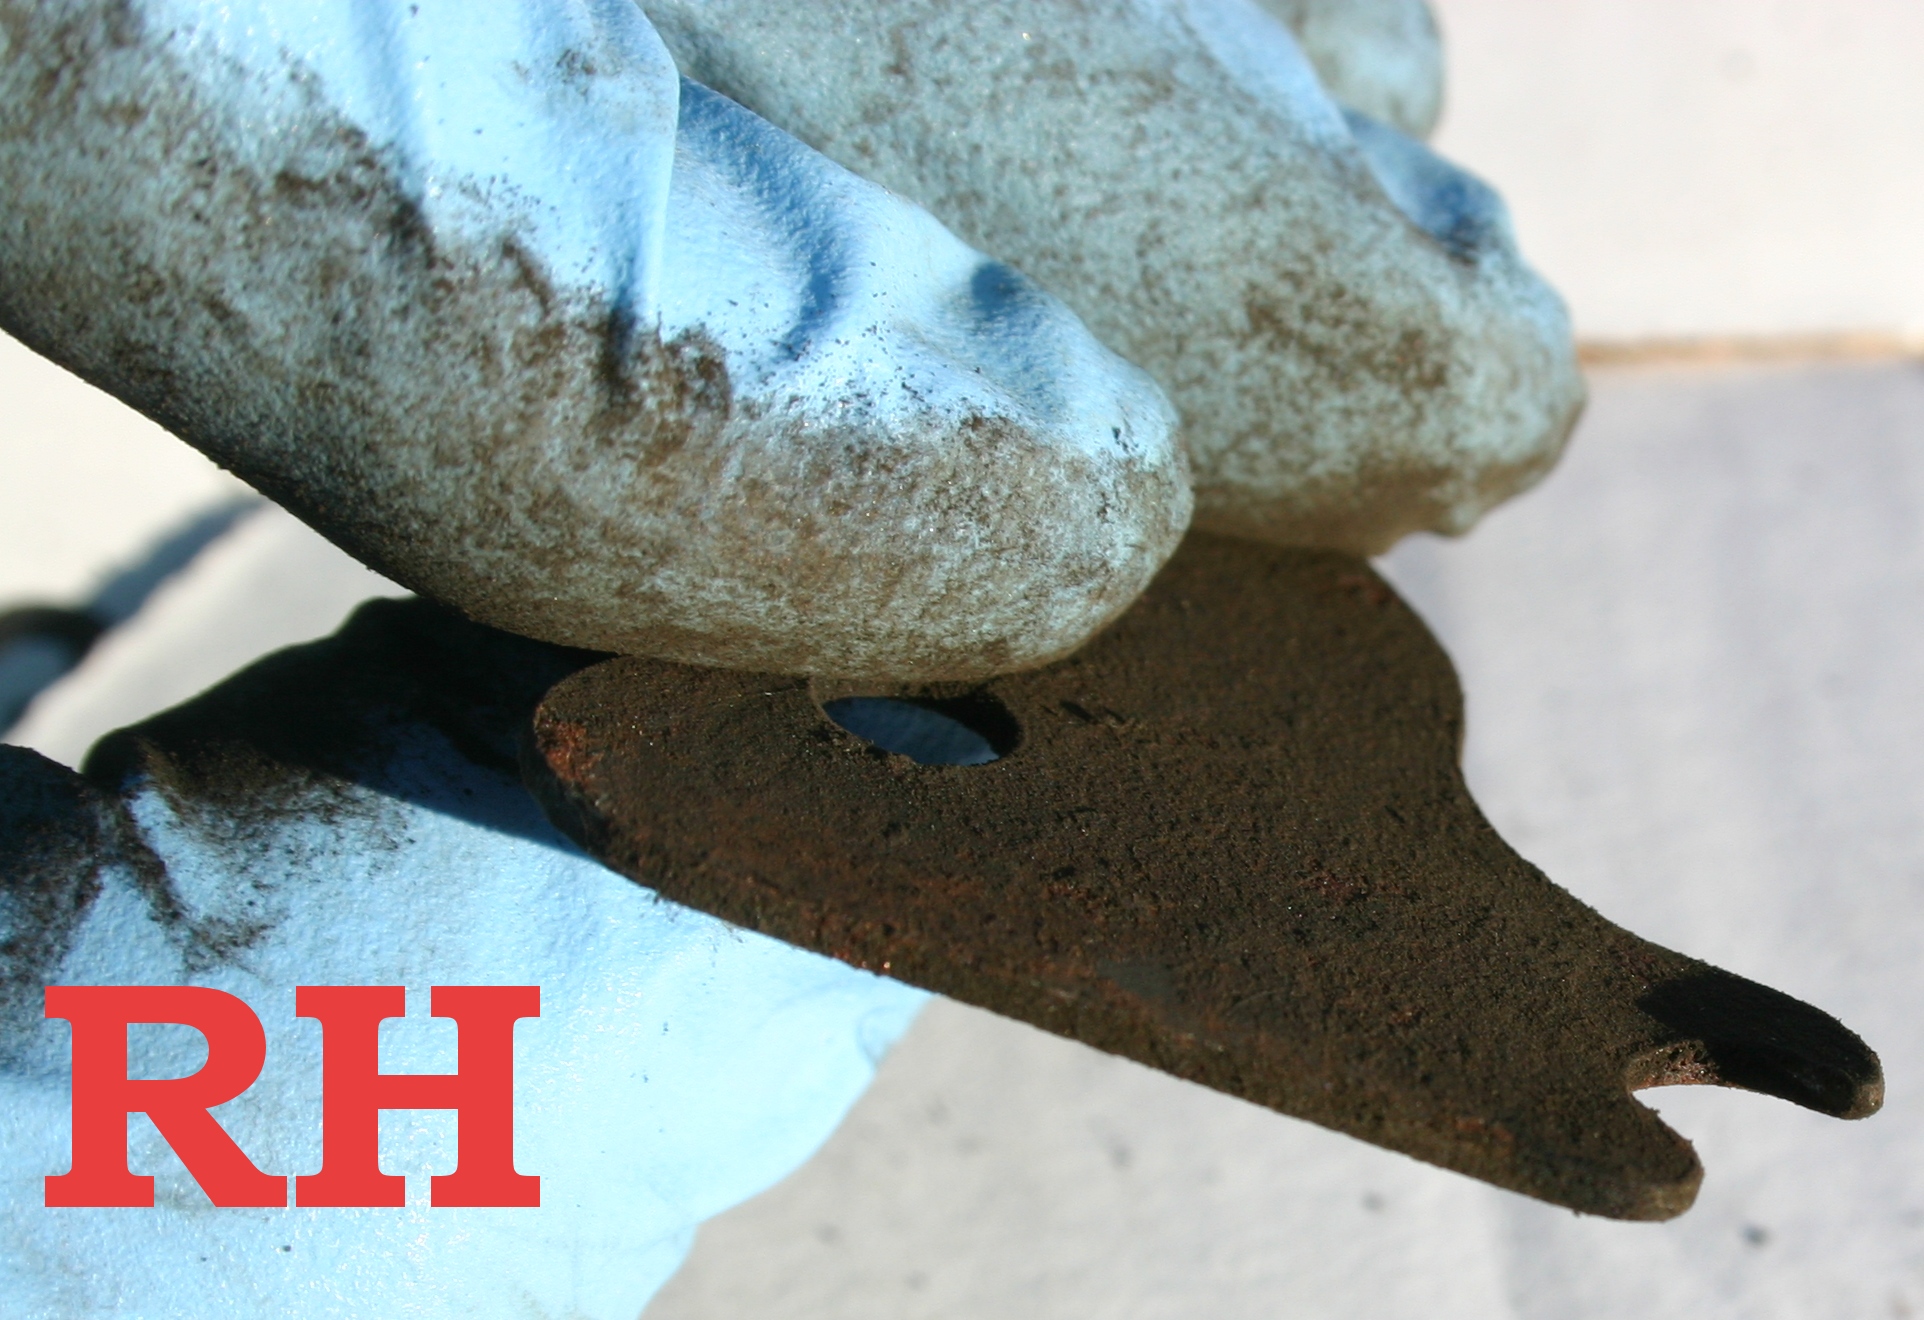
Here's the parking brake arm. You can see that this cable looks much older (more rusty) than the one on the other side--it has seen the last of its days in its current incarnation. You can also see that its over-travel spring housing has been artistically updated by an abusive relationship with the drum.
Then the backing plate got a bath in de-greaser!


I'm now considering pulling both backing plates off to clean them up and paint them, yet I don't want to invite too many more complications. For one, I believe there are seals behind them that I'll want to replace, and I don't have the seals. And for two, this parking brake cable clip looks rather permanent! I remember having to try super hard years ago to remove one of these clips, on another truck.
This Evening's Questions:
- Is there a special method for removing that heavy-duty parking brake cable clip? Or does it simply need to be squished down and forced out?
- Do those clips tend to break during removal? I'm not super excited about the prospect of replacing the parking brake cable(s) after ruining one or more of these clips trying to get it apart.
- Does anybody happen to know of a source for new wheel cylinder push-rods like these?
Robroy
-
70_F100

- Moderator

- Posts: 2999
- Joined: Mon Oct 22, 2007 11:23 am
- Location: North Carolina, Kernersville
Re: 1972 F250 12"x2.5" Bendix rear drum brake rebuild: advice?
Robroy, I would forget the gasket and just use a good bead of "The Right Stuff". You'll get a more positive seal and less chance for leaks. That's what all of the OEM's have been doing for MANY years.
As for the clips, use a pair of pliers and carefully squeeze the retaining tabs as you pull the cable from the back side of the backing plate. You shouldn't have any problems. Spray them down good with brake cleaner first, because in the last photo, it looks like you may have a lot of crud that might prohibit you from collapsing them enough.
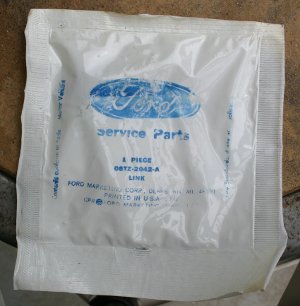
I found new "links" (Ford terminology) at Green Ford Sales. The part number is C6TZ 2042-A, Link-Brake Cylinder to Shoe. The MPC says they should be 1-1/2" long, and they fit all trucks 66-up with 12" x 2-1/2" and 12" x 3" brakes. They show to have six in stock, and the inventory was updated on 05/21/10. Dennis Carpenter also shows to have a couple in their NOS inventory. A word to the wise, though. Go with Green. I've had to have several items during my transmission swap, and I found that Green sells at or below wholesale, and DC tends to mark up their NOS stuff by about 500-600% . One example is a washer that I got from Green for $5.00 was $50.00 at DC, and that was the case with all of the parts I checked on
  . Green's parts are NOS, just like DC's. Green also ships same-day, while DC has a 48-hour lead time for shipping. Green's contact info is on their website: http://www.greensalescompany.com.
I hope this helps!!
As for the clips, use a pair of pliers and carefully squeeze the retaining tabs as you pull the cable from the back side of the backing plate. You shouldn't have any problems. Spray them down good with brake cleaner first, because in the last photo, it looks like you may have a lot of crud that might prohibit you from collapsing them enough.
I found new "links" (Ford terminology) at Green Ford Sales. The part number is C6TZ 2042-A, Link-Brake Cylinder to Shoe. The MPC says they should be 1-1/2" long, and they fit all trucks 66-up with 12" x 2-1/2" and 12" x 3" brakes. They show to have six in stock, and the inventory was updated on 05/21/10. Dennis Carpenter also shows to have a couple in their NOS inventory. A word to the wise, though. Go with Green. I've had to have several items during my transmission swap, and I found that Green sells at or below wholesale, and DC tends to mark up their NOS stuff by about 500-600%
I hope this helps!!
Wise men talk because they have something to say; fools talk because they have to say something.--Plato
Why is it that there's seldom time to fix it right the first time, but there's always time to fix it right the second time???
That's not an oil leak That's SWEAT from all that HORSEPOWER!!
Why is it that there's seldom time to fix it right the first time, but there's always time to fix it right the second time???
That's not an oil leak
-
Ranchero50

- Moderator
- Posts: 5799
- Joined: Wed Nov 08, 2006 7:02 pm
- Location: Maryland, Hagerstown
- Contact:
Re: 1972 F250 12"x2.5" Bendix rear drum brake rebuild: advice?
Robroy, looks like another fun project. I've never been through a 60 but the E brake cable usually releases by putting a 1/2" closed end 12pt wrench over the sheath to hold the fingers in while you wiggle the cabel out of the hole.
You are going to put a posi unit in right?
Jamie
You are going to put a posi unit in right?
Jamie
'70 F-350 CS Cummins 6BT 10klb truck 64k mile Bahama Blue
Contact me for CNC Dome Lamp Bezels and Ash Tray pulls.
Contact me for CNC Dome Lamp Bezels and Ash Tray pulls.
-
robroy
- 100% FORDified!
- Posts: 3768
- Joined: Sun Jul 06, 2008 4:36 pm
- Location: California, Salinas
Re: 1972 F250 12"x2.5" Bendix rear drum brake rebuild: advice?
Good afternoon 70_F100 and Jamie, thank you both for your marvelous replies!
I also thought using the new gasket wouldn't be a bad idea, since I was guessing that The Right Stuff would make the cover more difficult to remove later on (than the gasket would). Since I'm planning on putting in some kind of limited slip differential, and possibly switching to gears more suited to the highway, making it a little easier to re-open seemed like a good idea.
That said, although the gasket seemed like a good match for the original, it inexplicably reformed itself during installation and may not have complete coverage of the sealing surfaces. I'll show a couple of photos of that in an update section, at the end of this post.
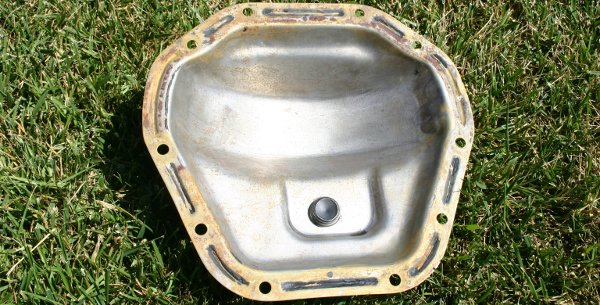
My reason for cracking it open was simply to change the oil, to avoid contaminating my new bearings and races with super ancient stuff. And once I had it open, I found following 70_F100's differential assessment advice highly instructional. Differentials amaze me!
This Afternoon's Update:
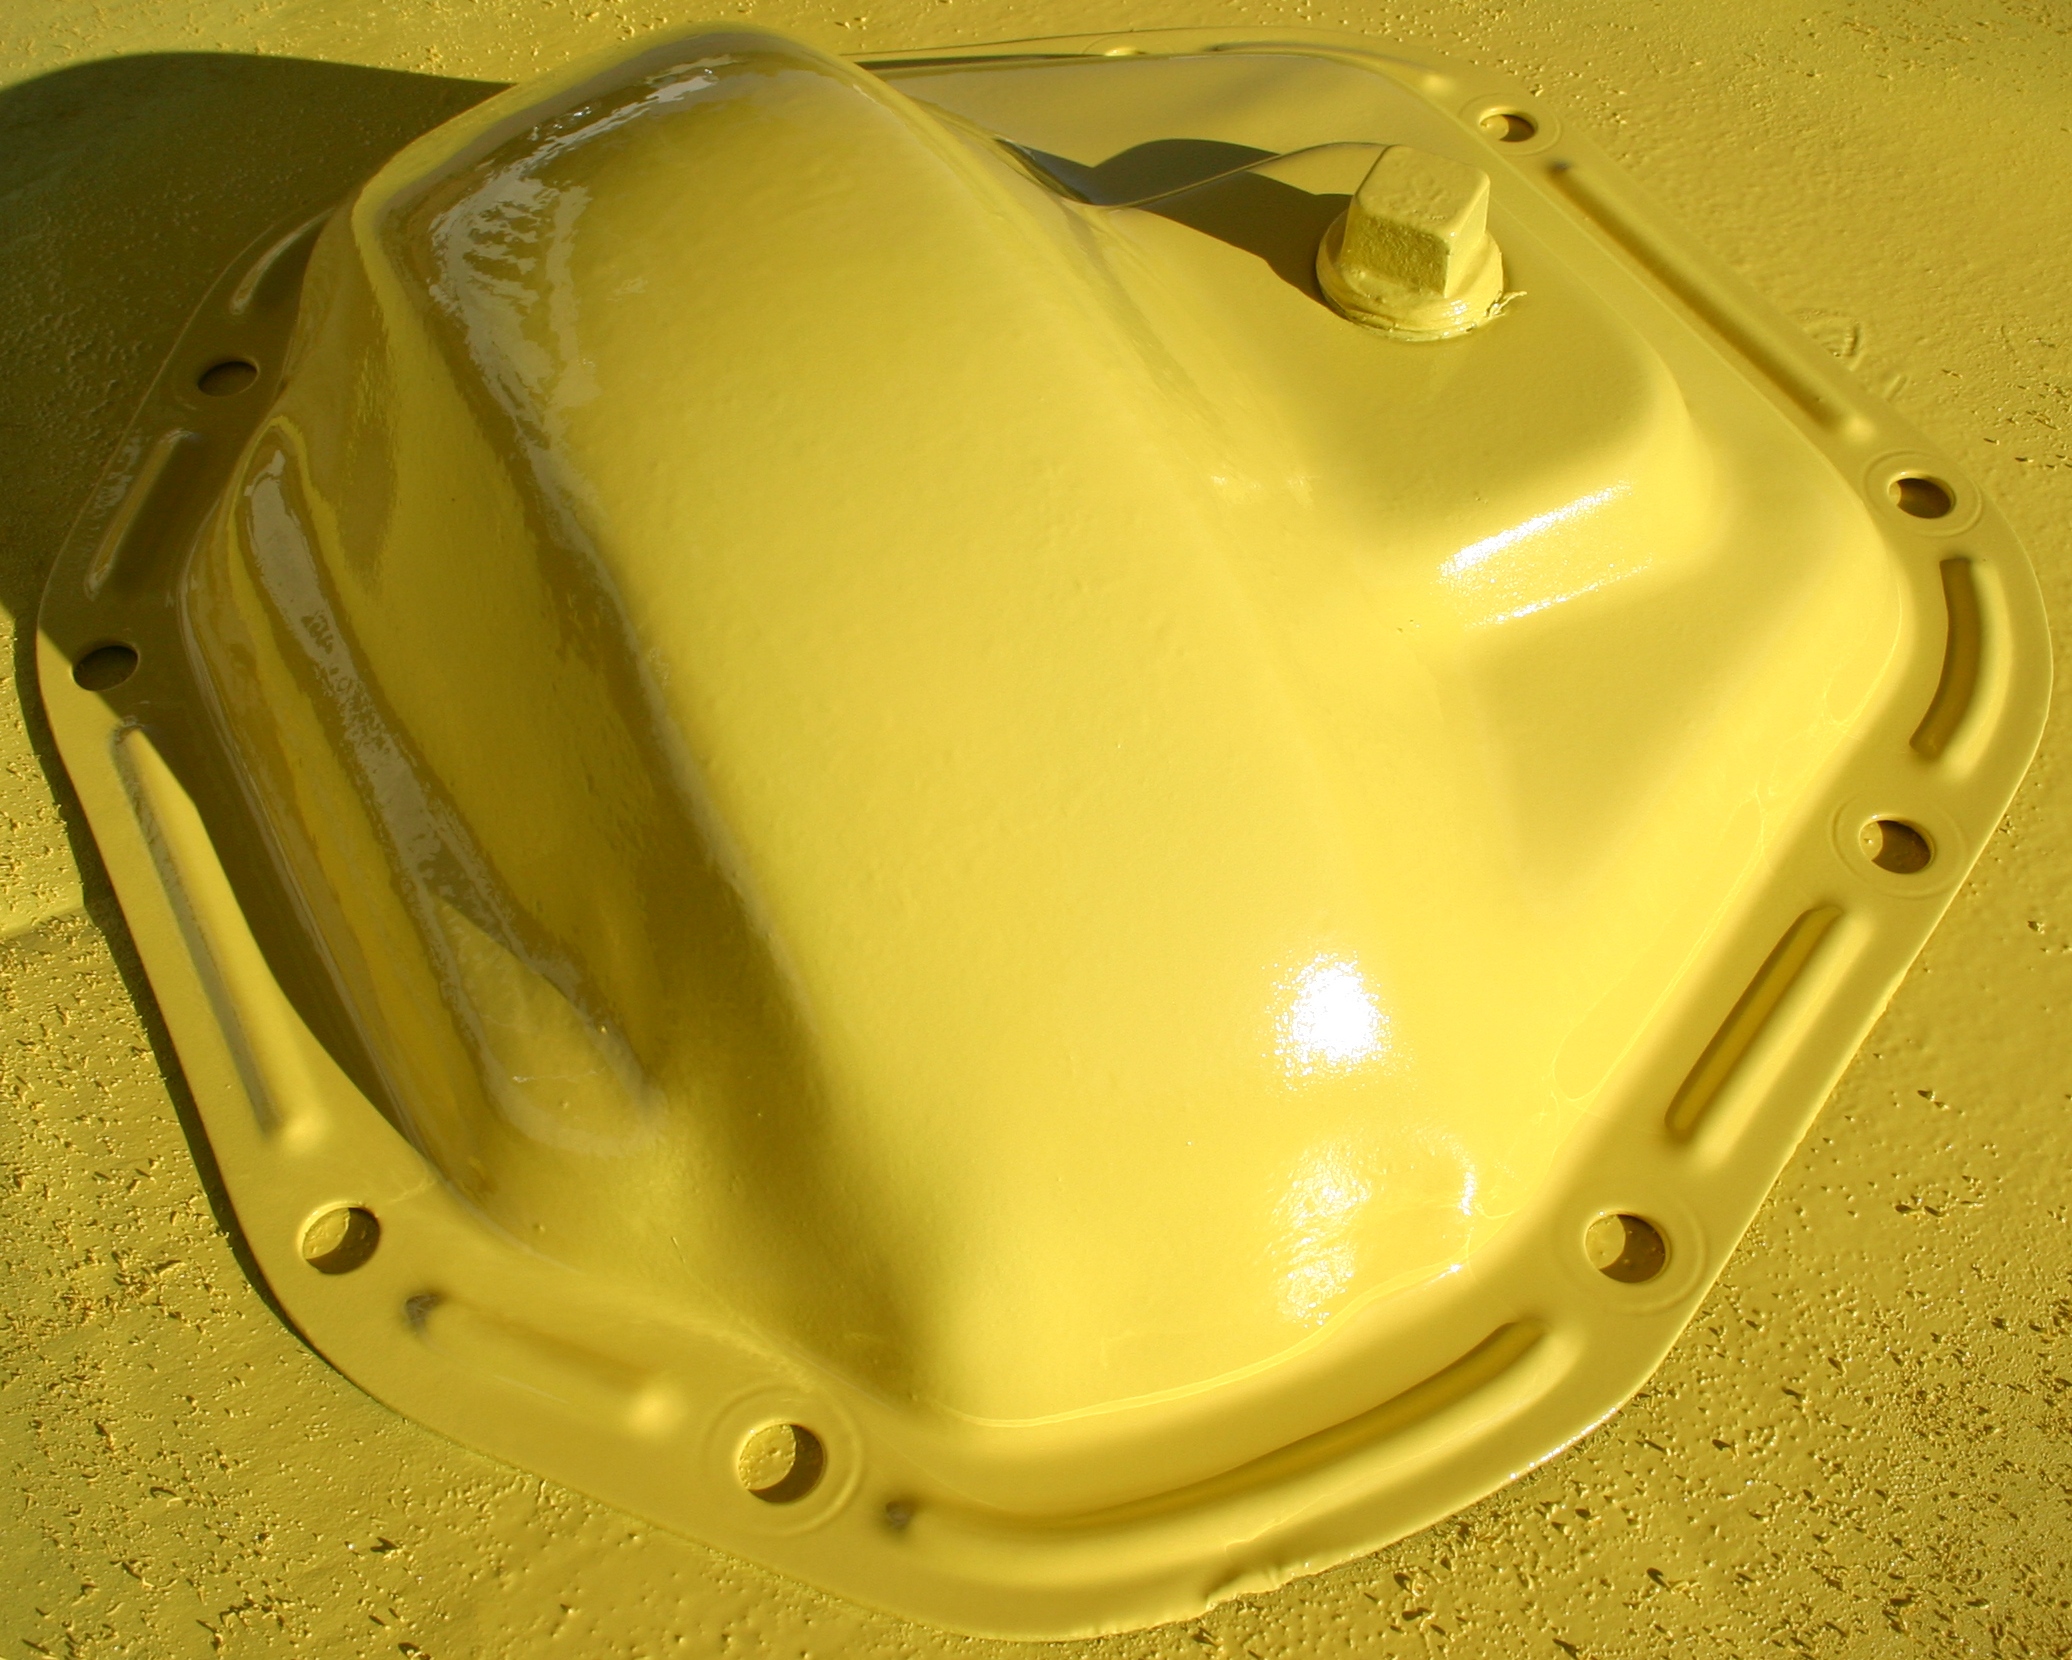
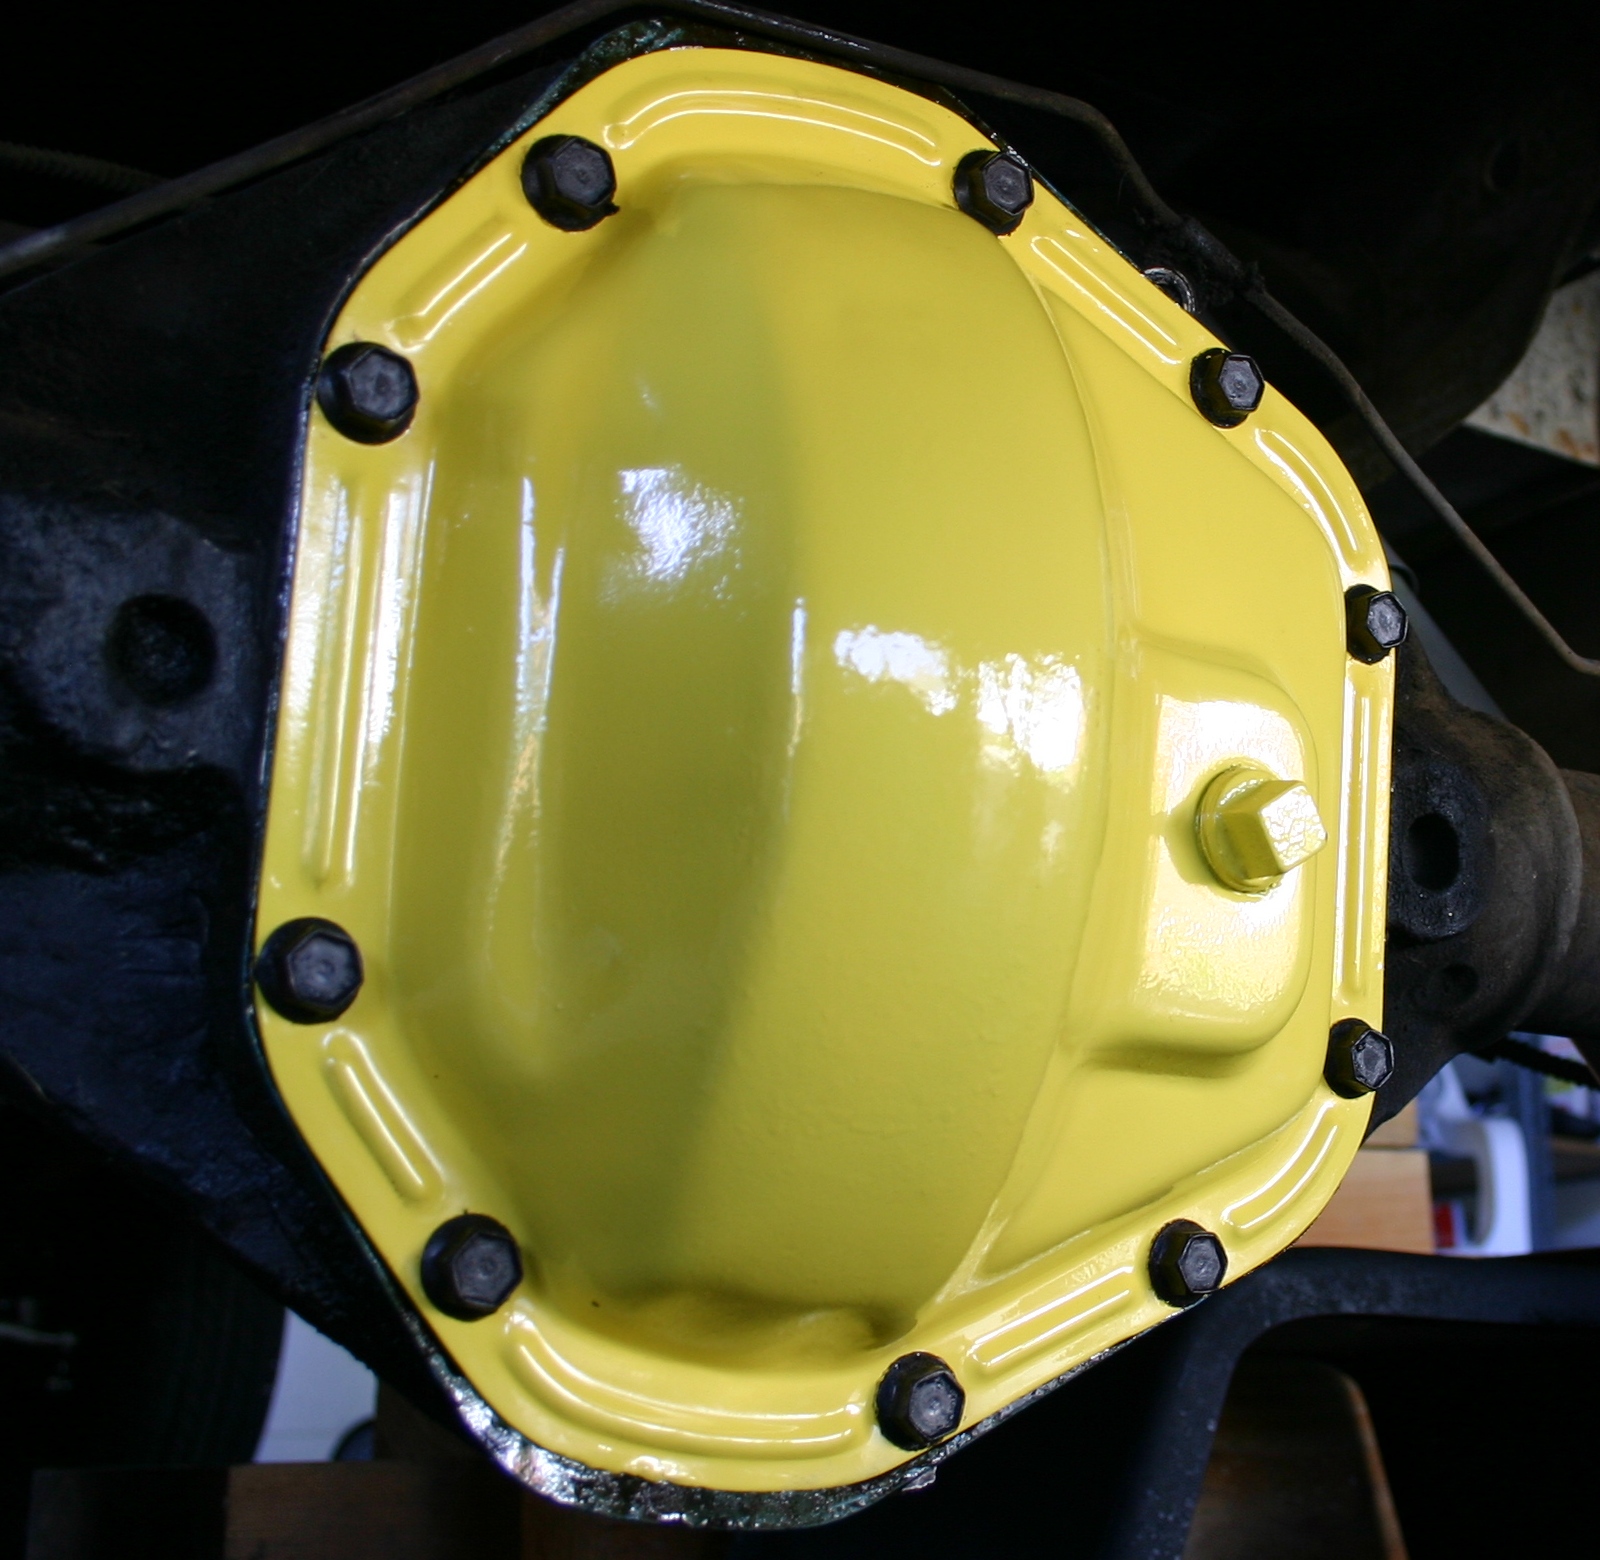
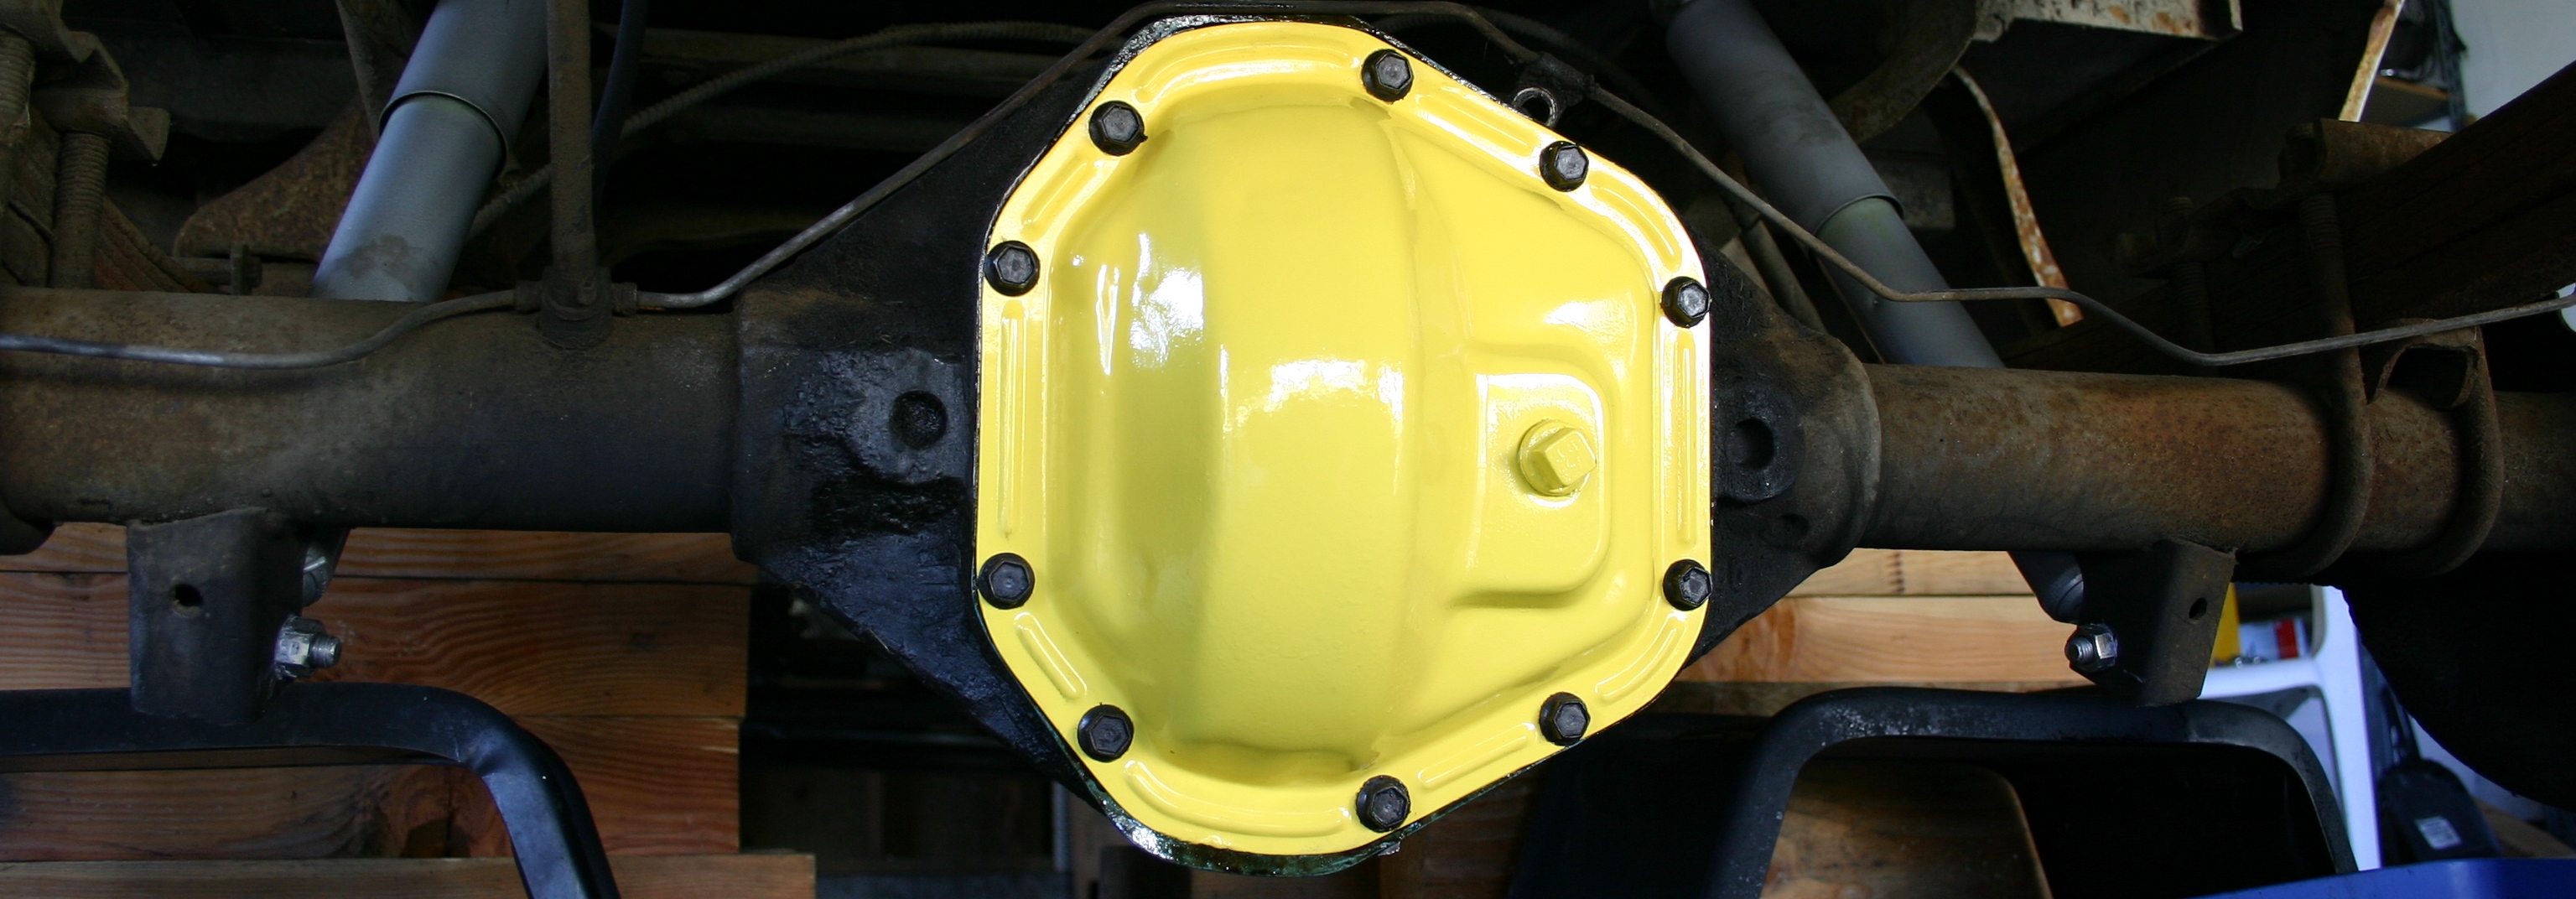
Here's how the cover turned out with its paint basically cured!
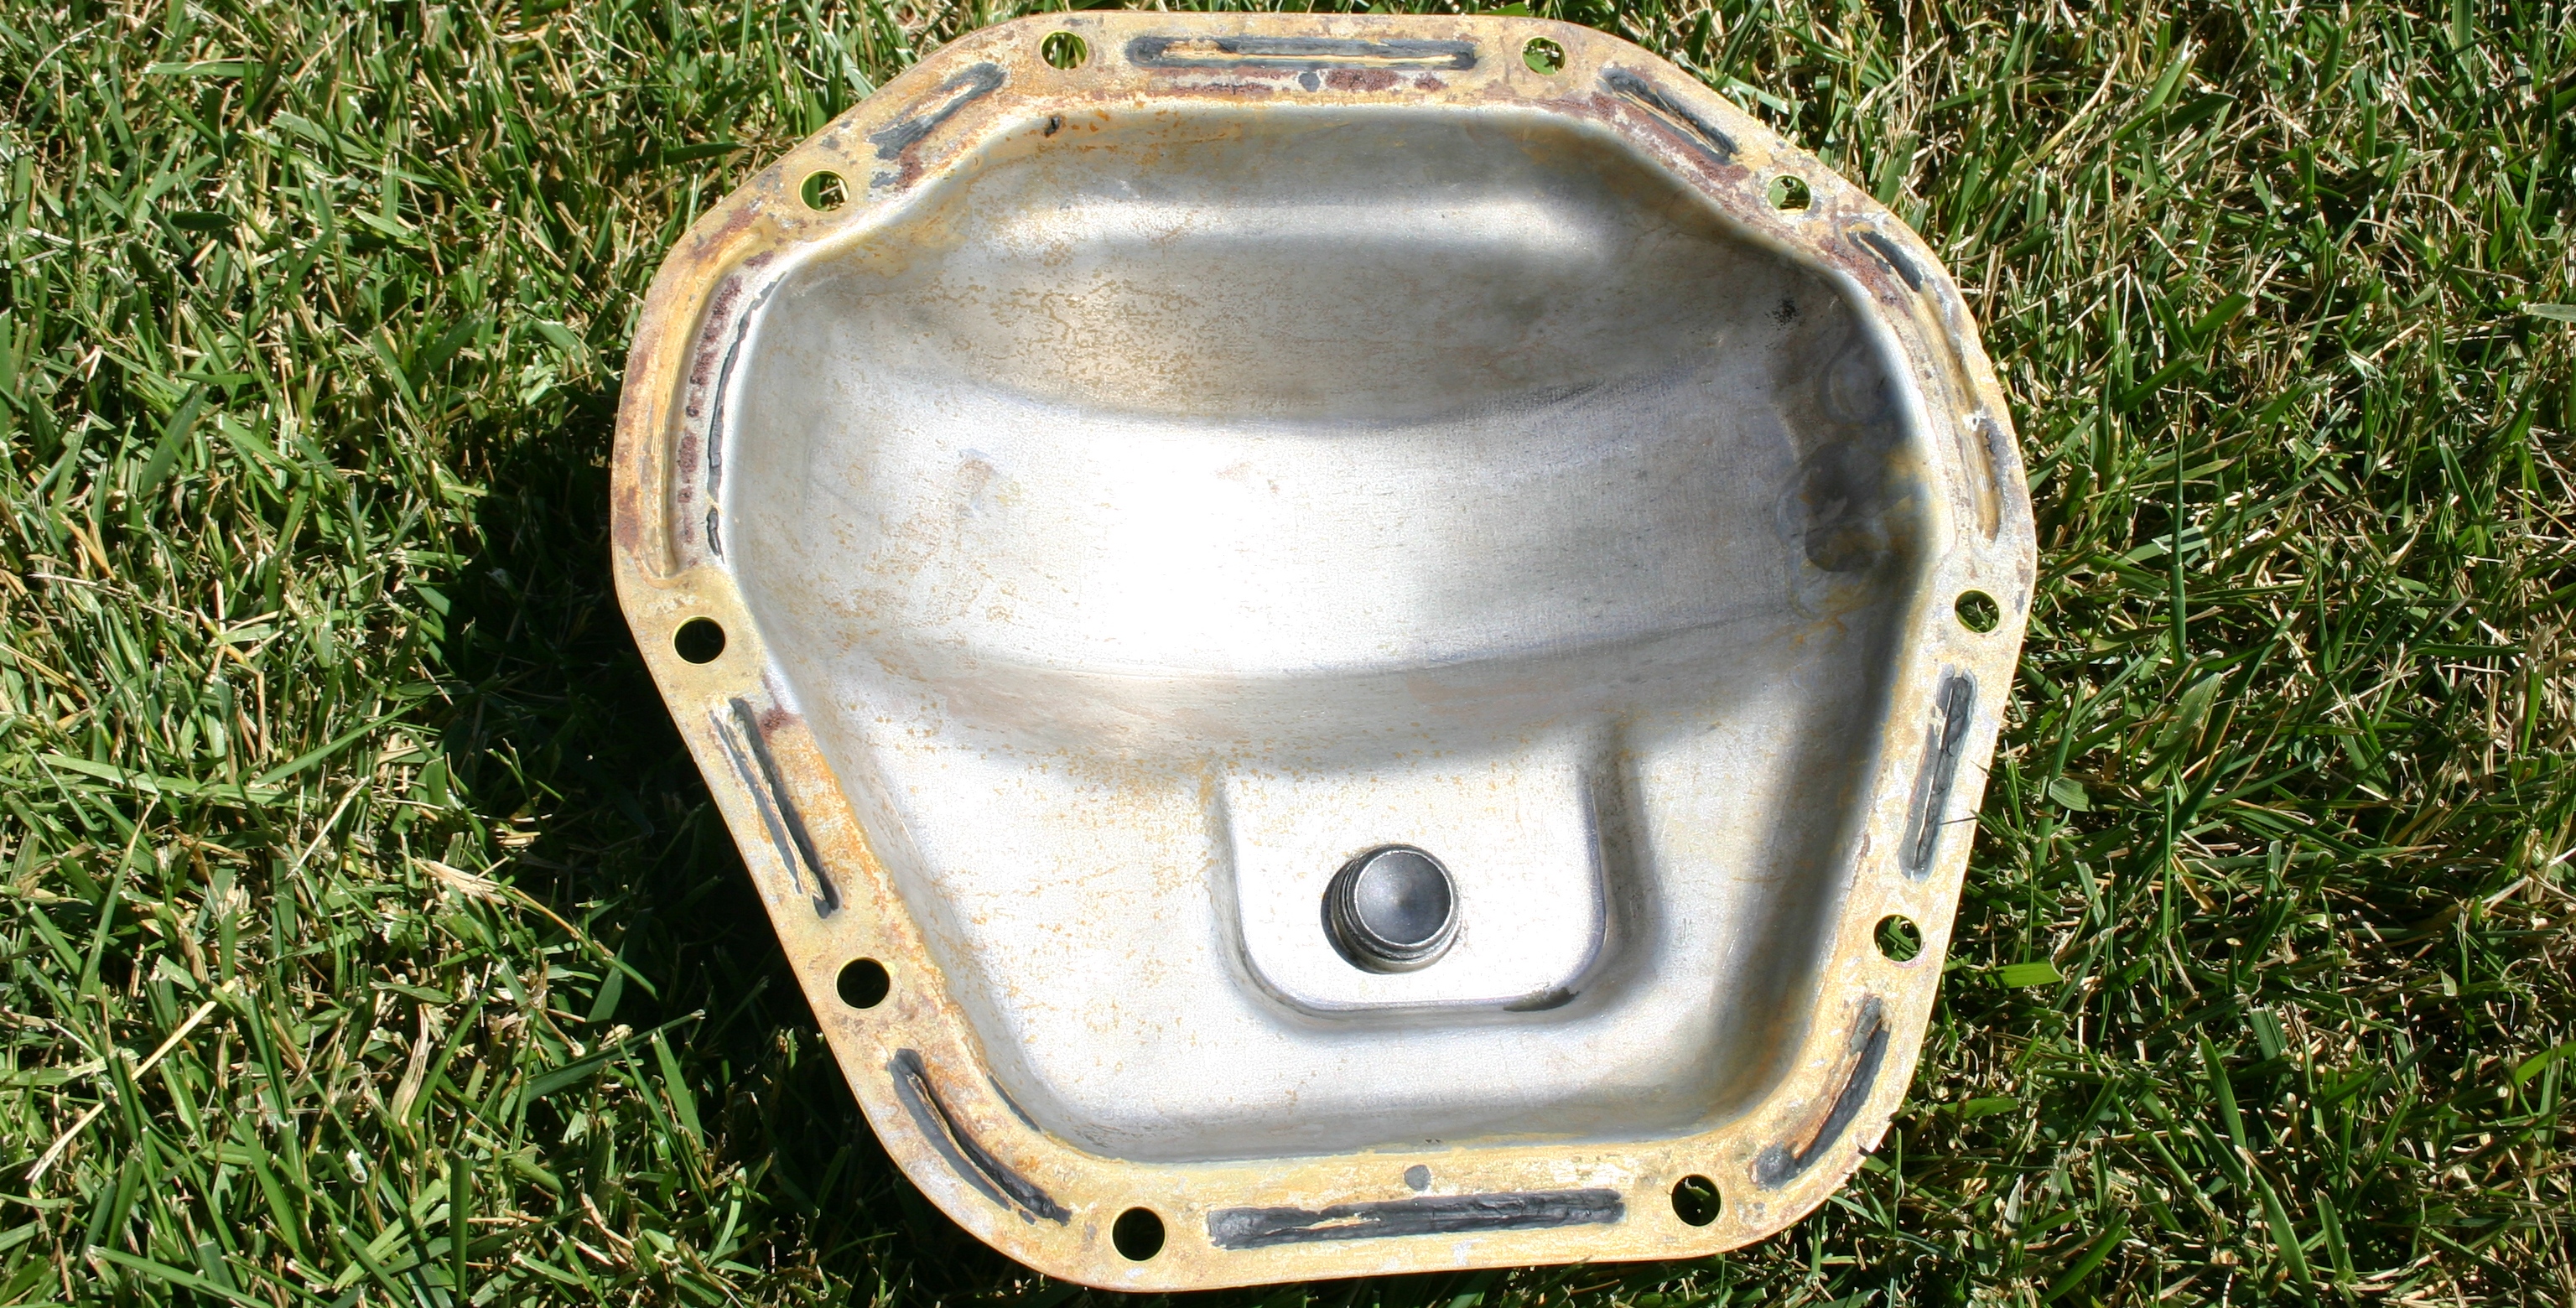
Some of the phosphoric acid seems to have crept underneath the cover around the edge, so before putting it together I took a razor and cleaned the newly formed rust from that area.
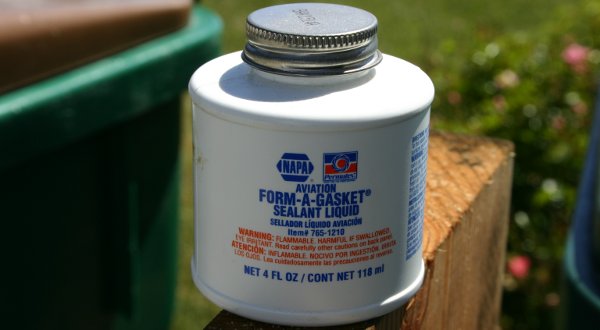
I tried to squirt some The Right Stuff on to a rag, to get ready to put the icing on the cake, yet it was profoundly clogged up! The nail that I'd shoved in to its tip didn't do a perfect job of sealing it up. I fought with it for a while, then gave up and switched to the gasket plan.

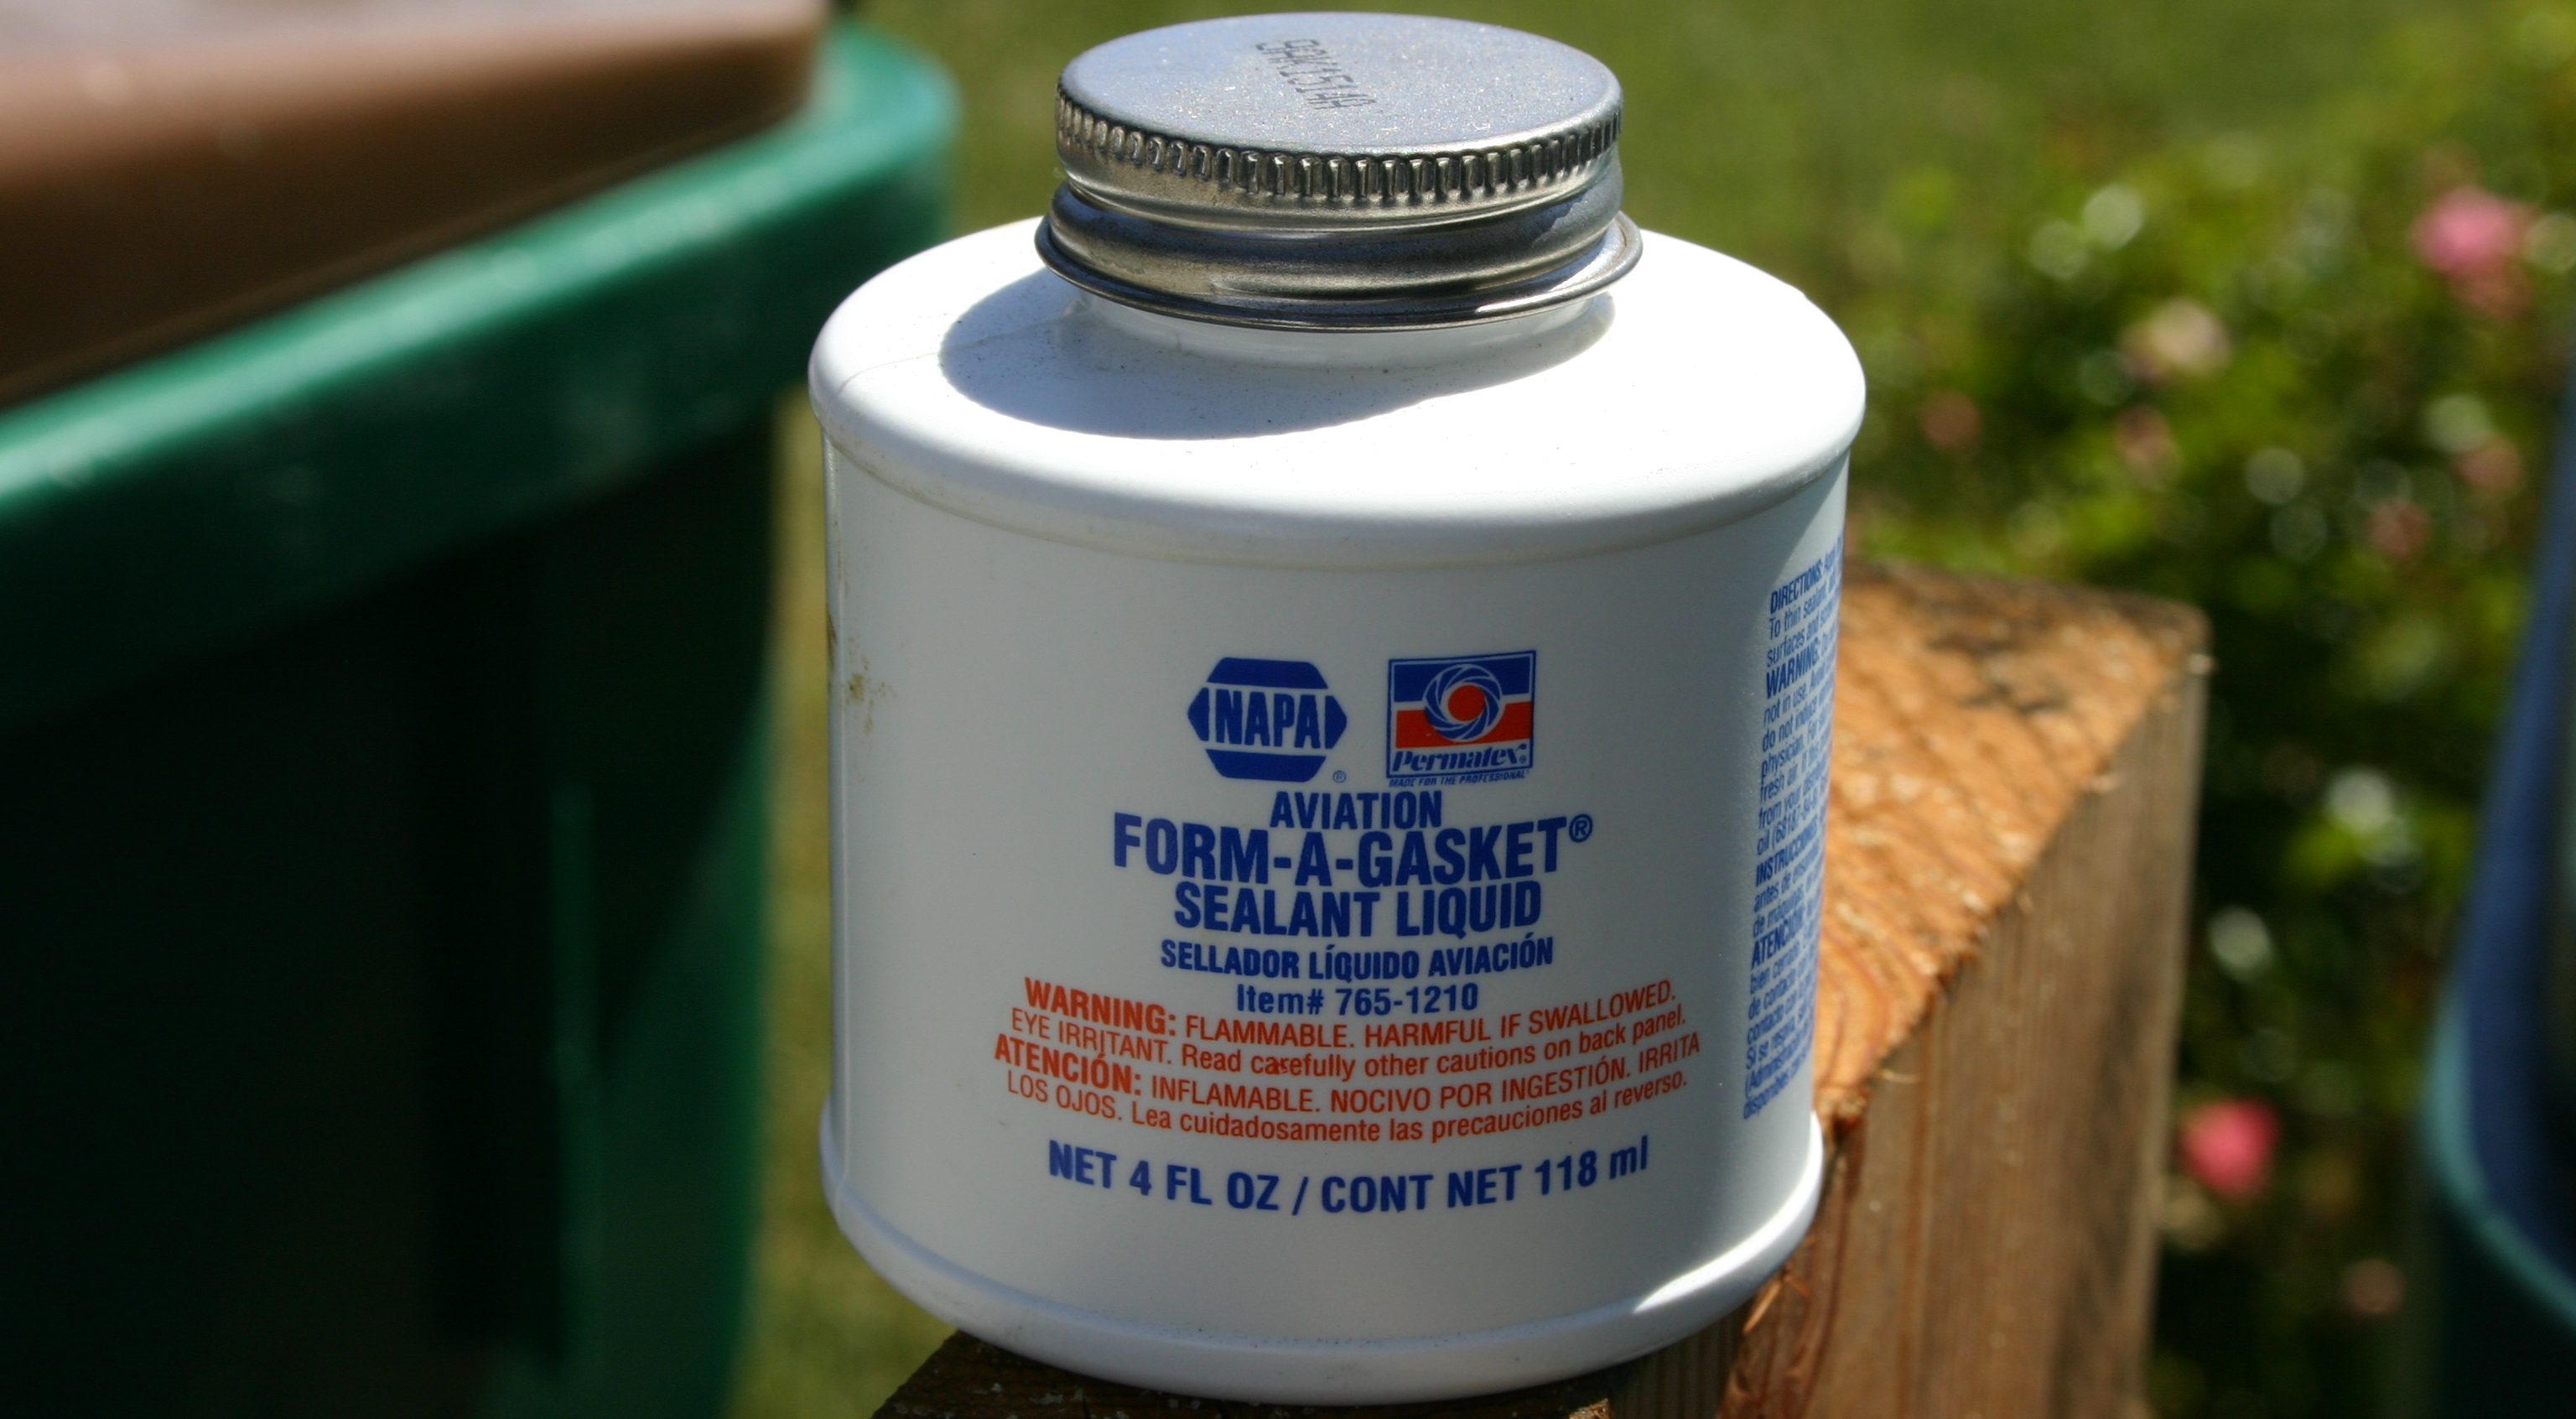
Following Speed Bump's guidance, I used this "Aviation Form-A-Gasket Sealant Liquid" on the gasket prior to installation.
Here's how it looked on the gasket. I painted it on to both sides, then let it air dry for a couple of minutes before putting the cover back on.

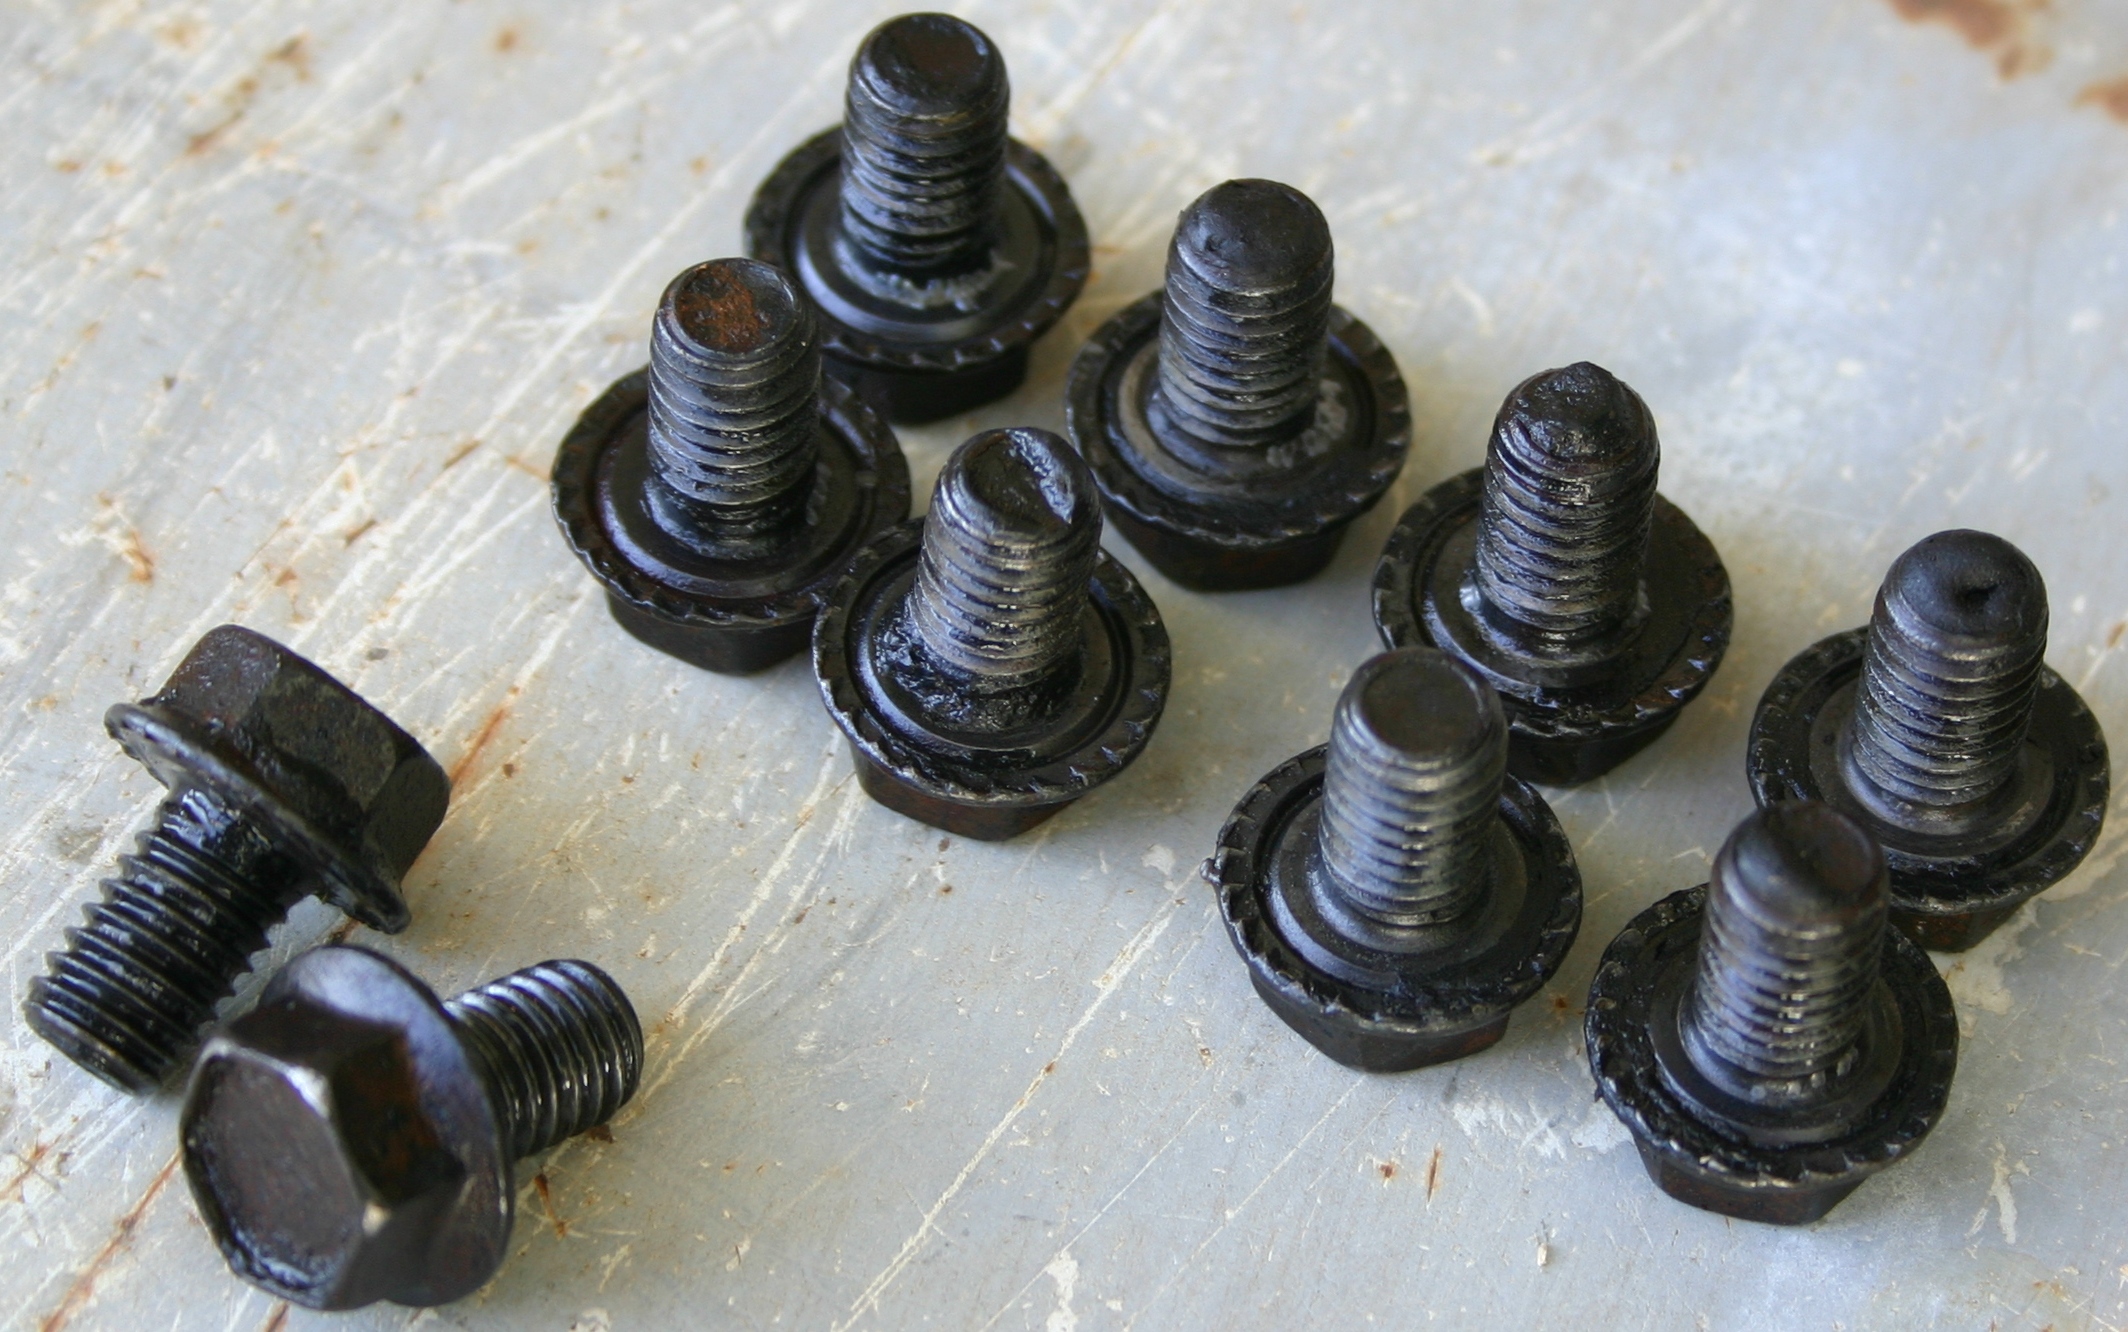
I spent a little time the other day cleaning up the bolts. They may not look all that clean, yet y'all should have seen them when I began that effort!

Here's the installed cover. What a contrast with the axle tubes and differential case, isn't it? I torqued the bolts incrementally to 35 ft/lbs.
Can y'all see the way the gasket sticks out at the bottom and the top? I'm not certain whether or not it's providing adequate coverage in the sealing areas.


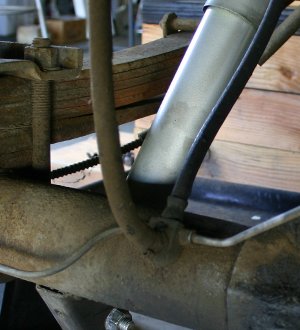
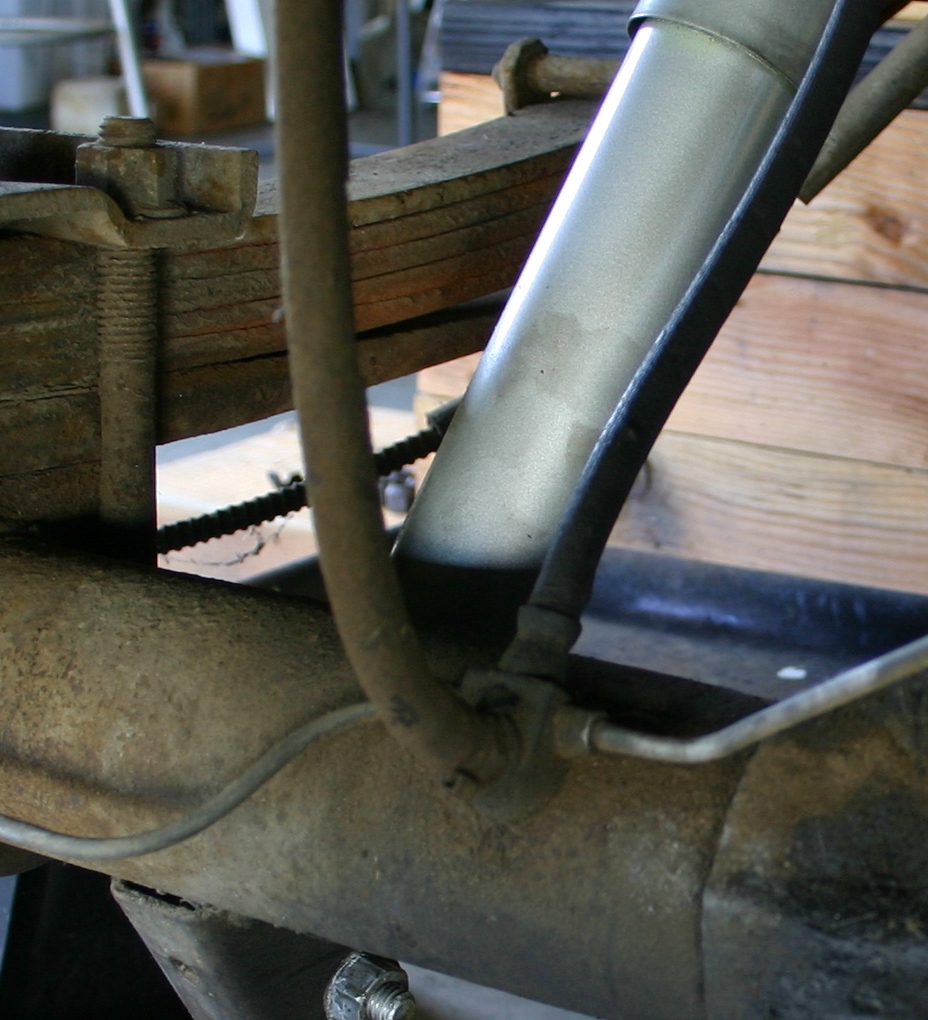
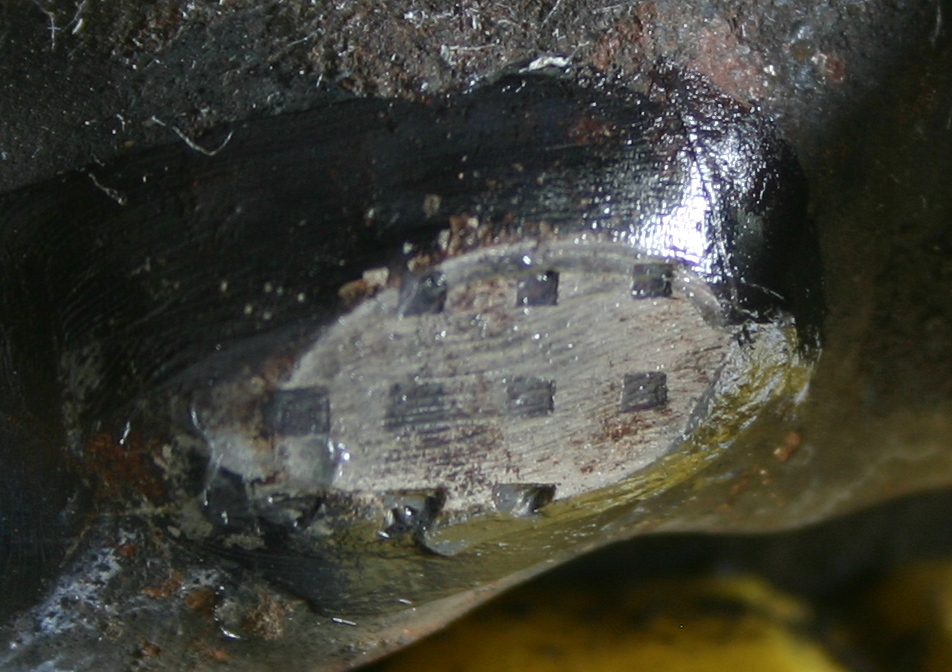
And finally, a close inspection of the rear brake hose revealed several small lumps on its outer rubber shield! I'm guessing that it's ancient and needs to be replaced for safety reasons. Unfortunately, I wasn't able to get a good photo of the lumps, but they don't look good!
Here are a couple of photos of the brake hose area. I wish these had turned out better. There's enough room for the tripod under the truck, but not enough room for my head to get high enough to look through the camera's view-finder! So precision aiming's not feasible.

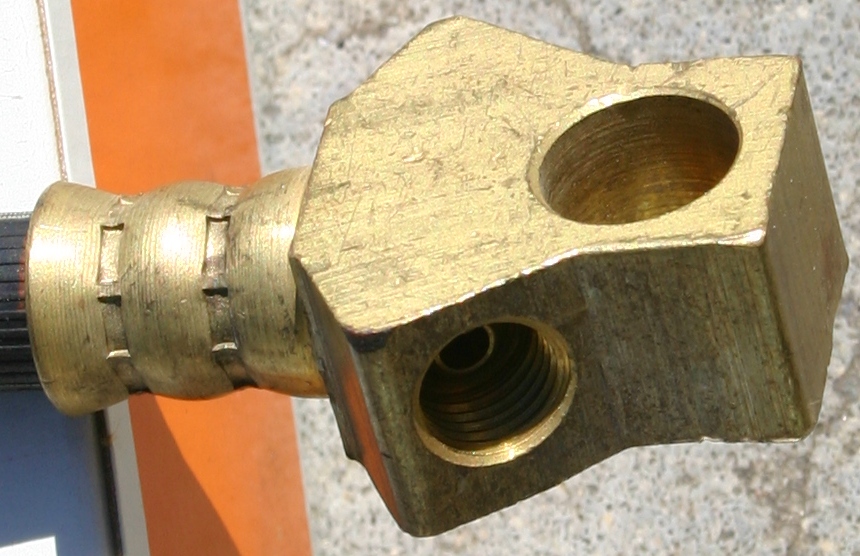
And I found something promising in my spare parts pile! This rear brake hose. I must have bought it in the 1990's either for #50 or for another Bumpside, and never got around to installing it. Just as I typed that, a faded memory returned to me: I did buy that hose for #50, and always meant to get around to installing it!
It's a Wagner F55581. I Googled it and it looks like this particular part is no longer made, but it confirmed that it's for a Ford truck!

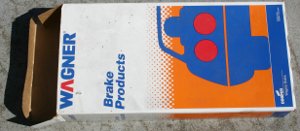
Here's the top end. It looks just the same as the old hose on #50!
Here's the bottom end. It looks similar to the hose on #50, yet the angle that the brake lines fasten to it is slightly different. If I go ahead and replace the brake lines (which I probably will), this won't be a problem, I think.

This Afternoon's Questions:
70_F100 and Jamie, thank you both for your fantastic replies!
Robroy
That sounds like an excellent idea--thanks for mentioning this 70_F100! I tried to use my tube of The Right Stuff without success. It seems that I hadn't done a perfect job of sealing up the applicator tip, and it had somehow dried up in a deeply impenetrable fashion! After fighting with it for a while I went ahead and used the new gasket.70_F100 wrote:Robroy, I would forget the gasket and just use a good bead of "The Right Stuff". You'll get a more positive seal and less chance for leaks. That's what all of the OEM's have been doing for MANY years.
I also thought using the new gasket wouldn't be a bad idea, since I was guessing that The Right Stuff would make the cover more difficult to remove later on (than the gasket would). Since I'm planning on putting in some kind of limited slip differential, and possibly switching to gears more suited to the highway, making it a little easier to re-open seemed like a good idea.
That said, although the gasket seemed like a good match for the original, it inexplicably reformed itself during installation and may not have complete coverage of the sealing surfaces. I'll show a couple of photos of that in an update section, at the end of this post.
Okay! Thanks for your excellent advice on this--I won't be so afraid to give it a whirl, should I go the route of pulling the backing plates. I like to decide on things right away, but I've honestly found myself mentally flip-flopping on whether or not to re-finish them.70_F100 wrote:As for the clips, use a pair of pliers and carefully squeeze the retaining tabs as you pull the cable from the back side of the backing plate. You shouldn't have any problems. Spray them down good with brake cleaner first, because in the last photo, it looks like you may have a lot of crud that might prohibit you from collapsing them enough.
Gosh, thanks so much for this outstanding information! I would have never found them under the name, "link!" I measured mine and sure though: they're 1 and 1/2" long.70_F100 wrote:I found new "links" (Ford terminology) at Green Ford Sales. The part number is C6TZ 2042-A, Link-Brake Cylinder to Shoe. The MPC says they should be 1-1/2" long, and they fit all trucks 66-up with 12" x 2-1/2" and 12" x 3" brakes.
Perfect!!!70_F100 wrote:They show to have six in stock, and the inventory was updated on 05/21/10.
That's excellent to know--thanks for the advice! I've been vaguely aware of Green Sales Company for years, yet I can't remember ever ordering something from them before. This coming Monday I will most certainly call them up and see about some of these "links!"70_F100 wrote:Dennis Carpenter also shows to have a couple in their NOS inventory. A word to the wise, though. Go with Green. I've had to have several items during my transmission swap, and I found that Green sells at or below wholesale, and DC tends to mark up their NOS stuff by about 500-600%
It's stupendously helpful 70_F100!!! Thanks so much for the high quality information.70_F100 wrote:I hope this helps!!
It has been fun and very educational for me, thanks to all the superb advice y'all have been providing!Ranchero50 wrote:Robroy, looks like another fun project.
That's a very clever idea! I slipped a 1/2", closed end, 12pt wrench over the cable, and it seemed a little small; the 9/16" wrench may have been a better fit. If I go ahead and remove these, I'll most certainly give this technique a whirl. Thanks!Ranchero50 wrote:I've never been through a 60 but the E brake cable usually releases by putting a 1/2" closed end 12pt wrench over the sheath to hold the fingers in while you wiggle the cabel out of the hole.
Indeed, I'll be looking at one of the after-market limited slip differentials ultimately. I wanted to get the truck up and running first so that I can see whether I'll want to go with gears more suited to the highway or not. And thankfully, it seems like the differential update can be done independently of many other things!Ranchero50 wrote:You are going to put a posi unit in right?
My reason for cracking it open was simply to change the oil, to avoid contaminating my new bearings and races with super ancient stuff. And once I had it open, I found following 70_F100's differential assessment advice highly instructional. Differentials amaze me!
This Afternoon's Update:
Here's how the cover turned out with its paint basically cured!
Some of the phosphoric acid seems to have crept underneath the cover around the edge, so before putting it together I took a razor and cleaned the newly formed rust from that area.
I tried to squirt some The Right Stuff on to a rag, to get ready to put the icing on the cake, yet it was profoundly clogged up! The nail that I'd shoved in to its tip didn't do a perfect job of sealing it up. I fought with it for a while, then gave up and switched to the gasket plan.

Following Speed Bump's guidance, I used this "Aviation Form-A-Gasket Sealant Liquid" on the gasket prior to installation.
Here's how it looked on the gasket. I painted it on to both sides, then let it air dry for a couple of minutes before putting the cover back on.

I spent a little time the other day cleaning up the bolts. They may not look all that clean, yet y'all should have seen them when I began that effort!
Here's the installed cover. What a contrast with the axle tubes and differential case, isn't it? I torqued the bolts incrementally to 35 ft/lbs.
Can y'all see the way the gasket sticks out at the bottom and the top? I'm not certain whether or not it's providing adequate coverage in the sealing areas.
And finally, a close inspection of the rear brake hose revealed several small lumps on its outer rubber shield! I'm guessing that it's ancient and needs to be replaced for safety reasons. Unfortunately, I wasn't able to get a good photo of the lumps, but they don't look good!
Here are a couple of photos of the brake hose area. I wish these had turned out better. There's enough room for the tripod under the truck, but not enough room for my head to get high enough to look through the camera's view-finder! So precision aiming's not feasible.

And I found something promising in my spare parts pile! This rear brake hose. I must have bought it in the 1990's either for #50 or for another Bumpside, and never got around to installing it. Just as I typed that, a faded memory returned to me: I did buy that hose for #50, and always meant to get around to installing it!
It's a Wagner F55581. I Googled it and it looks like this particular part is no longer made, but it confirmed that it's for a Ford truck!


Here's the top end. It looks just the same as the old hose on #50!

Here's the bottom end. It looks similar to the hose on #50, yet the angle that the brake lines fasten to it is slightly different. If I go ahead and replace the brake lines (which I probably will), this won't be a problem, I think.
This Afternoon's Questions:
- Is there a better way to seal tubes like my The Right Stuff, other than using a nail in the end?
- Does the way the gasket sticks out along the top and bottom look problematic enough to pull it apart and re-do that? Note that I'll be pulling it apart in a few thousand miles anyways, to install a limited slip differential. EDIT: Upon closer inspection of the old gasket, I think my new one's fine--it's just wider in those areas than the old one. I also now realize that I should have trimmed it to fit the cover. Oh well!
- Is the age of my new rear brake hose problematic? It has been sitting in its box (indoors) since the 1990's, and its outer appearance is perfect.
- Does it seem reasonable to go ahead and use that new brake hose, even though it's shaped slightly differently than the original one (meaning the new brake lines must be bent to match it)?
- When removing the old brake hose, does it pull off of a rigid, metal vent tube sticking out of the axle housing?
70_F100 and Jamie, thank you both for your fantastic replies!
Robroy
-
speed bump
- New Member
- Posts: 113
- Joined: Tue Feb 26, 2008 11:31 am
- Location: Butte Montana
Re: 1972 F250 12"x2.5" Bendix rear drum brake rebuild: advice?
The gasket will look like that, its slightly oversize.
The brake hose should be find and yes its entirely possible that the angles are slightly different. You are dealing with a 40 year old truck very little will go completely smooth bolt on. Just wait until you start dealing with body panels or decide you want to upgrade something. As my dad always likes to tell me, welcome to either hot rodding or 40 year old trucks.
The brake hose should be find and yes its entirely possible that the angles are slightly different. You are dealing with a 40 year old truck very little will go completely smooth bolt on. Just wait until you start dealing with body panels or decide you want to upgrade something. As my dad always likes to tell me, welcome to either hot rodding or 40 year old trucks.
71 3/4 ton 4x4 highboy
68 Mercury Monteray
68 Mercury Monteray
-
robroy
- 100% FORDified!
- Posts: 3768
- Joined: Sun Jul 06, 2008 4:36 pm
- Location: California, Salinas
Re: 1972 F250 12"x2.5" Bendix rear drum brake rebuild: advice?
Good afternoon!
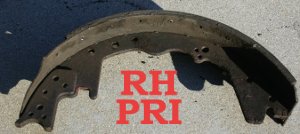
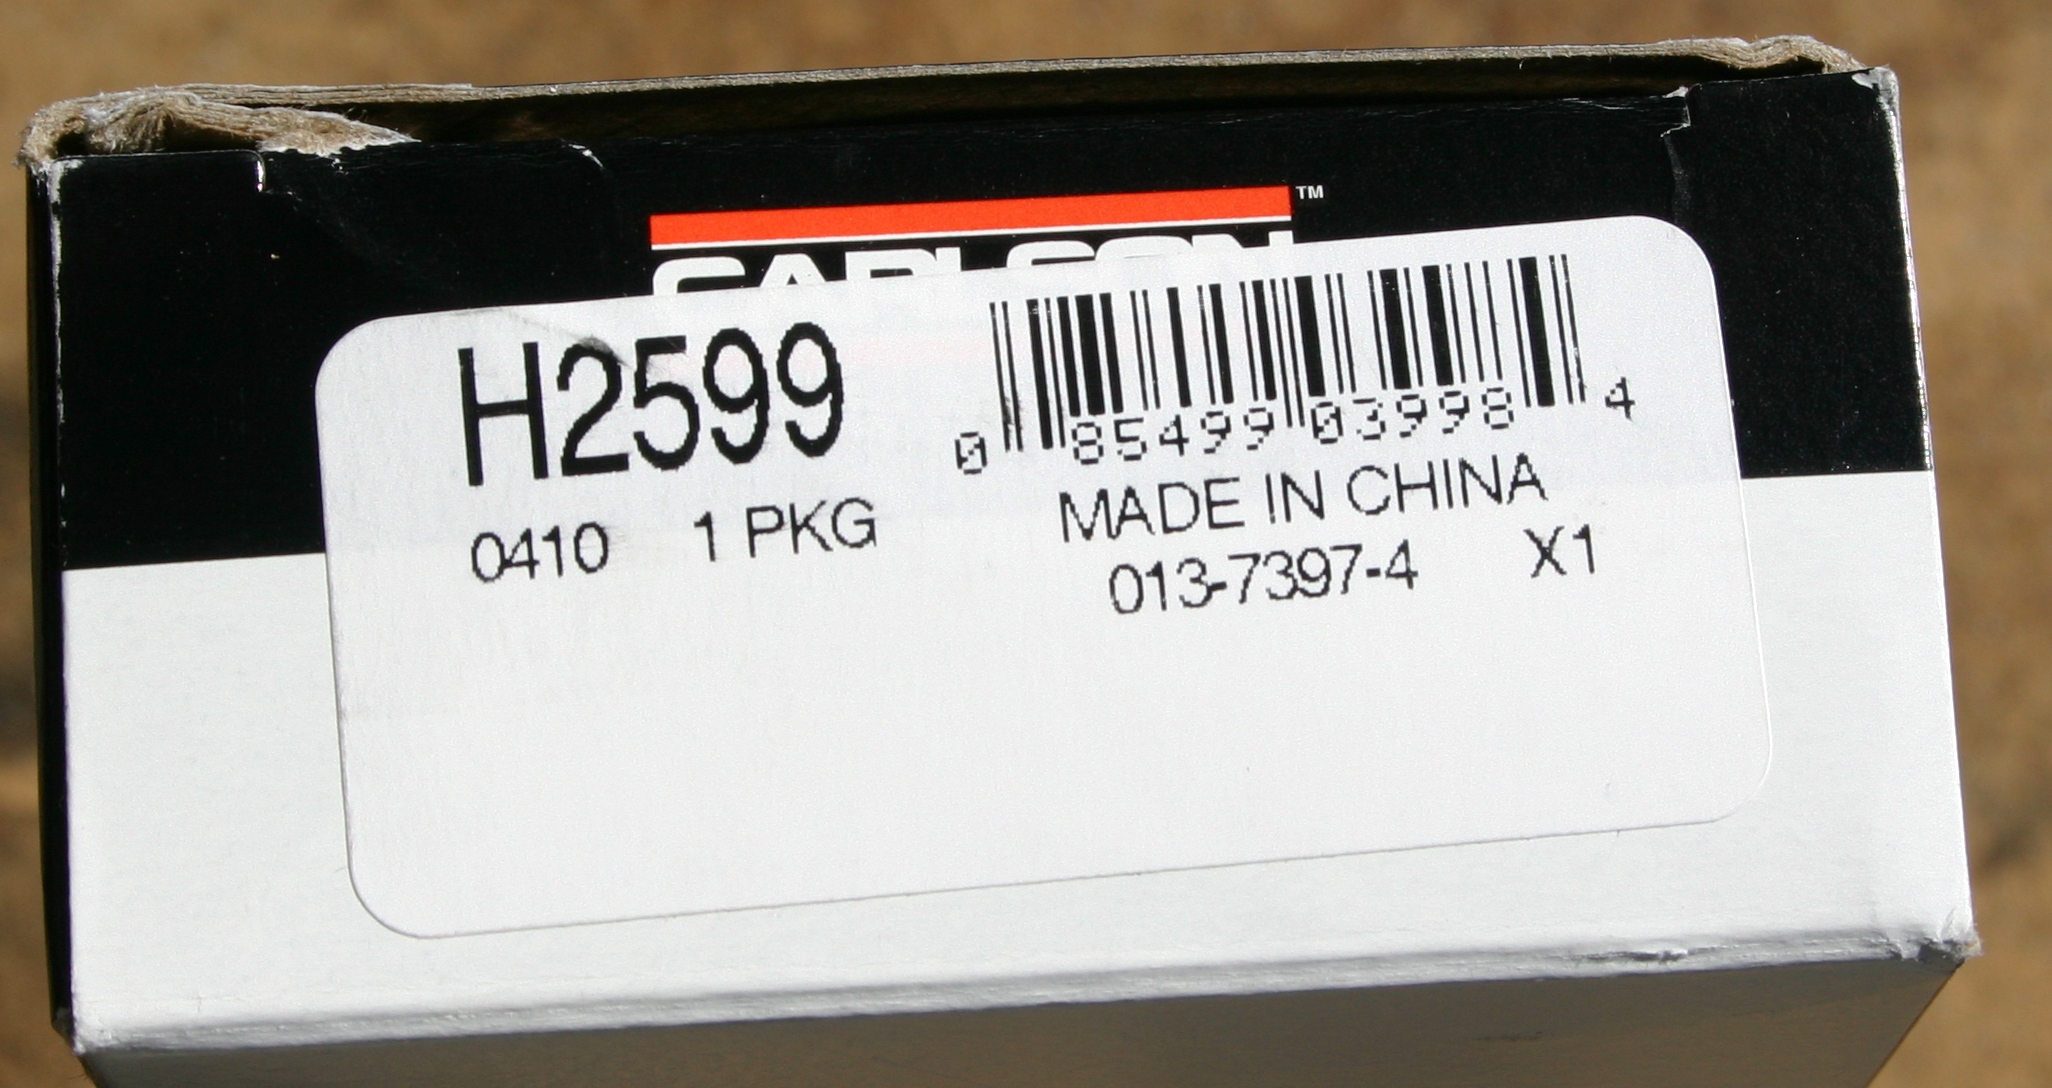
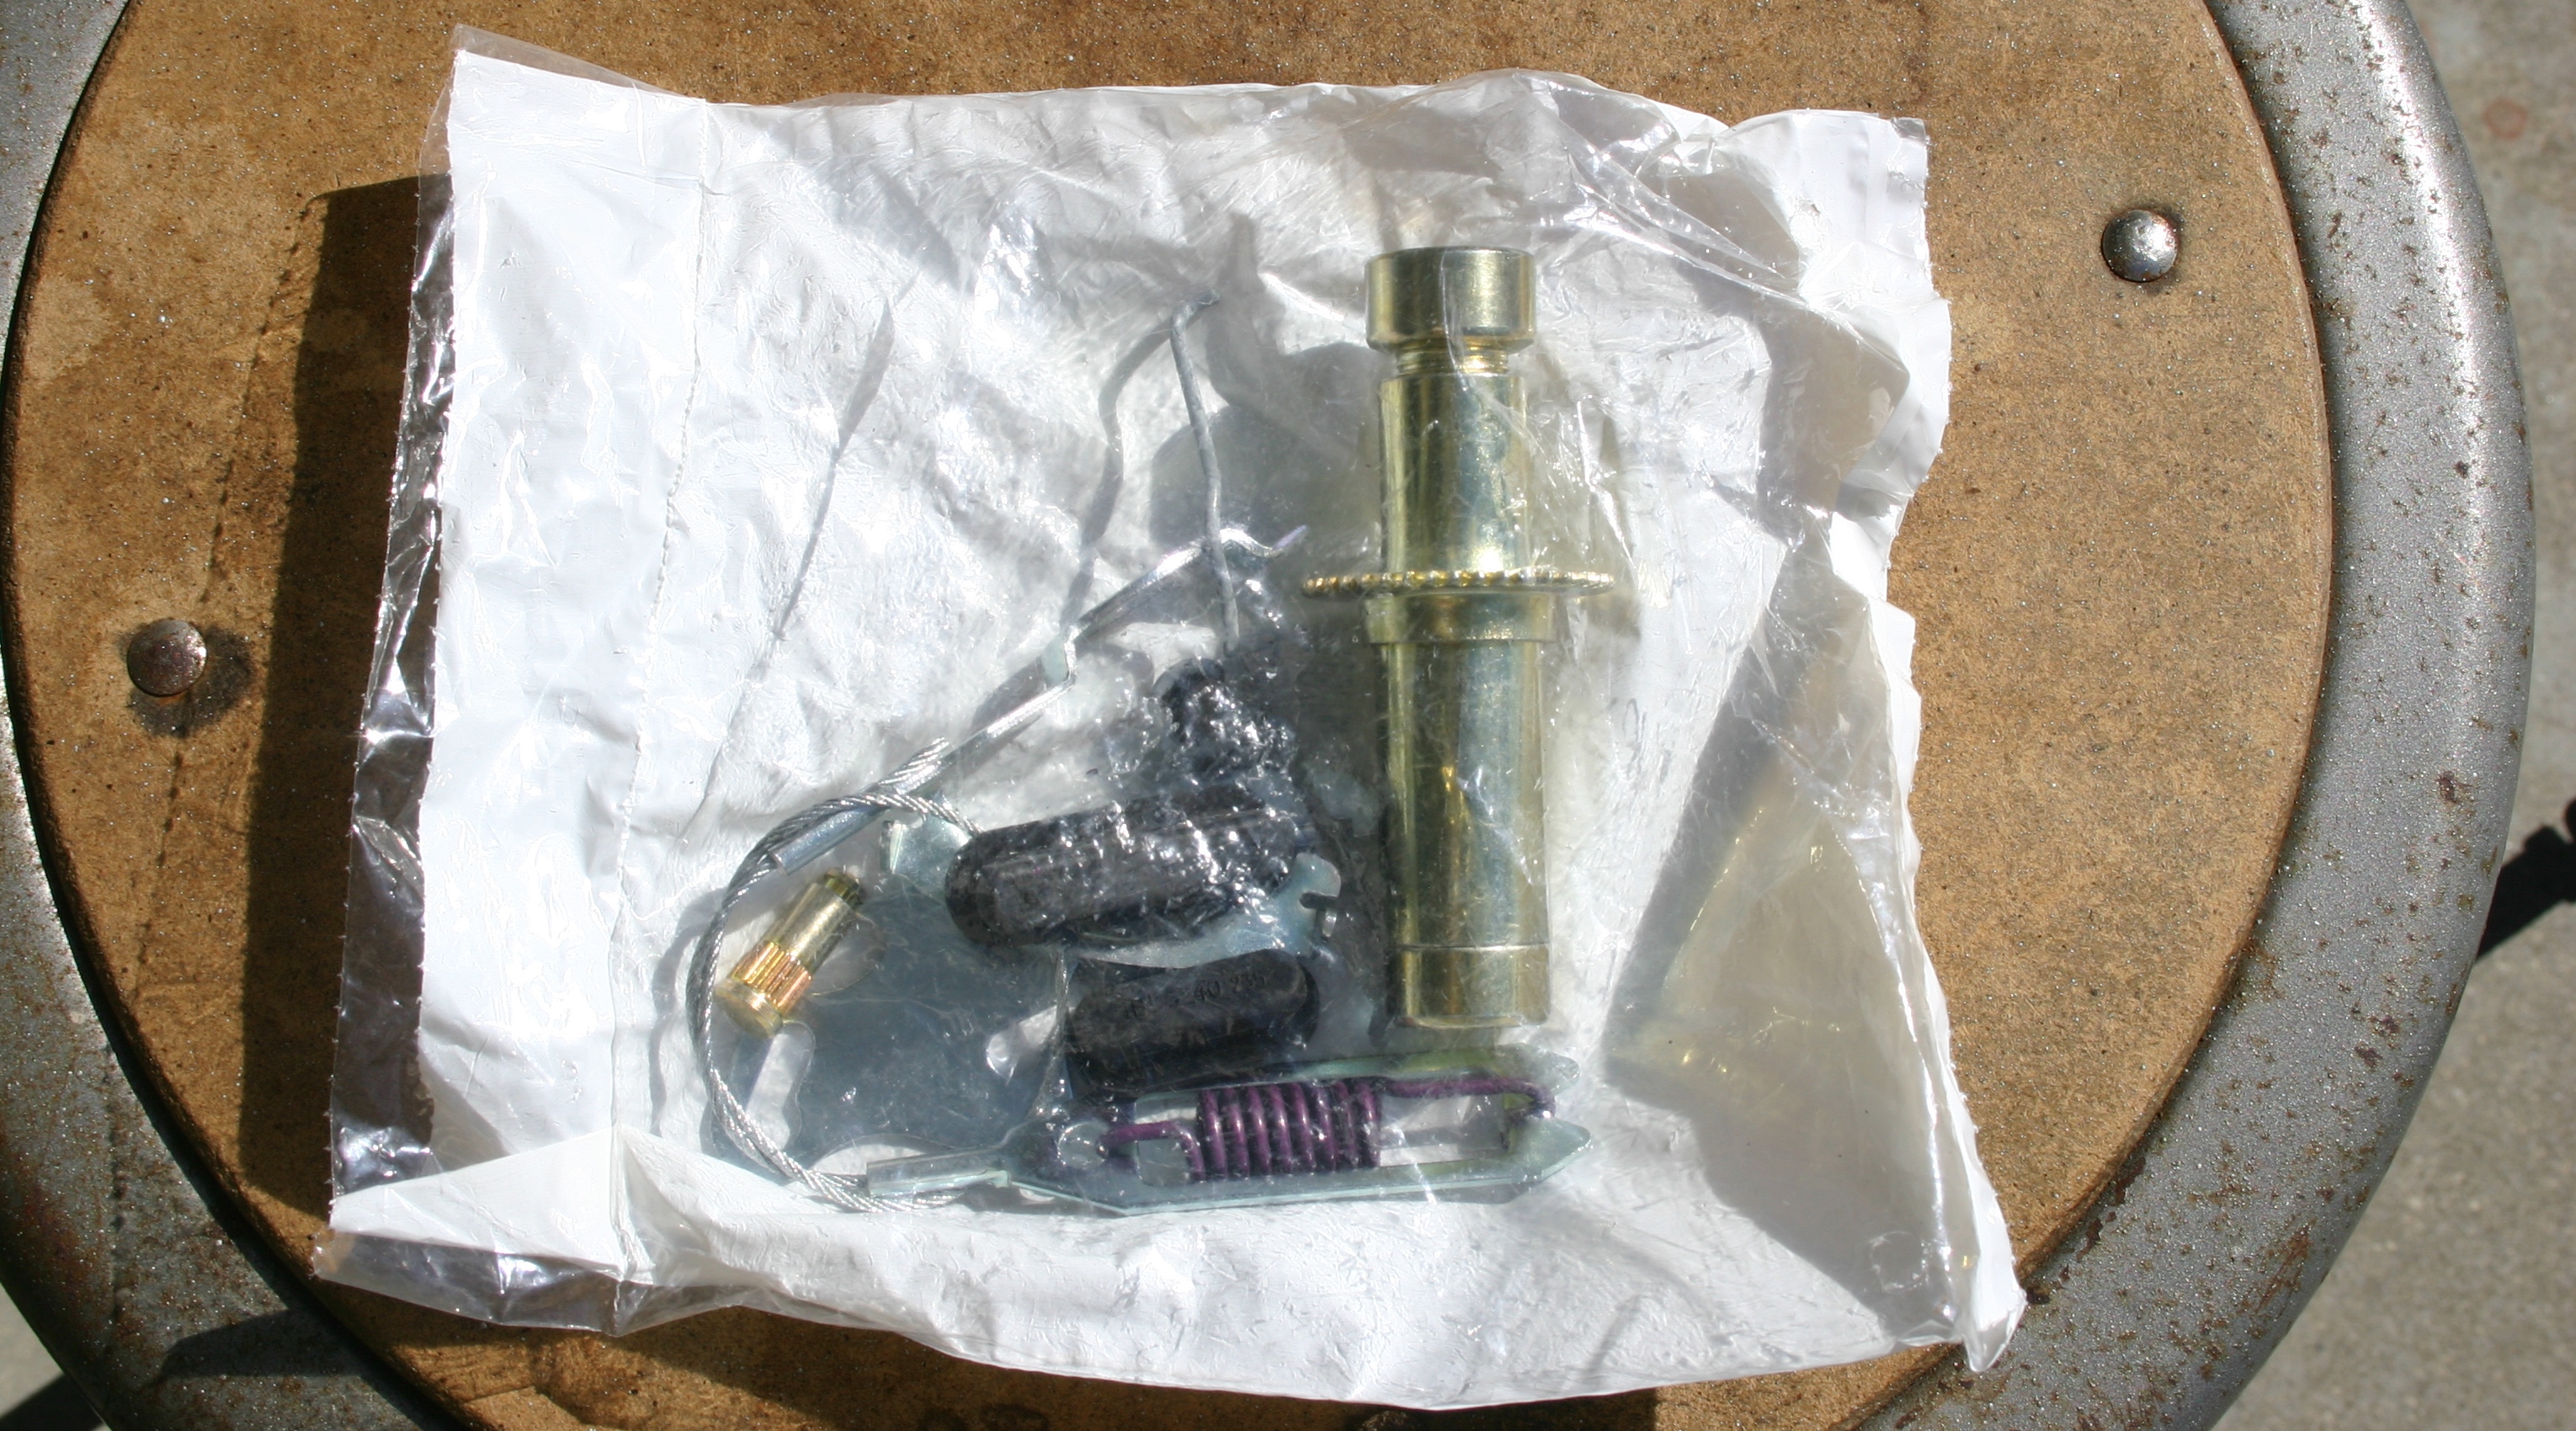
Last Friday I visited Brake Supply Plus to fetch the supposedly USA-made RH adjusting kit!
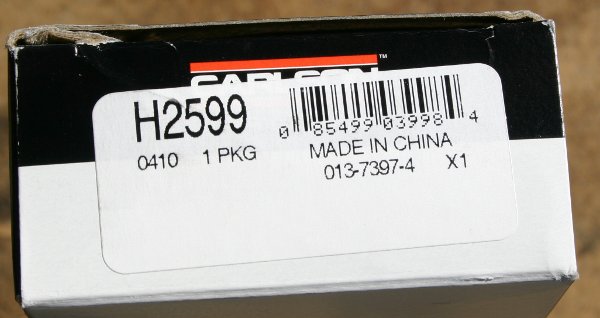
It turned out to be a Carlson H2599, for which I paid $36 ($25.22 for the kit and $8.57 to have it special ordered).
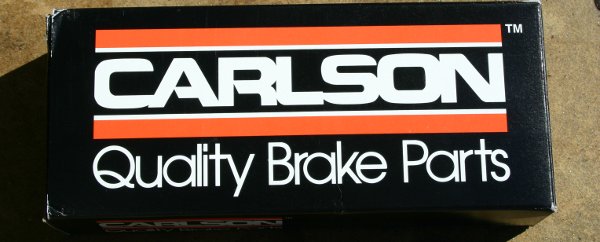
Does a USA-made kit for less than NAPA's China-made kit sound too good to be true? It was. The Carlson H2599 is made in China. So much for the salesman's assurance that it was USA-made!
Since they'd special ordered it, and since the only alternative I was aware of was also China-made (and more expensive than this one), I swallowed my acute disenchantment and accepted it.
That said, I have a hunch that the Wagner kit might be made elsewhere, since I haven't seen any Wagner products made in China yet. So if y'all are looking for one of these kits, consider hunting down the Wagner part to see where it's made!
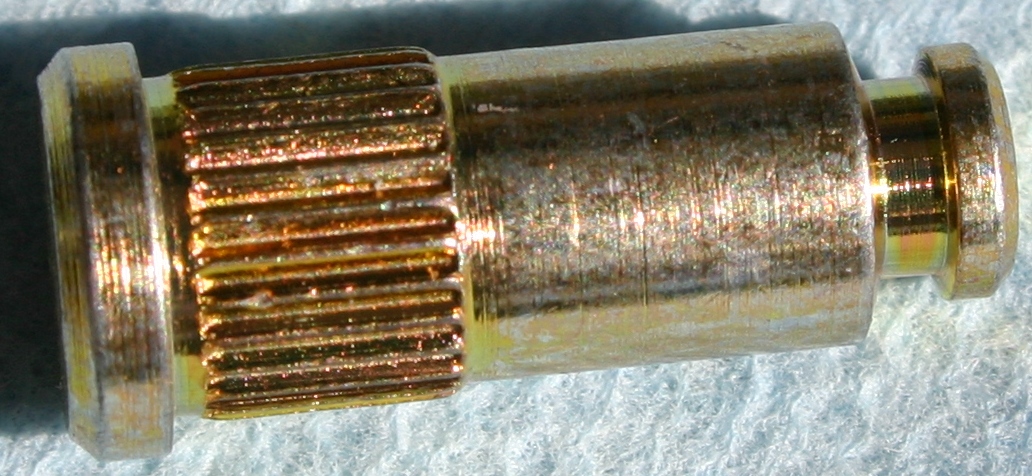
Here's the new adjusting star.

And the new spring that fits under the lever (that interfaces with the star).
The new cable and its spring--at least it's not chewed up like my old one!
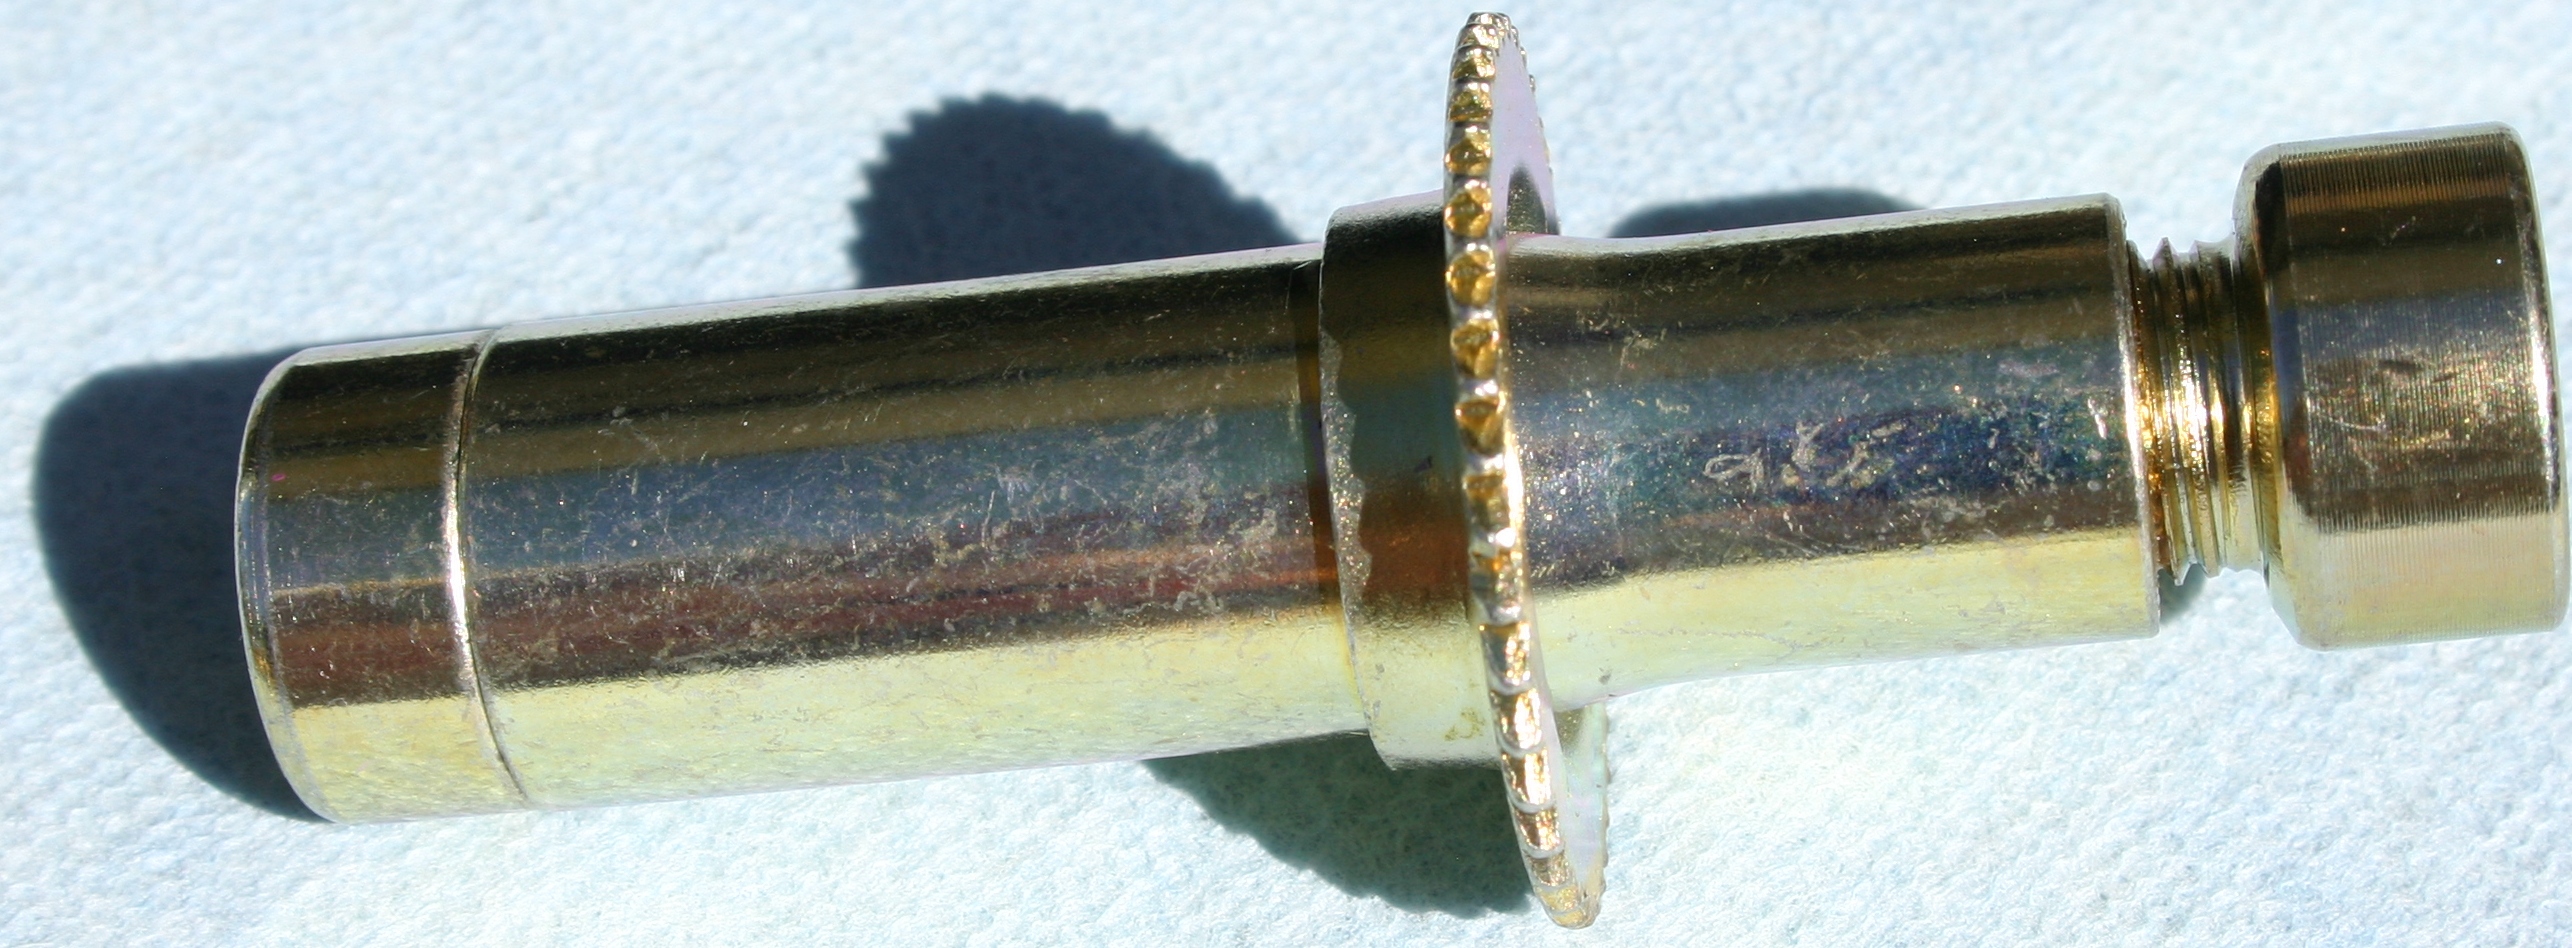
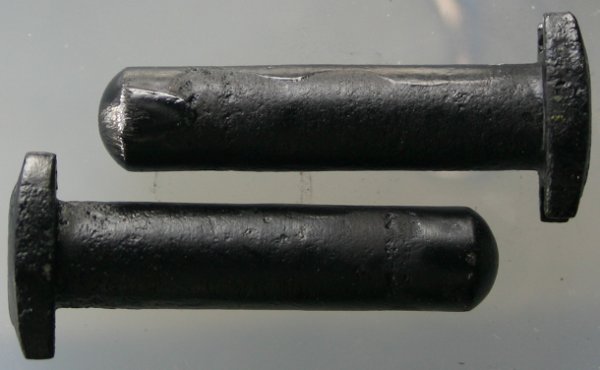
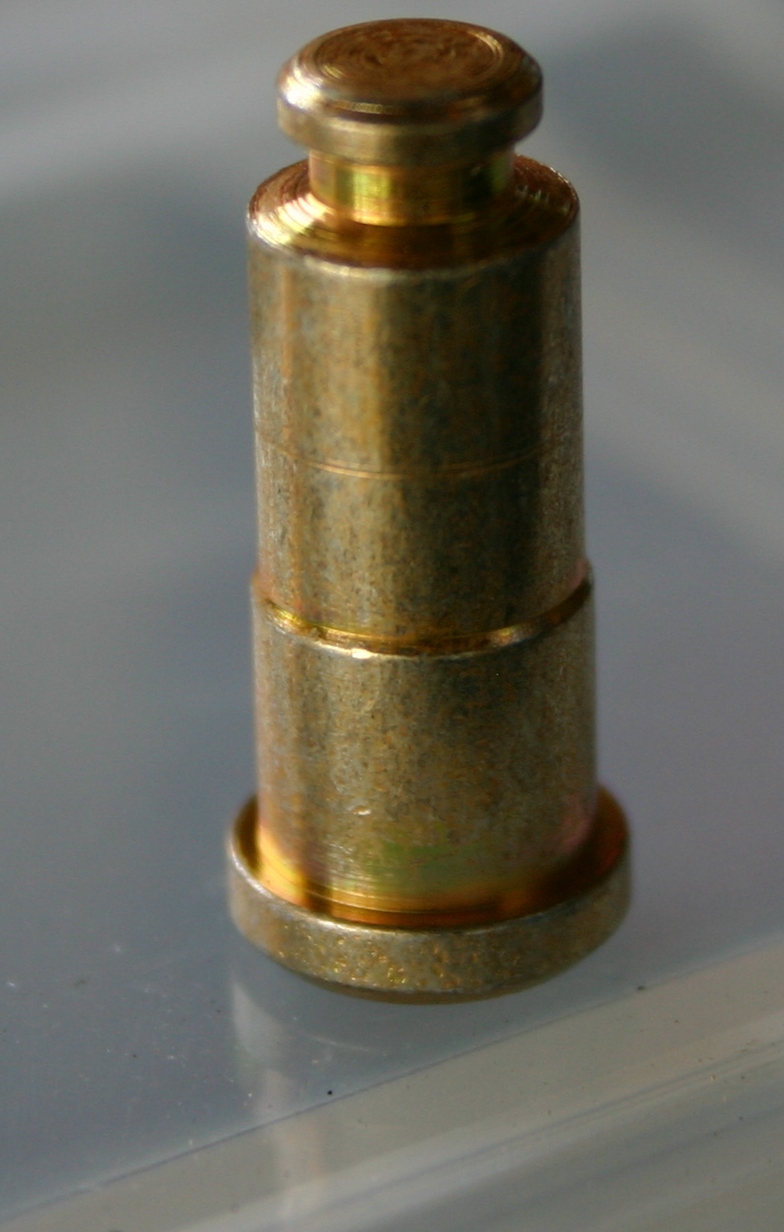
The new pin that the long adjuster arm rotates from, at the top of the backing plate.

This part looks much better than the thoroughly chewed up one I removed!

The cable guide bracket, and some new rubber plugs.

Now the only parts I'm waiting on are the new "links," coming from Green Sales Company!
Thanks for all the superb guidance!
Robroy
Last Friday I visited Brake Supply Plus to fetch the supposedly USA-made RH adjusting kit!
It turned out to be a Carlson H2599, for which I paid $36 ($25.22 for the kit and $8.57 to have it special ordered).

Does a USA-made kit for less than NAPA's China-made kit sound too good to be true? It was. The Carlson H2599 is made in China. So much for the salesman's assurance that it was USA-made!
Since they'd special ordered it, and since the only alternative I was aware of was also China-made (and more expensive than this one), I swallowed my acute disenchantment and accepted it.
That said, I have a hunch that the Wagner kit might be made elsewhere, since I haven't seen any Wagner products made in China yet. So if y'all are looking for one of these kits, consider hunting down the Wagner part to see where it's made!
Here's the new adjusting star.

And the new spring that fits under the lever (that interfaces with the star).

The new cable and its spring--at least it's not chewed up like my old one!

The new pin that the long adjuster arm rotates from, at the top of the backing plate.
This part looks much better than the thoroughly chewed up one I removed!

The cable guide bracket, and some new rubber plugs.

Now the only parts I'm waiting on are the new "links," coming from Green Sales Company!
Thanks for all the superb guidance!
Robroy
-
robroy
- 100% FORDified!
- Posts: 3768
- Joined: Sun Jul 06, 2008 4:36 pm
- Location: California, Salinas
Re: 1972 F250 12"x2.5" Bendix rear drum brake rebuild: advice?
Good evening!
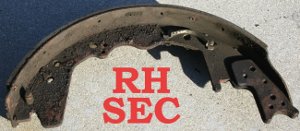
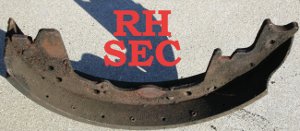
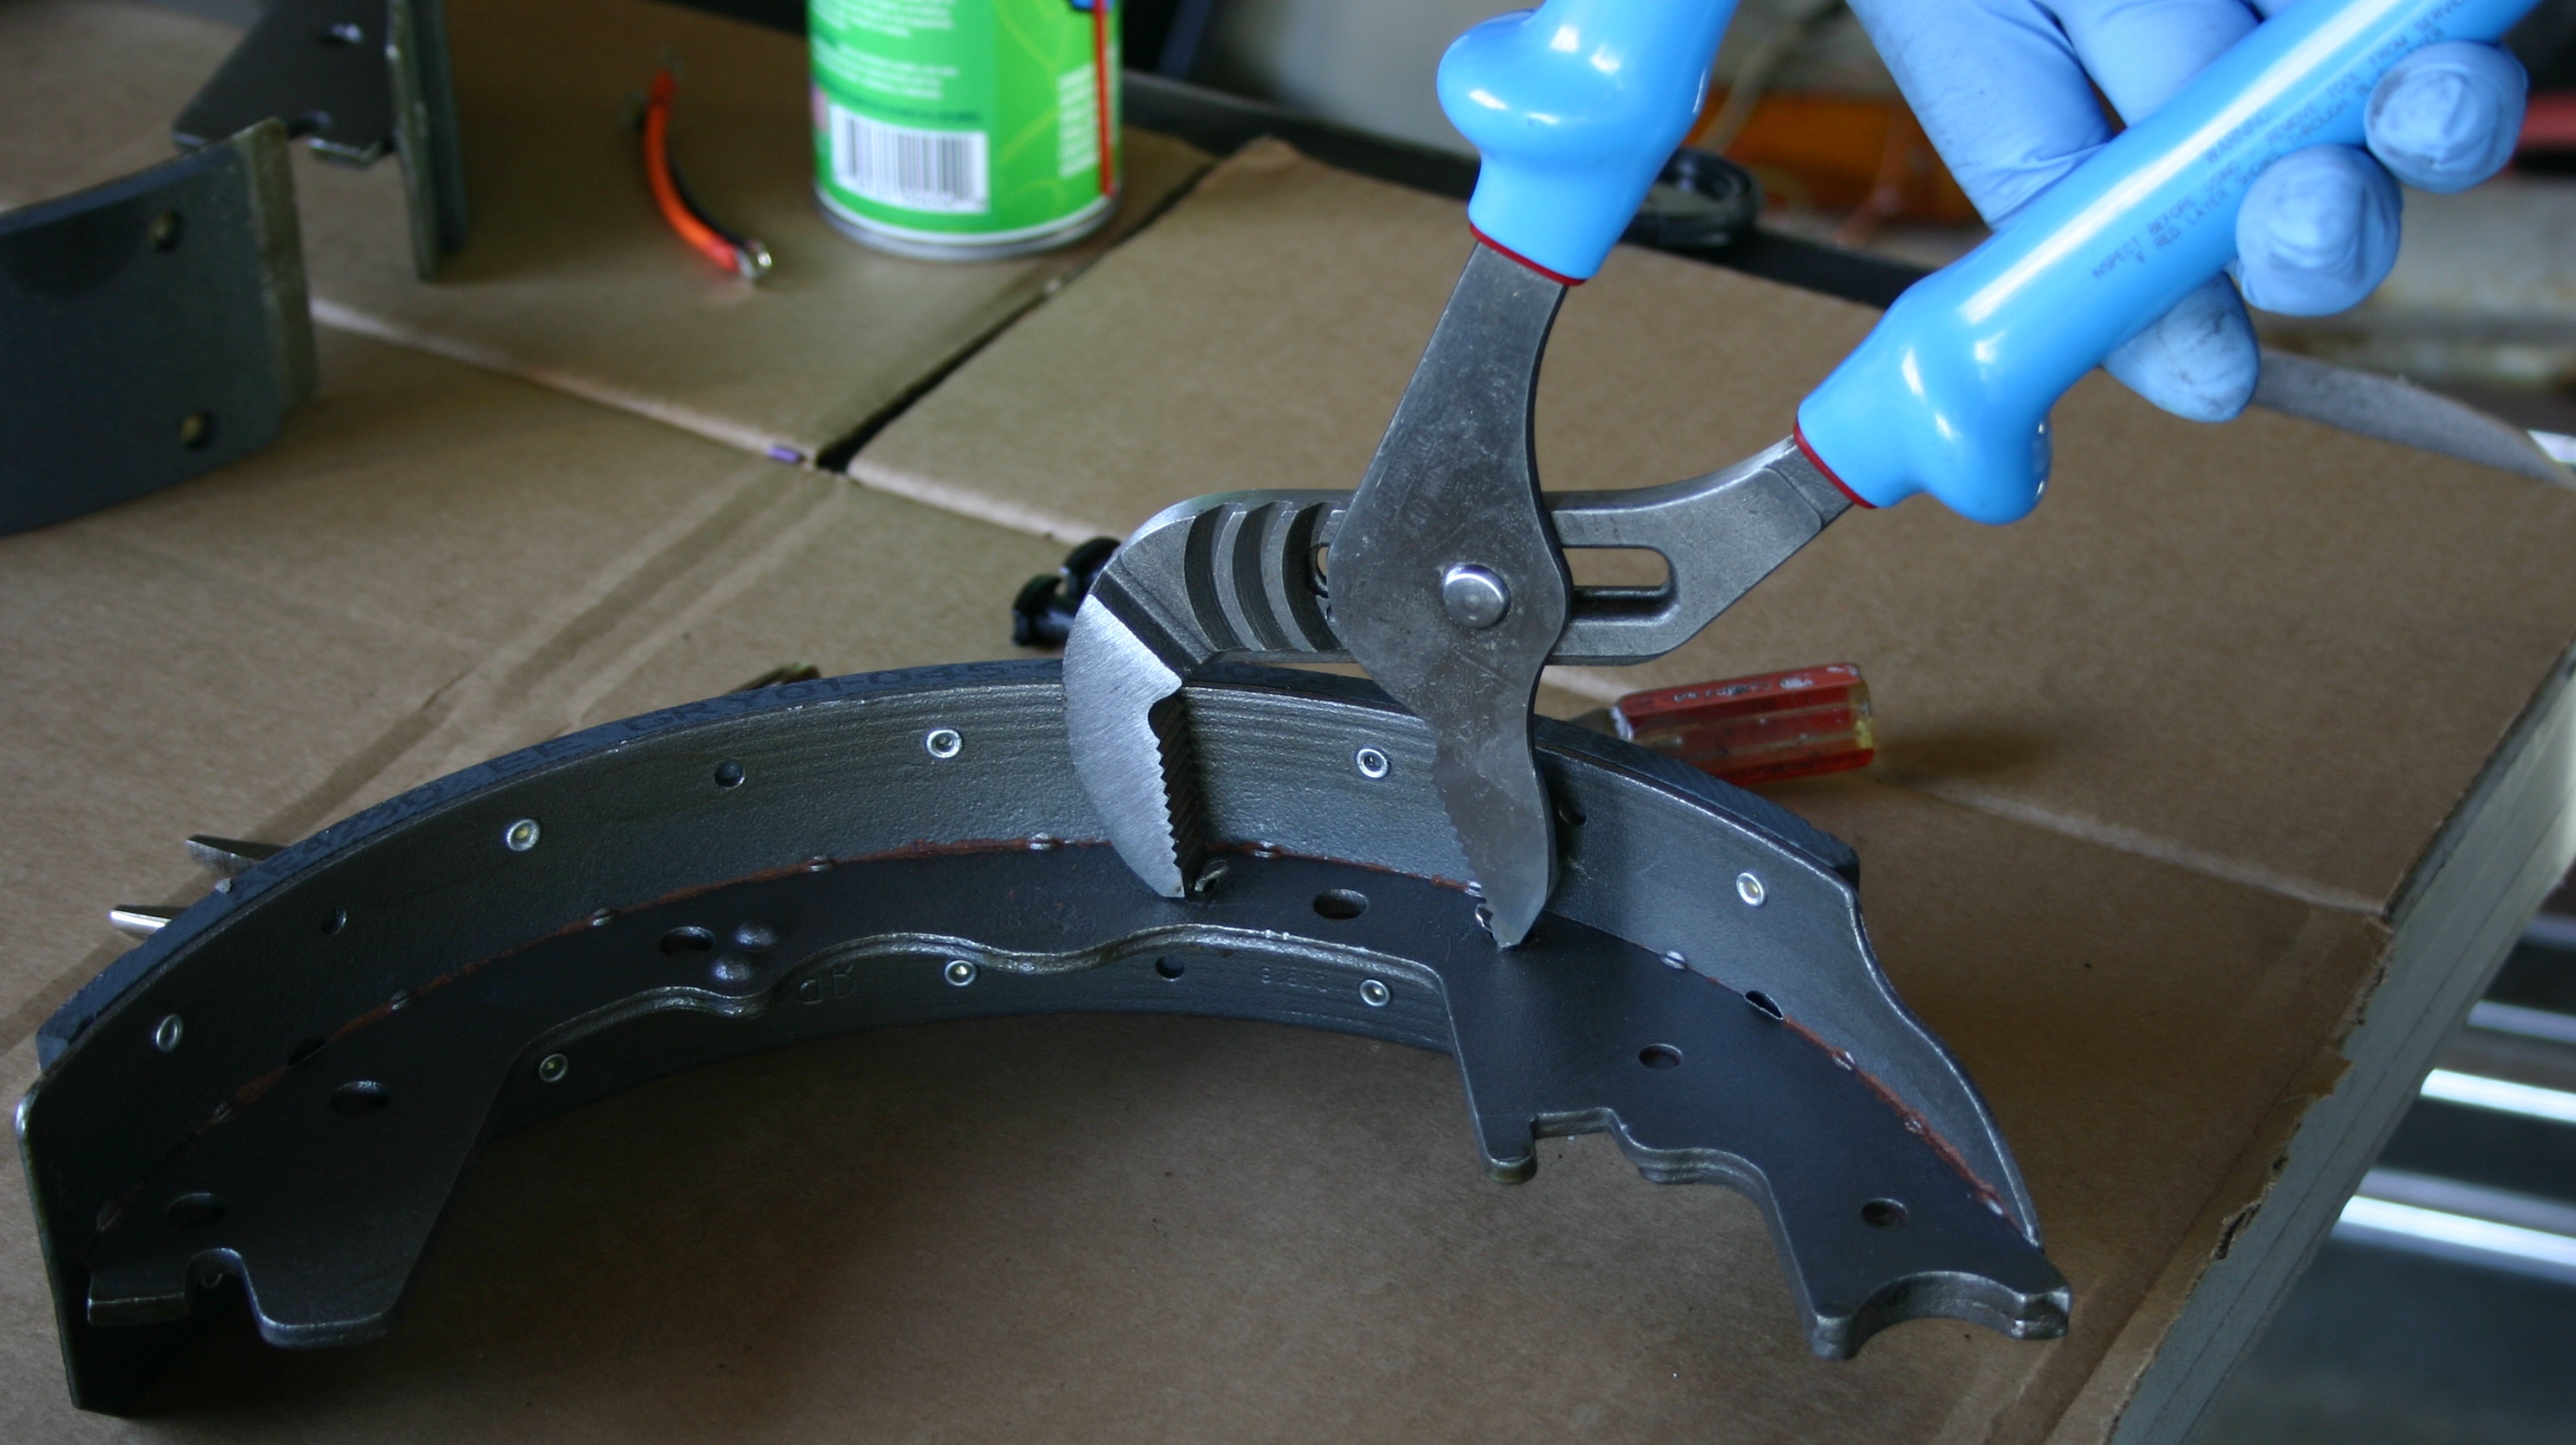
Earlier today I transferred the cable guide from the old LH secondary shoe to the new one. I used some large pliers to get the ear bends started, then chomped them down like a moose biting a candy cane (left). The thoroughly chomped ears are shown on the bottom.


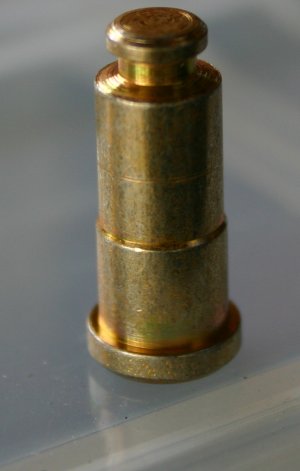
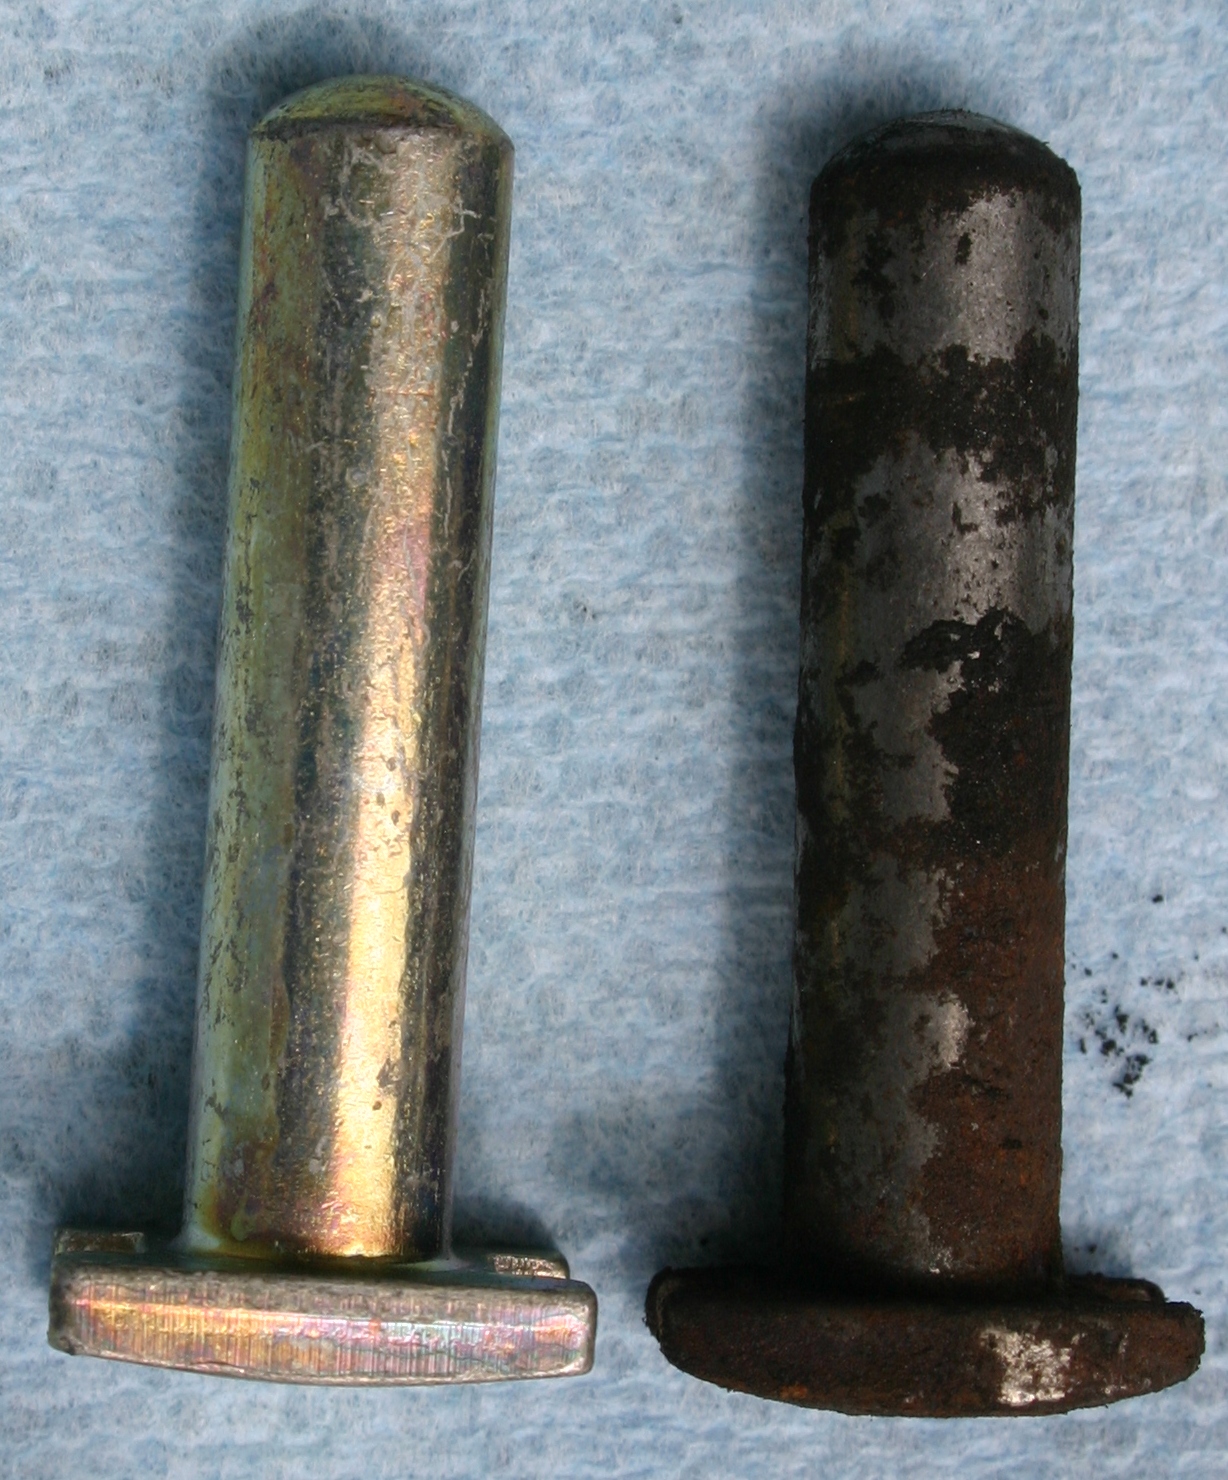
Next I'll be pressing a new adjuster arm lever pin in to the new LH secondary shoe. Here's the old pin (left) and the new pin (right).
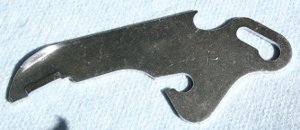
Here are the LH "links." I already casually de-rusted them and hit them with some Eastwood Rust Encapsulator. Since they're somewhat re-finished, I think I'll go ahead and begin putting the LH side together, and save the new "links" I ordered for that side for next time. I can still put the new "links" in the RH side when they arrive.
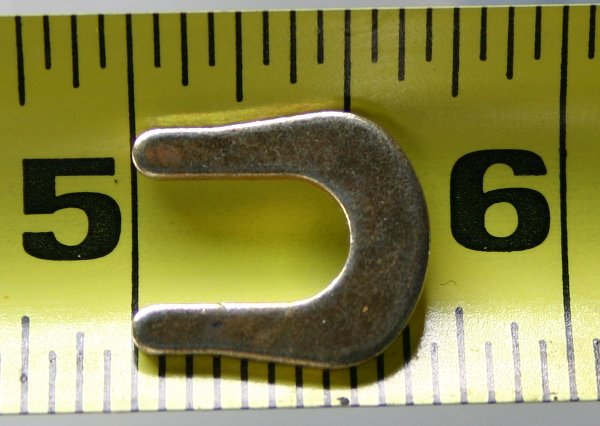
Two of these horse-shoe clips were included along with the two new adjusting lever pins (one of them is shown above). I've delayed confronting my ignorance of their purpose thus far, since I figured it would become clear in due time. Yet I'm ready to beginning assembling and their purpose remains a mystery to me!
This Evening's Question:
Robroy
Earlier today I transferred the cable guide from the old LH secondary shoe to the new one. I used some large pliers to get the ear bends started, then chomped them down like a moose biting a candy cane (left). The thoroughly chomped ears are shown on the bottom.
Next I'll be pressing a new adjuster arm lever pin in to the new LH secondary shoe. Here's the old pin (left) and the new pin (right).
Here are the LH "links." I already casually de-rusted them and hit them with some Eastwood Rust Encapsulator. Since they're somewhat re-finished, I think I'll go ahead and begin putting the LH side together, and save the new "links" I ordered for that side for next time. I can still put the new "links" in the RH side when they arrive.
Two of these horse-shoe clips were included along with the two new adjusting lever pins (one of them is shown above). I've delayed confronting my ignorance of their purpose thus far, since I figured it would become clear in due time. Yet I'm ready to beginning assembling and their purpose remains a mystery to me!

This Evening's Question:
- What's the purpose of these horse-shoe clips? May I omit them?
Robroy
-
fordman
- 100% FORDified!
- Posts: 22329
- Joined: Sun Aug 28, 2005 8:17 pm
- Location: Kansas, Ottawa
- Contact:
Re: 1972 F250 12"x2.5" Bendix rear drum brake rebuild: advice?
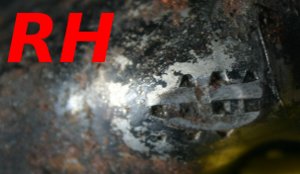
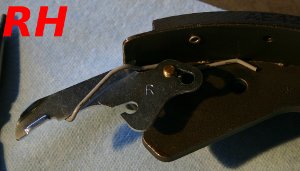
that clip is used on 9 inch 2wd F100 axles to atach the parkign brake lever to the brake shoe. the lever has a stud that sticks out of it that goes through the shoes and the clip is pinched to keep the lever from coming out of the shoe. and i didnt know they were now making the brake cable guides to put on your shoes now. they didnt used to have them available.
-
robroy
- 100% FORDified!
- Posts: 3768
- Joined: Sun Jul 06, 2008 4:36 pm
- Location: California, Salinas
Re: 1972 F250 12"x2.5" Bendix rear drum brake rebuild: advice?
Good afternoon Fordman, thanks for your excellent reply!
This Afternoon's Update:
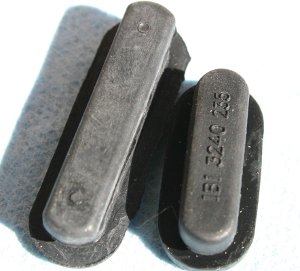
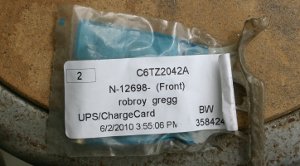
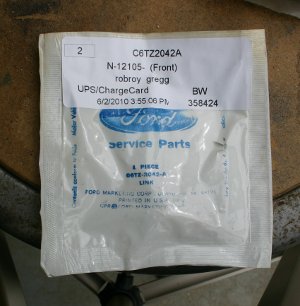
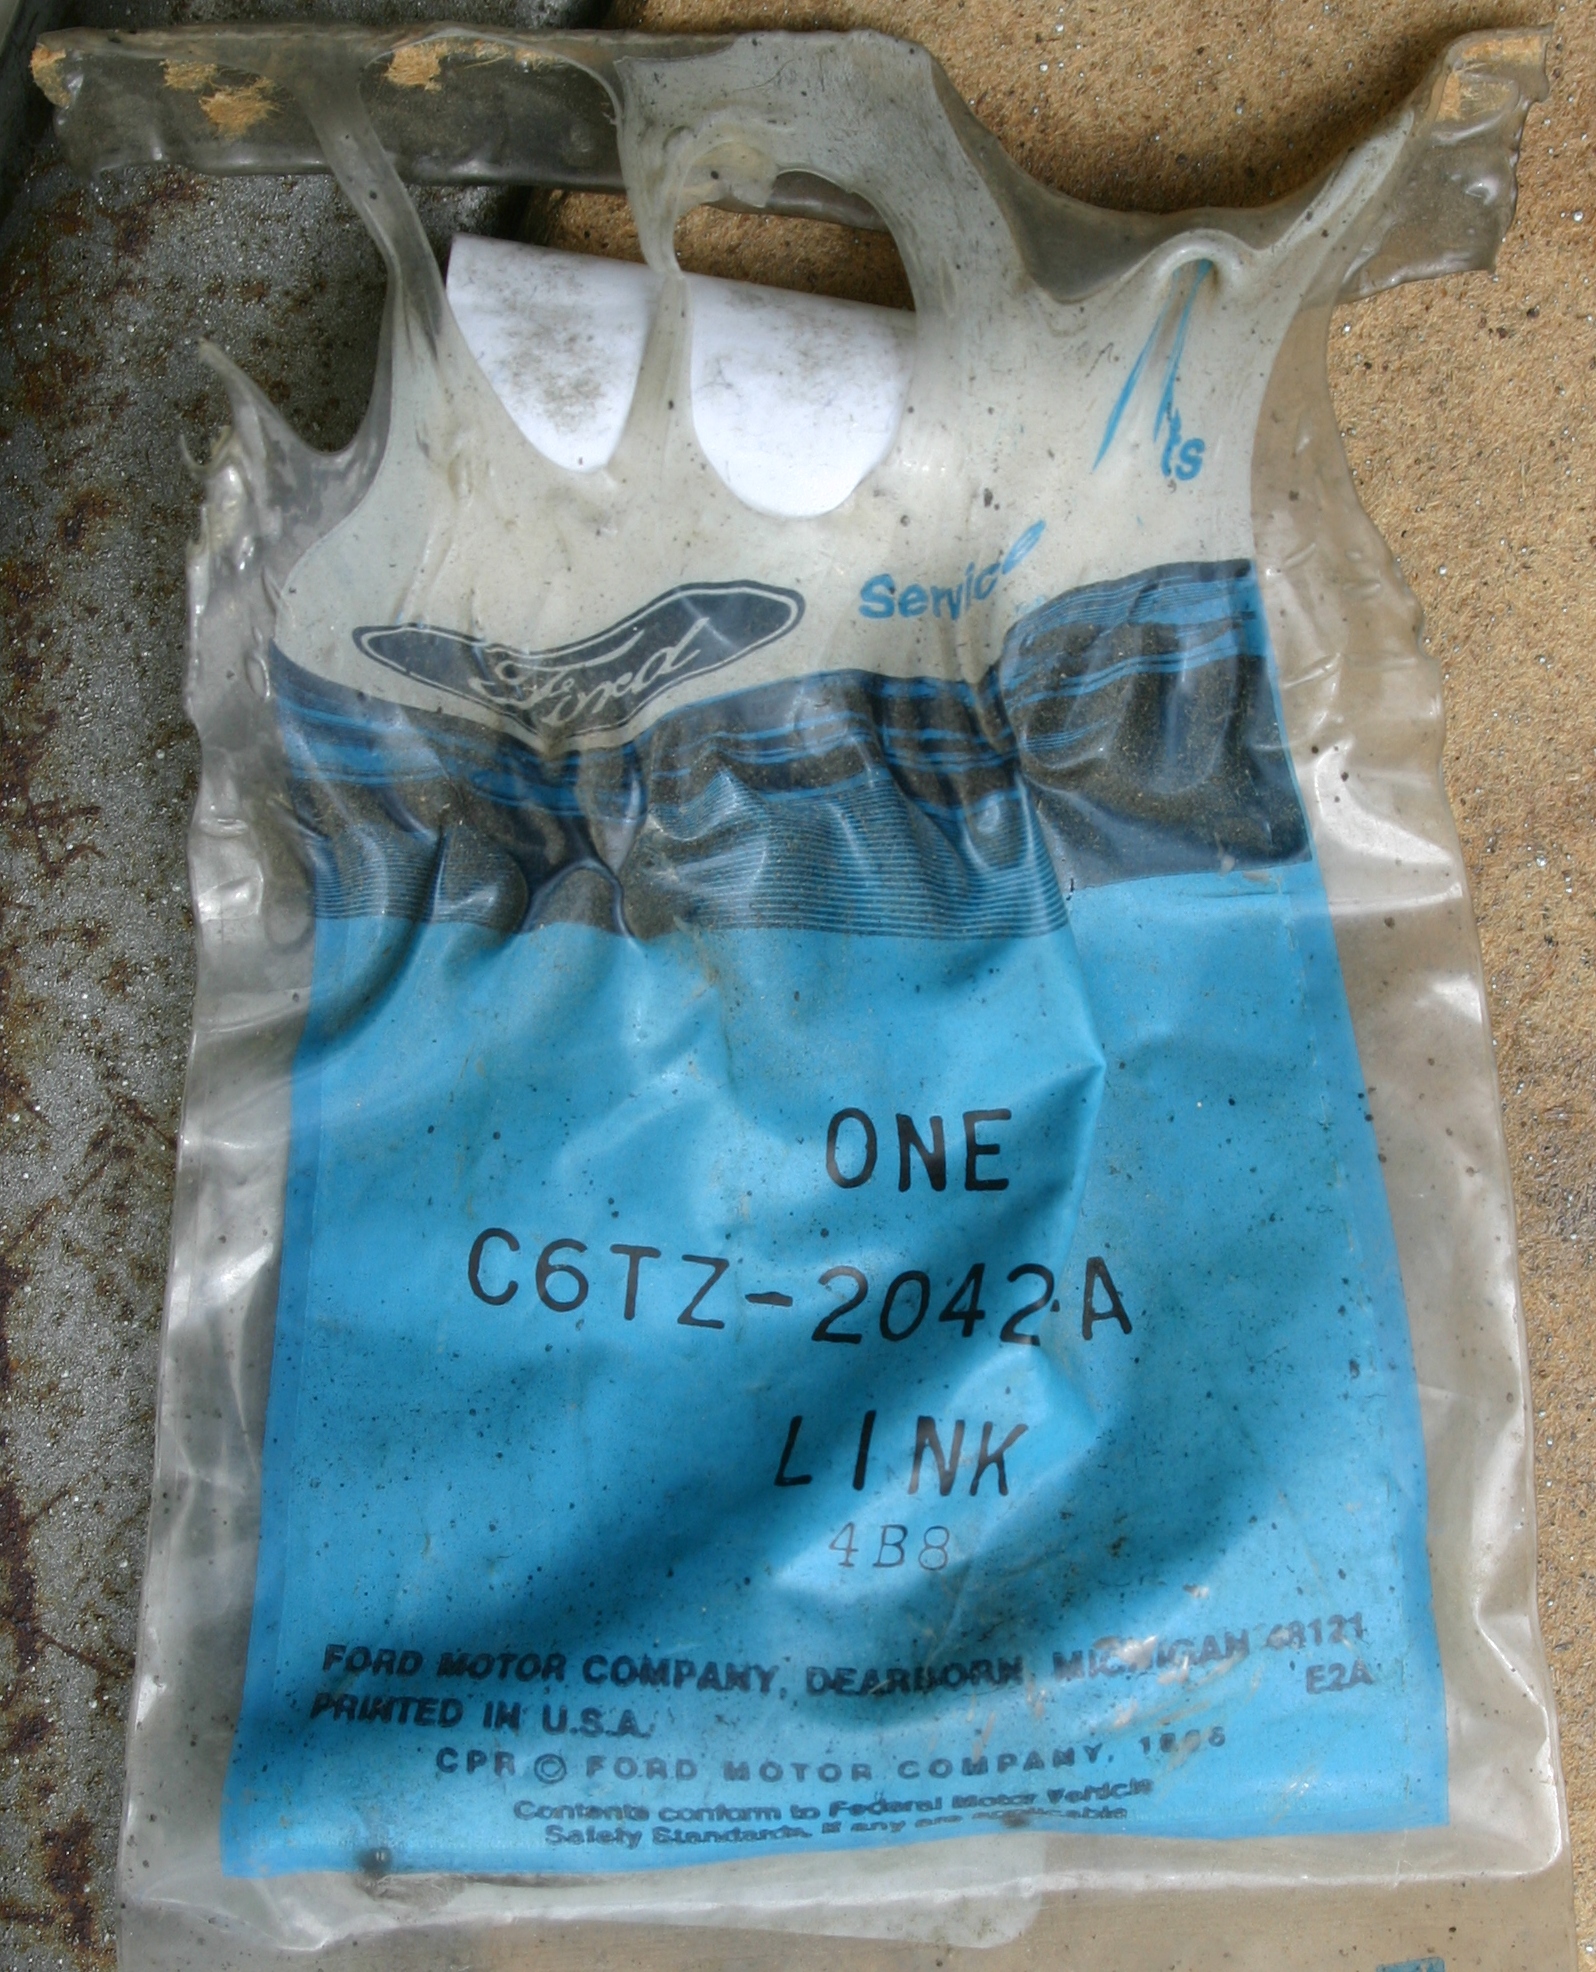
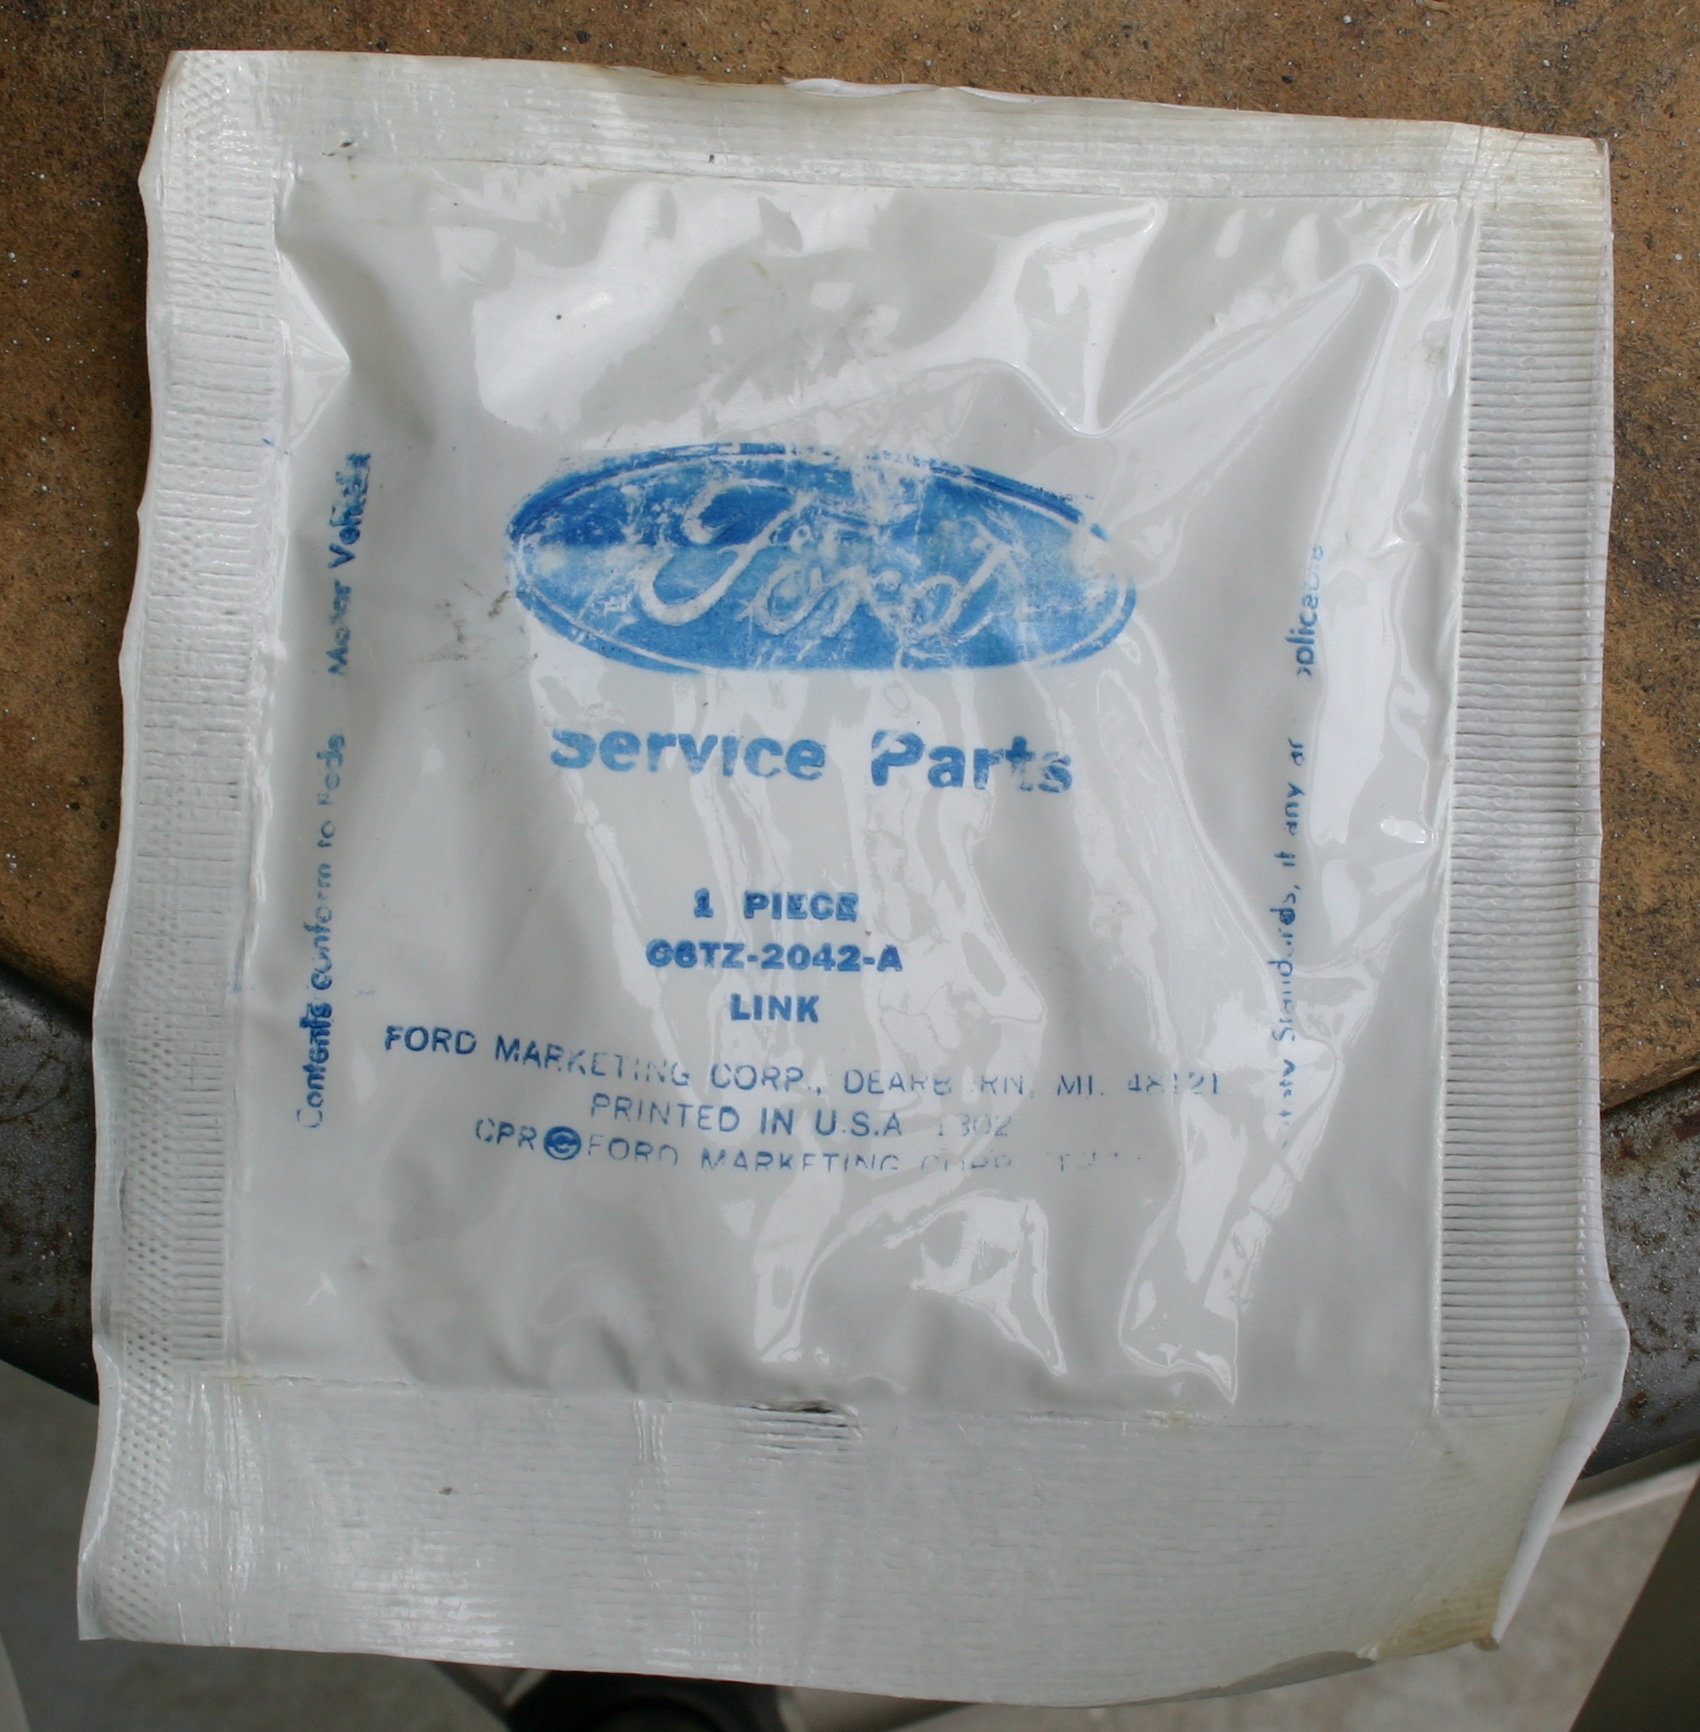
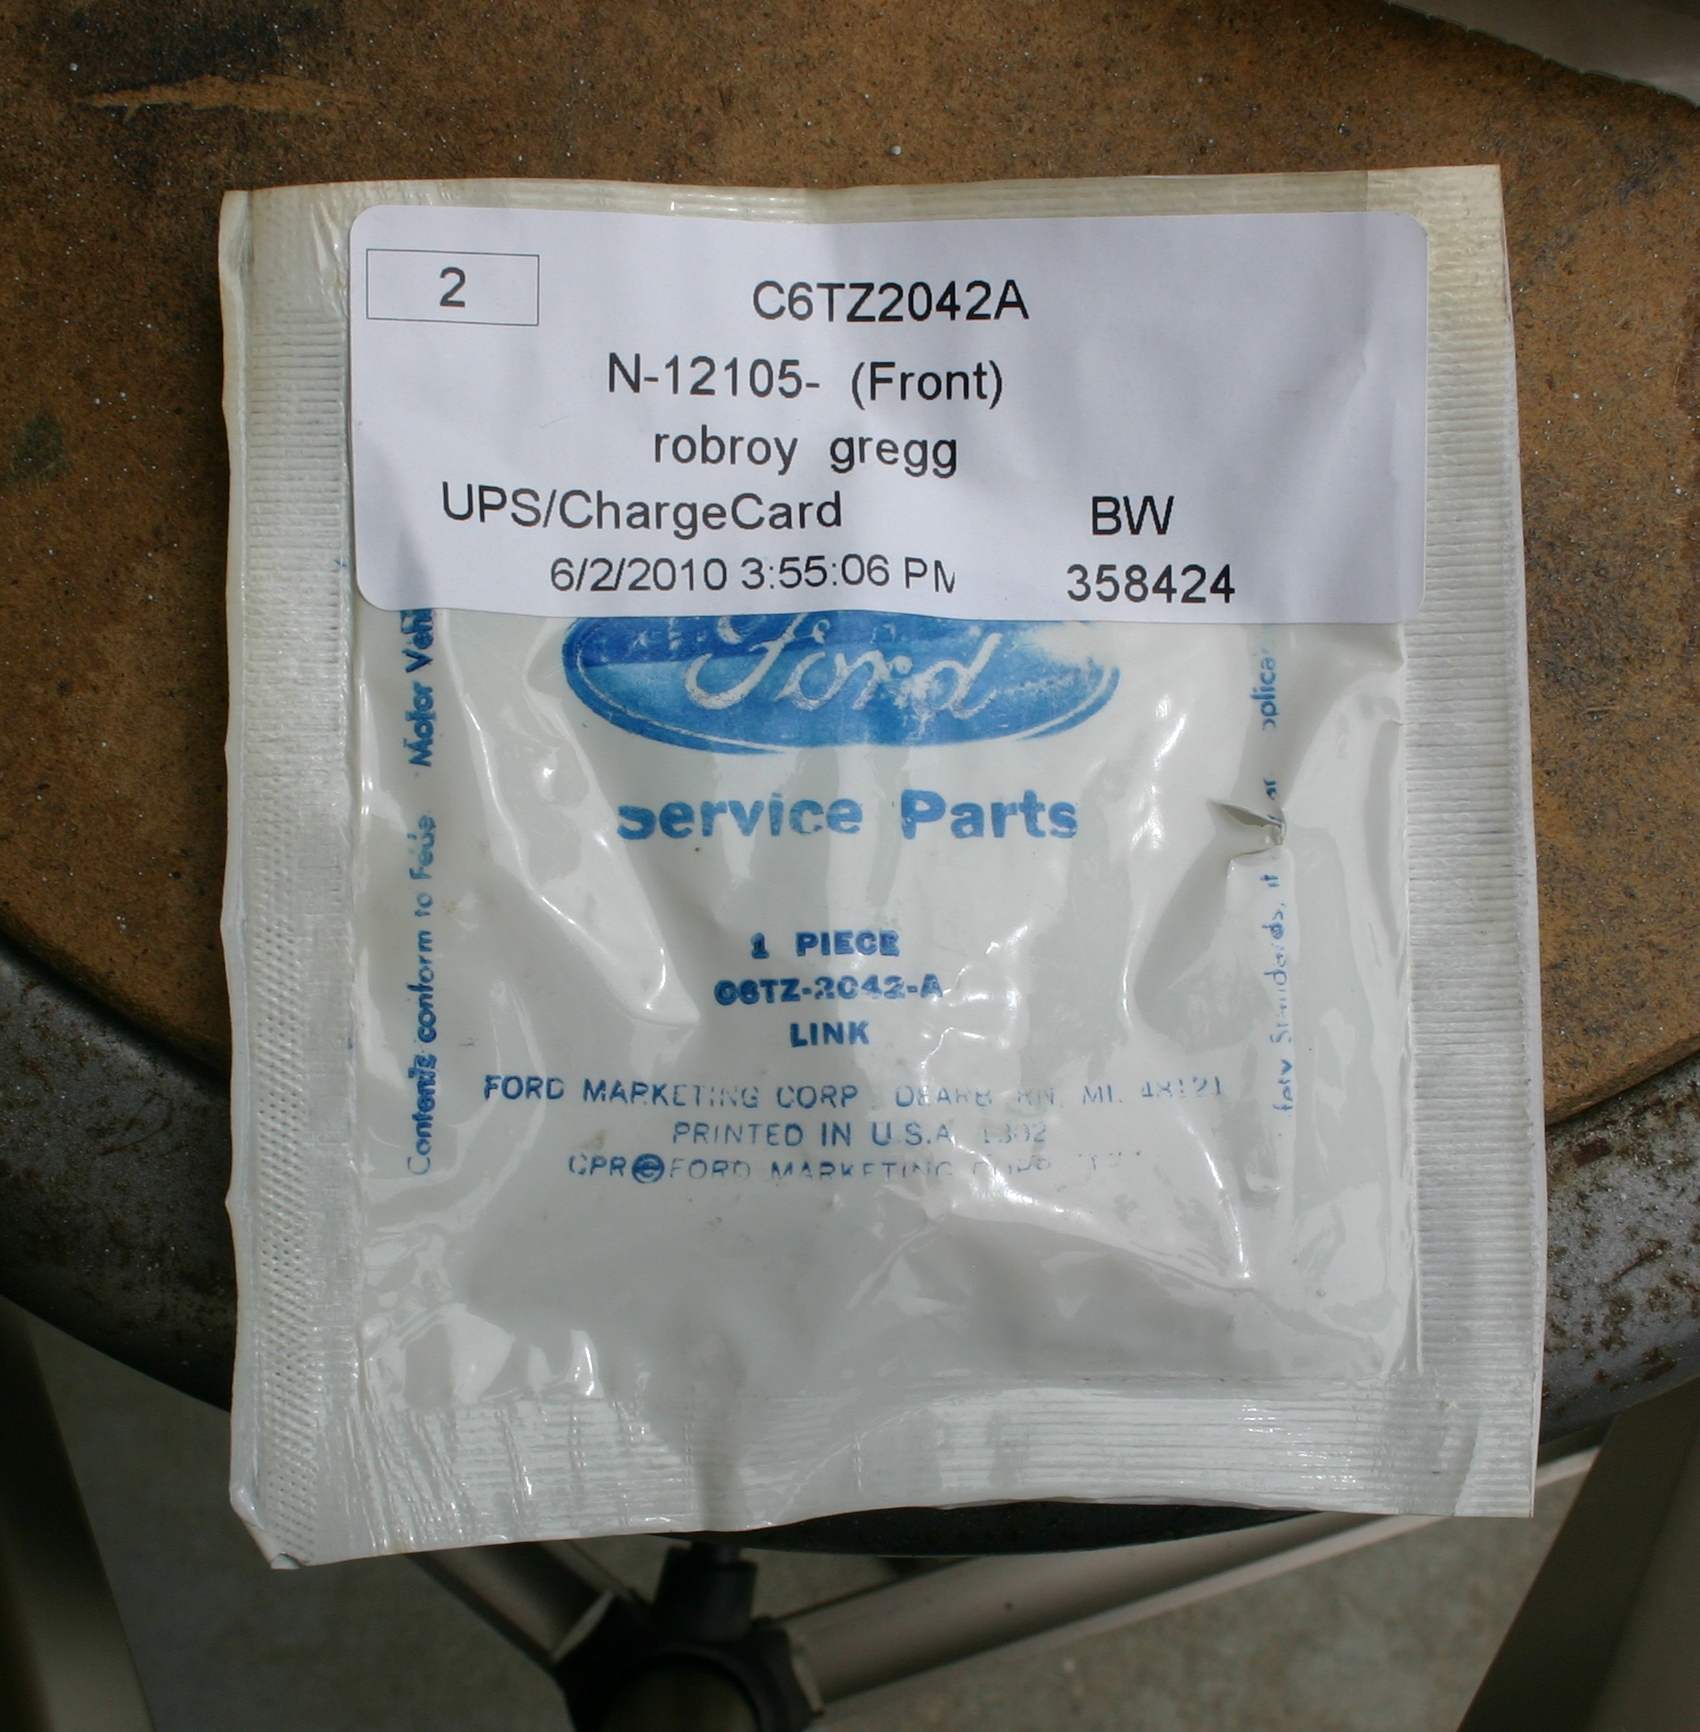
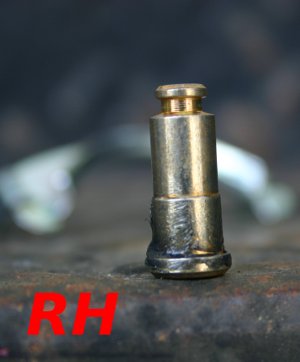
Today the C6TZ-2042-A brake shoe push-rods/links arrived from Green Sales Company! They charged me $2.50 per link and $8 for shipping, so the total charge was $18.
These are plainly NOS parts, the characteristics of which I find strangely charming; these parts have history!
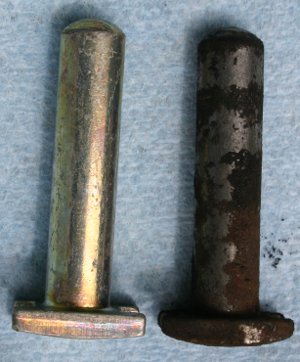
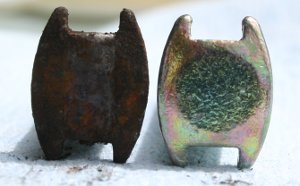
It looks like this one may have been involved in an historic fire or dragon-slaying, yet the link's undamaged.
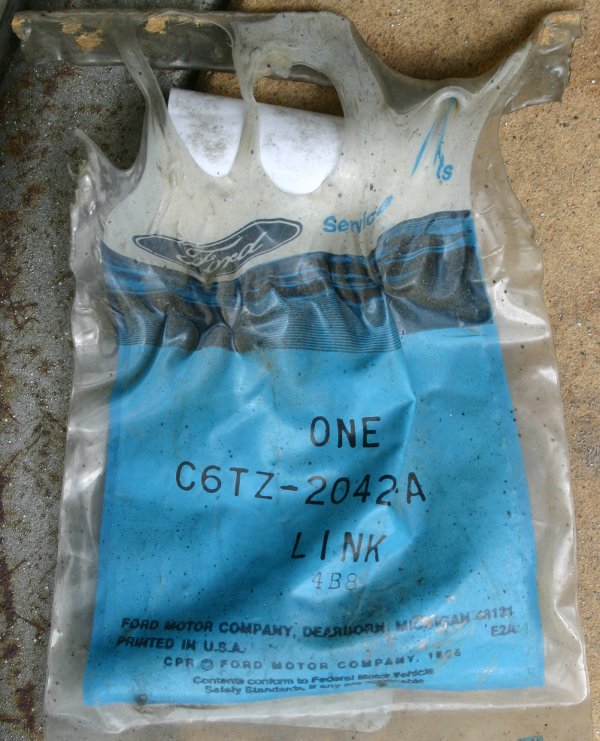
The reverse side of the melted sack (left), and another one (right).
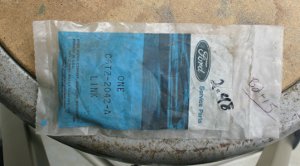
Two of the links came in different sacks and are of a slightly different, yet seemingly compatible style--more on that difference below.
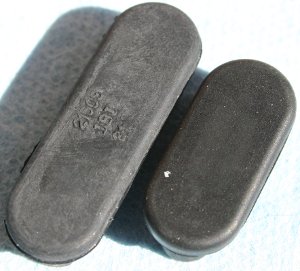
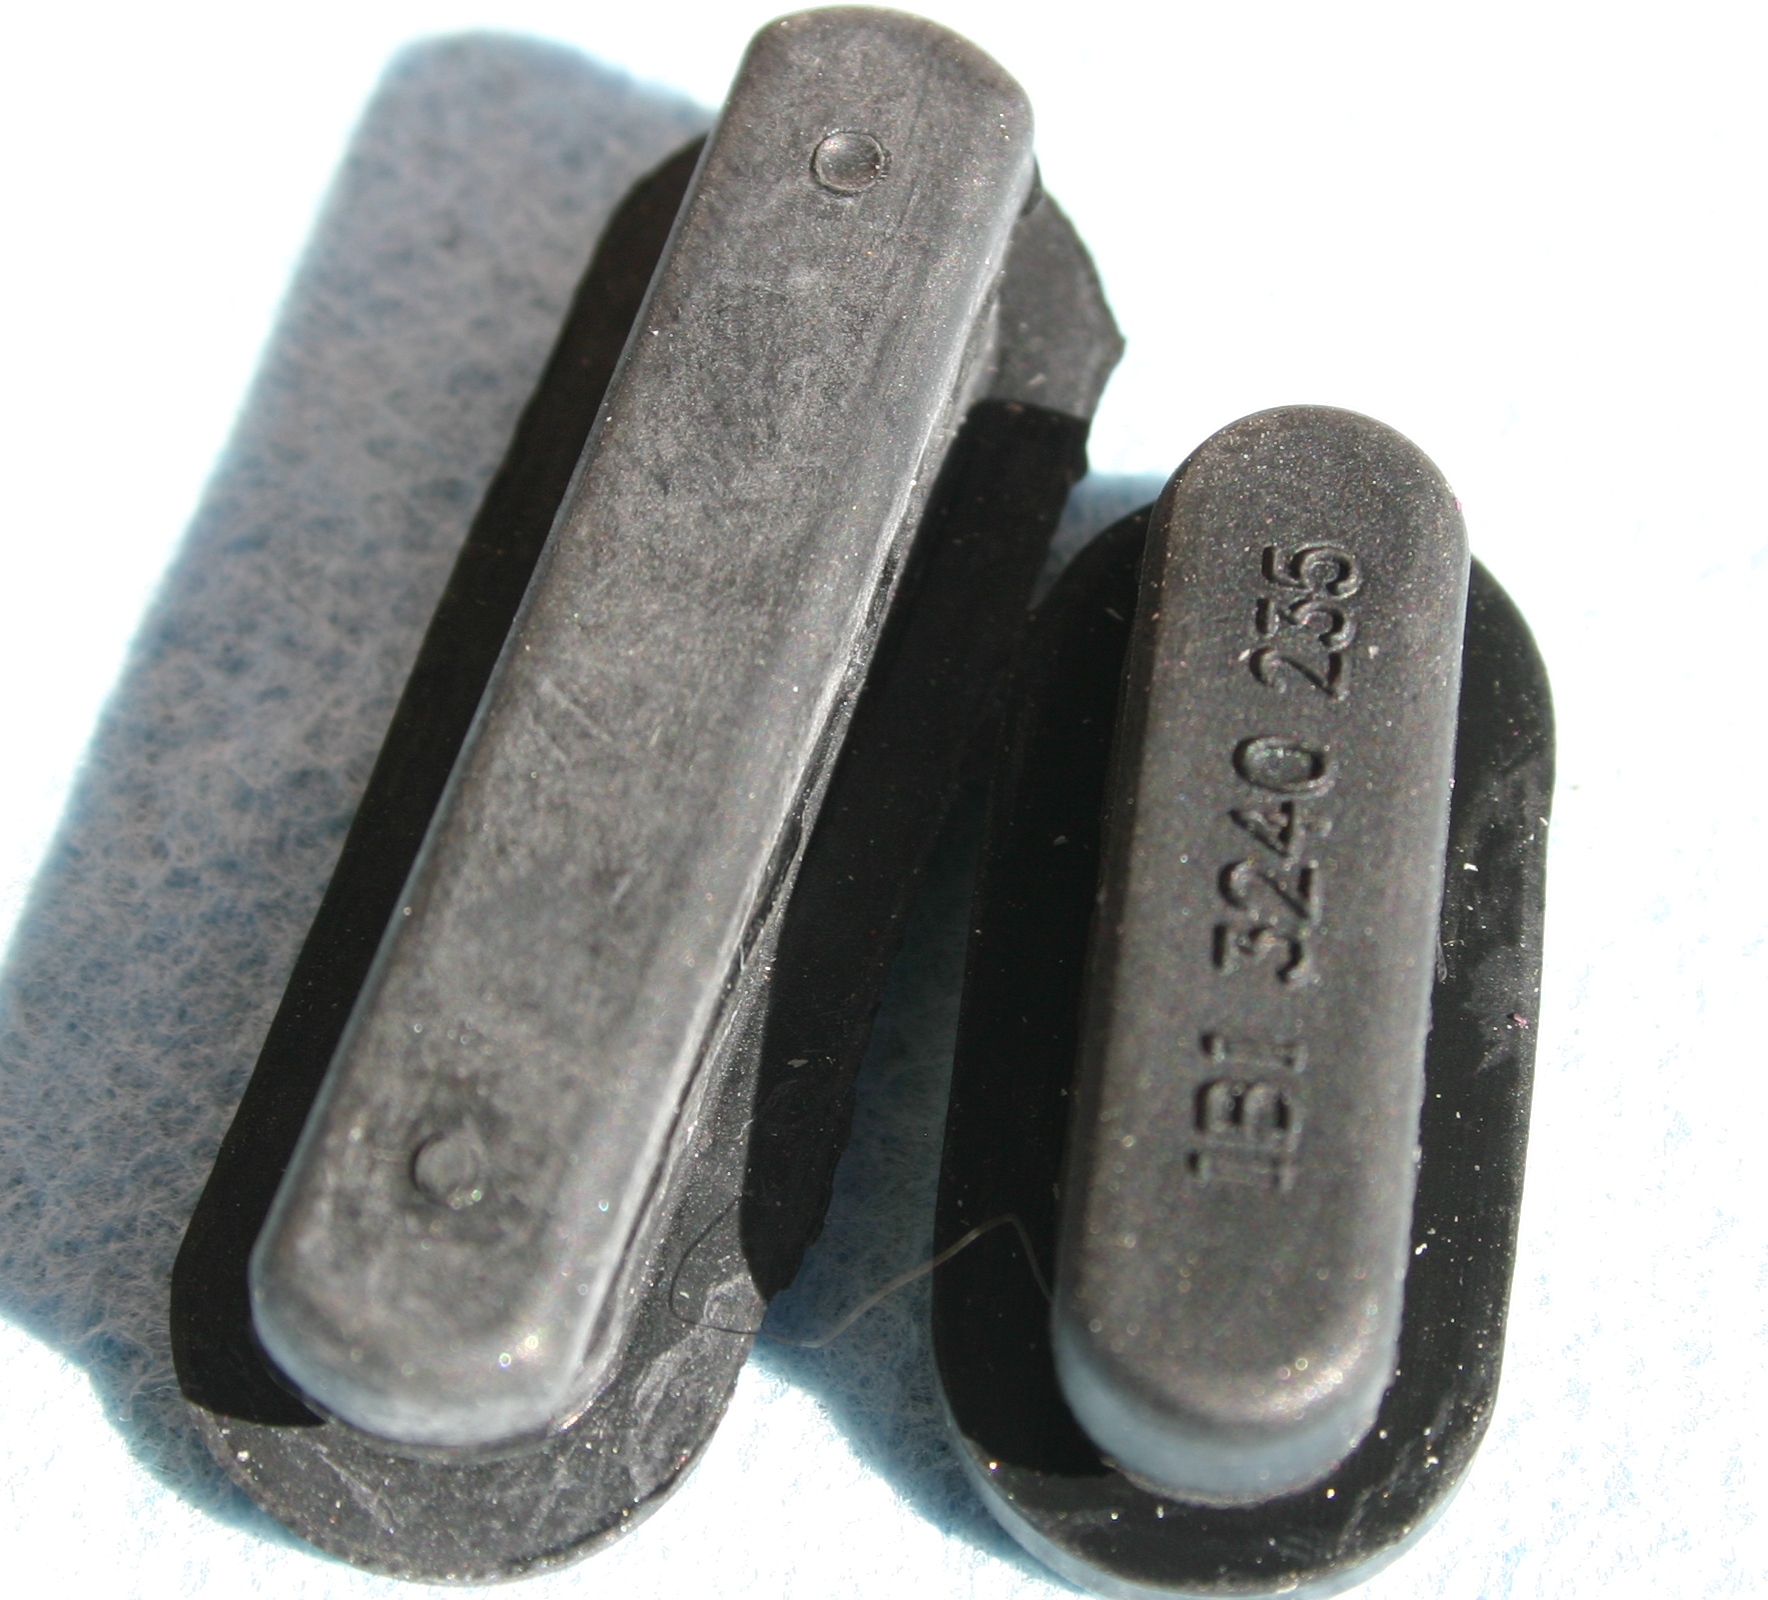
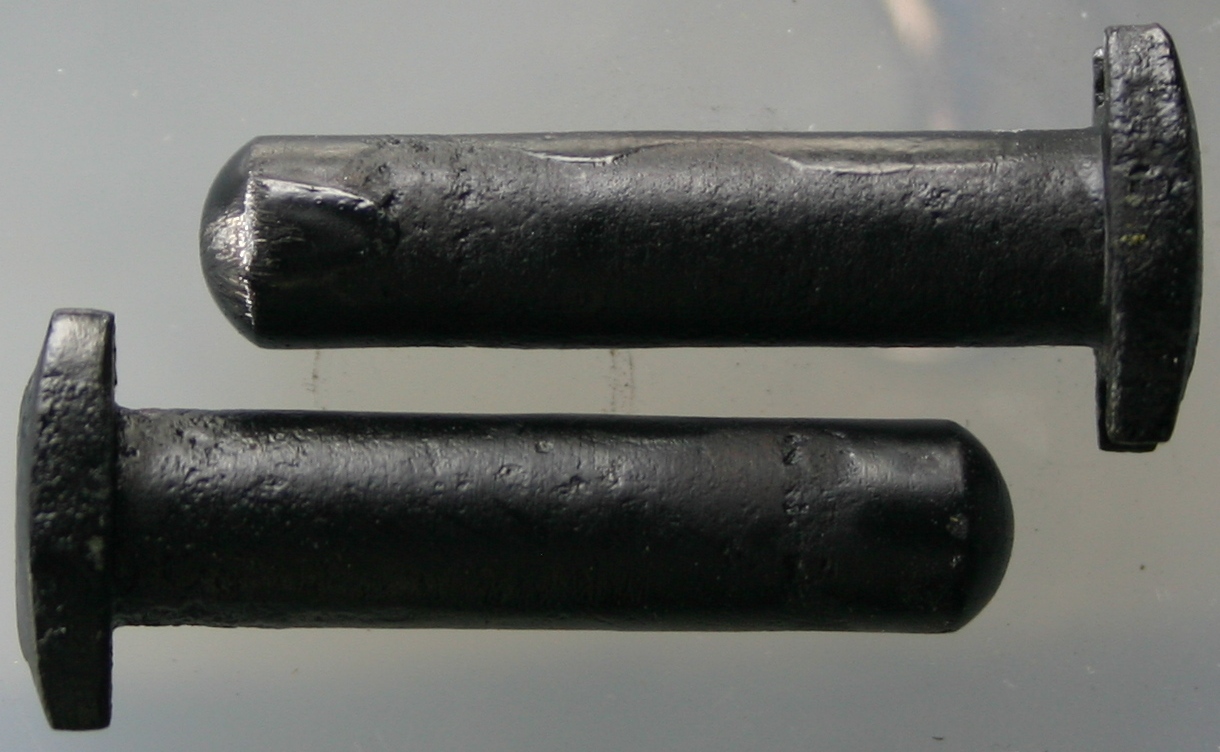
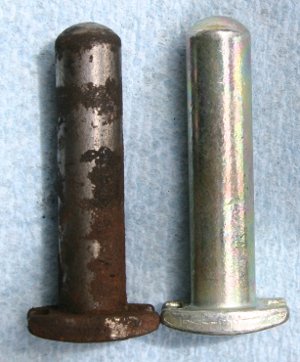
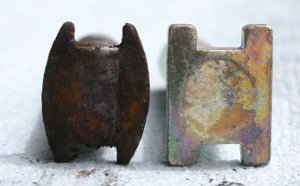
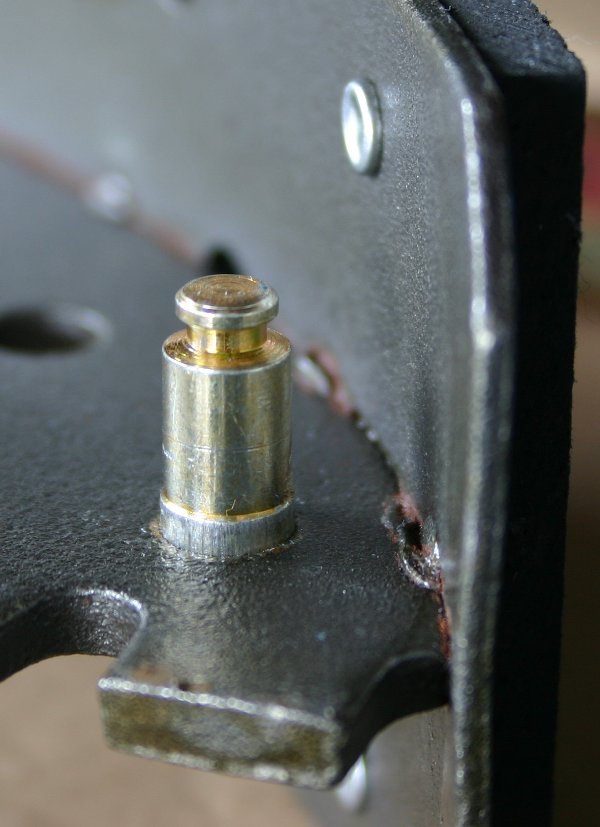
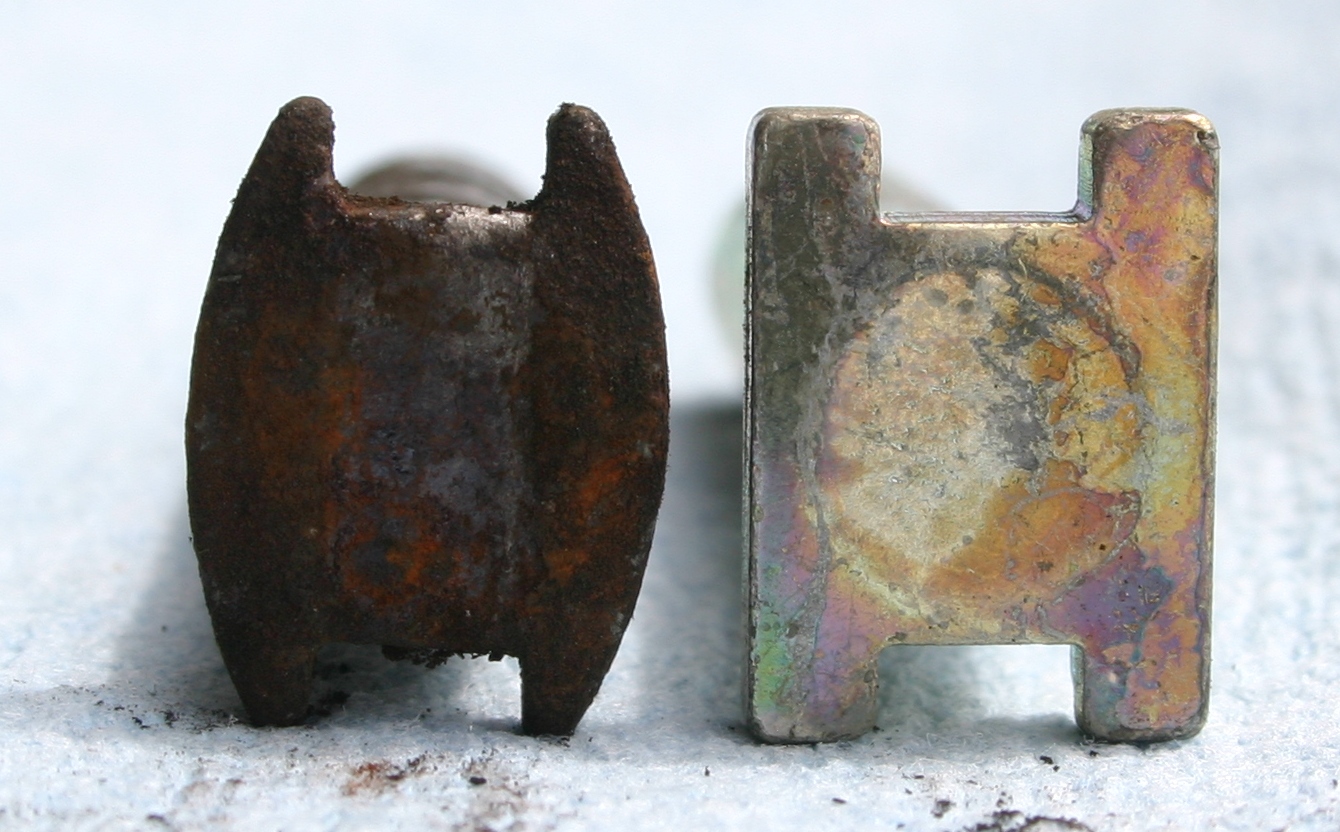
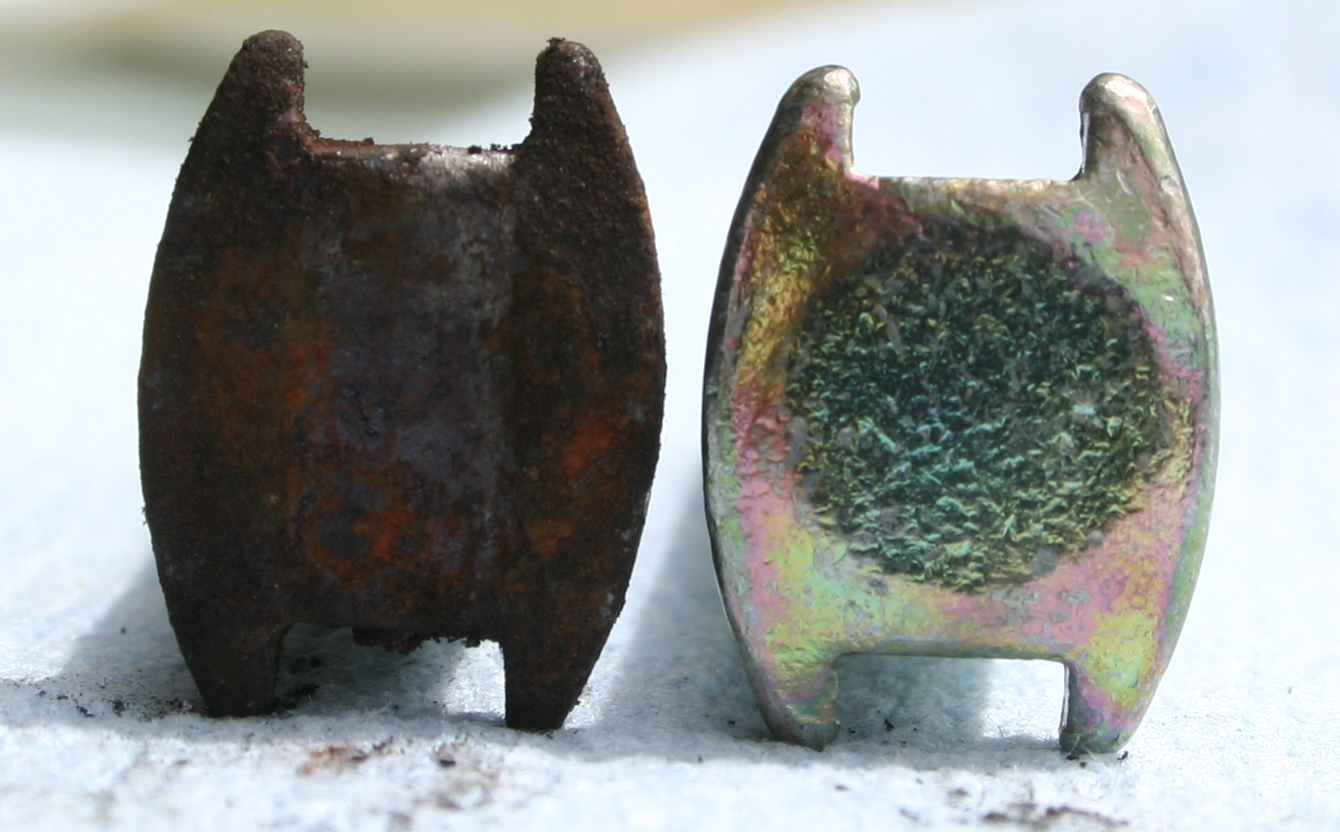
The links that came in the square, white sacks had heads with square edges (left), while the links that came in the rectangular, transparent+blue sacks had heads with rounded edges (right). As you can see, the links with the round heads are an exact match for the OEM parts, save their superior golden finish (on the new links)!
Despite the subtle difference between half of these NOS links, they seem to fit perfectly in the shoes; I'm guessing that their functionally identical.
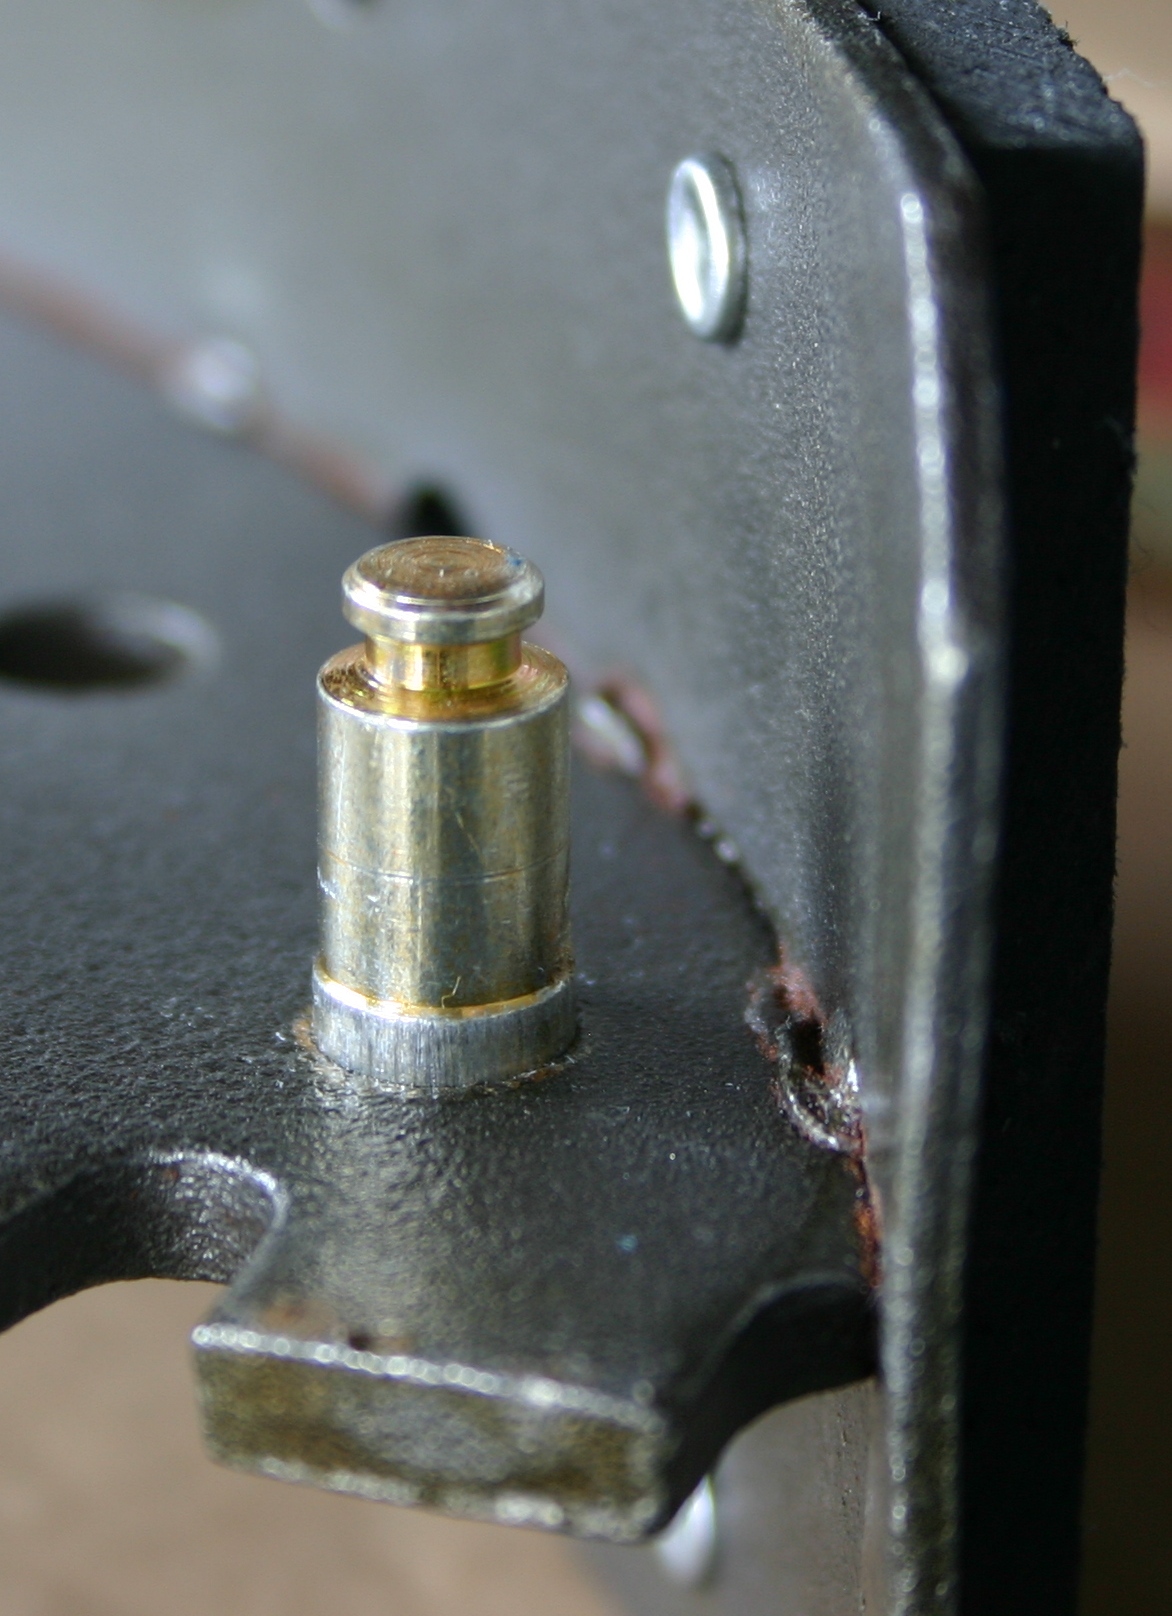
I used a small hammer and a hard surface to gently tap the adjusting lever pin in to the new LH, secondary shoe (left). Before that, I put a film of grease on the OD of the pin portion to be pressed through--that seemed to help a lot (right). The installed pin is shown below.
This Afternoon's Question:
Robroy
Okay--thanks Fordman! I did a Google Images on Ford+Brake+Horseshoe+Clip and found some examples of just what you're describing. Since these clips came with the brake shoes, perhaps the shoe manufacturer simply doesn't want to bother including different kits for different drum brake styles on Fords.fordman wrote:that clip is used on 9 inch 2wd F100 axles to atach the parkign brake lever to the brake shoe. the lever has a stud that sticks out of it that goes through the shoes and the clip is pinched to keep the lever from coming out of the shoe.
I see! Yes, they're part of the various self-adjusting kits I've seen, and NAPA sells them piecemeal also.fordman wrote:and i didnt know they were now making the brake cable guides to put on your shoes now. they didnt used to have them available.
This Afternoon's Update:
Today the C6TZ-2042-A brake shoe push-rods/links arrived from Green Sales Company! They charged me $2.50 per link and $8 for shipping, so the total charge was $18.
These are plainly NOS parts, the characteristics of which I find strangely charming; these parts have history!
It looks like this one may have been involved in an historic fire or dragon-slaying, yet the link's undamaged.
The reverse side of the melted sack (left), and another one (right).


Two of the links came in different sacks and are of a slightly different, yet seemingly compatible style--more on that difference below.
The links that came in the square, white sacks had heads with square edges (left), while the links that came in the rectangular, transparent+blue sacks had heads with rounded edges (right). As you can see, the links with the round heads are an exact match for the OEM parts, save their superior golden finish (on the new links)!
Despite the subtle difference between half of these NOS links, they seem to fit perfectly in the shoes; I'm guessing that their functionally identical.

I used a small hammer and a hard surface to gently tap the adjusting lever pin in to the new LH, secondary shoe (left). Before that, I put a film of grease on the OD of the pin portion to be pressed through--that seemed to help a lot (right). The installed pin is shown below.


This Afternoon's Question:
- Do y'all agree that the two brake shoe push-rod/link styles are functionally identical?
Robroy
-
70_F100
- Moderator
- Posts: 2999
- Joined: Mon Oct 22, 2007 11:23 am
- Location: North Carolina, Kernersville
Re: 1972 F250 12"x2.5" Bendix rear drum brake rebuild: advice?
Yes, their function is not determined by the shape of the link.
As long as they are the same length and fit the shoes and wheel cylinders the same, they will perform the same function.
As long as they are the same length and fit the shoes and wheel cylinders the same, they will perform the same function.
Wise men talk because they have something to say; fools talk because they have to say something.--Plato
Why is it that there's seldom time to fix it right the first time, but there's always time to fix it right the second time???
That's not an oil leak That's SWEAT from all that HORSEPOWER!!
Why is it that there's seldom time to fix it right the first time, but there's always time to fix it right the second time???
That's not an oil leak
-
robroy
- 100% FORDified!
- Posts: 3768
- Joined: Sun Jul 06, 2008 4:36 pm
- Location: California, Salinas
Re: 1972 F250 12"x2.5" Bendix rear drum brake rebuild: advice?
Good afternoon 70_F100, thanks for your quick reply!
This Evening's Update:
With the links here from Green Sales Company, I've begun following these instructions from the 1972 Ford Truck Shop Manual, page 12-02-5:
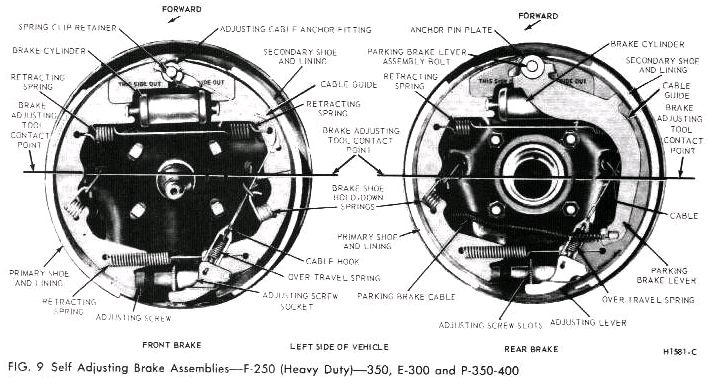
I've also been referencing this illustration from page 12-02-5 (click on it a version that's easier to see):
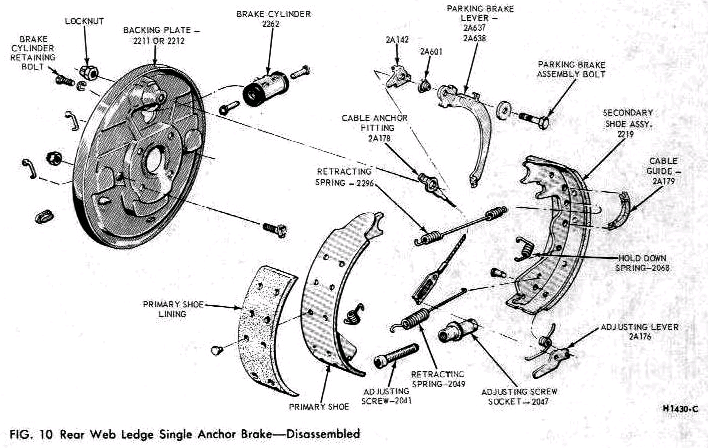
And this illustration from page 12-02-6 (click on this one also):
I first covered the Installation step #1 by going over the shoe contact points on the backing plate with some fine emery cloth, removing most of the surface rust, then wiping them clean with brake cleaner on a rag.
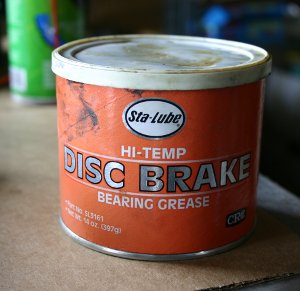
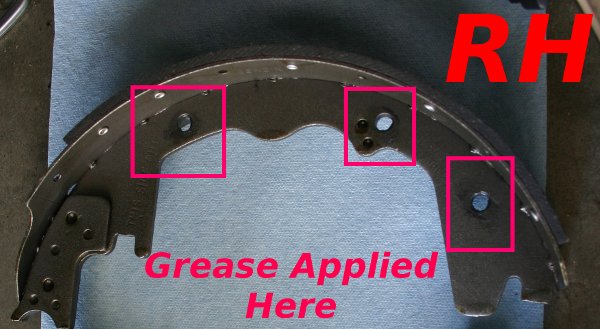
Then for step #2, I put some of this high-temperature disc brake grease on the shoe and spring contact points. Here's the amount of grease I put on the two highest shoe contact points:


And here are the two shoe contact points in the middle:

And you can see the amount of grease I used at the lower retracting spring hole on the shoe (left), and around the shoe hold-down nail (right). Now that I'm writing this, I can't think of a reason to put any grease nearby that nail--oh well. Good thing I used it so sparingly!


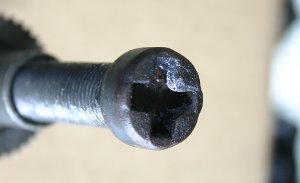
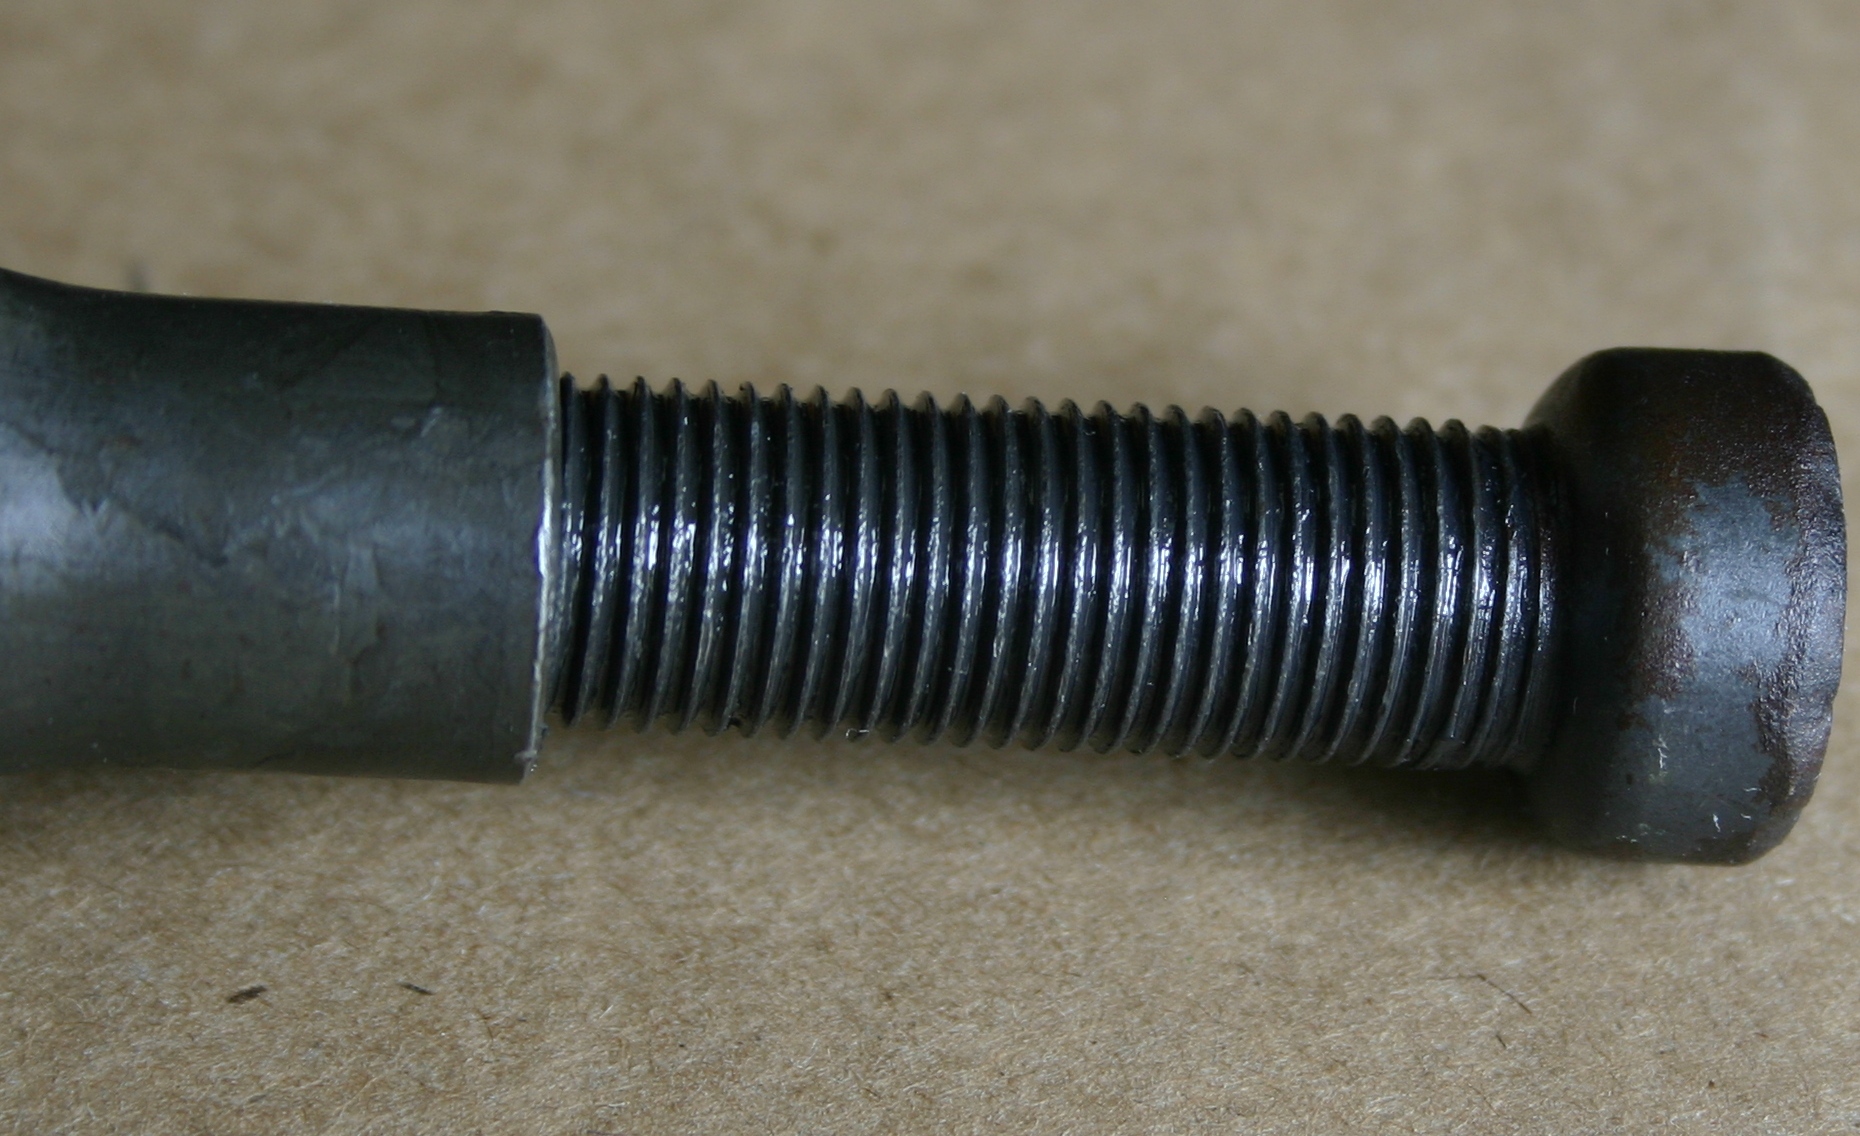
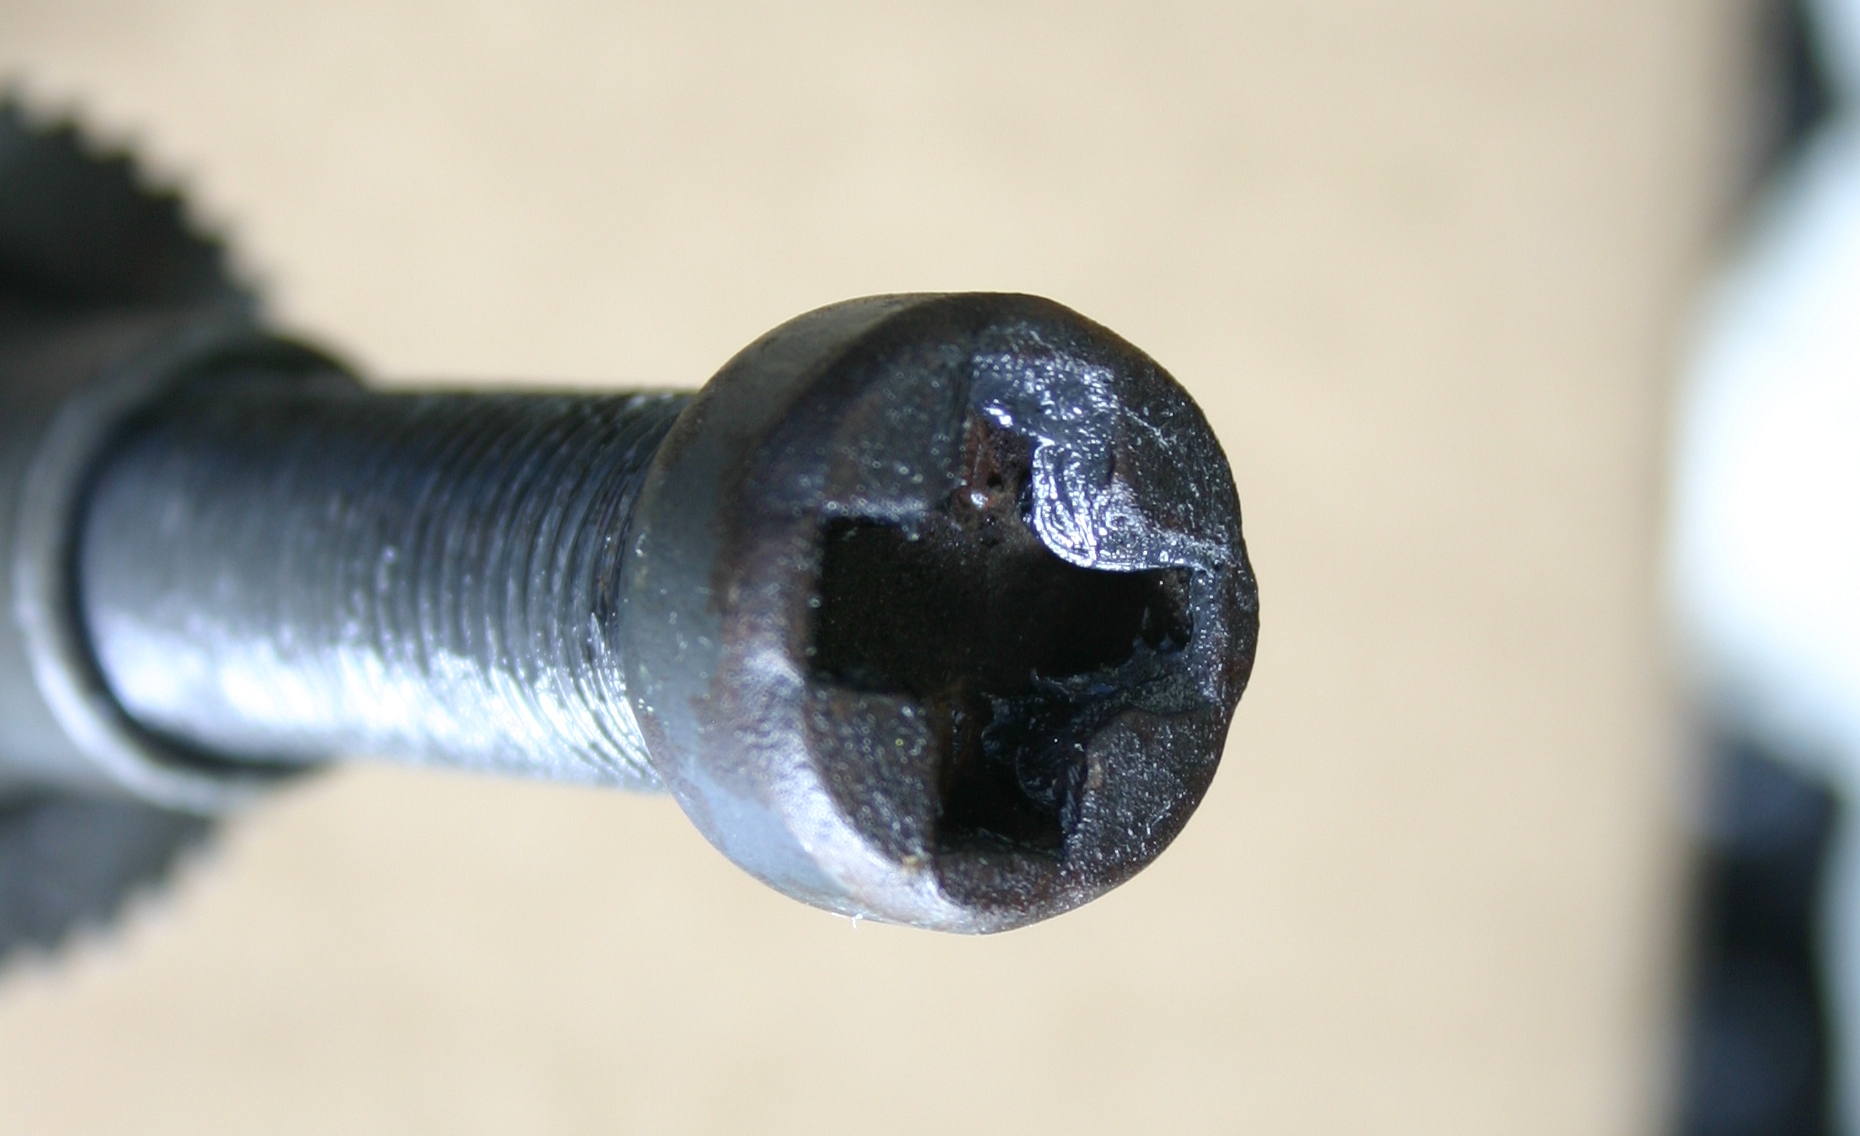
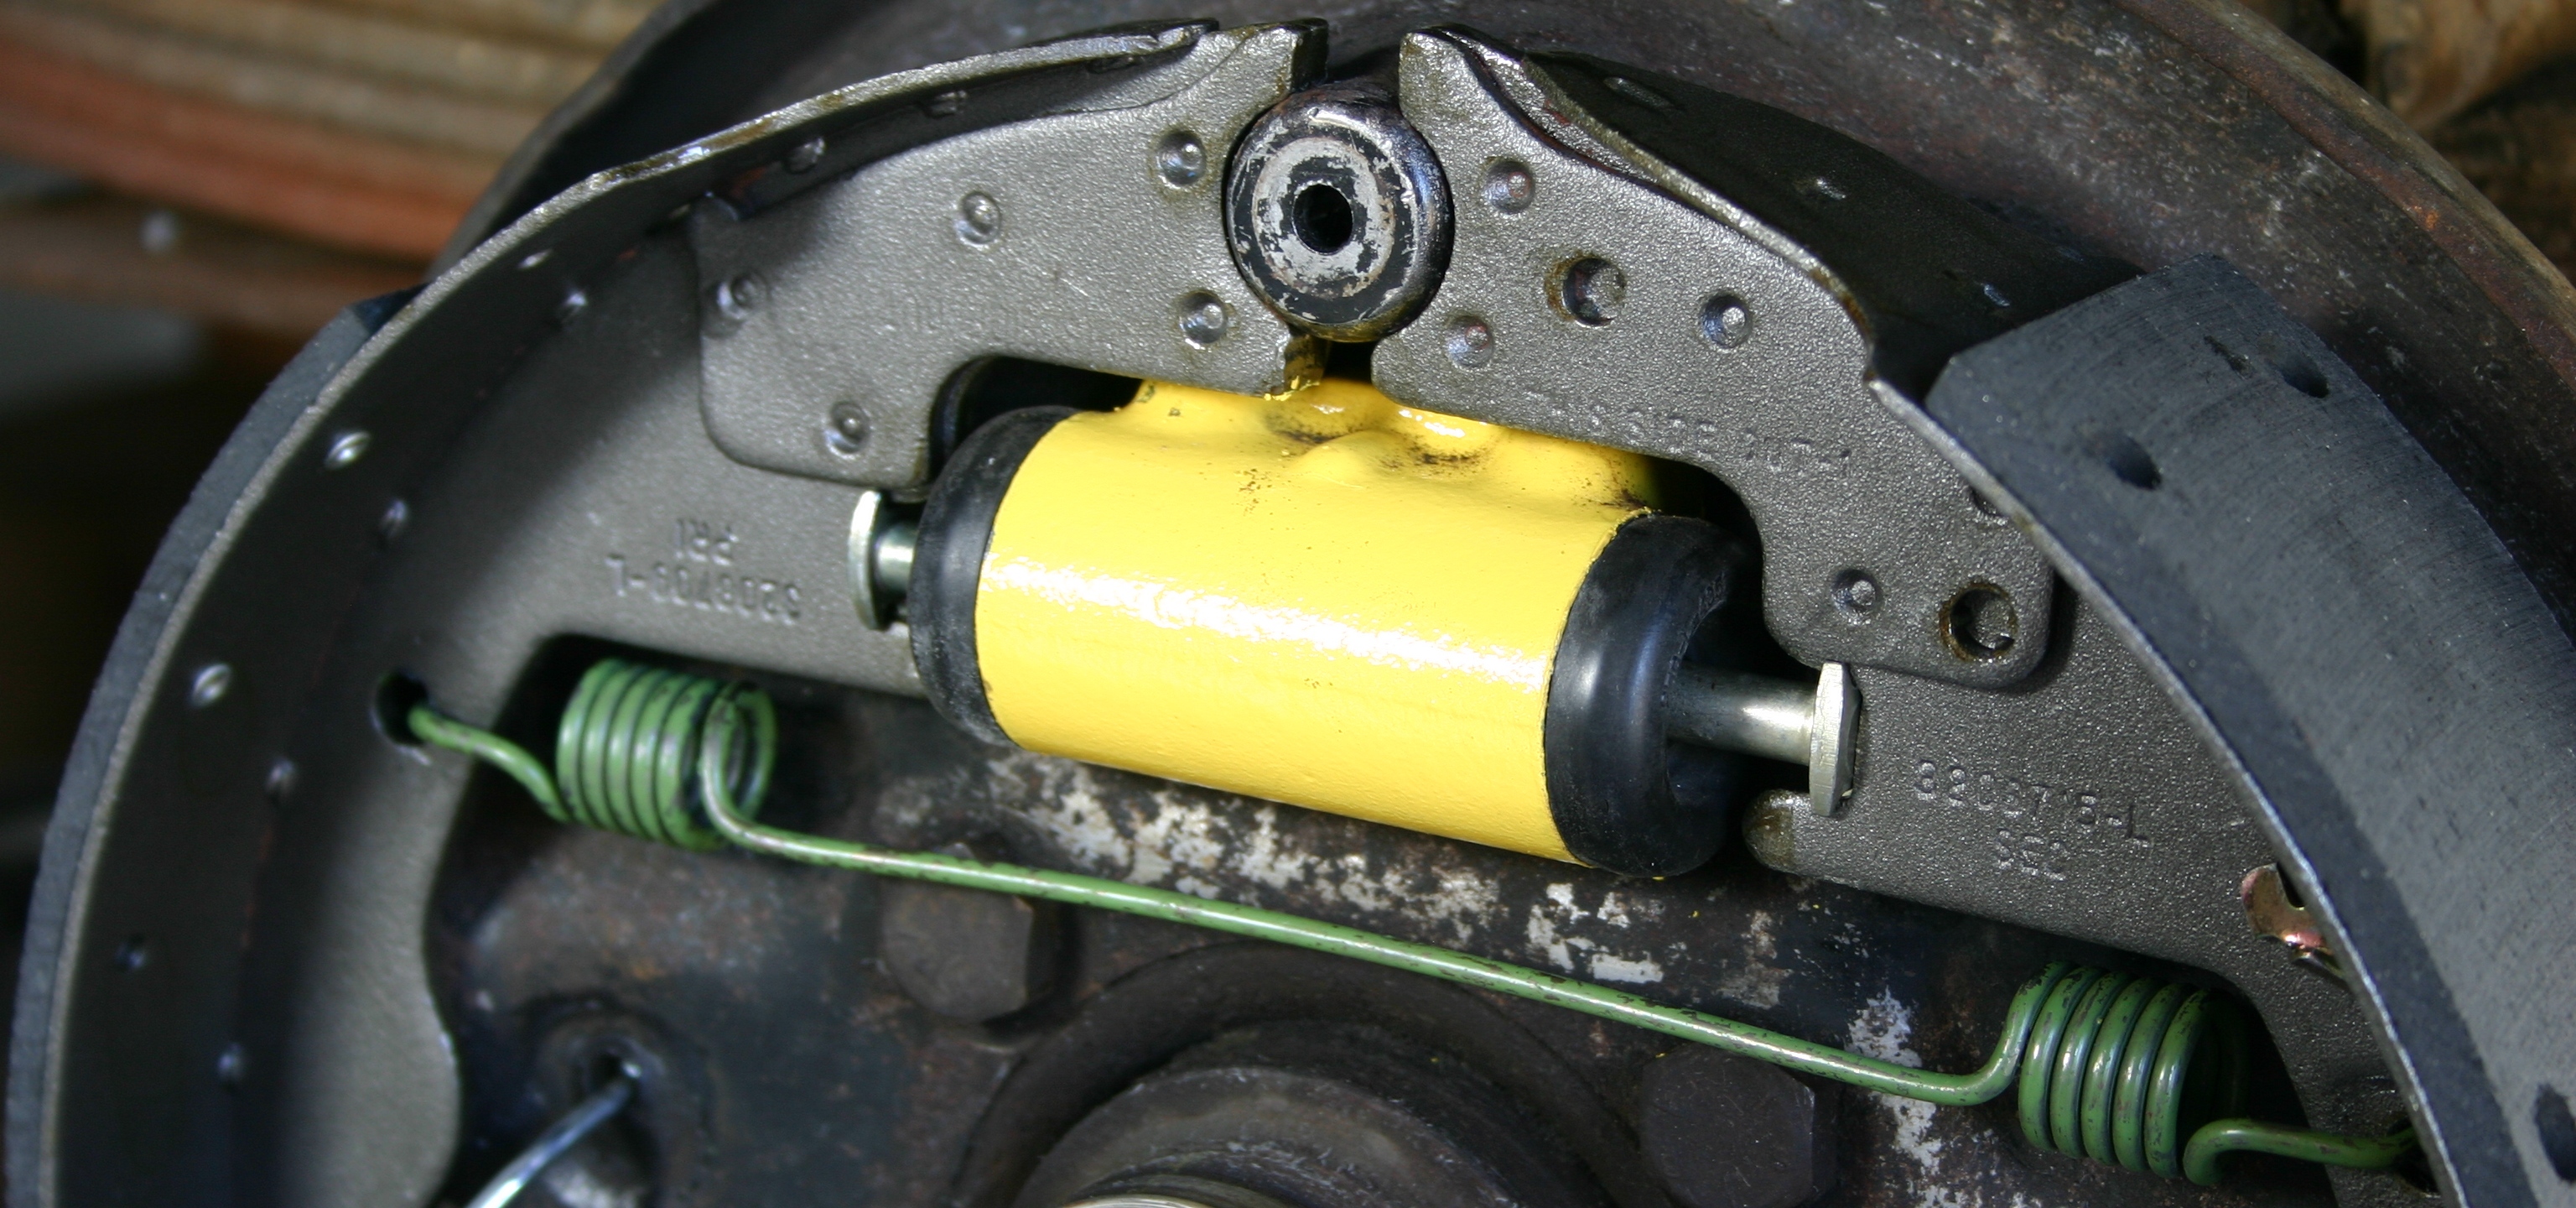
Now for step #3, I put lots of this grease on the adjusting screw threads (left), then screwed it all the way in, cleaning off all the excess grease that billowed out. I also greased both ends of the screw assembly. The cross-hair end's shown on the right. Now that I'm writing this, I realize that I probably didn't need to use any grease on that cross-hair end, since it's stationary--it must be the other end--the round, convex end--that needs the grease.
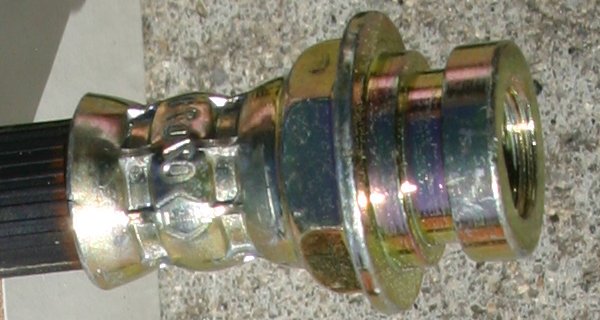
Here are the new links poked in to the wheel cylinder rubbers. I could shove them in easily but they didn't want to stay in! They kept creeping out. I persisted and finally got them to stay for long enough to get the shoes on.
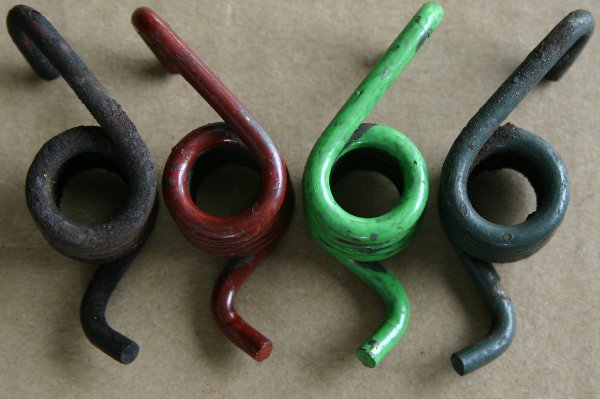
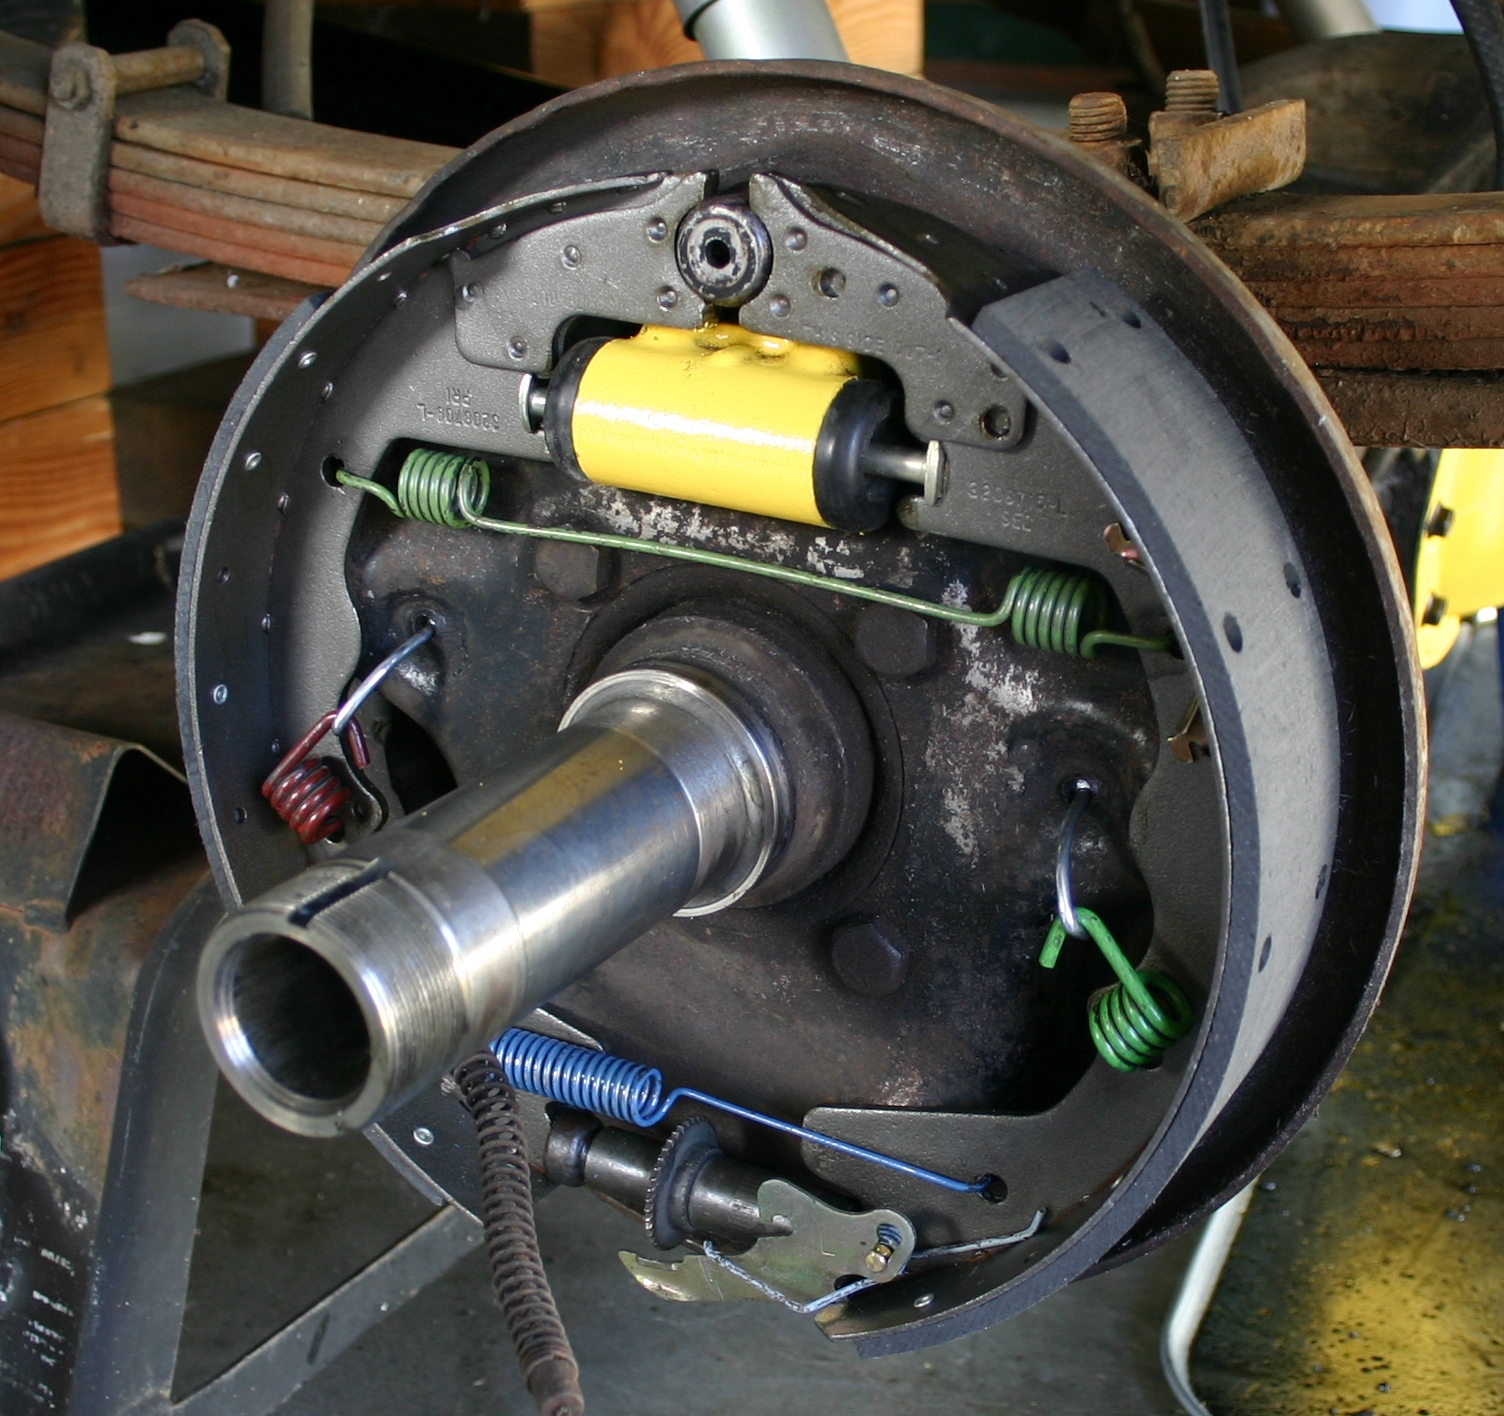
Here are the old hold-down springs (outside) and the new hold-down springs (inside). I had the good fortune of encountering some old springs that still had paint color visible on them, so I could see that last time, it was put together with one green and one red spring. Yet I suppose these colors may not be consistent across spring kits from different vendors.
The difference between the two is that they're mirror images of one another. Looking super carefully at the illustrations on page 12-02-5 and 12-02-6, I could see that in this case, the green spring's meant for the secondary shoe, while the red's meant for the primary shoe.
Here's the adjuster lever spring sitting on the secondary shoe; it's in the same attitude that it's installed in (left). It's shown all installed on the right. I was able to install the spring by hand with moderate force. No tools were required.

At this point I decided to switch from the Ford Shop Manual to GSequoia's great article. GSequoia recommends installing the secondary shoe first, by itself, and then installing the primary shoe when that's complete. That sounded easier than the all-at-once approach in the Ford manual.
With moderate effort I managed to get the secondary shoe hold-down spring and nail in place. I didn't need to use any tools for this, although the shoe was still somewhat loose from its ultimate resting place. I took advantage of that.
Here's the new link mated to the secondary shoe.
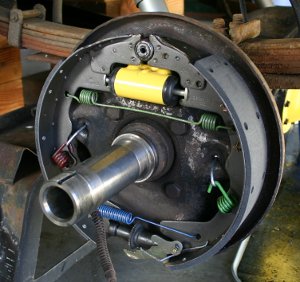
Installing the primary shoe, along with the two retracting springs, the adjusting screw, and the other shoe hold-down spring, was easier than it looked (to me). With the primary shoe in the vicinity and slightly ajar, I coupled it with the adjuster screw first, then the lower retracting spring, then the push-rod/link, then the upper retracting spring. It seems that there's no magic order in which to attach any of these things.
With all that in place, I manipulated the shoe hold-down spring in to place with a skinny common screwdriver. I'm sure a special tool would have made this much easier, yet considering the frequency at which I'll be doing rear brake jobs on #50, the screwdriver worked just fine!

This Evening's Question:
Robroy
Perfect--thank you.70_F100 wrote:Yes, their function is not determined by the shape of the link.
Excellent! Indeed, their characteristics appear identical aside from the subtle head shape variety.70_F100 wrote:As long as they are the same length and fit the shoes and wheel cylinders the same, they will perform the same function.
This Evening's Update:
With the links here from Green Sales Company, I've begun following these instructions from the 1972 Ford Truck Shop Manual, page 12-02-5:
I've also been referencing this illustration from page 12-02-5 (click on it a version that's easier to see):
And this illustration from page 12-02-6 (click on this one also):
I first covered the Installation step #1 by going over the shoe contact points on the backing plate with some fine emery cloth, removing most of the surface rust, then wiping them clean with brake cleaner on a rag.
Then for step #2, I put some of this high-temperature disc brake grease on the shoe and spring contact points. Here's the amount of grease I put on the two highest shoe contact points:

And here are the two shoe contact points in the middle:

And you can see the amount of grease I used at the lower retracting spring hole on the shoe (left), and around the shoe hold-down nail (right). Now that I'm writing this, I can't think of a reason to put any grease nearby that nail--oh well. Good thing I used it so sparingly!

Now for step #3, I put lots of this grease on the adjusting screw threads (left), then screwed it all the way in, cleaning off all the excess grease that billowed out. I also greased both ends of the screw assembly. The cross-hair end's shown on the right. Now that I'm writing this, I realize that I probably didn't need to use any grease on that cross-hair end, since it's stationary--it must be the other end--the round, convex end--that needs the grease.
Here are the new links poked in to the wheel cylinder rubbers. I could shove them in easily but they didn't want to stay in! They kept creeping out. I persisted and finally got them to stay for long enough to get the shoes on.

Here are the old hold-down springs (outside) and the new hold-down springs (inside). I had the good fortune of encountering some old springs that still had paint color visible on them, so I could see that last time, it was put together with one green and one red spring. Yet I suppose these colors may not be consistent across spring kits from different vendors.
The difference between the two is that they're mirror images of one another. Looking super carefully at the illustrations on page 12-02-5 and 12-02-6, I could see that in this case, the green spring's meant for the secondary shoe, while the red's meant for the primary shoe.

Here's the adjuster lever spring sitting on the secondary shoe; it's in the same attitude that it's installed in (left). It's shown all installed on the right. I was able to install the spring by hand with moderate force. No tools were required.

At this point I decided to switch from the Ford Shop Manual to GSequoia's great article. GSequoia recommends installing the secondary shoe first, by itself, and then installing the primary shoe when that's complete. That sounded easier than the all-at-once approach in the Ford manual.
With moderate effort I managed to get the secondary shoe hold-down spring and nail in place. I didn't need to use any tools for this, although the shoe was still somewhat loose from its ultimate resting place. I took advantage of that.
Here's the new link mated to the secondary shoe.

Installing the primary shoe, along with the two retracting springs, the adjusting screw, and the other shoe hold-down spring, was easier than it looked (to me). With the primary shoe in the vicinity and slightly ajar, I coupled it with the adjuster screw first, then the lower retracting spring, then the push-rod/link, then the upper retracting spring. It seems that there's no magic order in which to attach any of these things.
With all that in place, I manipulated the shoe hold-down spring in to place with a skinny common screwdriver. I'm sure a special tool would have made this much easier, yet considering the frequency at which I'll be doing rear brake jobs on #50, the screwdriver worked just fine!

This Evening's Question:
- My gloved hands weren't necessarily immaculate during the brake shoe installation, and despite my best efforts, I surely got tiny amounts of dirt and grease on the shoe linings. It wasn't enough to feel or see clearly, yet it was a non-zero amount. Is it prudent to hit the brake linings with brake cleaner on a clean rag to make sure they're immaculate?
Robroy
-
fordman
- 100% FORDified!
- Posts: 22329
- Joined: Sun Aug 28, 2005 8:17 pm
- Location: Kansas, Ottawa
- Contact:
Re: 1972 F250 12"x2.5" Bendix rear drum brake rebuild: advice?
yes spray off the linings and clean them with a rag. only use brake cleaner. if you dotn clean them it will burn off sooner or later but it will smell and the brakes wont be as affective as if they were clean and dry. so it is bad to have grease on the brake shoes. however you can only get them as clean as you can get them. things happen and it isnt always right. so we do our best to make it as right as we can.
-
robroy
- 100% FORDified!
- Posts: 3768
- Joined: Sun Jul 06, 2008 4:36 pm
- Location: California, Salinas
Re: 1972 F250 12"x2.5" Bendix rear drum brake rebuild: advice?
Good day Fordman, thanks so much for your great reply!
This Morning's Update:
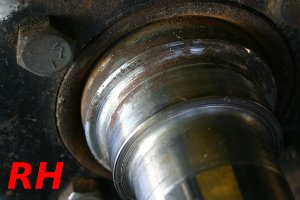
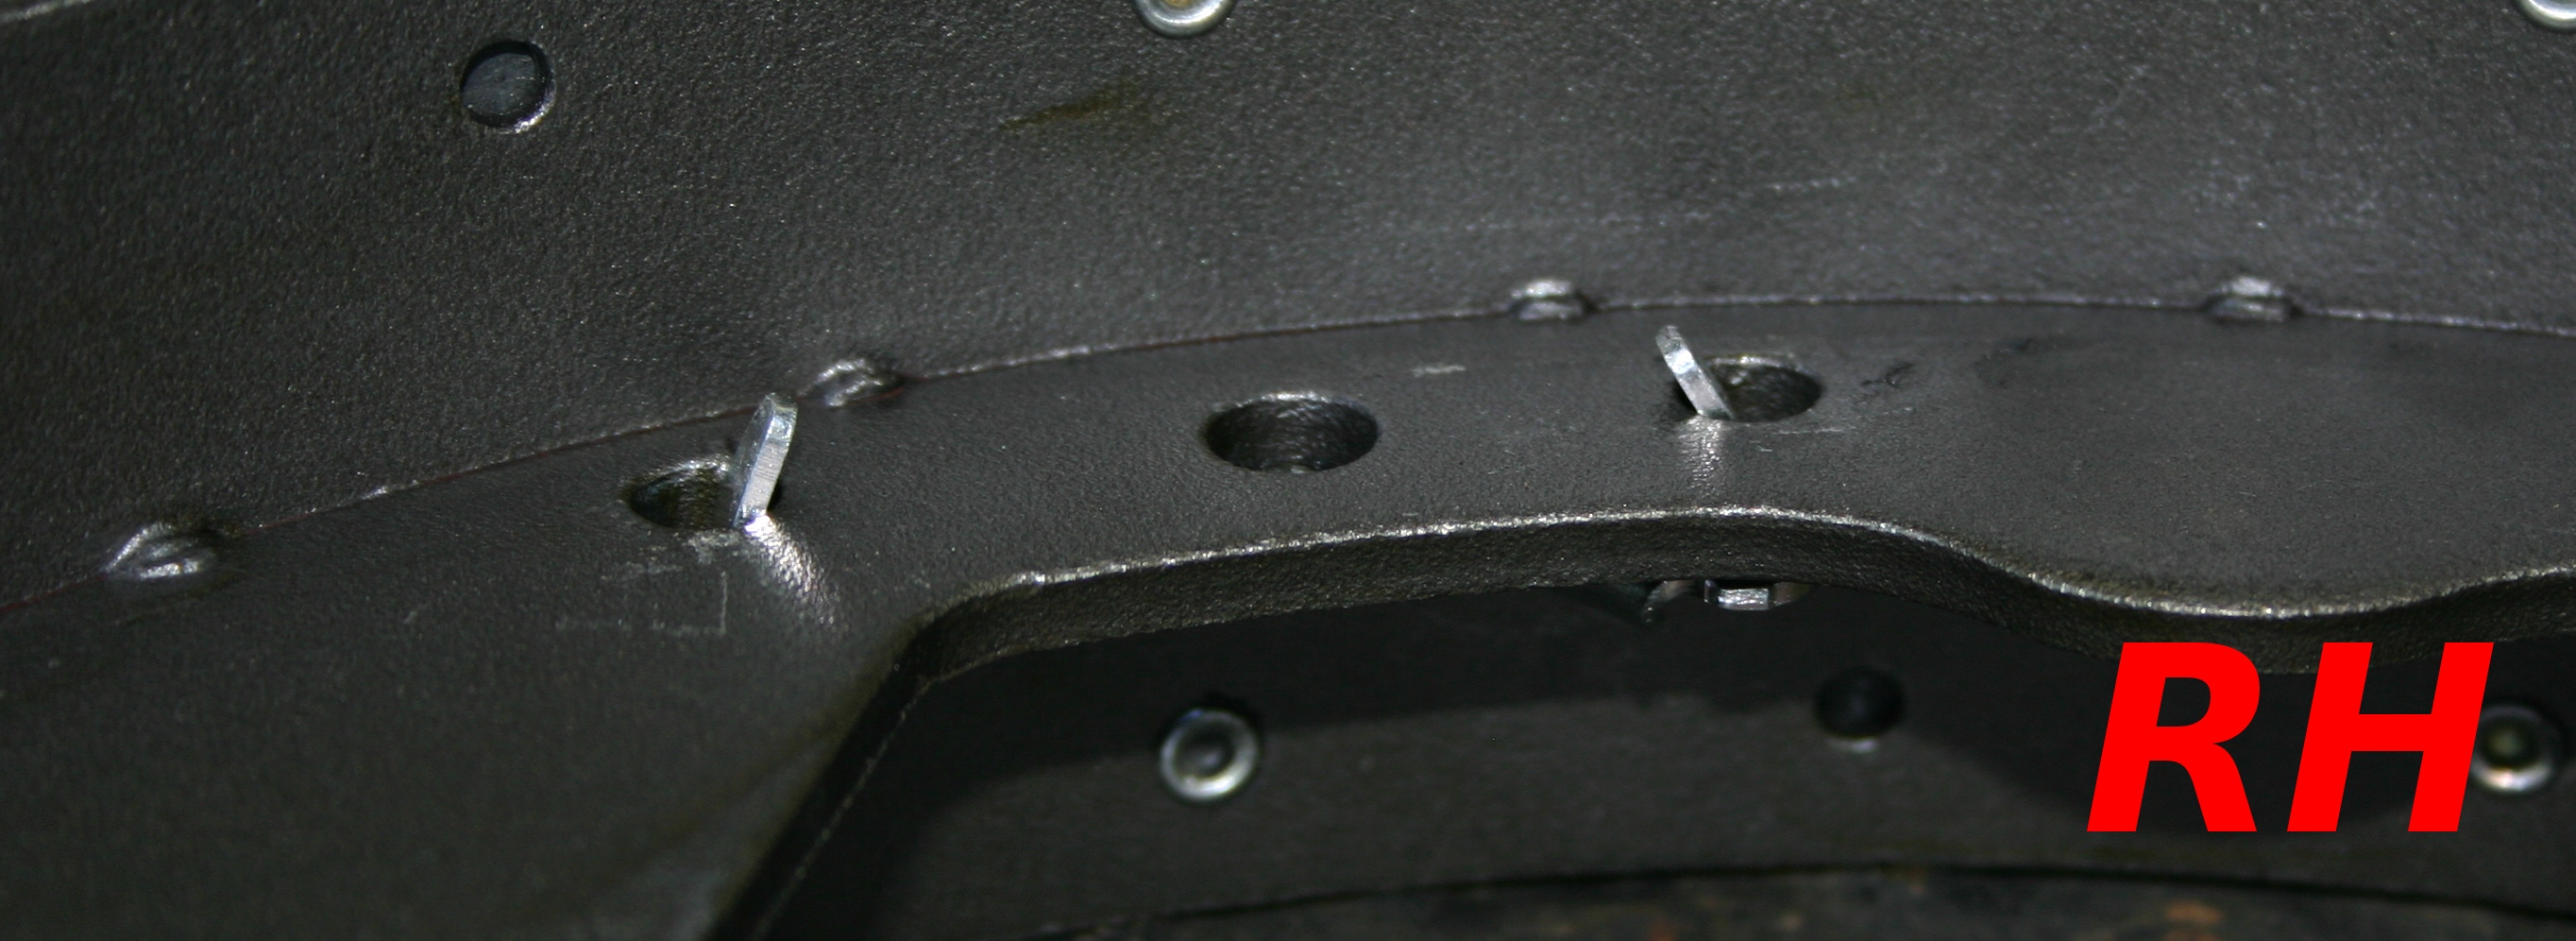
Since I found a quandary with the LH side (more on that towards the end of this update, and in the questions section), I switched to the RH side. Here's a general photo of the area as the adventure began.
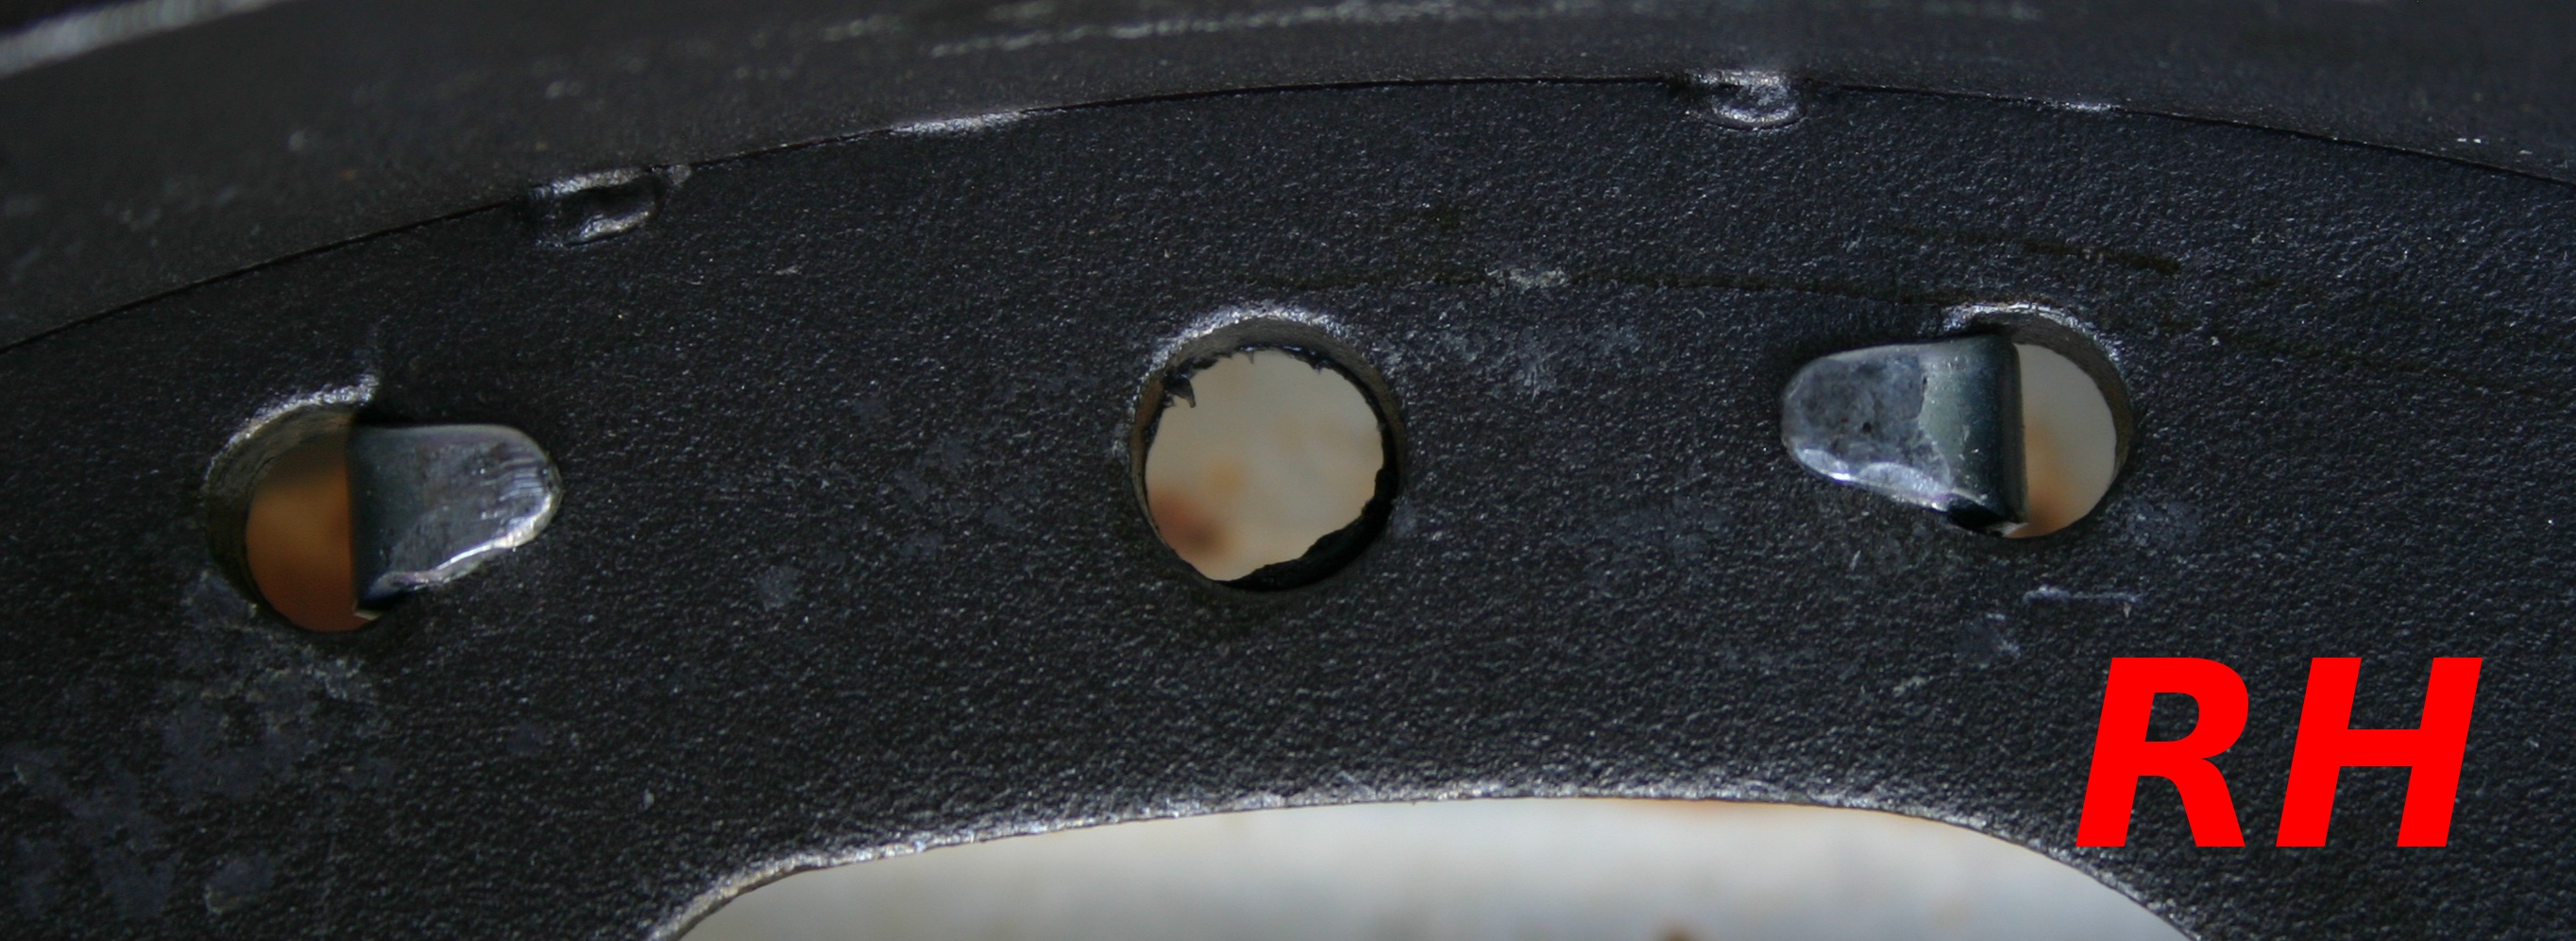
Here are the two (out of six) upper brake shoe contact points on the backing plate, before being hit with emery cloth and grease. Below is the piece of fine-grit emery cloth I used to clean them up.

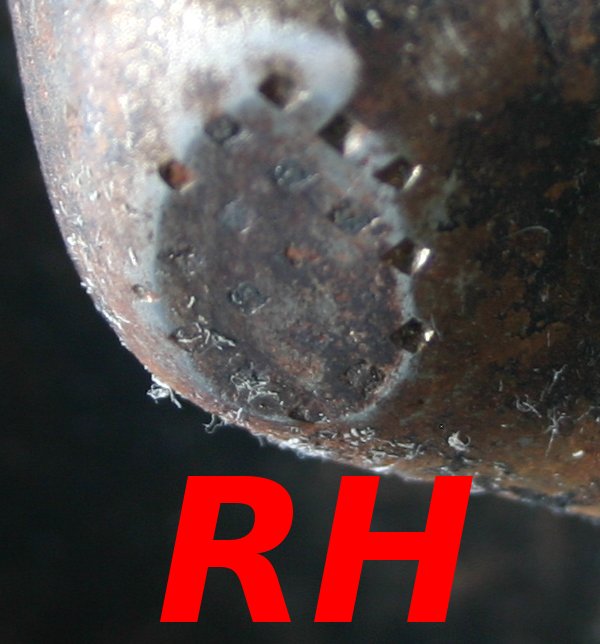
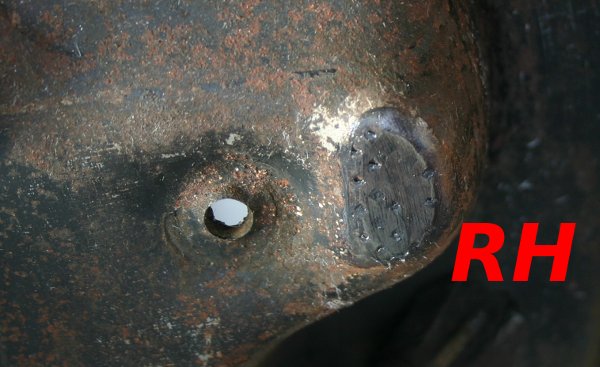
I noted some surface rust on the axle housing itself (left). I'm guessing that this type of surface rust isn't a major problem, since there aren't any moving parts that contact that housing, yet I carefully cleaned it up with the emery cloth on general principles (right). Do y'all think I got it clean enough--is there any reason for me to get it cleaner? I'll ask this question in the questions section at the end of this post.
Here are a couple of photos of backing plate brake shoe contact points after an emery cloth treatment. They don't look all that different, since I didn't want to go overboard with this gritty stuff. After the emery cloth, I used a rag and brake cleaner to get the area immaculate before applying any grease.

And here's the high-temperature grease applied to three of the backing plate shoe contact points.
Following the Ford instructions, I put a small amount of grease on the retracting and hold-down spring shoe contact points. One shoe is shown but I greased both.
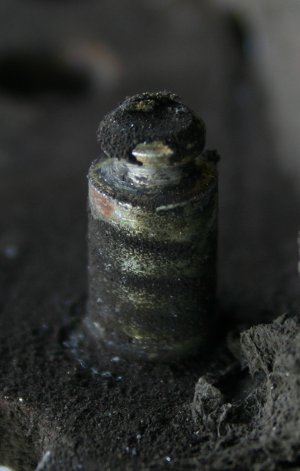
Here you can see the small amount of grease smeared on the parking brake lever pin (left), which really helps it tap in easily (right). This new pin came with the brake shoes.

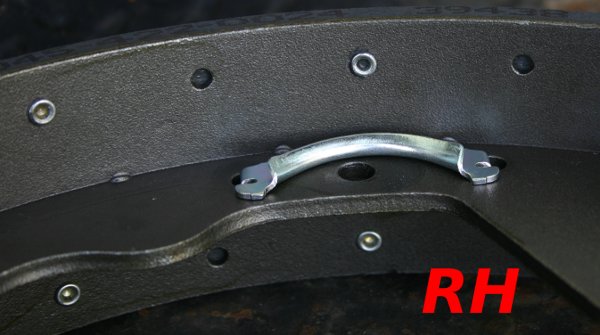
Here's the new China-made, Carlson parking brake cable guide resting in the RH secondary shoe.
As before, I used some large pliers to bite the ears, starting the bends (left). I then held the cable guide from the bottom side while carefully tapping the ears in to position with a ball-peen hammer (right).


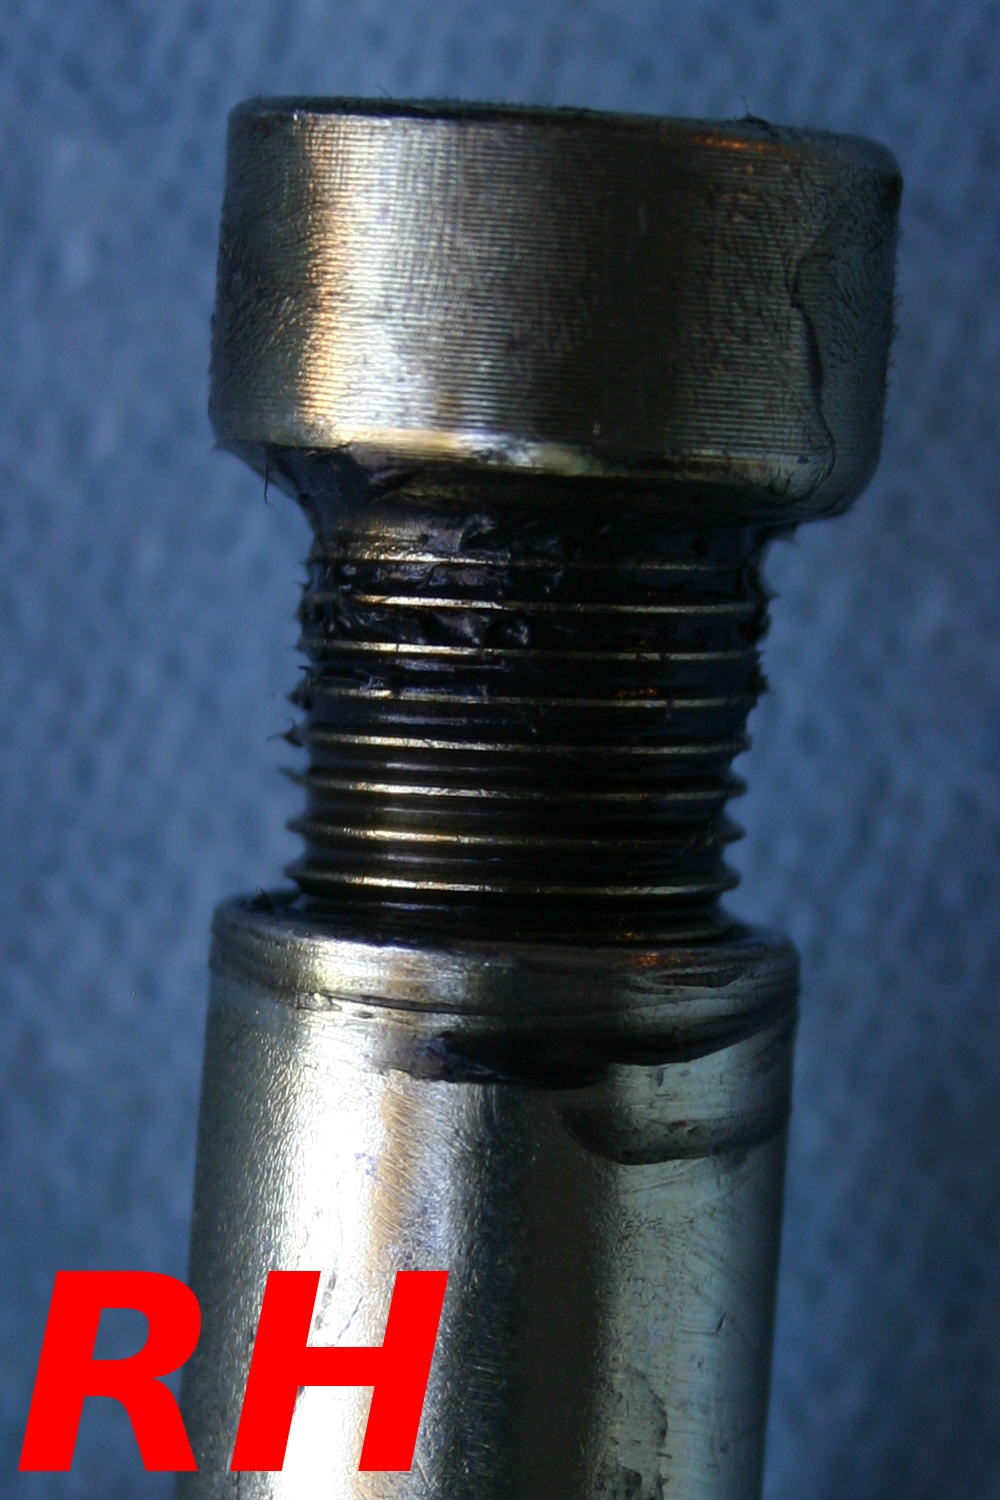
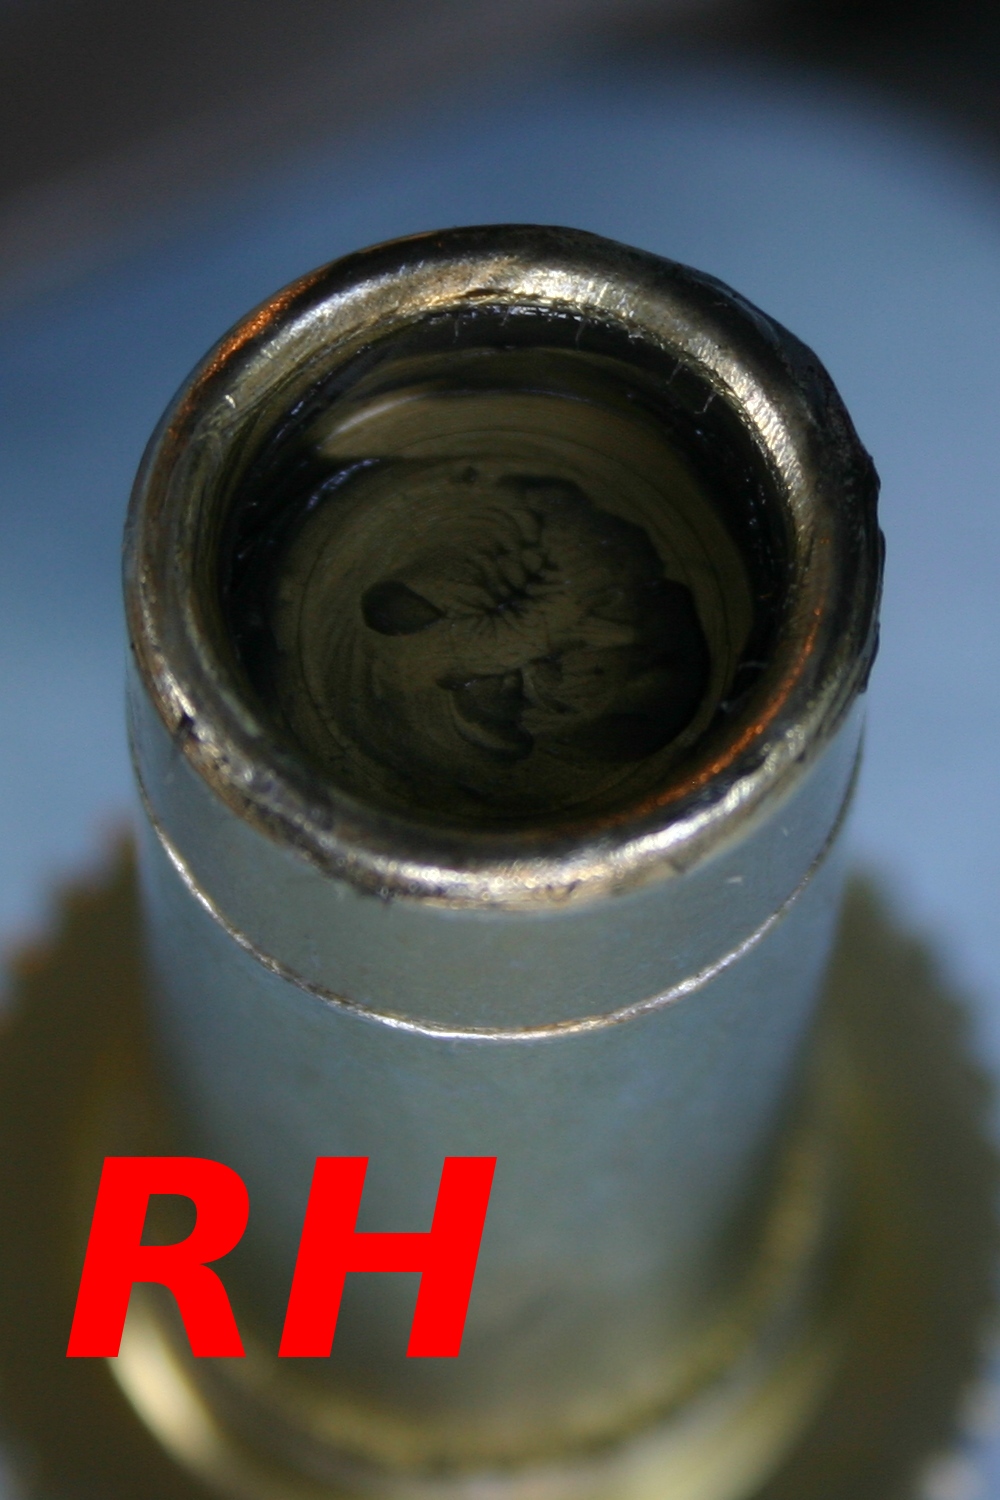
The China-made Carlson adjuster screw and socket assembly came pre-greased, yet in a skimpy fashion. I re-greased it with the high temperature grease I've used elsewhere (left). I also put grease in the area Ford calls the "socket" end, since it rotates while in contact with the secondary brake shoe (right).

Here's the adjuster lever spring in its proper orientation (left), and the lever installed on top of it (right).

Using an unwise, brutal application of what modest finger power I have at my command, I installed the secondary shoe first. I set a screwdriver across the hold-down spring to assist in bending it down, while Kasie placed the nail/hook over the screw arm. With no special tool for this, either two very strong hands or three average hands are required.
And here's the primary shoe installed. Like before, I hooked the springs in to the secondary shoe, then held the primary shoe in the vicinity, hooked the springs on to it, and finally pressed it down in to position.
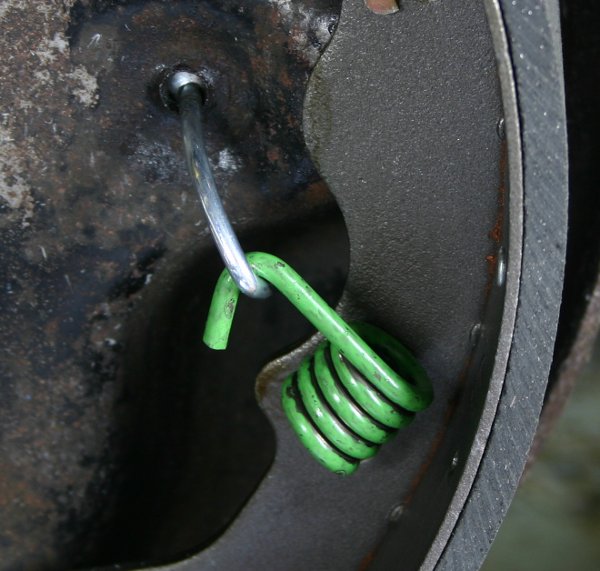
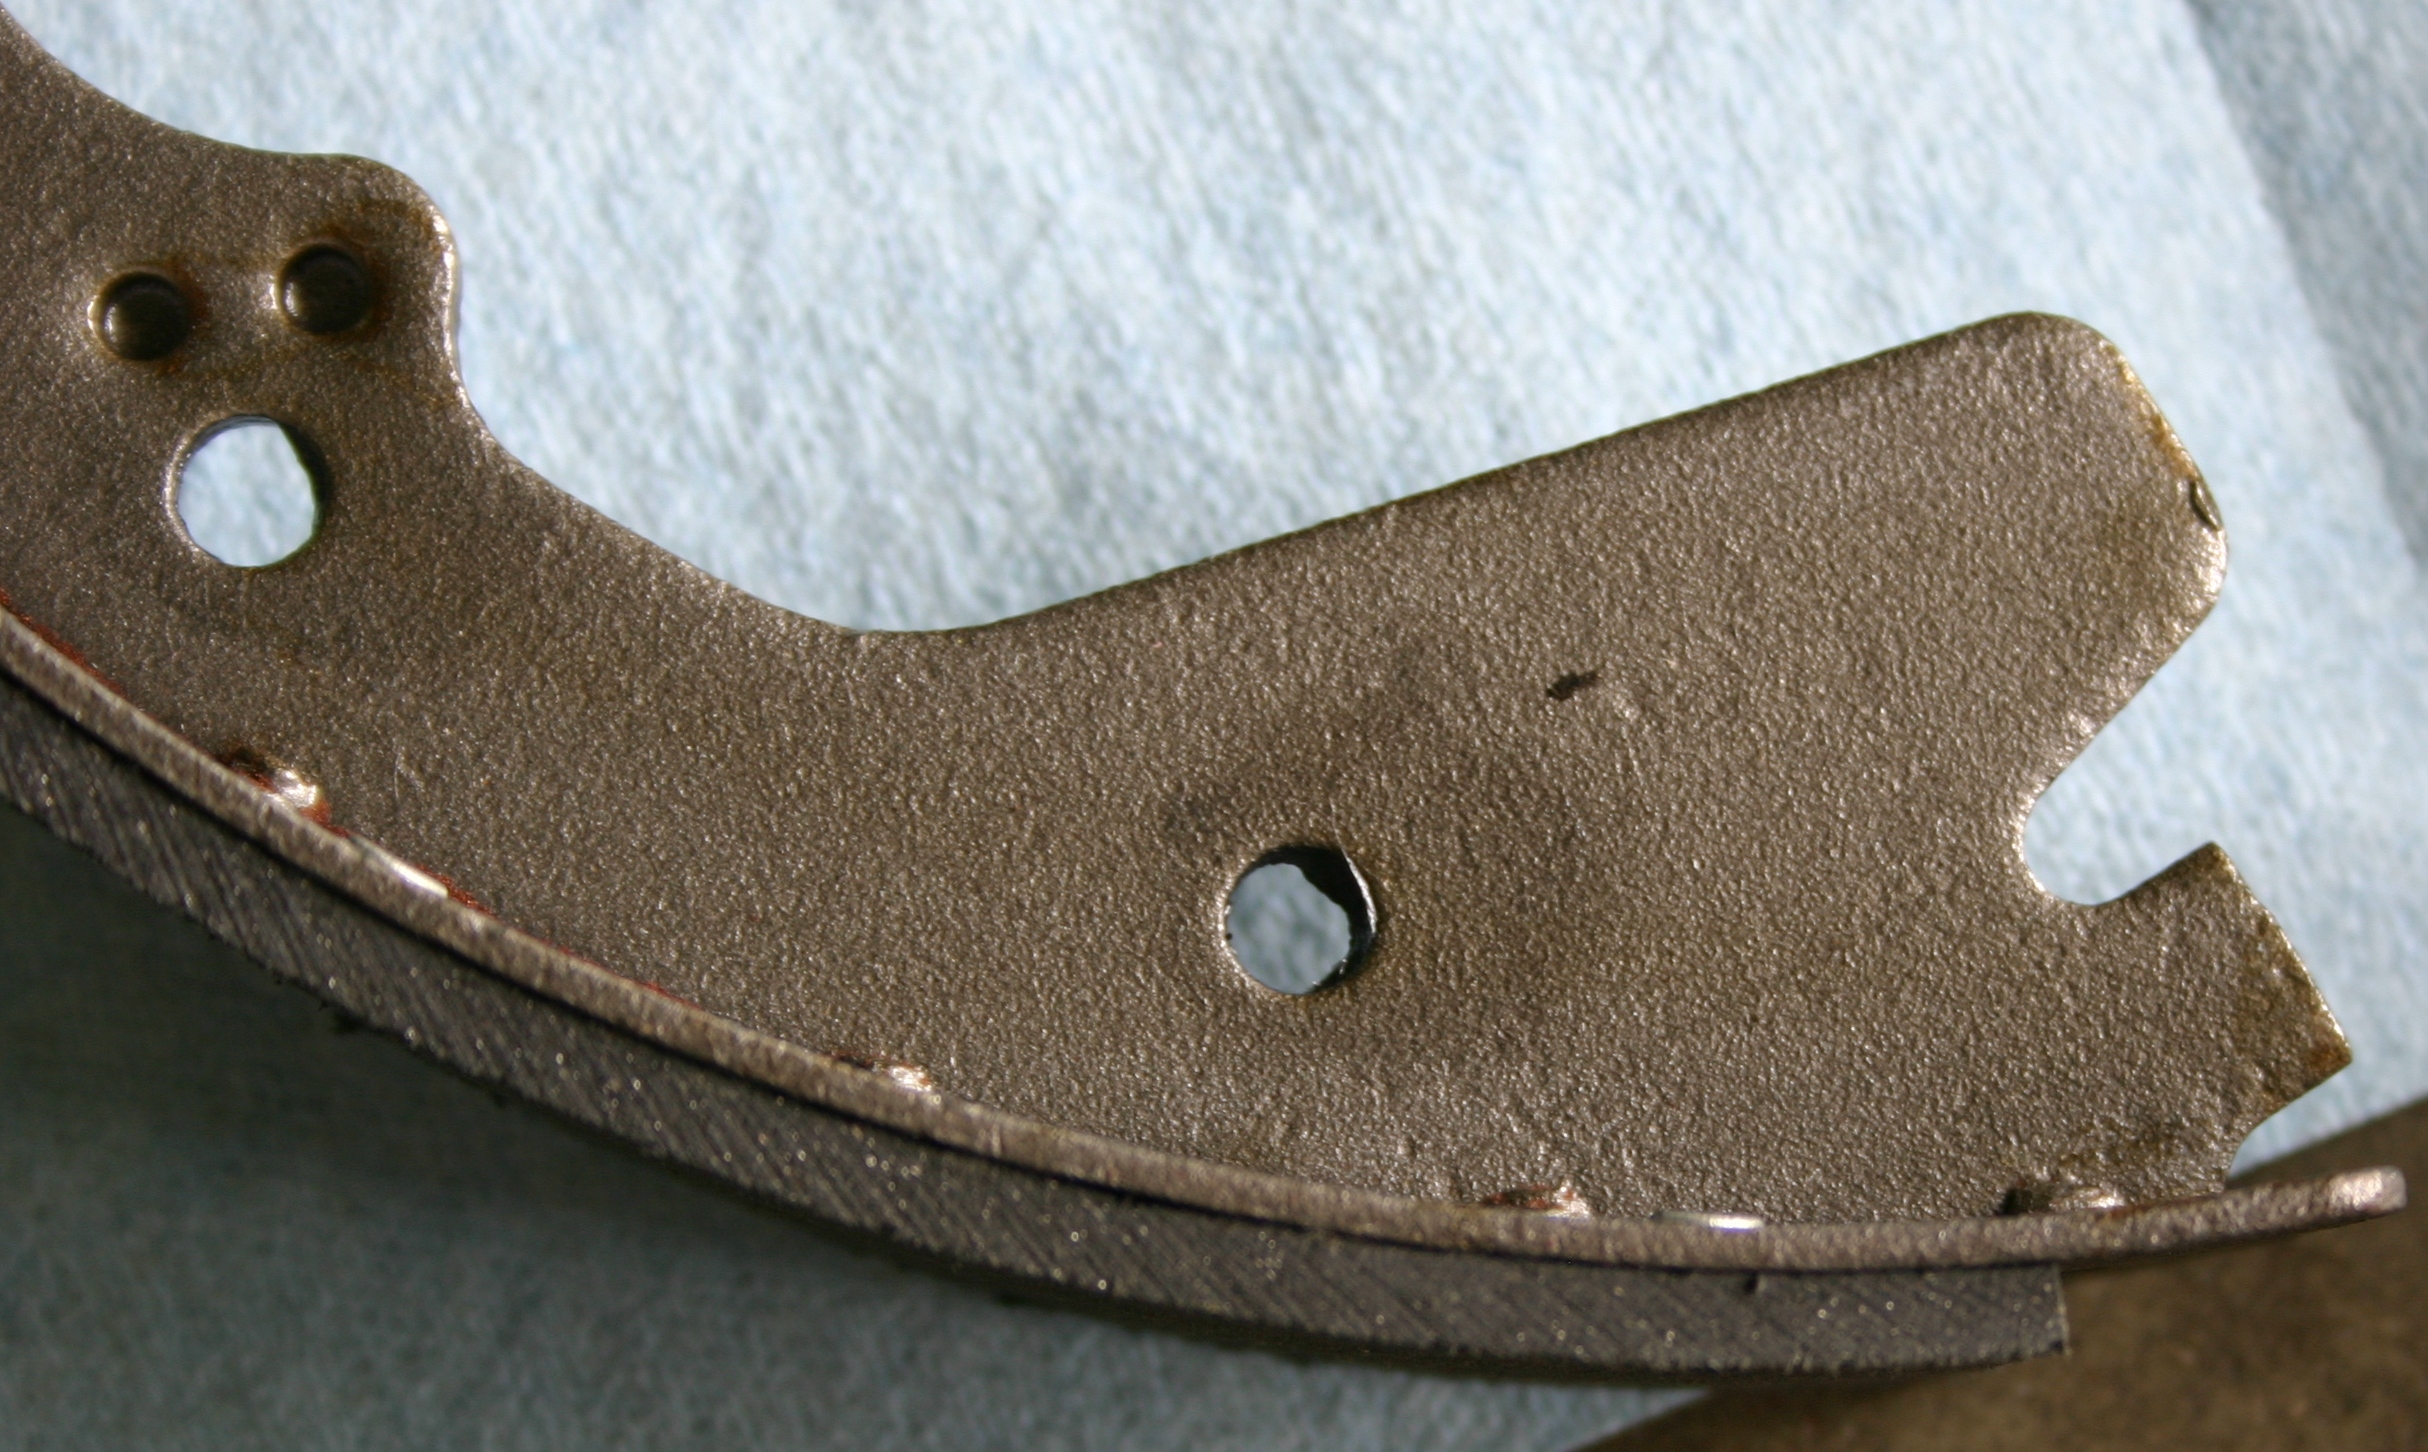
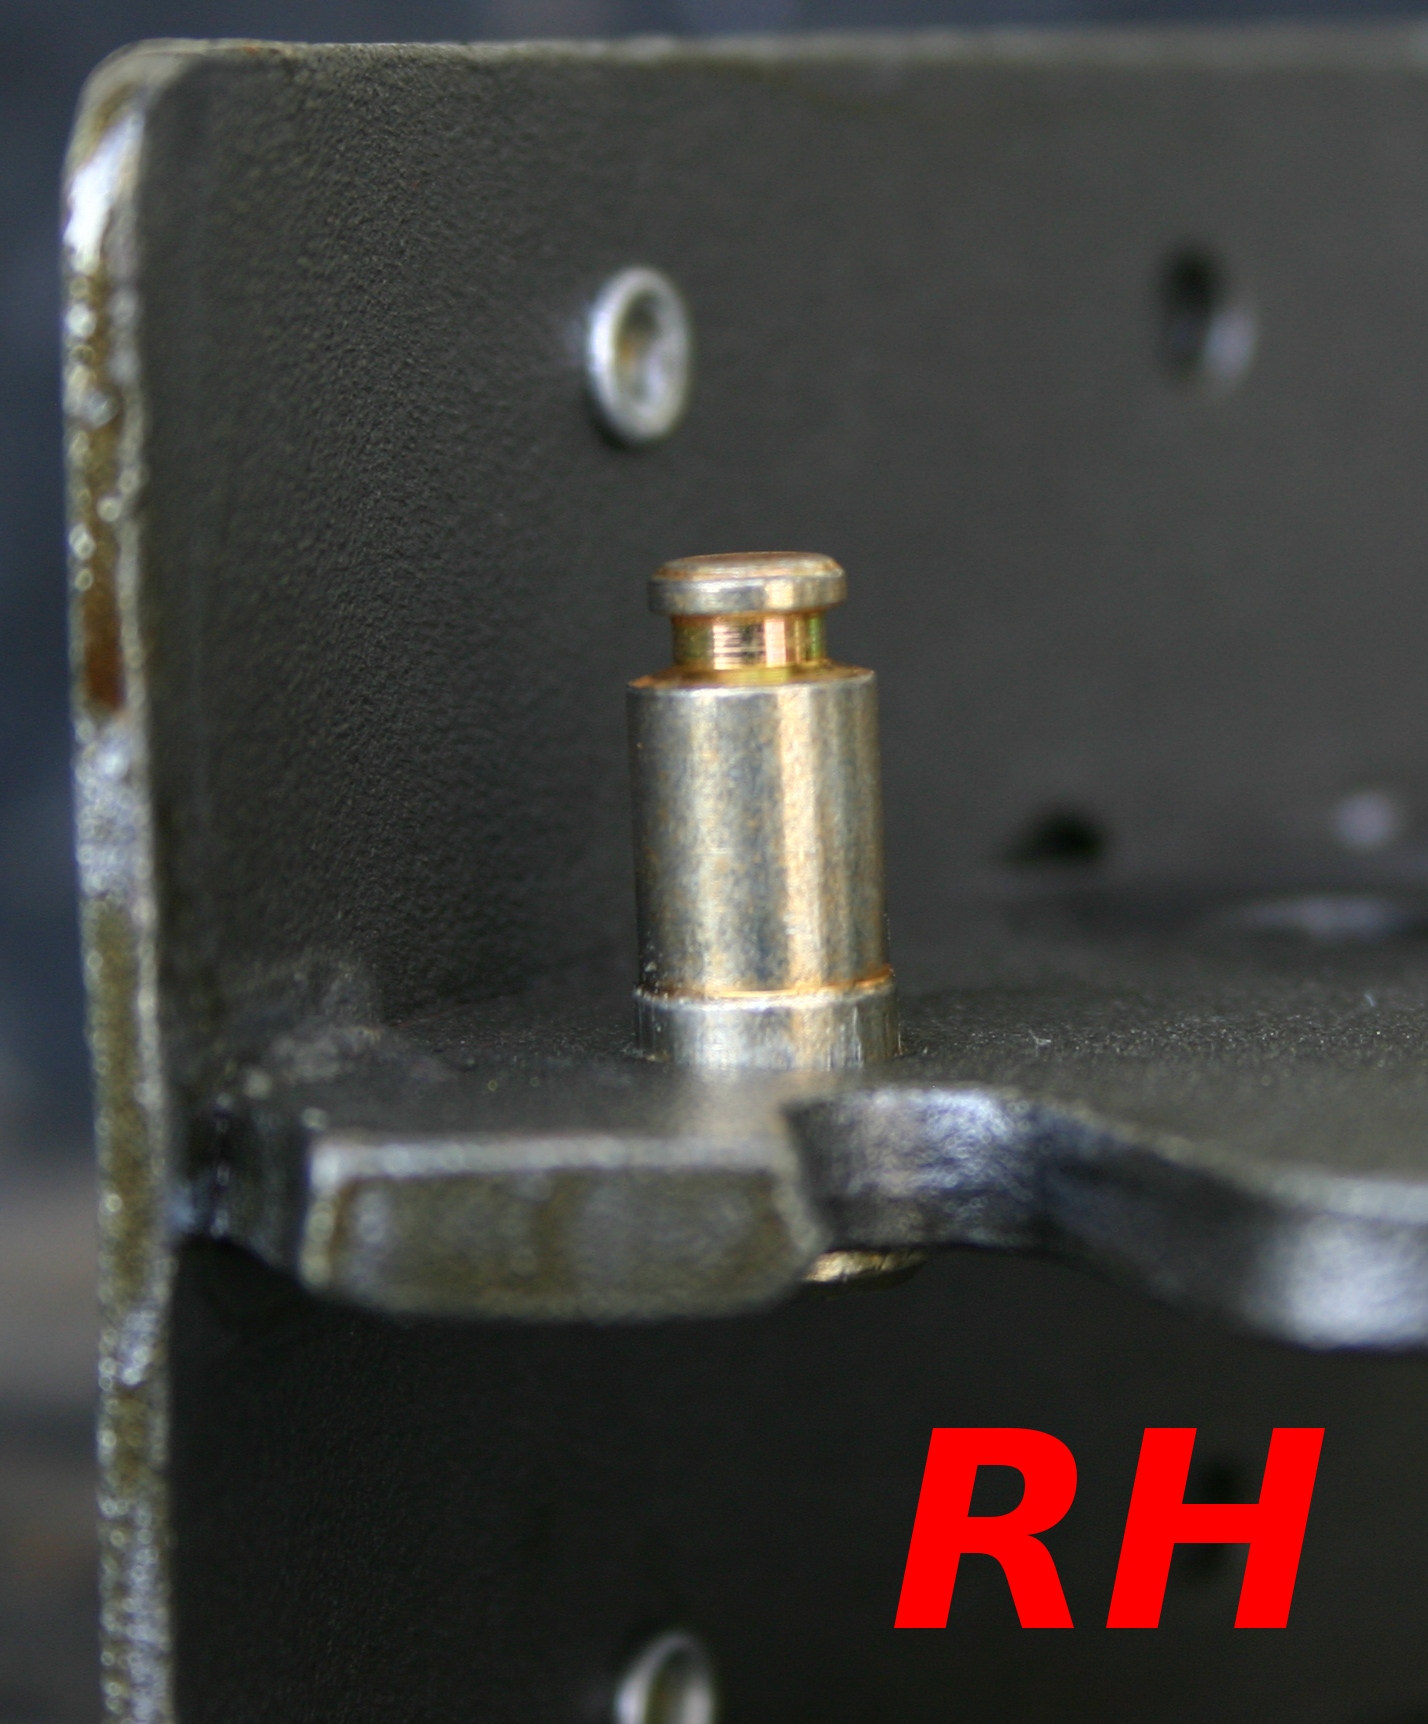
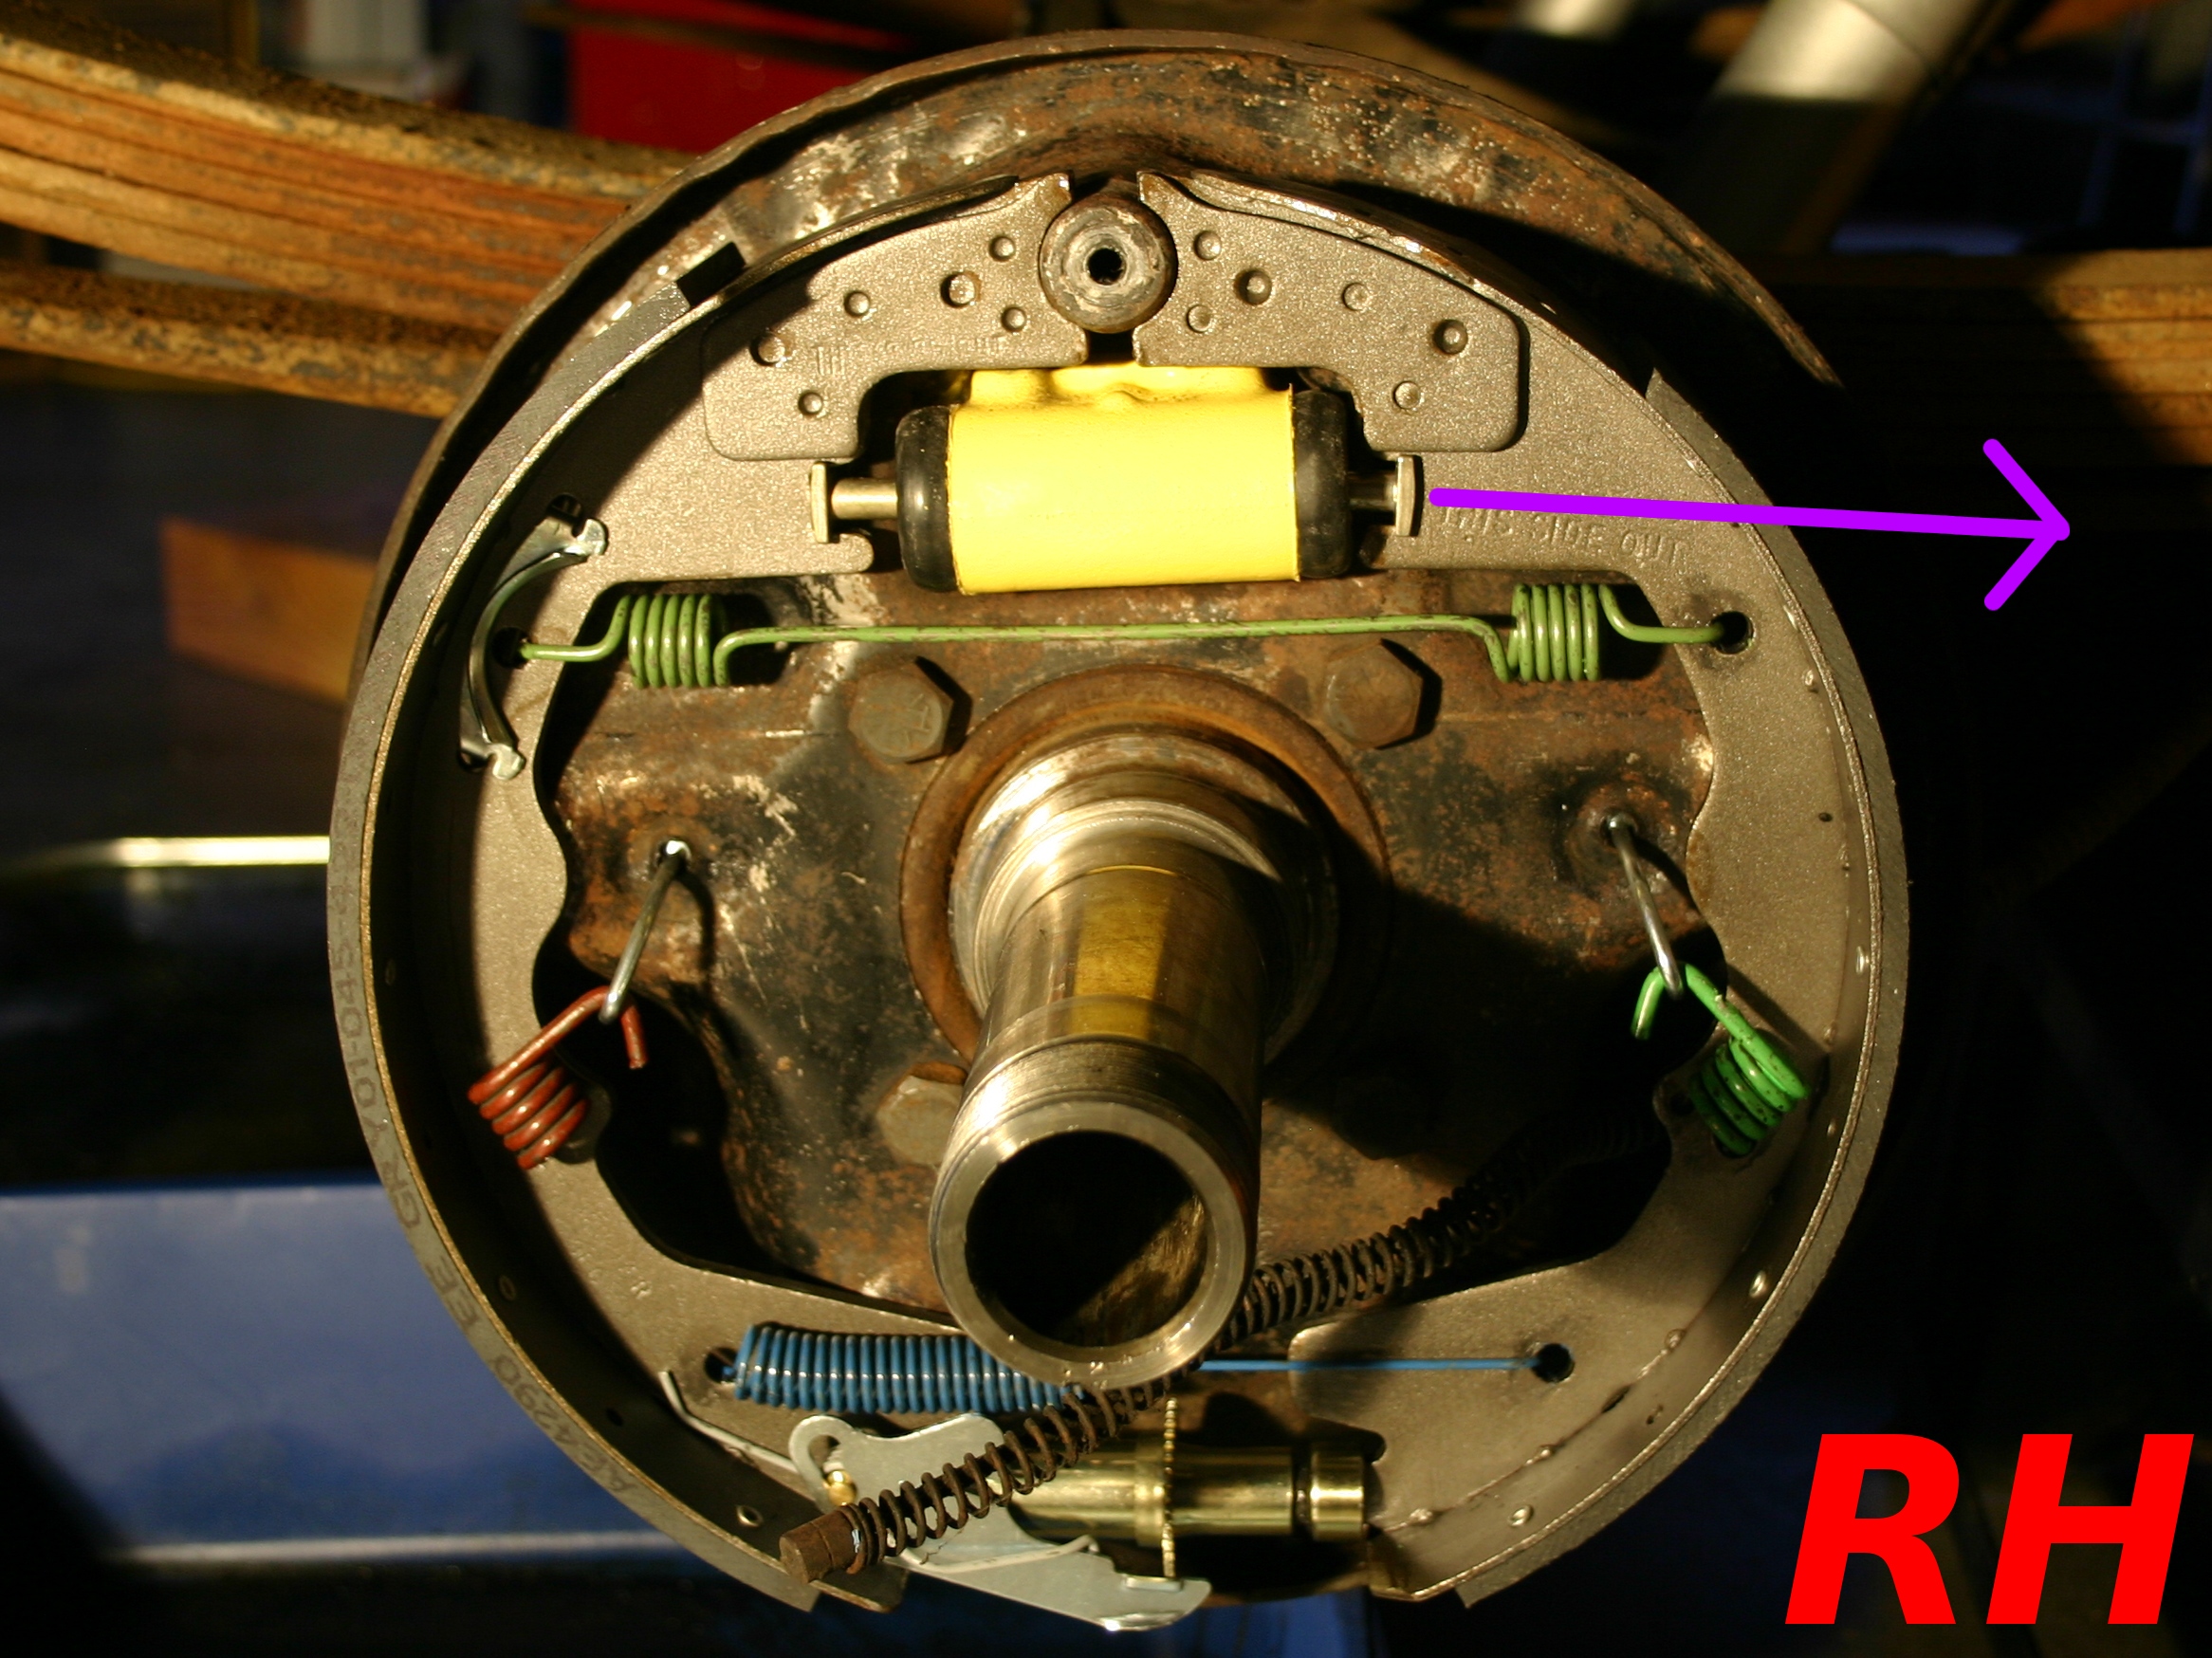
The purple line relates to one of my questions: is it OK that the brake shoe push-rod/link appears to be slightly crooked in there? Will that automatically center itself when the brakes are applied? The secondary shoe link doesn't look perfectly straight either.

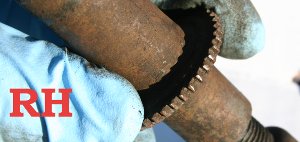
Here's how the China-made Carlson adjusting setup came out. Note that the adjusting lever's in contact with the teeth on the sprocket. Before everything had been tightened down, I tried this out and it felt like a fine watch mechanism. In contrast, the LH side's original parts seem to be in relatively bad shape. I'll include a question about this in the questions section.

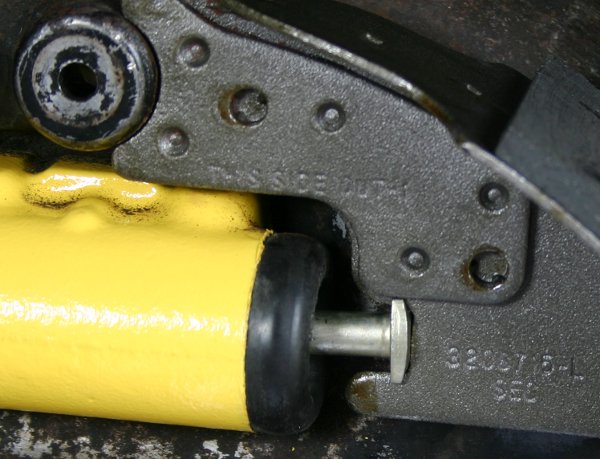
Here's the wheel cylinder area. As in one of the above photos, you can see that the brake shoe push-rods/links don't appear to be perfectly straight.
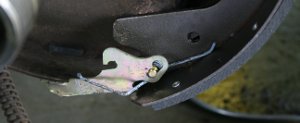
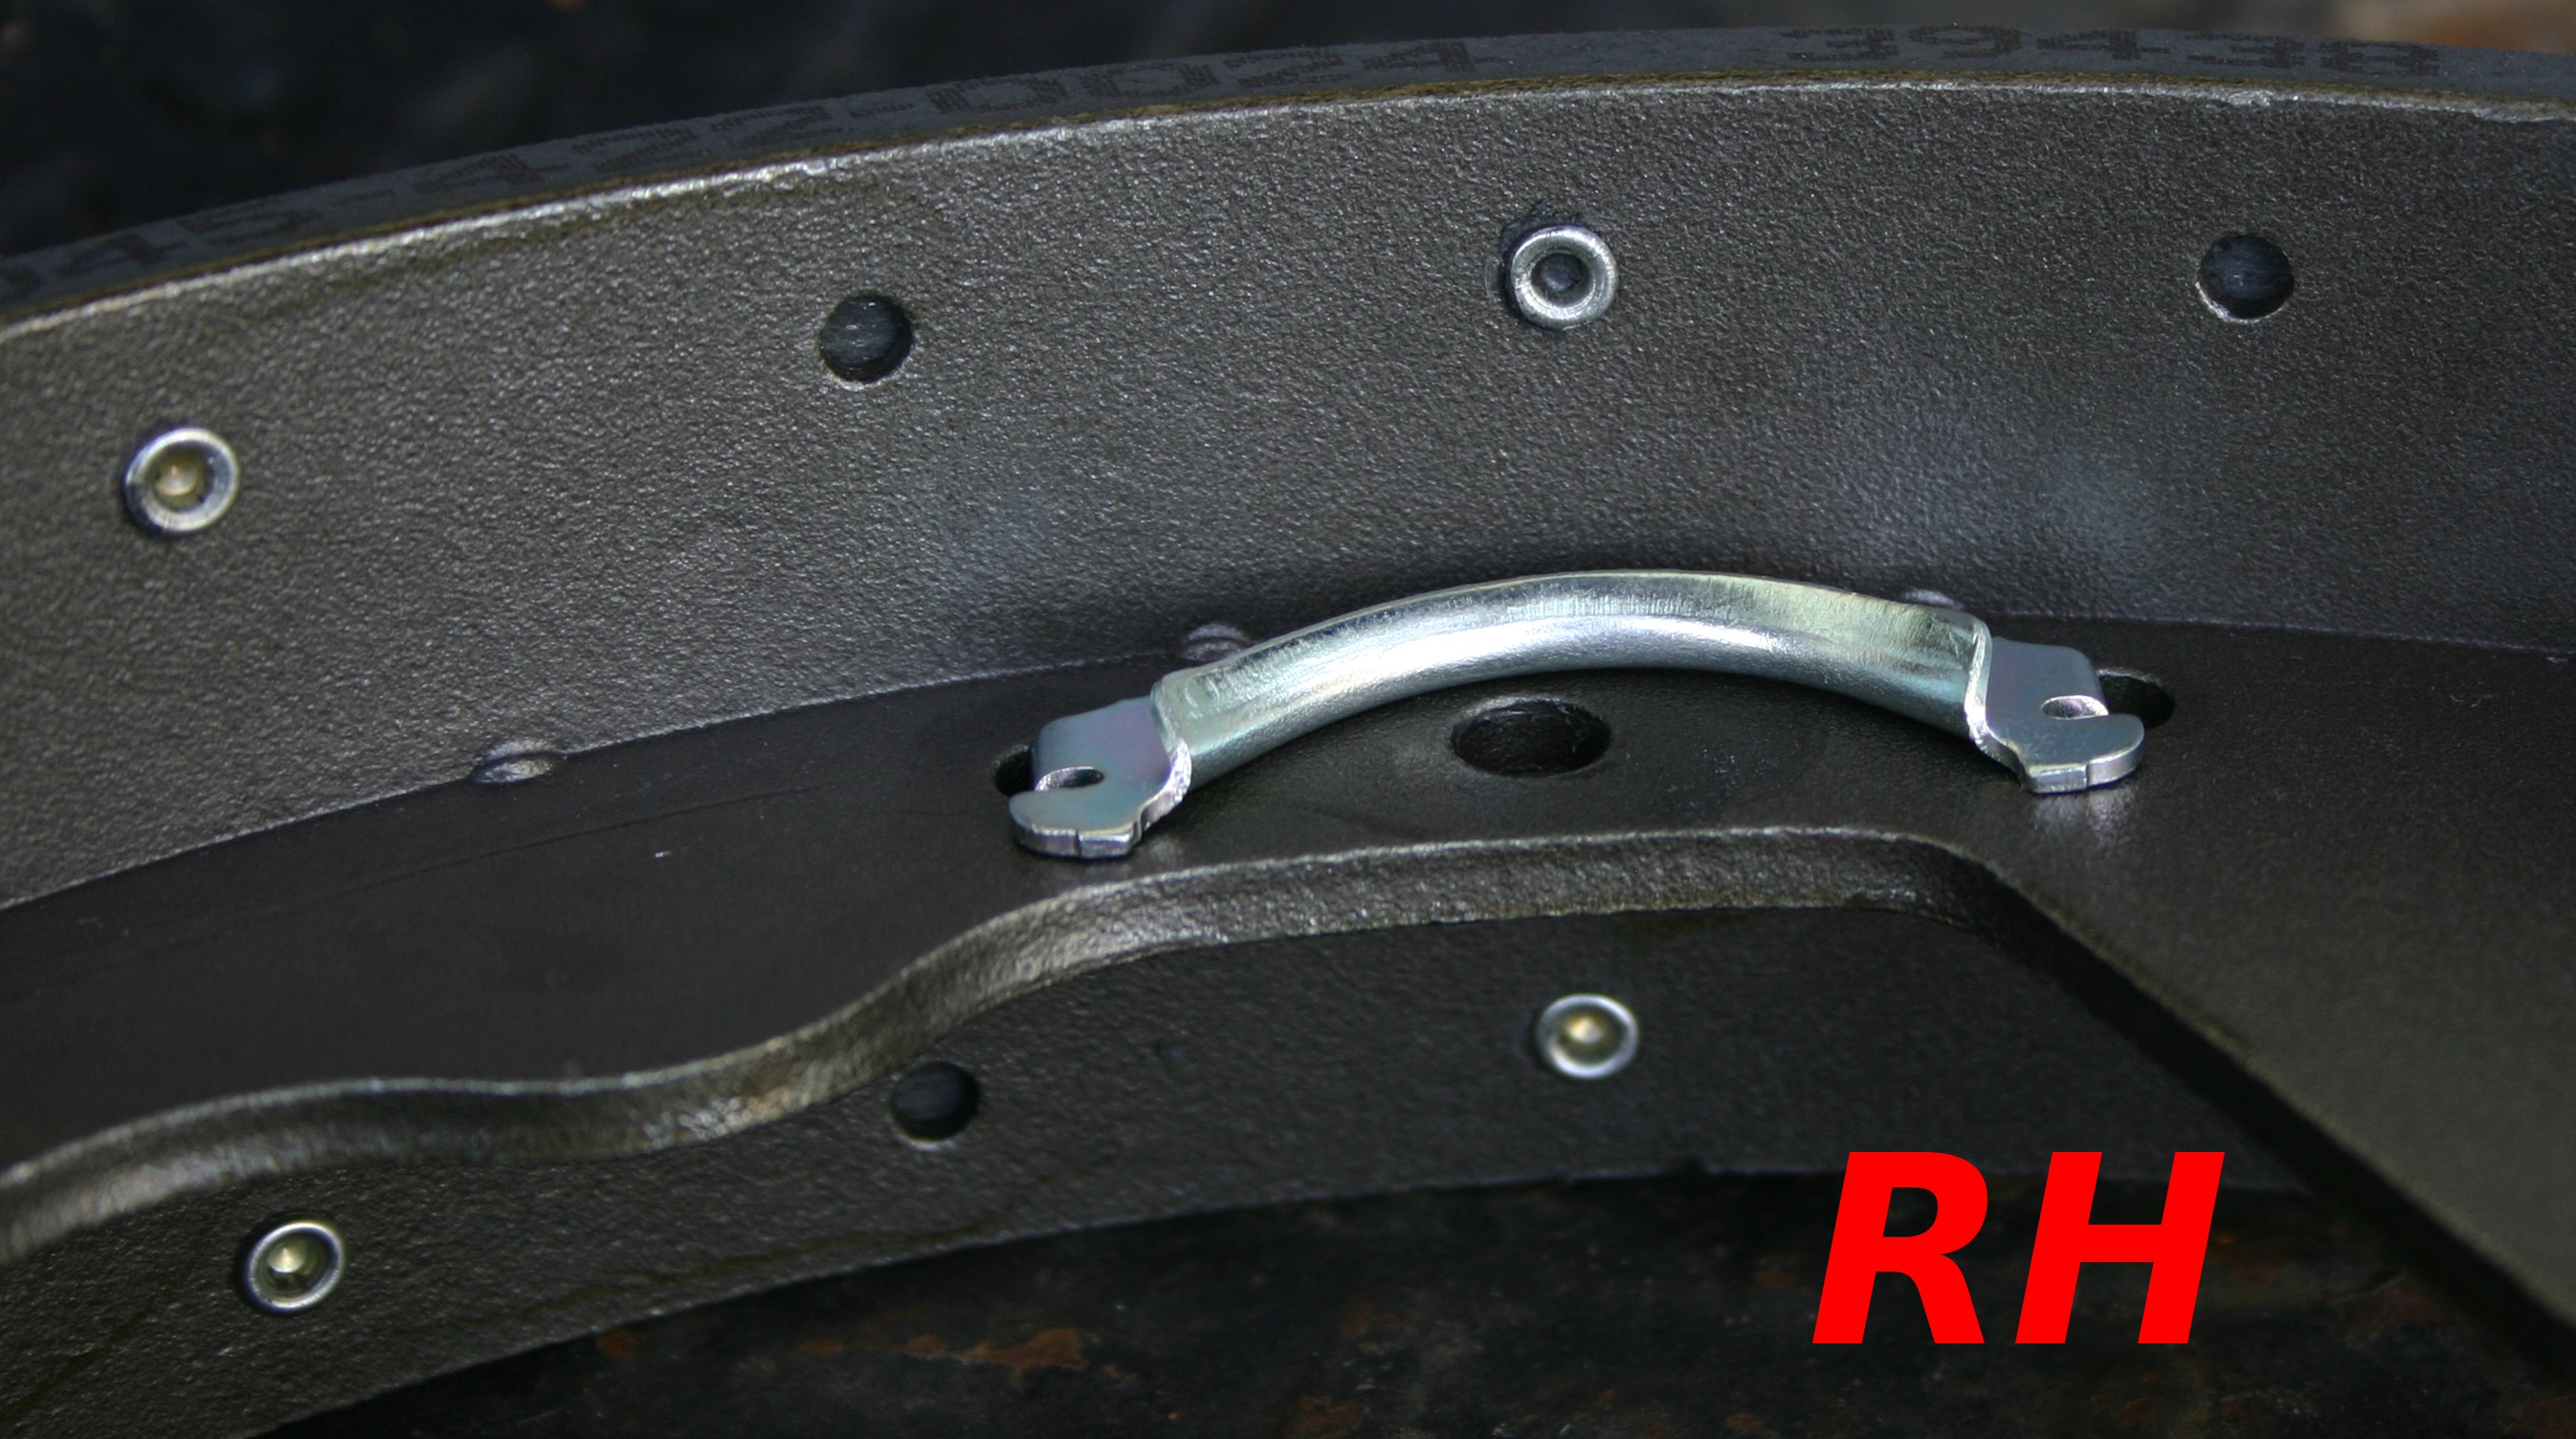
Re-visiting the LH side, I noticed that the components of the parking brake lever assembly don't appear to be assembled in the same order as shown in the Ford manual. Specifically, the 2A601 spring's installed on the outside of the lever, while in the diagram it appears to be installed on the inside over the lever. Both the LH and RH parking brake lever assemblies have this potential issue. Should I re-assemble both of these in a manner that matches the Ford diagram?
Here's a photo that shows where the 2A601 spring's installed.

And here's the Ford diagram from page 12-02-6, which appears to show 2A601 installed behind the lever, not in front of it: 1972FordTruckShopManual_12-02-6_A.png.
This Morning's Questions:
Robroy
Okay, thanks!fordman wrote:yes spray off the linings and clean them with a rag. only use brake cleaner.
Understood!fordman wrote:if you dotn clean them it will burn off sooner or later but it will smell and the brakes wont be as affective as if they were clean and dry. so it is bad to have grease on the brake shoes.
I see what you mean. Thanks Fordman!fordman wrote:however you can only get them as clean as you can get them. things happen and it isnt always right. so we do our best to make it as right as we can.
This Morning's Update:
Since I found a quandary with the LH side (more on that towards the end of this update, and in the questions section), I switched to the RH side. Here's a general photo of the area as the adventure began.

Here are the two (out of six) upper brake shoe contact points on the backing plate, before being hit with emery cloth and grease. Below is the piece of fine-grit emery cloth I used to clean them up.
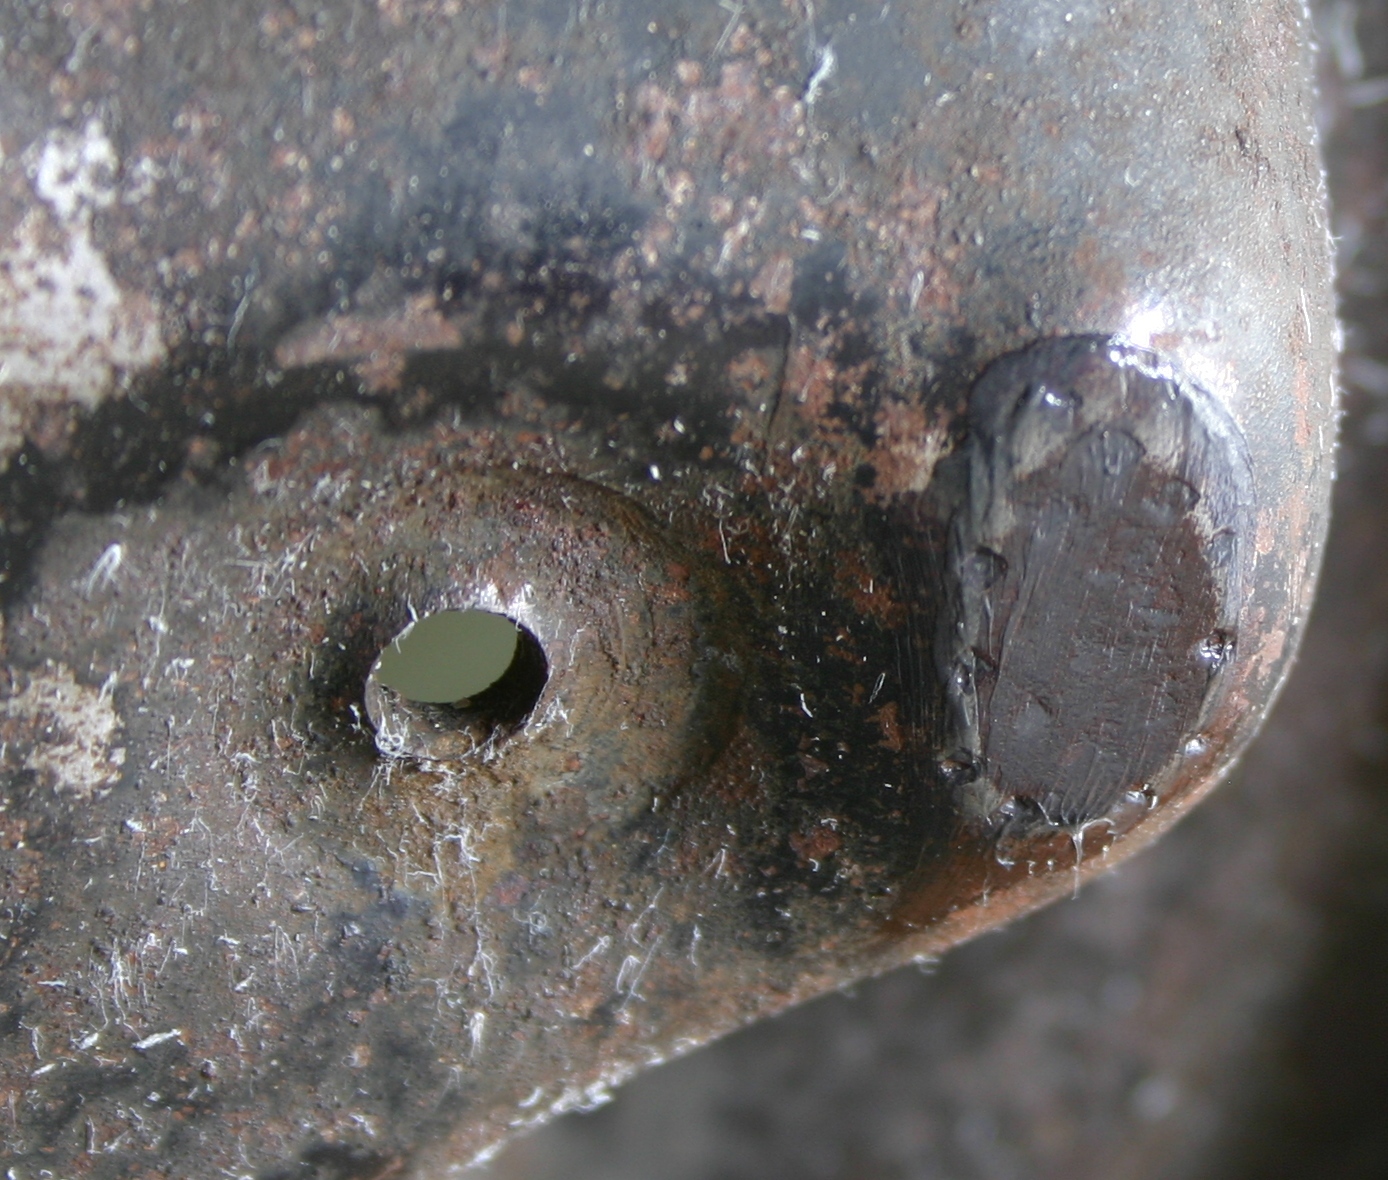
I noted some surface rust on the axle housing itself (left). I'm guessing that this type of surface rust isn't a major problem, since there aren't any moving parts that contact that housing, yet I carefully cleaned it up with the emery cloth on general principles (right). Do y'all think I got it clean enough--is there any reason for me to get it cleaner? I'll ask this question in the questions section at the end of this post.


Here are a couple of photos of backing plate brake shoe contact points after an emery cloth treatment. They don't look all that different, since I didn't want to go overboard with this gritty stuff. After the emery cloth, I used a rag and brake cleaner to get the area immaculate before applying any grease.
And here's the high-temperature grease applied to three of the backing plate shoe contact points.


Following the Ford instructions, I put a small amount of grease on the retracting and hold-down spring shoe contact points. One shoe is shown but I greased both.

Here you can see the small amount of grease smeared on the parking brake lever pin (left), which really helps it tap in easily (right). This new pin came with the brake shoes.

Here's the new China-made, Carlson parking brake cable guide resting in the RH secondary shoe.
As before, I used some large pliers to bite the ears, starting the bends (left). I then held the cable guide from the bottom side while carefully tapping the ears in to position with a ball-peen hammer (right).
The China-made Carlson adjuster screw and socket assembly came pre-greased, yet in a skimpy fashion. I re-greased it with the high temperature grease I've used elsewhere (left). I also put grease in the area Ford calls the "socket" end, since it rotates while in contact with the secondary brake shoe (right).
Here's the adjuster lever spring in its proper orientation (left), and the lever installed on top of it (right).
Using an unwise, brutal application of what modest finger power I have at my command, I installed the secondary shoe first. I set a screwdriver across the hold-down spring to assist in bending it down, while Kasie placed the nail/hook over the screw arm. With no special tool for this, either two very strong hands or three average hands are required.
And here's the primary shoe installed. Like before, I hooked the springs in to the secondary shoe, then held the primary shoe in the vicinity, hooked the springs on to it, and finally pressed it down in to position.
The purple line relates to one of my questions: is it OK that the brake shoe push-rod/link appears to be slightly crooked in there? Will that automatically center itself when the brakes are applied? The secondary shoe link doesn't look perfectly straight either.
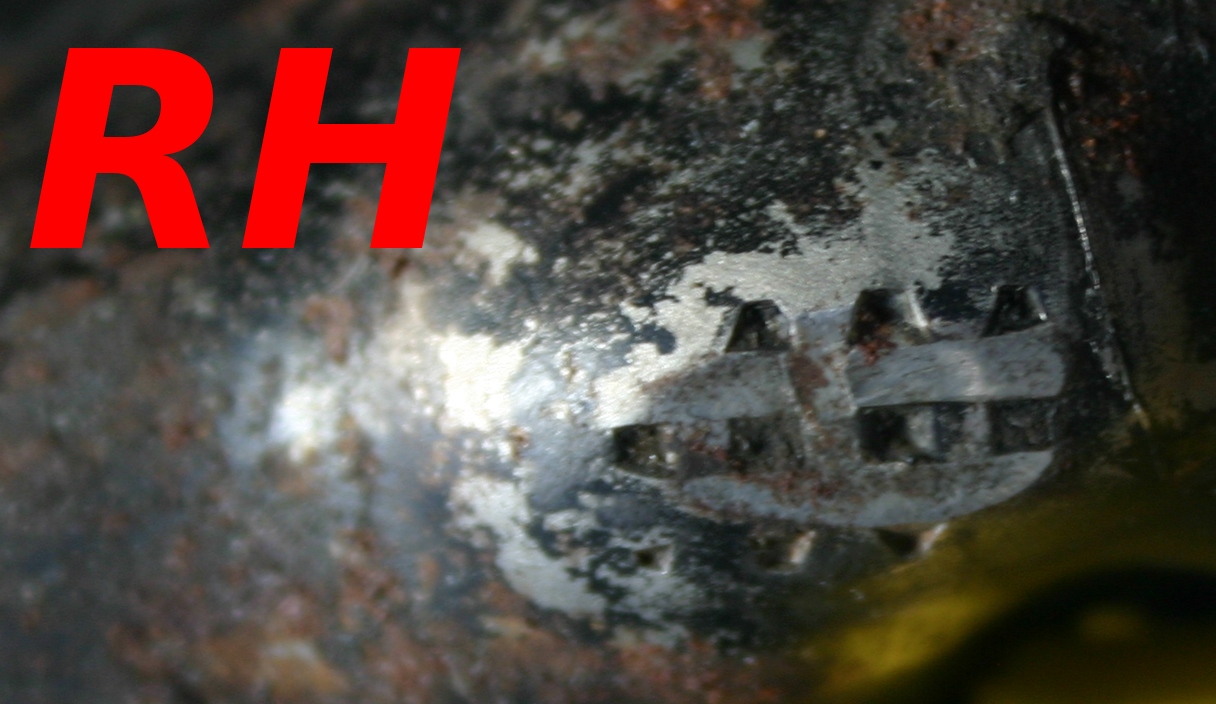
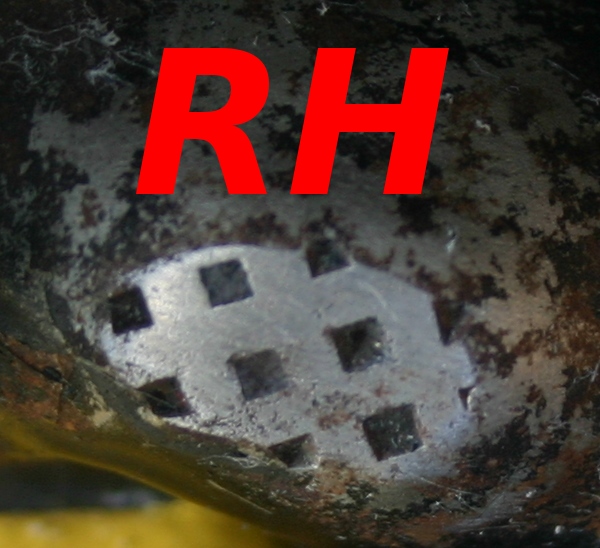
Here's how the China-made Carlson adjusting setup came out. Note that the adjusting lever's in contact with the teeth on the sprocket. Before everything had been tightened down, I tried this out and it felt like a fine watch mechanism. In contrast, the LH side's original parts seem to be in relatively bad shape. I'll include a question about this in the questions section.
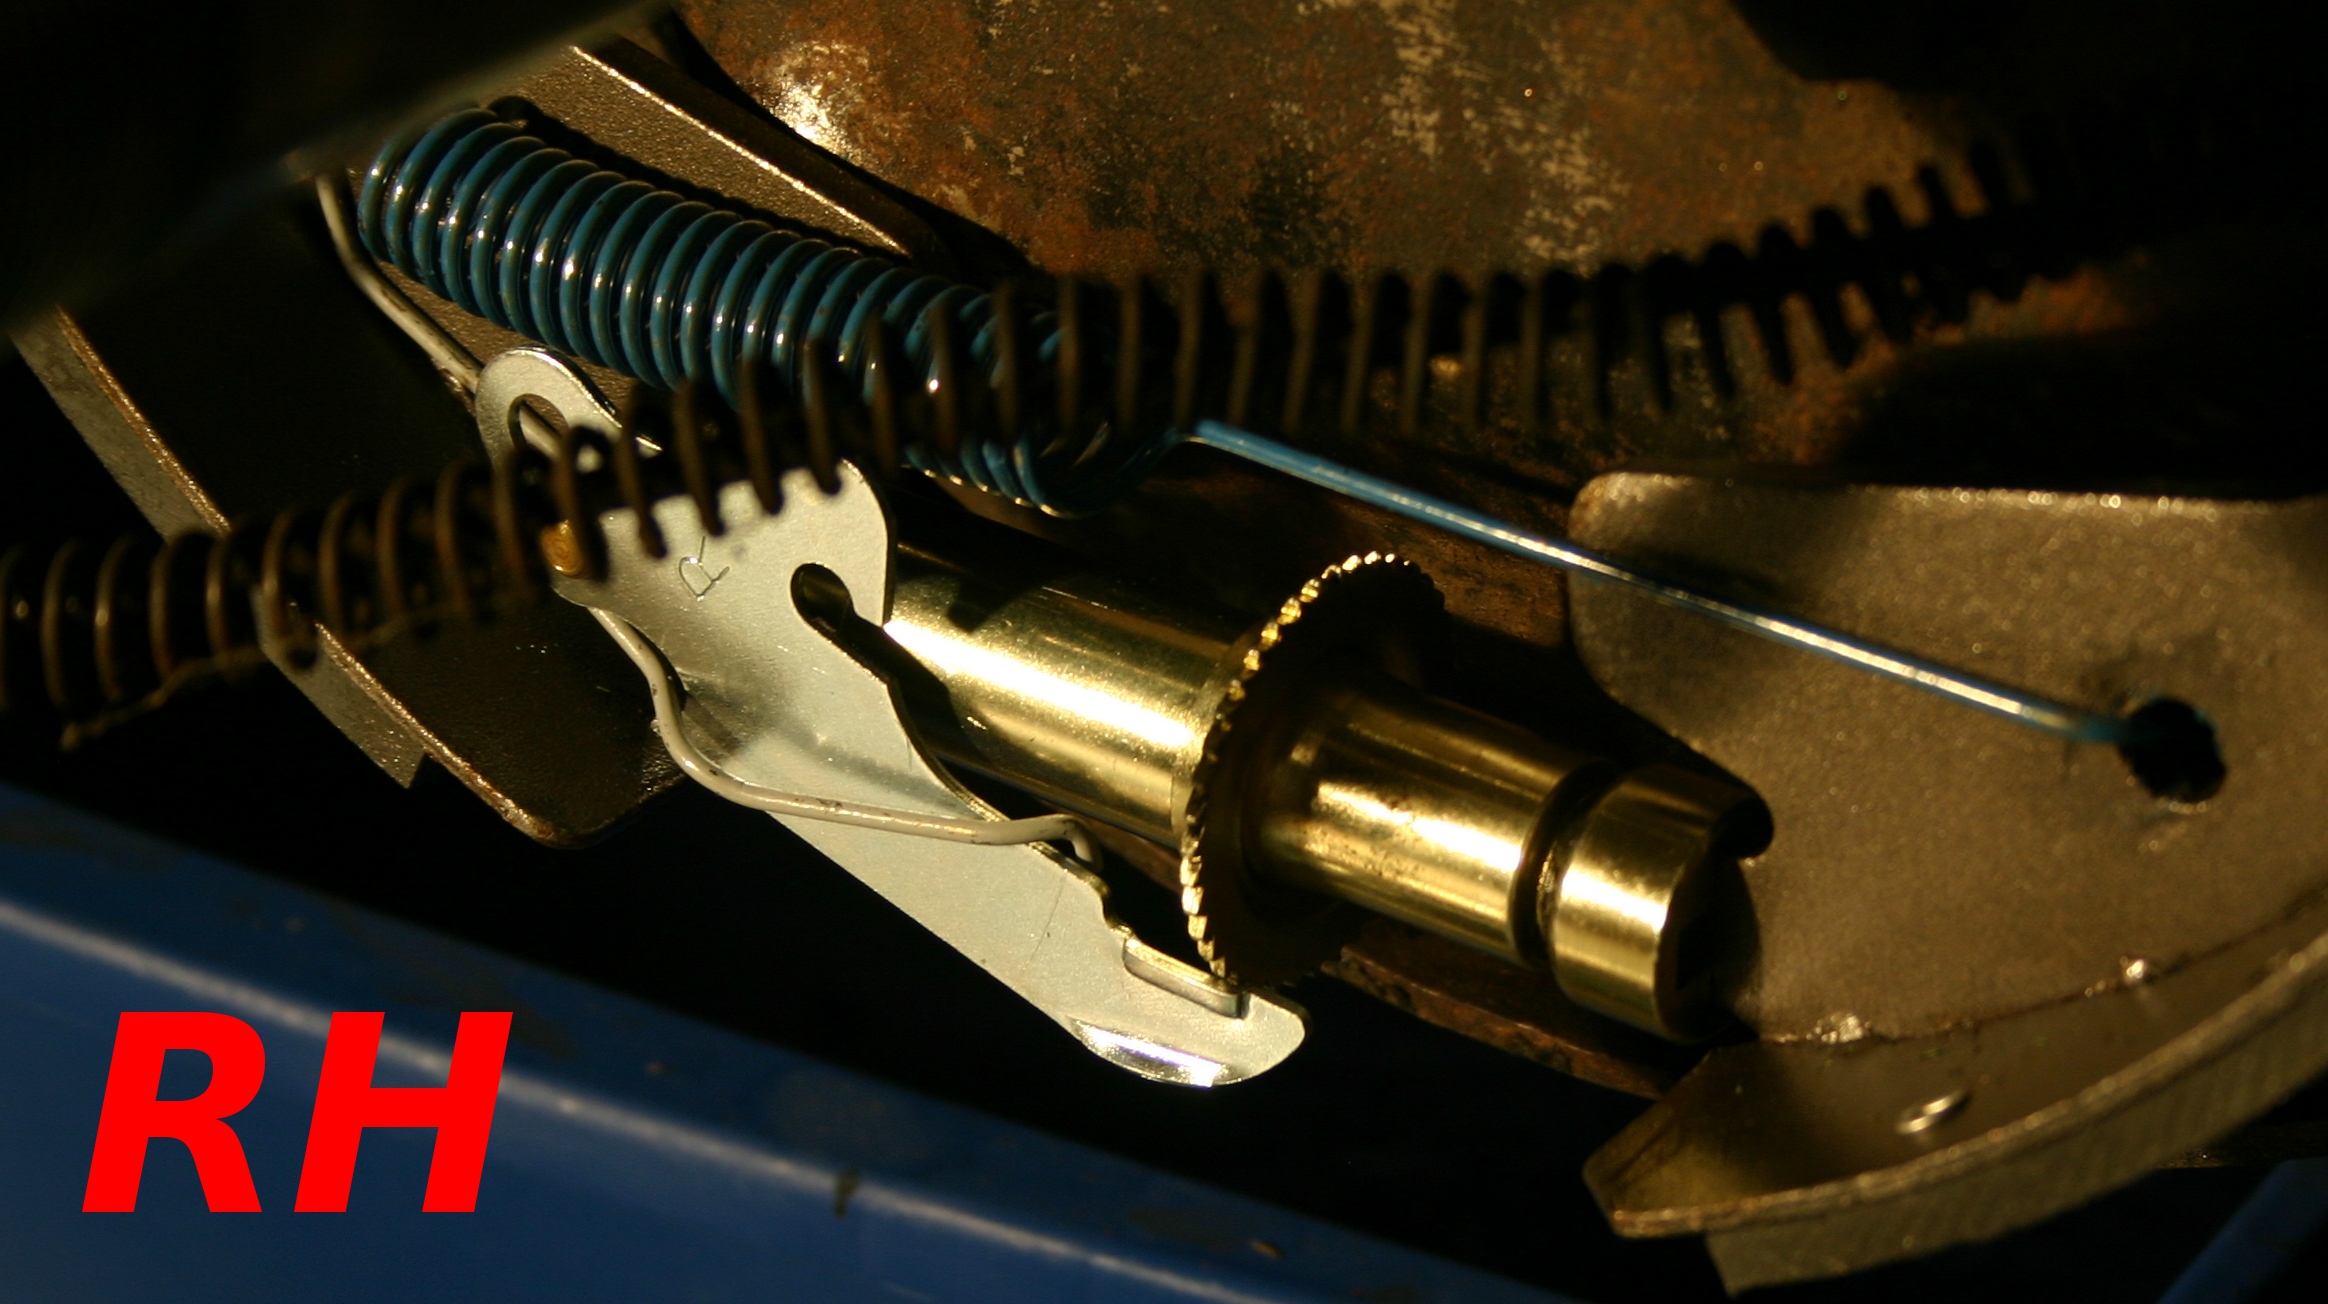
Here's the wheel cylinder area. As in one of the above photos, you can see that the brake shoe push-rods/links don't appear to be perfectly straight.
Re-visiting the LH side, I noticed that the components of the parking brake lever assembly don't appear to be assembled in the same order as shown in the Ford manual. Specifically, the 2A601 spring's installed on the outside of the lever, while in the diagram it appears to be installed on the inside over the lever. Both the LH and RH parking brake lever assemblies have this potential issue. Should I re-assemble both of these in a manner that matches the Ford diagram?
Here's a photo that shows where the 2A601 spring's installed.

And here's the Ford diagram from page 12-02-6, which appears to show 2A601 installed behind the lever, not in front of it: 1972FordTruckShopManual_12-02-6_A.png.
This Morning's Questions:
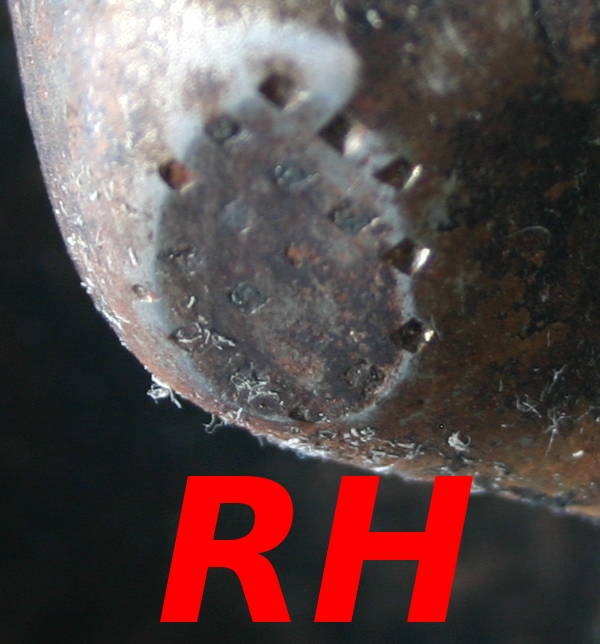
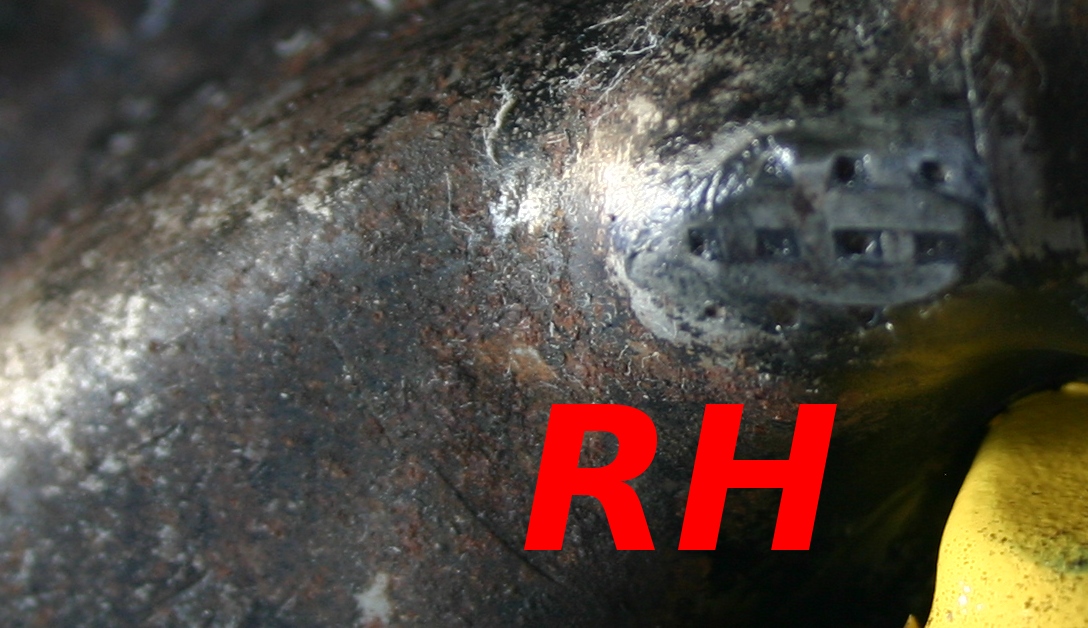
- Now that I have the RH adjuster screw area assembled with new parts, I can see that the lever's supposed to be in contact with the teeth on the sprocket, as shown here: IMG_9174x.JPG. Yet on the LH side, they're not in contact, as you can see here: IMG_8830x.JPG. Would it be prudent to pull the LH side apart again? And should I try to re-bend the adjuster lever to come in contact with the teeth, or just install a whole new adjusting part kit, as I did on the RH side?
- Are the 2A601 springs installed incorrectly on my parking brake lever assemblies? You can see that the LH side 2A601's installed in front of the lever (and the RH side's the same), while the diagram on 12-02-6 shows 2A601 installed behind the lever!
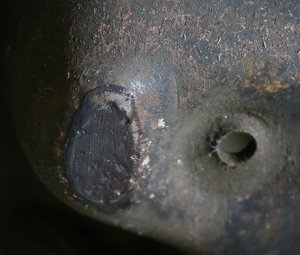
- Will the brake shoe push-rods/links automatically center themselves in the wheel cylinder when braking force is applied? Here's a photo that shows them looking somewhat crooked, as shown with the purple arrow: IMG_9173x.JPG.
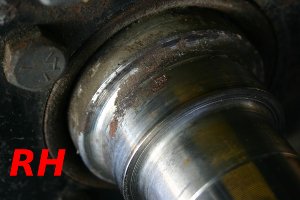
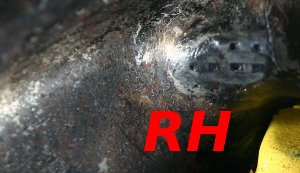
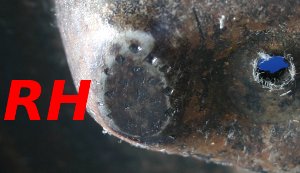
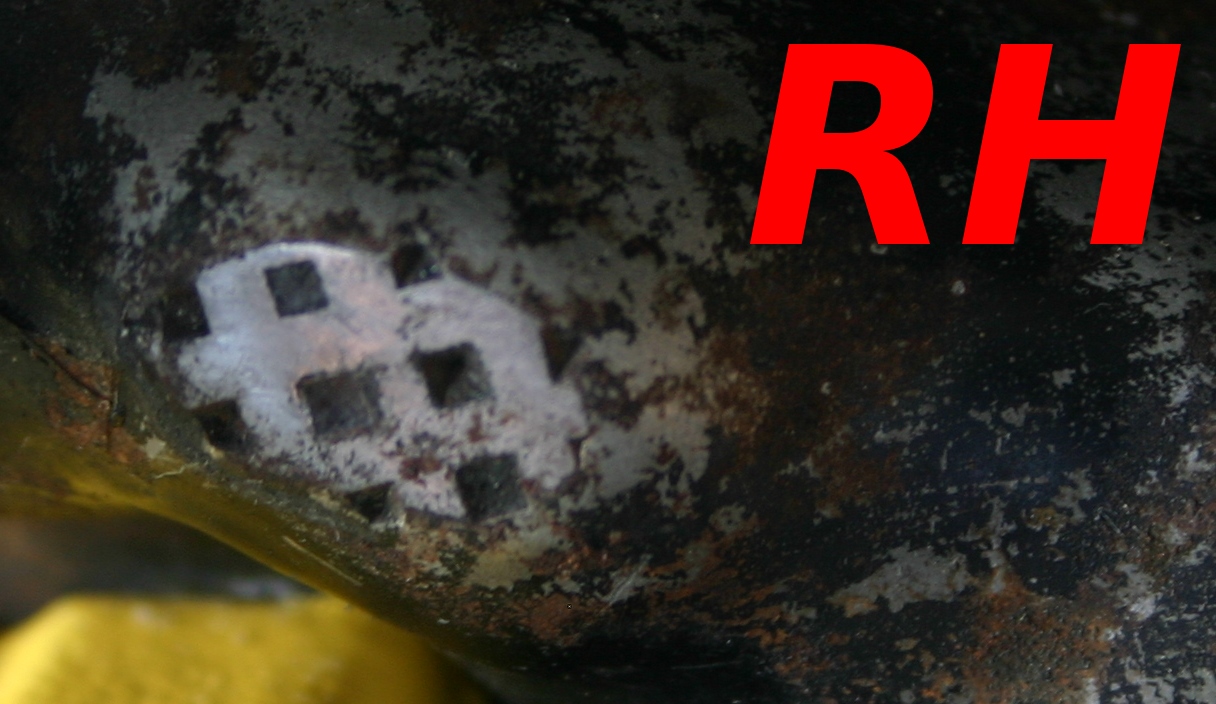
- Did I get the surface rust on the axle housing area cleaned up sufficiently? Here's as it appeared before my effort: IMG_9142x.JPG, and here's how it appeared after my effort: IMG_9144x.JPG.
Robroy
-
rjewkes

- 100% FORDified!
- Posts: 3711
- Joined: Sun Apr 17, 2005 1:09 am
- Location: Missouri, Webb City
- Contact:
Re: 1972 F250 12"x2.5" Bendix rear drum brake rebuild: advice?
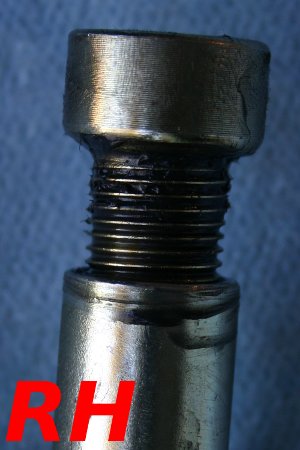
Didn't realize #50 was an F250. So on those the rear drum is bolted on like the front hubs/drums on an F100 or atleast bolted on like in the sense they both have a bolt holding the outer bearing and hub/drum to everytrhing else. IIRC those axles are full floating aren't they?
"It is better to keep your mouth shut and appear stupid than to open it and remove all doubt." - Mark Twain
'70 f250 4x4 Crew cab 460/C6 '72 F100 390/C6 9.8 MPG AVG. '89 Mercury Cougar LS Dual Exh. V6 . 18.9 MPG AVG. In Town.

I don't want to give em a heart-attack. That is what would happen if I answered the door in the buff. Heck it almost scares me to death when I step out of the shower and look in the mirror.~Mancar1~
fuelly.com
'70 f250 4x4 Crew cab 460/C6 '72 F100 390/C6 9.8 MPG AVG. '89 Mercury Cougar LS Dual Exh. V6 . 18.9 MPG AVG. In Town.
I don't want to give em a heart-attack. That is what would happen if I answered the door in the buff. Heck it almost scares me to death when I step out of the shower and look in the mirror.~Mancar1~
fuelly.com