'71 F-250 Diesel conversion and more 01/10 starting back in

Post progress reports on your project truck(s)

Moderator: FORDification

Post Reply
User avatar
Ranchero50
Moderator
Moderator
Posts: 5799
Joined: Wed Nov 08, 2006 7:02 pm
Location: Maryland, Hagerstown
Contact:

Post by Ranchero50 »

Well today pretty much sucked. Went for the floor section from the '73 dentside F-150 4x4 and the truck was gone, crushed for weight two weeks ago. Owner said it had been sitting down in the hollow for fifteen years and figured it was time to go. He was really sorry that he didn't notice the floors. Took two hours of climbing to find decent enough floor to cut up. Ended up sawsalling a '77 bronco 4x4 apart that was about a half mile away from the ranchero up the side of a mountain. Really got myself dehydrated too, very bad that in spite of drinking three liters of water. Got the front floor sections, both had excellent cab mounts and I can fix the passenger side floor rust with scraps, but I'll have to reskin the drivers floor. Seems like the dents have a much better rust protective system compared to the bumps. Every bump had the cab mounts failing but most of the dents were in decent shape (crawled under about fifty trucks today)... I did manage to unbolt the motor and tranny this evening once it cooled down and I recovered from the junk yard trip.

Pics of the floor sections. Paid $50 for these, so compared to what DC wants for good cab mounts I feel this route is a bargain.
Image

Image

Image

Image

Cab corners from the '69 F350 I parted out last month (freebies)
Image

Bed on the dolly for the tractor
Image

Now I can get back to fitting the 6.9 in tomorow before work on Sunday.
'70 F-350 CS Cummins 6BT 10klb truck 64k mile Bahama Blue

Contact me for CNC Dome Lamp Bezels and Ash Tray pulls.
User avatar
Ranchero50
Moderator
Moderator
Posts: 5799
Joined: Wed Nov 08, 2006 7:02 pm
Location: Maryland, Hagerstown
Contact:

Post by Ranchero50 »

Worked on it the last two days, the 360 is gone and the 6.9 is hovering over the frame where it goes. The cab had to go to fit this beast. The ZF series tranny is a little bigger than the T18 and the 6.9 is a couple inches taller with the deep sump oil pan. I'm thinking about shortening the sump to clear the steering links a little better so it fits down lower.

Here's some pics showing it just hovering over the frame. Gonna be interesting when done.

Image

Image

Image

Image

Image

Tonight I hope to remove the front springs to get the ride height correct so I can make sure the pan clears the drag links when done. I have F-350 springs waiting to go in.

Jamie
User avatar
Manny
Blue Oval Guru
Blue Oval Guru
Posts: 1190
Joined: Wed Oct 04, 2006 7:15 pm
Location: Georgia, Lake City
Contact:

re: '71 F-250 Diesel conversion and more

Post by Manny »

That is SWEEEEEETTTTTTTT!!!!!!!!!!! Awesome man can't wait to see it in there :thup: You never know i might have to copy you :evil:
Just another Ford fool named Dan.
The Junk that hangs around
67' F-250 highboy Camper special cross breed currently under way
http://www.fordification.com/forum/view ... 22&t=86706
1974 Bronco 302 3 speed
1984 bronco 302 c6 35's
1994 F350 7.3 5spd dually.
woods wrote: The rust holes in my truck were a factory install (very rare).
User avatar
Ranchero50
Moderator
Moderator
Posts: 5799
Joined: Wed Nov 08, 2006 7:02 pm
Location: Maryland, Hagerstown
Contact:

Post by Ranchero50 »

Manny, first you'll have to smack your finger with a hammer to get in the correct mood. This is almost scary because it's outgrowing my garage and my timeline. Hoped to have it running after my seven off next week, but I'll probably still be fabricating bits and pieces. It's just a lot of work, plus I have to fix the rust in the cab, remove the rust scale and paint the frame, disc brake swap up front, and install the power steering box. The biggest trick is going to be the clutch pivot Z bar mount on the engine.


Jamie
'70 F-350 CS Cummins 6BT 10klb truck 64k mile Bahama Blue

Contact me for CNC Dome Lamp Bezels and Ash Tray pulls.
User avatar
Ranchero50
Moderator
Moderator
Posts: 5799
Joined: Wed Nov 08, 2006 7:02 pm
Location: Maryland, Hagerstown
Contact:

Post by Ranchero50 »

Well, that went well. Actually unthreaded the big nut that holds the spring to the I beams. Figured it was going to fight. Torched the top spring strap bolts and the old shocks and lowered the frame onto some blocks so the I beams are nearly on the bumpstops. Unbolted the tranny crossmember and slid it back until the tranny mount lined up (about three inches) with the driveshaft U joint in the yoke. Measured the side offset in the rear (15" to tranny centerline) and tweaked the front balancer to the same distance. Lowered the engine until it hit the steering and checked things out. I put the starter in and the passenger side fit is nice, but the drivers is going to be tight with the larger power steering box so tomorow night after work I get to pop the motor, pull the oil pan and pickup tube off and finally install the power steering box. Oh yeah, while it's up I need to bolt the engine mounts to the engine so I can fab up the frame mounts next.

The goal is to get the crank centerline set the same as the FE motor to keep the same pinion angles on the driveline. The ZF tranny centerline height is the same as the T18 and it's sitting in the T18 tranny mount on the crossmember. Right now it looks like I'll have to raise the oil pan sump 2-3" to get the crank centerline down to 10" off the crossmember (@ same as the FE)

Jamie
User avatar
Manny
Blue Oval Guru
Blue Oval Guru
Posts: 1190
Joined: Wed Oct 04, 2006 7:15 pm
Location: Georgia, Lake City
Contact:

re: '71 F-250 Diesel conversion and more

Post by Manny »

Lookin good man seems like you've got your head on right for checking all your measurements to make it right in the truck. Oh, and i know exactly what your talking about with just go ahead and smash your thumb to get in the mood :evil:
Just another Ford fool named Dan.
The Junk that hangs around
67' F-250 highboy Camper special cross breed currently under way
http://www.fordification.com/forum/view ... 22&t=86706
1974 Bronco 302 3 speed
1984 bronco 302 c6 35's
1994 F350 7.3 5spd dually.
woods wrote: The rust holes in my truck were a factory install (very rare).
User avatar
Ranchero50
Moderator
Moderator
Posts: 5799
Joined: Wed Nov 08, 2006 7:02 pm
Location: Maryland, Hagerstown
Contact:

Motor mount fabrication.

Post by Ranchero50 »

Progress today, first I managed to get the power steering box swapped out and it was taller and a little wider. We also pulled the oil pan and pickup off the engine and set it back in the hole. Without the oil pan I was able to use some old EGR spacers from the Mustangs and some square stock to build a stand to set the main cap on so I could fab up some motor mounts. I ended up starting with the '84 diesel F250 4x4 frame perches and made stands with some 3mm european sheetmetal salvaged from some old conveyors at work. Used a torch, grinder, flapwheel, little 110 Lincoln mig and some C clamps to fab them up. Took the better part of the day. The biggest trick is getting the truck frame sitting level and then setting the motor level on the blocks before fabbing it up. Then measure and cut out the top and bottom stand plates, pop them in the vise and beat the bend into them with a five pound sledge, mock them into place and tack them up. Then take the torch and trim the excess off of the plate or the mounts as needed. Weld them up and then use the flapwheel to get a nice finish. I also tacked the plates to the frame until I could get them drilled and mounted firm. The crank height is about an inch higher than the FE, but I couldn't go any lower without hitting the power steering box. As it is I'll have to shim the motor mount for a little clearance. Some pics.

Image

Image

Image

Notice how tight the exhaust is to the power steering box. It's actually a little of 1/8" in the pic.

Image

Image

Image

I'm thinking about capping the front of the mount as well and cutting a window to get to the mounting nuts. I cheated and drilled new frame mount holes instead of trying to find the old ones or fab the mounts to fit them. I also used a laser level and some blocks of wood to mark the oil pan so I can section that out tomorow and pray for a non leaking weld. If everything works out I'll probably pull the motor / tranny combo and put it together for good and try to figureout the clutch Z bar mount on the engine side. I have the hydraulic stuff, but want to keep it looking '70'ish.

Jamie
User avatar
averagef250
100% FORDified!
100% FORDified!
Posts: 4387
Joined: Fri Mar 17, 2006 12:58 am
Location: Oregon, Beavercreek

Post by averagef250 »

Lookin good man!

I agree on capping the frame stands. How about cutting clean access holes through the crossmember to get at the nuts from the bottom? I know it's cutting into the frame, but by the time everything is in the engine bay getting at those nuts might be a bear from the top. Putting a 4BT into a 90's truck with 300 six mounts I've torched a bit of wiggle room into the crossmember under the stands so I could get my fingers in there better. Nobody could ever see it, but sure made the job nicer.

I try to weld liquid tight stuff both inside and out to make sure it won't leak.

Nice progress!
1970 F-250 4x4 original Willock swivel frame chassis '93 5.9 Cummins/Getrag/NP205/HP60/D70
User avatar
72stepside
Blue Oval Fan
Blue Oval Fan
Posts: 537
Joined: Tue May 09, 2006 10:31 pm
Location: Florida, Milton
Contact:

re: '71 F-250 Diesel conversion and more

Post by 72stepside »

Man that is close on the exhaust and steering box. Is there any wiggle room in there?
Chris
72 F100 Stepside w/ 78 300 CID
Hedman Headers
Disc Brakes
Power Steering with 3 STILL on the tree
Comfy Crown Vic Seats

71 F250 PS, PB, AC, Auto, 390
Loooong way to go on this one!

ImageImage
ImageImage
User avatar
Ranchero50
Moderator
Moderator
Posts: 5799
Joined: Wed Nov 08, 2006 7:02 pm
Location: Maryland, Hagerstown
Contact:

Post by Ranchero50 »

Chris, 1/8" loaded in the pic. Figure with 3/16 additional washer shims between the motor and the motor plate that the mounts bolt to and it'll be acceptable. It's the torque side so the engine will lift away from it under load. The passenger side fits really well, even with the offset starter.

Dustin, I looked into boring straight through for the nuts but it gets really ugly with both I beams crossing and the brace for the I beam pivot right under the crossmember. It's tight just trying to get the frame perch nuts on the bolts. I don't think a 4BT would go in a 2wd truck. I checked out my friends '98 6bt and those motors are really deep below the crank centerline. The FE crank center line rested about 9" off the crossmember and the 6bt looked at least 14" or so. That's why I sectioned the pan to get some more clearance.

This morning I trimmed one inch out of the oil pan with a jigsaw and lots of patience. I got some new flapwheels for the grinder and made quick work of prepping the edges. Used the ball peen end of a big ball peen hammer and a body hammer to work the edges where they met. Turned the heat up and the speed down and fused the two sections together (if the metal is clean it's really close to tig welding with filler rod). Once it was together I flipped it over and rewelded the inside the same way. I had to bandsaw 1" out of the oil pickup as well.


Image

Image

Image

Finally this evening I fired up the big welder and finished welding the underside of the frame mounts and added some gussets for the front. I want to avoid and fatigue stress fractures on the mounts. I got the drivers side pretty close to done, but I'm thinking about adding some more.

Image

Image

Tomorow I want to finish up the mounts and get the kids on scraping the frame for paint. The mounts are taking a little longer than I wanted but they are working out nice. There's a '77 kingcab F250 down at the farm getting parted so I'll probably run down and swipe the brake lines, etc and get those components swapped out. Hurry hurry, rush rush... Five days left and the 'to do' list is much longer than the 'done' list...

Jamie
User avatar
averagef250
100% FORDified!
100% FORDified!
Posts: 4387
Joined: Fri Mar 17, 2006 12:58 am
Location: Oregon, Beavercreek

Post by averagef250 »

Very nice!

The 4BT is 5 1/2" crank center to the bottom of the pan in front and 10 1/2" for the sump in the rear.

There are also all kinds of marine and industrial 4BT sumps to fit almost anything. The sump part of the 4BT pan looks a lot smaller than the IDI pan, but it's hard to judge without seeing them side by side.
1970 F-250 4x4 original Willock swivel frame chassis '93 5.9 Cummins/Getrag/NP205/HP60/D70
User avatar
Ranchero50
Moderator
Moderator
Posts: 5799
Joined: Wed Nov 08, 2006 7:02 pm
Location: Maryland, Hagerstown
Contact:

Post by Ranchero50 »

Wow, so it's actually an inch shallower, gonna have to find one of those to put in a dentside bronco for when momma kills her '92 Explorer.

Today went fairly well. I finished the frame mounts and I got the front brakes removed and checked the kingpins for wear. I also spent most of the day cleaning the front frame for paint and now that's done. I zipped the flywheel on and snapped a bolt so tomorow I get the remove that and go to the farm to scrounge another. Then get the motor / tranny dressed and down in the hole for good. Get the front brakes wrapped up and then start on rust repairs on the cab and inner fenders.

The $20 dial indicator rig setup for checking the kingpin wear.
Image

You can almost see .015" of movement on the indicator. My friend checked his books and the spec is .030" of movement so it should be ok
Image

Image

A nice dark shot of the finished motor mounts. I did wrap metal around the front and left a nice window to get at the bolts. The paint is Rustoleum flat black brushed on with a chip brush and it turned out ok for a driver.
Image

Image

Jamie
User avatar
Ranchero50
Moderator
Moderator
Posts: 5799
Joined: Wed Nov 08, 2006 7:02 pm
Location: Maryland, Hagerstown
Contact:

Post by Ranchero50 »

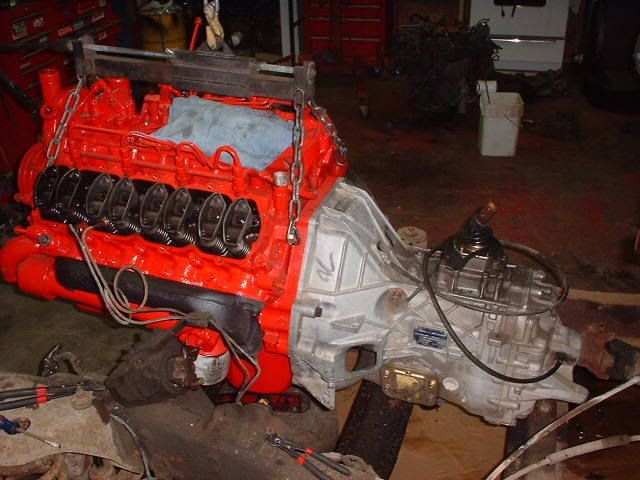
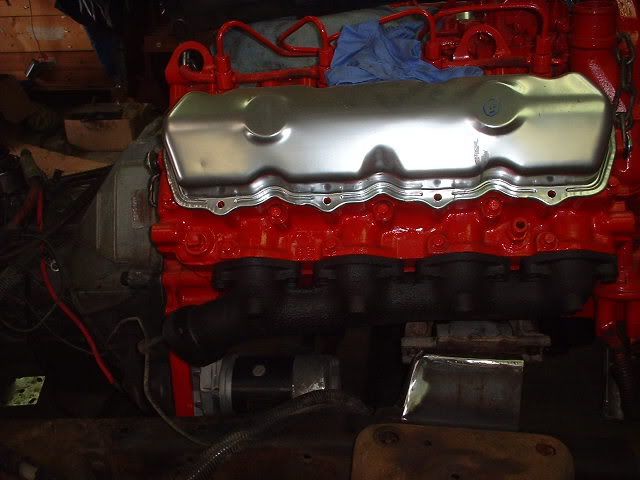
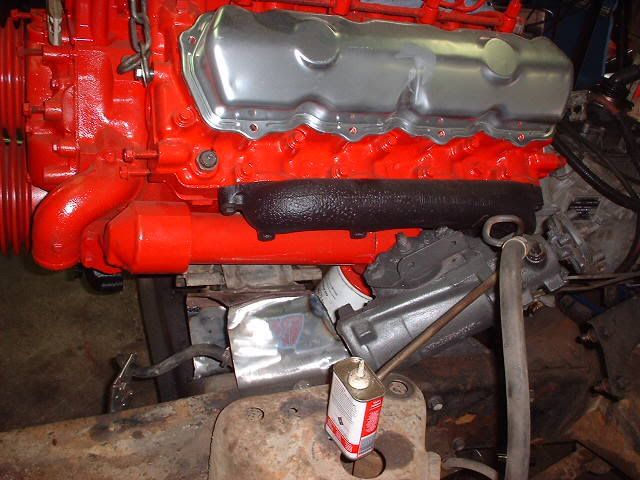
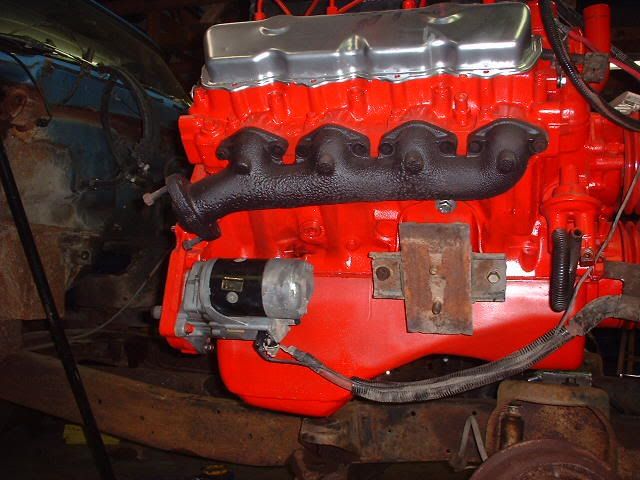
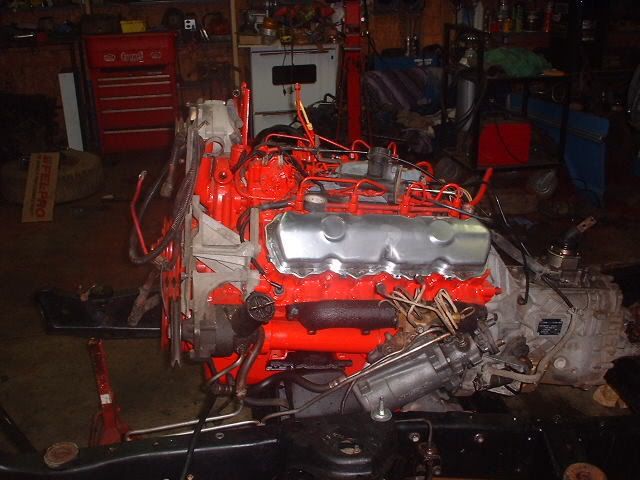
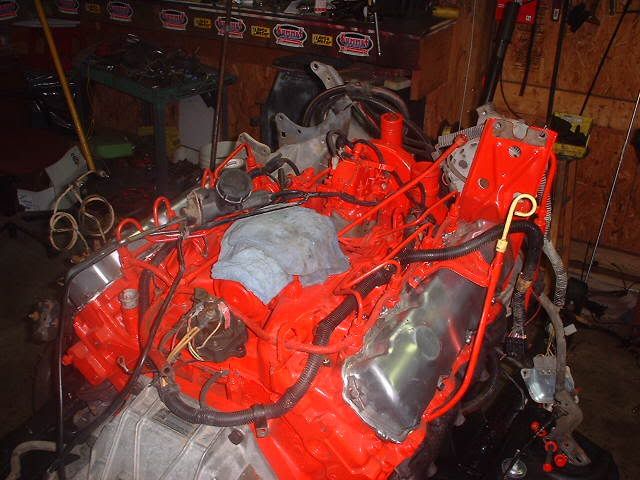
Sunday shoud have been a day of rest, but things went downhill and I had to scramble to get things going right again. The first difficulty came from trying to find a replacement bolt for the one I snapped off. I rode down to the farm and pulled one from a 7.3 with a dual mass flywheel, but noticed it was about 3/4" longer than the original one. Luckily I had a box of left overs from the '95 crew cab and one from the 6.9 donar was in that. The second difficulty came while putting the clutch assy on the engine. I used a spare T5 input shaft for an alignment tool for the clutch disc and after tightening the bolts set it down next to the 5 speed tranny. The tranny input shaft was bigger... Nuts...

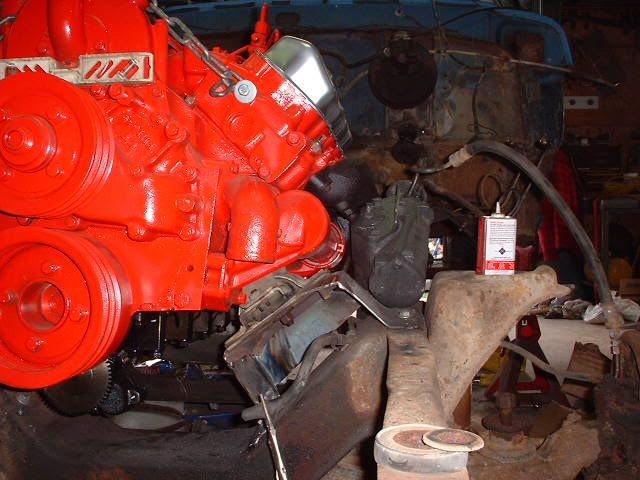
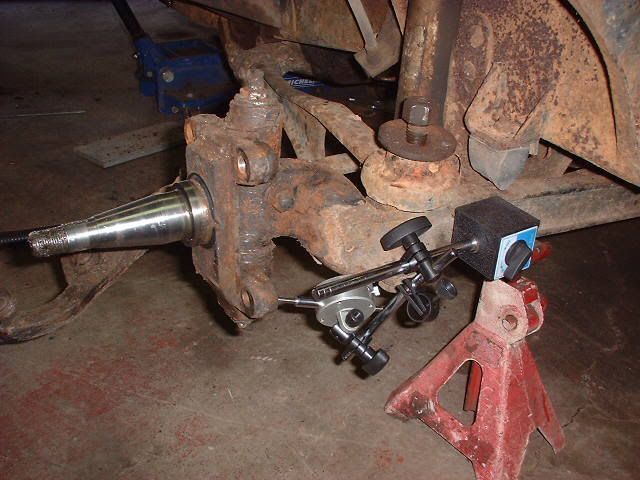
Figured I'd move on into the brakes and after gathering all the clean parts from the shed I noticed that the bolt pattern for the caliper / backing plate mount was different between '71 and '75. Luckily there's a '78 F250 king cab frame and running gear down at the farm and that came home this evening as well as a dual mass flywheel and clutch assy that was dang near new.

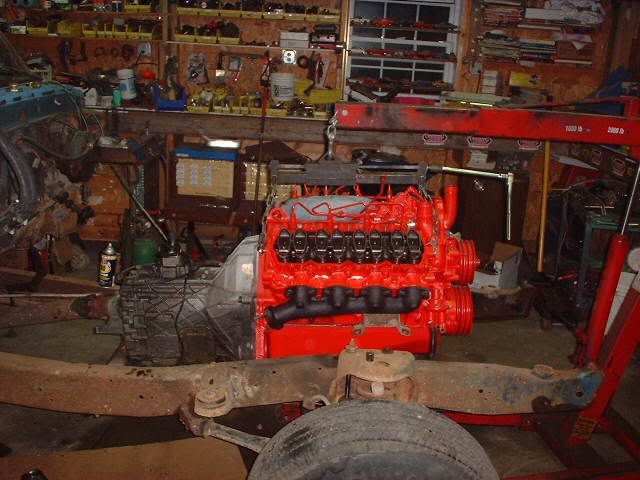
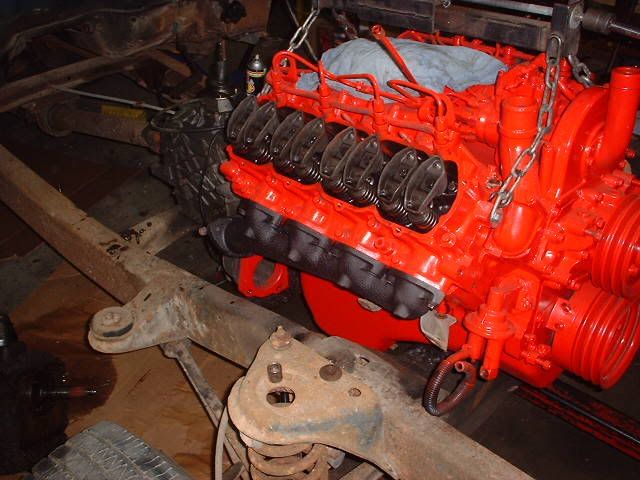
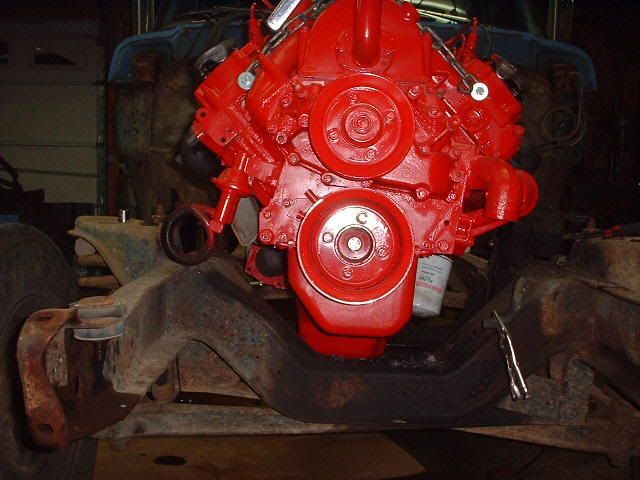
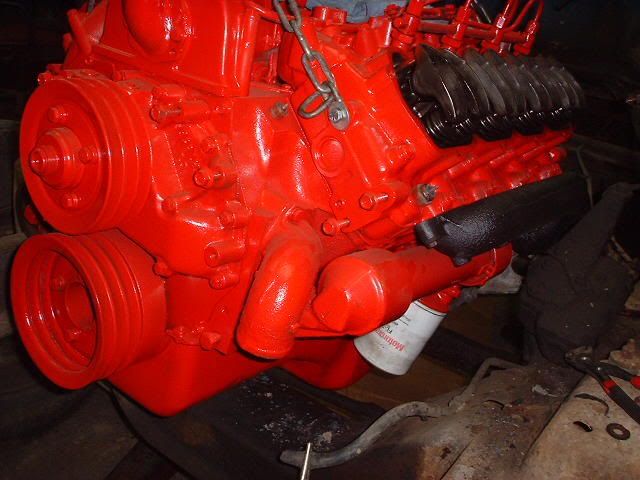
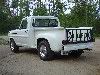
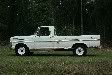
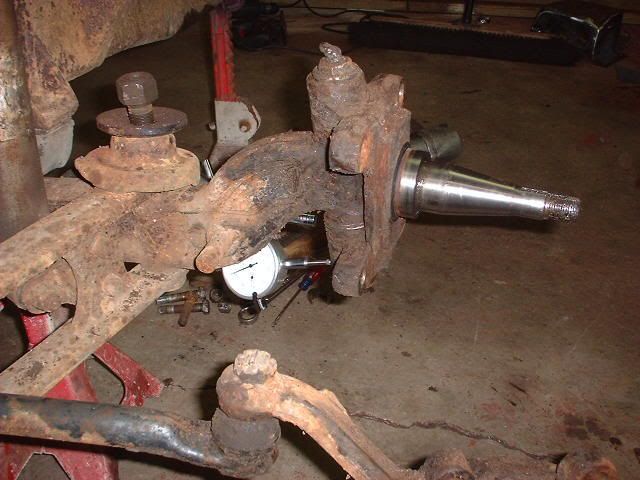
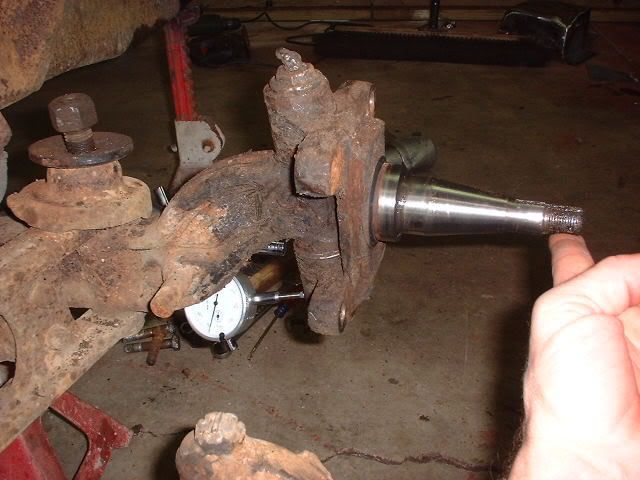
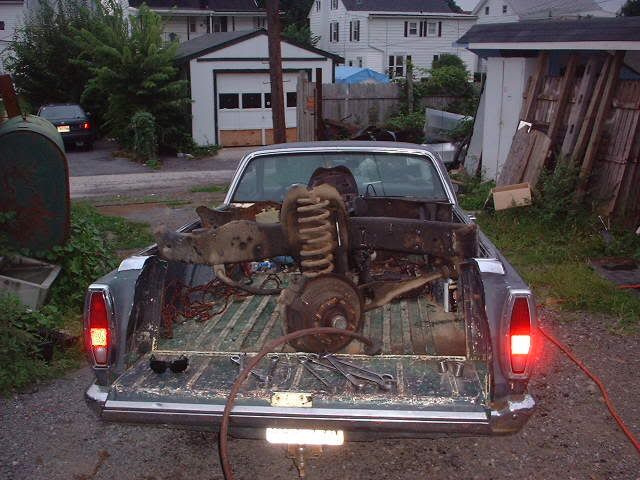
'68 Ranchero with a '78 F-250 front suspension
Image

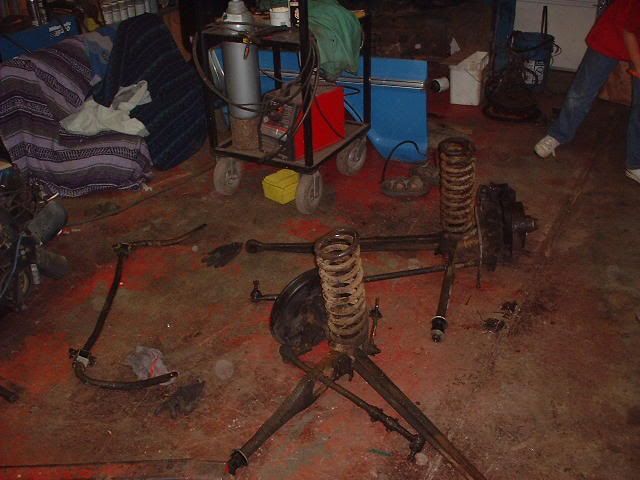
An hour later the front end was stripped down and in the garage awaiting cleanup and paint
Image

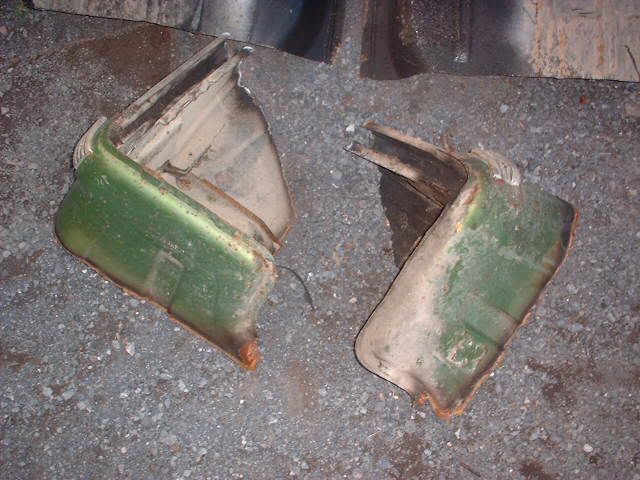
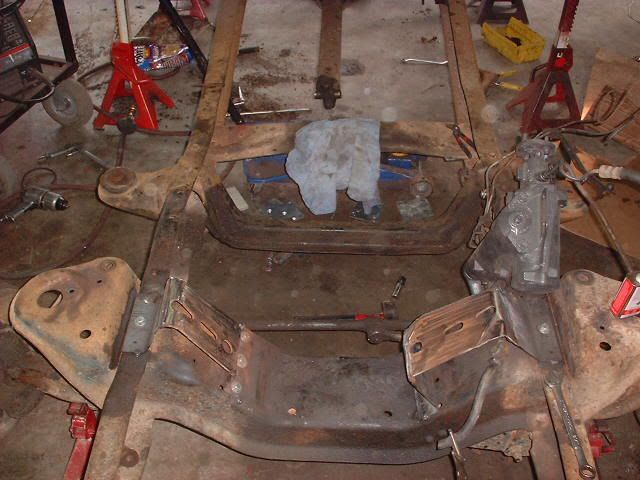
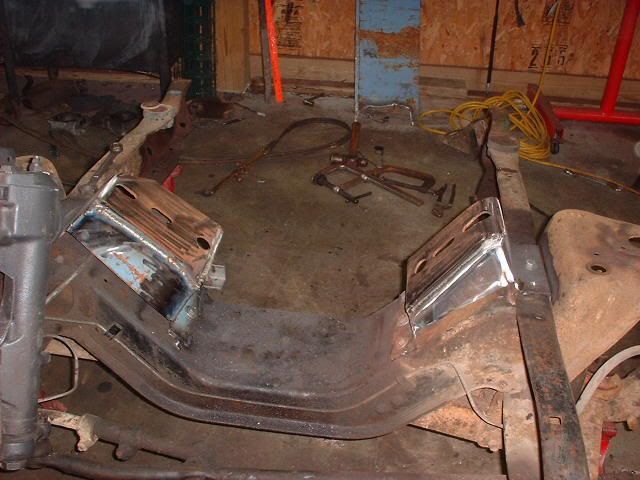
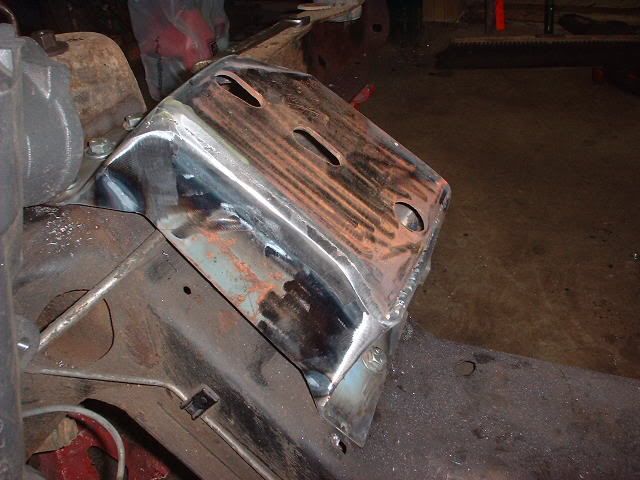
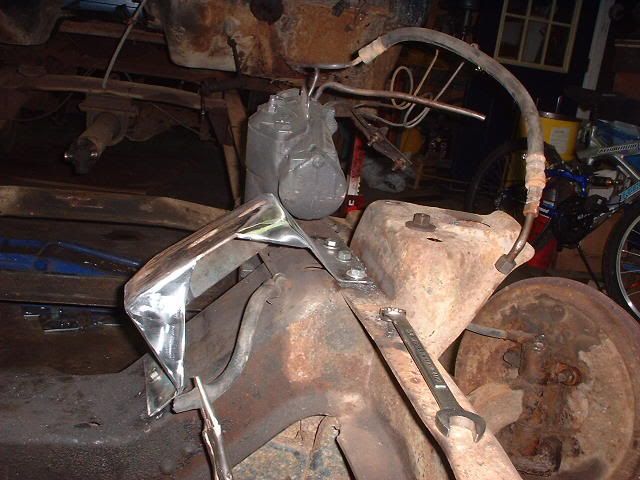
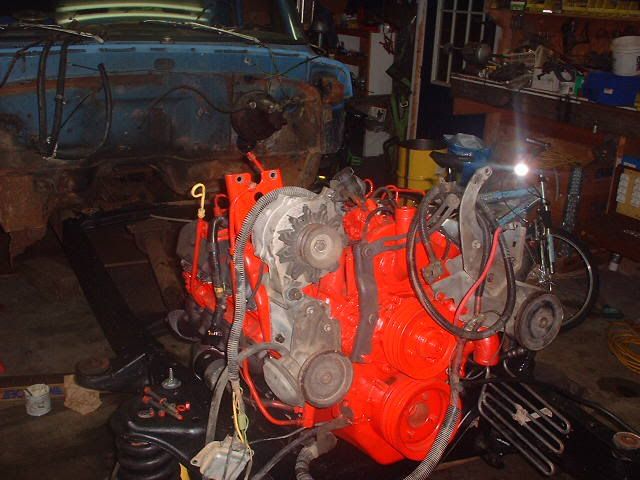
In the meantime my oldest son came down and wanted to help do 'something' so we decided to mock up the cab to see if it was all going to fit together again. I forgot to measure a reference height in the front and rear of the frame to make sure the motor was sitting pretty level in the truck when it was on jackstands so the cab check was a confidence booster. Of course the front cab mounts are gone so getting the frame level was a guesstimate at best. Seems like it's the little things that'll screw you up. Pics...

Image

Image

Image

Image

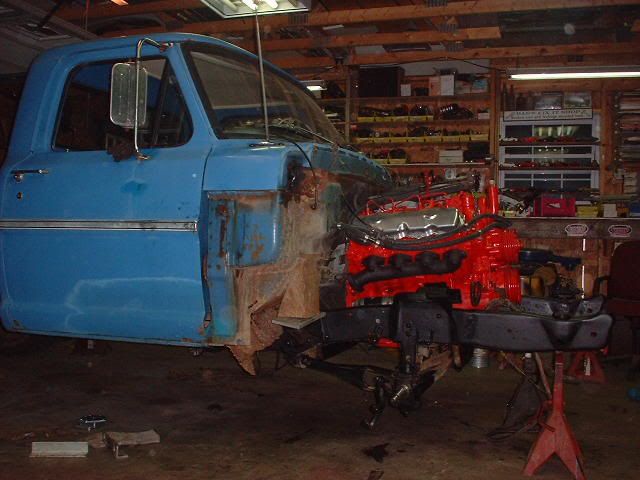
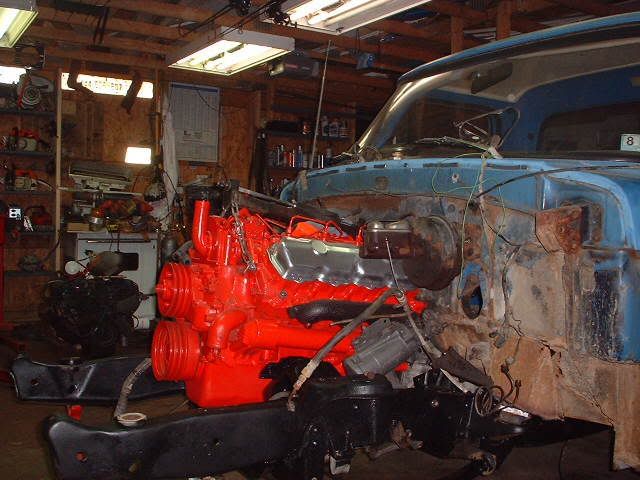
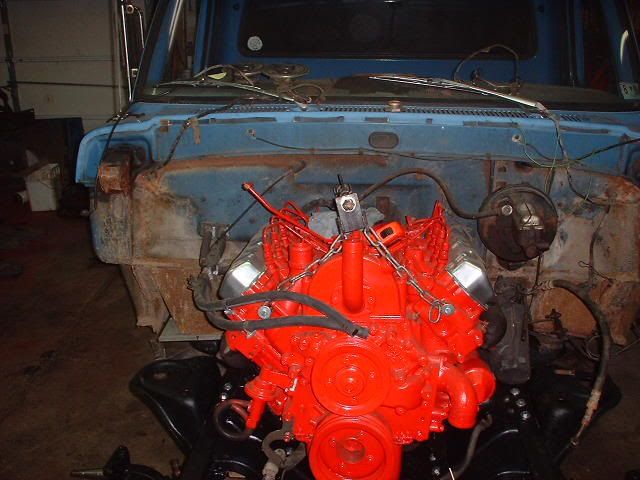
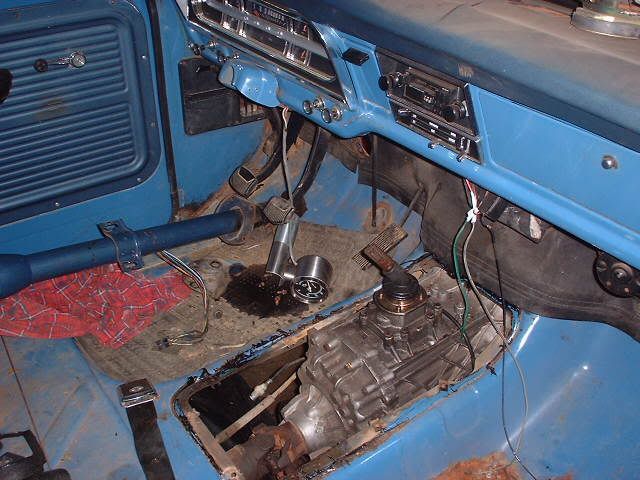
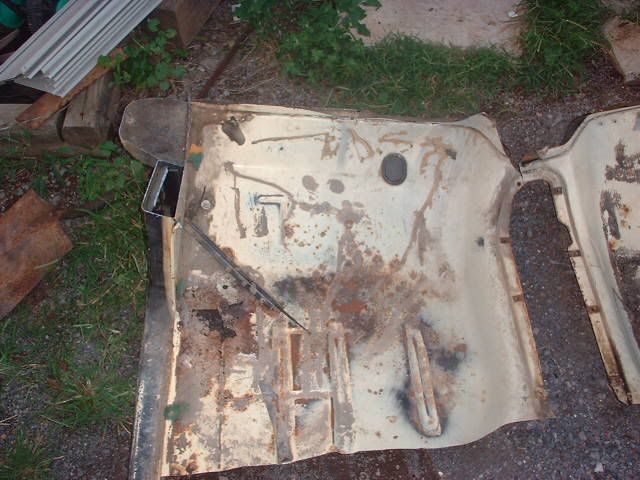
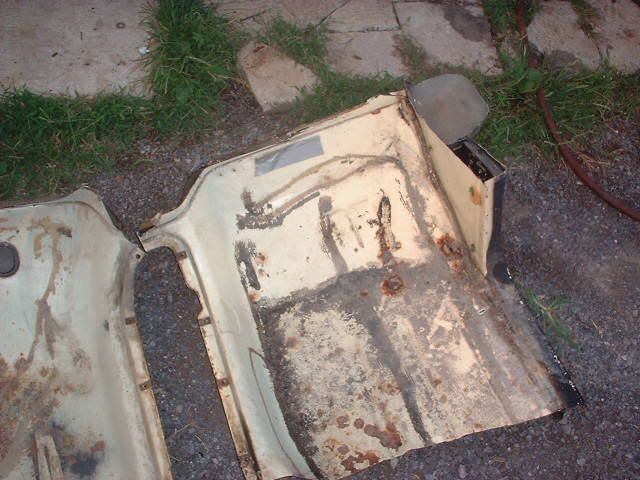
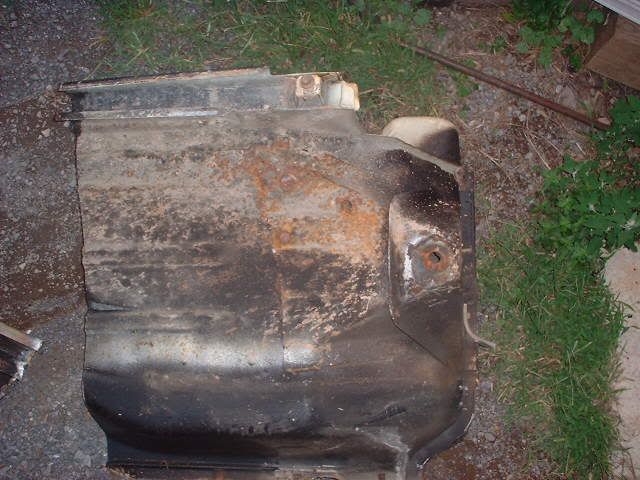
The cab is sitting pretty low in the front since the mounts are shot. I'm hoping that I can raise the tranny mount some and put a 1-2" body lift in to get the motor sitting better. The plan is to get the floor back together and see how it looks then.

Tomorow I hope to have the I beams cleaned and painted and installed, hopefully the distribution block installed and new brake lines run. I need to extend the fuel feed across the crossmember (swiped the one from the '78 for tubing and clips). Get the steering from the box down done and maybe start on the cab. I really want to get everything under the motor finished up and get it locked into place.

Jamie
User avatar
Ranchero50
Moderator
Moderator
Posts: 5799
Joined: Wed Nov 08, 2006 7:02 pm
Location: Maryland, Hagerstown
Contact:

Post by Ranchero50 »

Another day is done and a lot got accomplished. This moring started with everything off of the frame again. The boy and I cleaned and painted the front suspension from the other truck and the frame sections that got missed. While the paint was drying I went ahead and buttoned up the engine (valve cover gaskets, exhaust manifolds finished, engine wiring and finally front dress). We installed the I beams and engine and did the power steering plumbing (the '84 F250 pressure hose worked on our box with some rerouting). Finally this evening we installed the springs and shocks and even put some tires on. With the F350 springs it's sitting way up in the air, I hope it drops some with the cab and front clip installed.

This shot shows the routing for the power steering lines and the cooler mounted to the framerail. The pump has the return fitting broken off so I have to scrounge another in the morning as well as some of the hardware for the front dress. You really can't see it, but the hydraulic clutch slave cylinder is installed too.
Image

This shot shows the accessory locations. There is a spot for AC so I'll grab a compressor tomorow as well. AC is another project for another time.
Image

The final shot shows the wiring harness for the engine. Most of it self serving for the glowplug circuit. It also has oil pressure and water temp wiring running through it.
Image

Tomorow will be spent cutting the floor out of the cab and replacing that as well as routing the rest of the brake lines. Hope to have the cab sitting on the frame by dark and maybe starting the exhaust. Wednesday may see it running if I can figure out the accelerator cable and clutch stuff. Oh yeah, got to put the front clip on too...

Jamie
User avatar
averagef250
100% FORDified!
100% FORDified!
Posts: 4387
Joined: Fri Mar 17, 2006 12:58 am
Location: Oregon, Beavercreek

Post by averagef250 »

How do you plan to tackle steering if you body lift it?

Keep up the great work!
1970 F-250 4x4 original Willock swivel frame chassis '93 5.9 Cummins/Getrag/NP205/HP60/D70
Post Reply