Hackster's F100 #2 CV Swap 6 speed manual and Coyote

Post progress reports on your project truck(s)

Moderator: FORDification

Post Reply
hackster
Preferred User
Preferred User
Posts: 317
Joined: Fri Oct 18, 2013 11:21 am

Re: Hackster's F100 #2 CV Swap 6 speed manual and Coyote

Post by hackster »

SATURN5 wrote:IIRC the Coyote has a pressure transducer inline and the PCM controls the fuel pump to vary pressure. You're going to use the FRPP power pack I think I read. I'd look at the install instructions for it to see what they say to do.
Not exactly how the coyote fuel system works. The Ford Racing and American Muscle instructions go into it in detail and they recommend using a bypass regulator and supplying 55 lbs referenced to the intake manifold so this should work just fine.

Picked up the stuff I thought I would need for the fuel system and got to it.

Aeromotive Bypass regulator and all the -6 hose and fittings I would need, push lock hose -6 10 micron fuel filter, 10' of stainless and some braze on ends for the tubing.

Got the ends brazed on and snaked it in the frame rails. Pretty sure I am going to be able to get fitting on both ends. Tranny side is going to be just fine, the other end though is going to be a bitch.

Got the regulator mounted, mounted the fuel filter and started to route the fuel hoses and get them built.

Not much photo worthy back here but its coming together.

Image

Also had to push it outside in order to snake the fuel line in there so I snapped half a photo....still not digging the tires.

Image

Sean
hackster
Preferred User
Preferred User
Posts: 317
Joined: Fri Oct 18, 2013 11:21 am

Re: Hackster's F100 #2 CV Swap 6 speed manual and Coyote

Post by hackster »

What a day....

Had a hand with things today from my buddy Scoot. Was nice to have some company out in the shop too.

Cleaned up my mess and got my head on straight from yesterdays **** show.

Tore the shifter all apart to figure out how I could possibly get this thing shortened up and in the tuck on its own.

Here is what an MT82 shifter looks like on the inside and all the parts and pieces in there.

Image

I knew I needed to shorten this assembly up. So I ground off the pressed on pins and dissasemble this.

Image

I cut off the two ends to see how I was going to mate them and Ill be damned if they did not slip right together allowing me to shorten up the shifter linkage about 5" total. It was like the Ford guys planned it this way, no kidding :wink:

Image

Image

And here is my shortened up assembly, looks just like it would have come from Ford like this.

Image

I did not take a ton of photos of building this contraption but if you know anything about this stupid transmission, the shifter mounts off the back of the tranny with a rubber bushing and bolts to the bottom of the car to hold it in place. Well none of that was going to work for me so I got to building something that would support the front back and side to side motion of the shifter. This is what I came up with and I think it just might work.

Image

Image

Image

Got it painted up and bolted in place.

Shifter is bolted in place and in a nice spot. Ill need to extend the shifter itself a little bit to get it where i need it but its in a great spot in the car.

Image

Here is what it looks like on the truck.

Image

Also got the hard line in the frame, got the fittings on the front and rear, the rear hose built and the tube clamped in the frame so that is done...

Want to get a new fitting for the engine connection to hose and then I can button up that hose. and be pretty much done with the fuel system.....onto the electrical system next.

Sean
Binegar50
New Member
New Member
Posts: 2
Joined: Tue Jul 30, 2013 5:29 pm

Re: Hackster's F100 #2 CV Swap 6 speed manual and Coyote

Post by Binegar50 »

Love this Build, I have a 70 that I'm going to start as soon as I finish a couple things on the house , lol , just getting things in order of what I want to build, so far C.V. Front, IFS Rear, was thinking f150 5.0 BECAUSE ITS CHEAPER , and looking for what 5 speed I can use ? any thoughts ? , thanks
IN2FORD
Preferred User
Preferred User
Posts: 345
Joined: Sun Apr 27, 2014 3:54 pm
Location: Cookeville TN

Re: Hackster's F100 #2 CV Swap 6 speed manual and Coyote

Post by IN2FORD »

Binegar50 wrote:Love this Build, I have a 70 that I'm going to start as soon as I finish a couple things on the house , lol , just getting things in order of what I want to build, so far C.V. Front, IFS Rear, was thinking f150 5.0 BECAUSE ITS CHEAPER , and looking for what 5 speed I can use ? any thoughts ? , thanks
I you are using a stock 5.0 a Tremec T5 would be fine behind it. Shifter location will be very near the bench seat but works out fine. Or you can use a 5 speed out of a 87-96 F150. It's a mazda trans that works well in trucks but if you are looking for something that will take a beating behind a 5.0 then do the T5. If you are going to make more than 400hp I would look at a Tremec TKO trans. Tough transmissions..

Barry
hackster
Preferred User
Preferred User
Posts: 317
Joined: Fri Oct 18, 2013 11:21 am

Re: Hackster's F100 #2 CV Swap 6 speed manual and Coyote

Post by hackster »

I spent today cleaning the shop and doing house chores, recycling some CFL lights, getting rid of some oil, cleaning the gutters and detailing the wifes car.

Picked up the spacers to go under the front upper arms though and ordered some parts.


Coyote Control pack, battery box/mount, power steering pump mount, pump, pulley.

Hope that stuff gets here by the holiday weekend.

Oh and I took the other truck out for a spin.....forgot how fun that thing is to drive around =)

Sean
User avatar
48prerunner
Preferred User
Preferred User
Posts: 495
Joined: Thu Sep 30, 2010 5:44 pm

Re: Hackster's F100 #2 CV Swap 6 speed manual and Coyote

Post by 48prerunner »

One thing you might want to do when you put the control pack in is run some wires for an oss sensor from the tranny while you have it on the bench. I had to do it on the truck. Make sure you use 18 gauge wires without an extra thick inulation. You can get the pins from ford racing. Maybe they fixed the stall in the new computer but I havent heard yet.
hackster
Preferred User
Preferred User
Posts: 317
Joined: Fri Oct 18, 2013 11:21 am

Re: Hackster's F100 #2 CV Swap 6 speed manual and Coyote

Post by hackster »

48prerunner wrote:One thing you might want to do when you put the control pack in is run some wires for an oss sensor from the tranny while you have it on the bench. I had to do it on the truck. Make sure you use 18 gauge wires without an extra thick inulation. You can get the pins from ford racing. Maybe they fixed the stall in the new computer but I havent heard yet.
I have read a bunch about the stall issue....it sounds like they have it ironed out but the harness now has the OSS stuff with it I believe. I will check tonight when I am back from work. Good call though.

It did show up the other day as did the battery box and other stuff. Not too sure how much time I am going to have this weekend to work on the truck unfortunately. Honey do list, working on a stereo for a buddy Thursday and dirtbiking on friday if the weather holds out.

Also pulled the frontend apart again, it looks like I might have a bad rack. Pulled the inner and outer tie rods and still have a clunk.....****.

Sean
hackster
Preferred User
Preferred User
Posts: 317
Joined: Fri Oct 18, 2013 11:21 am

Re: Hackster's F100 #2 CV Swap 6 speed manual and Coyote

Post by hackster »

Well, a couple of nice days away from the truck.... got in some great miles of single track yesterday on the KTM.

I managed to not get anything done on the truck this past week so I tried to get back to it. Being stuck at this point of not really any noticeable progress for me is really tough. I like to see things get done.

So today I tore the frontend apart again, been chasing a clunk, and replaced the inner and out tie rod ends with new stuff from MOOG. Had good luck with their stuff in the past and this was no exception parts went on with no problems, I shortened up the inners a little bit so that the Toe could get aligned properly with the adjustable camber and lower ride height.

But there are no good photos from that junk now is there?

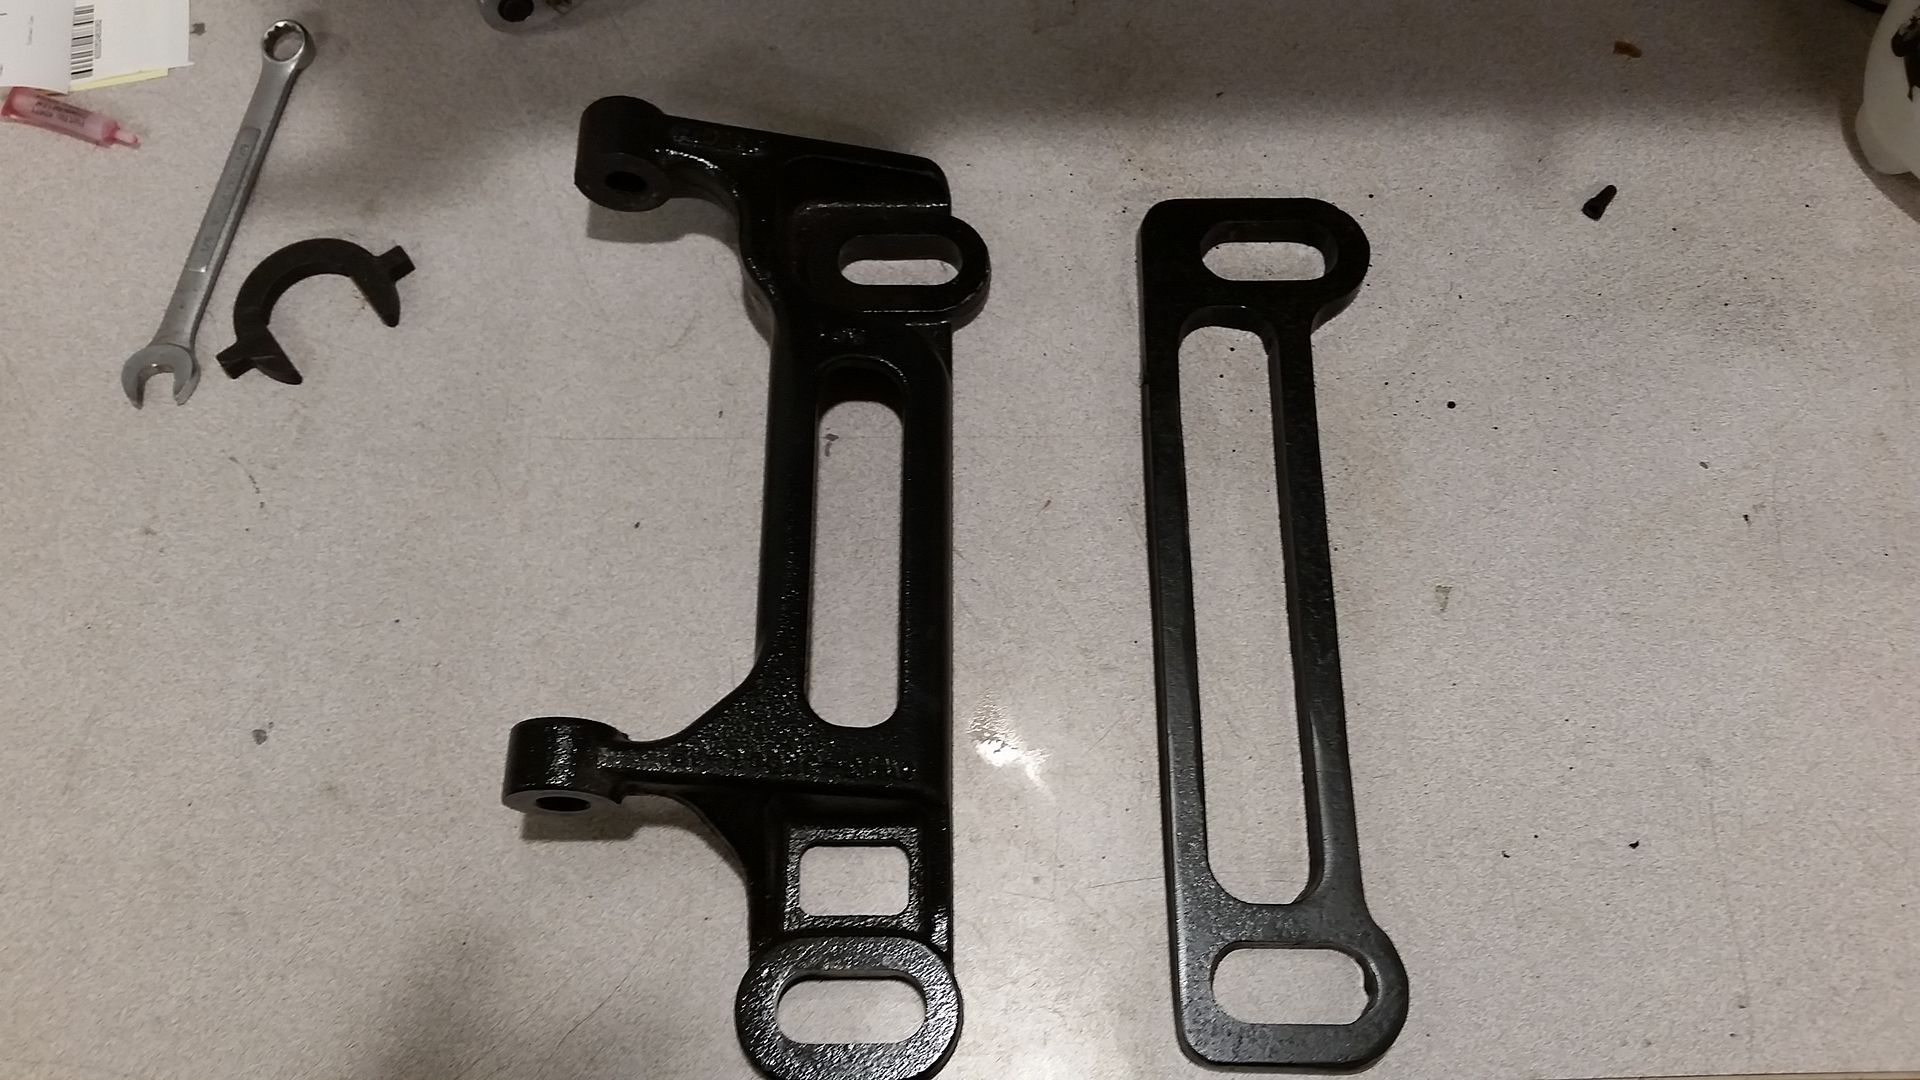
I know that I need to get the frontend final bolted in place so I can start moving forward with the rest of this build. So I had a buddy of mine cut out some spacers from 3/8" plate for the upper mounts for the crown vic stuff.

They turned out nice...and no way I can cut that thick that nice.

Image

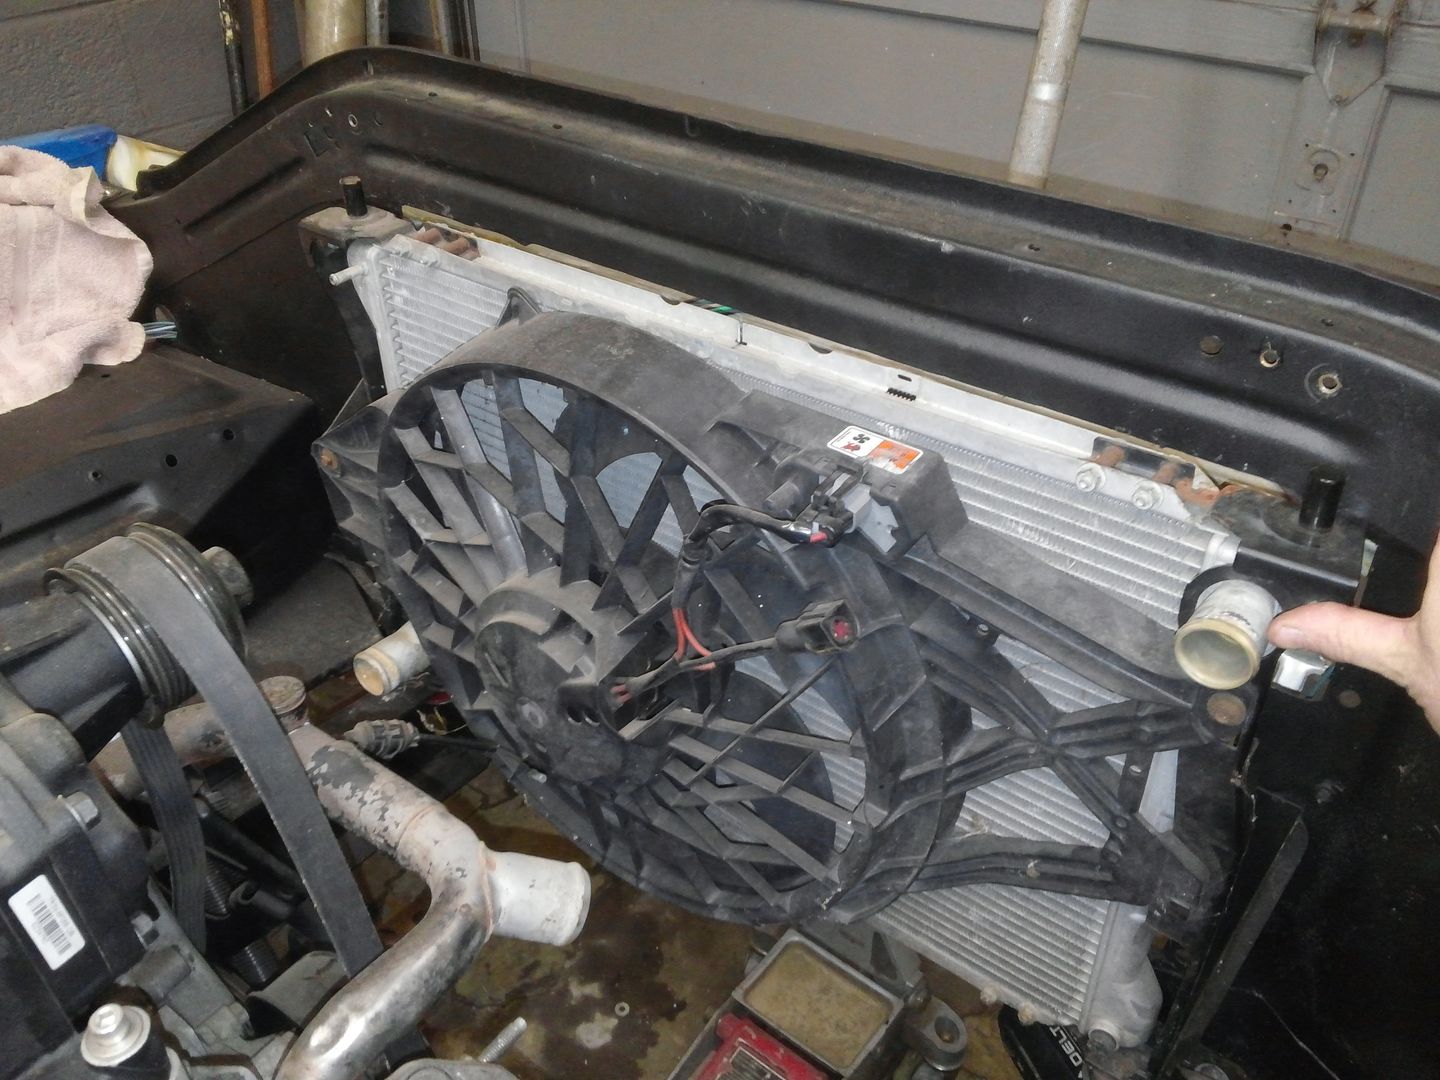
So with those in hand I bolted the frontend in place for good, hopefully for the last time. This looks :)

Image

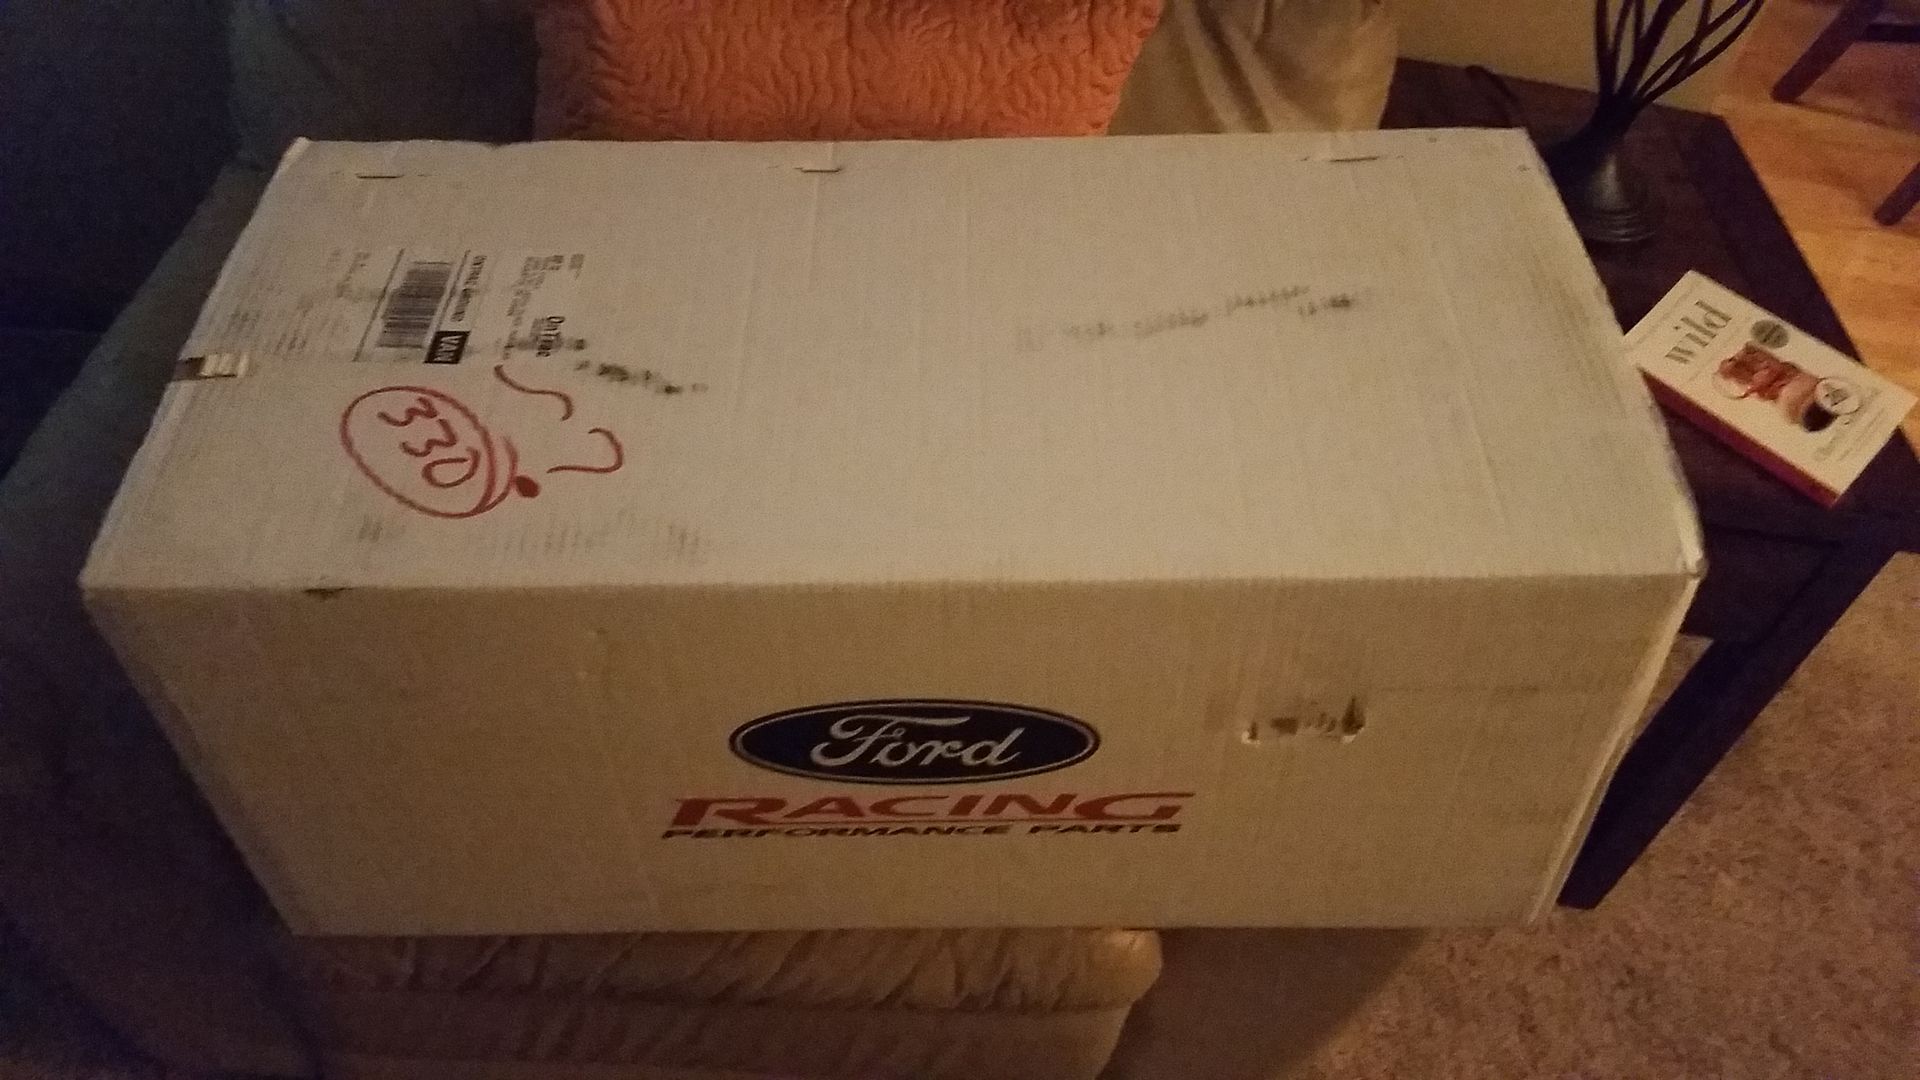
Also got this big ass box with the coyote control pack in it this week. Managed to also get the engine wire harness ordered today from the local FORD dealership as well.

Image

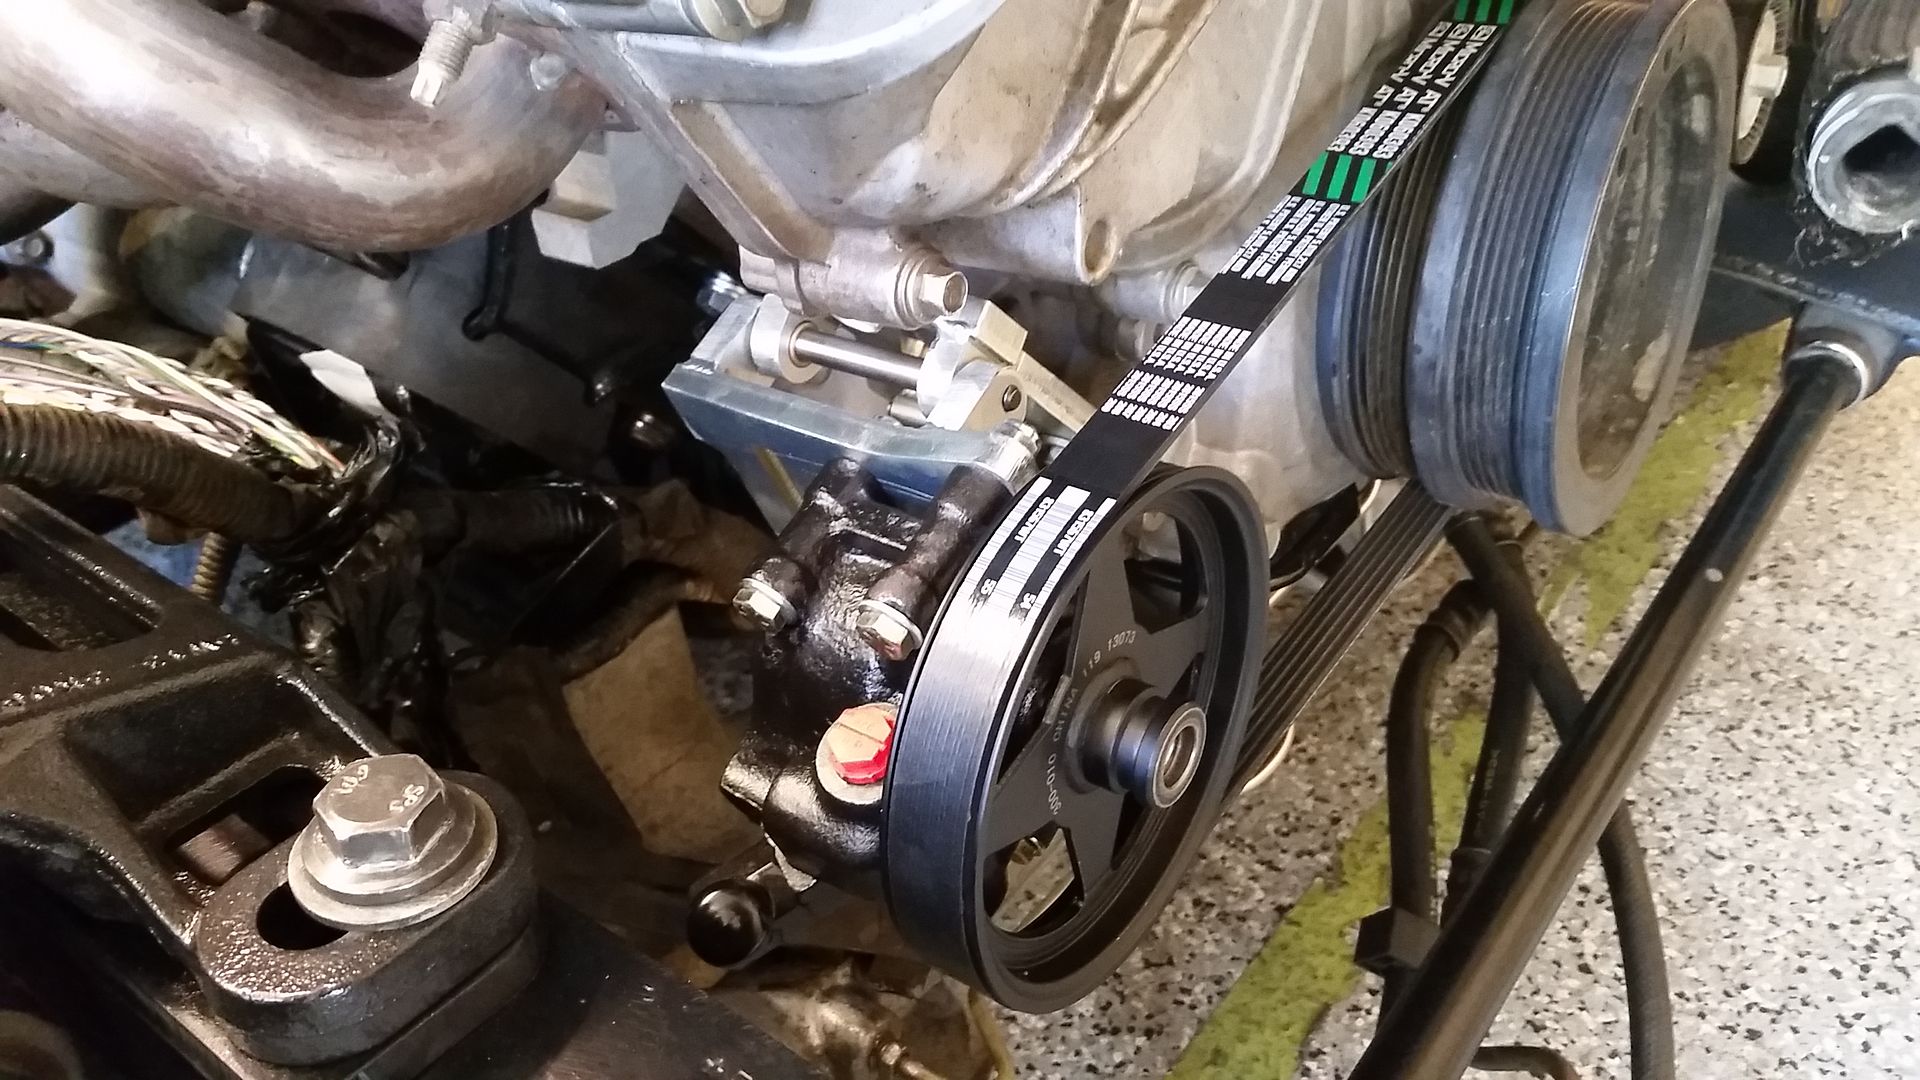
Ordered in a pump, the bracket and the pulley and finally got that installed with the right hardware finally. Even got a belt on it today. Its a pretty good looking setup.

Image

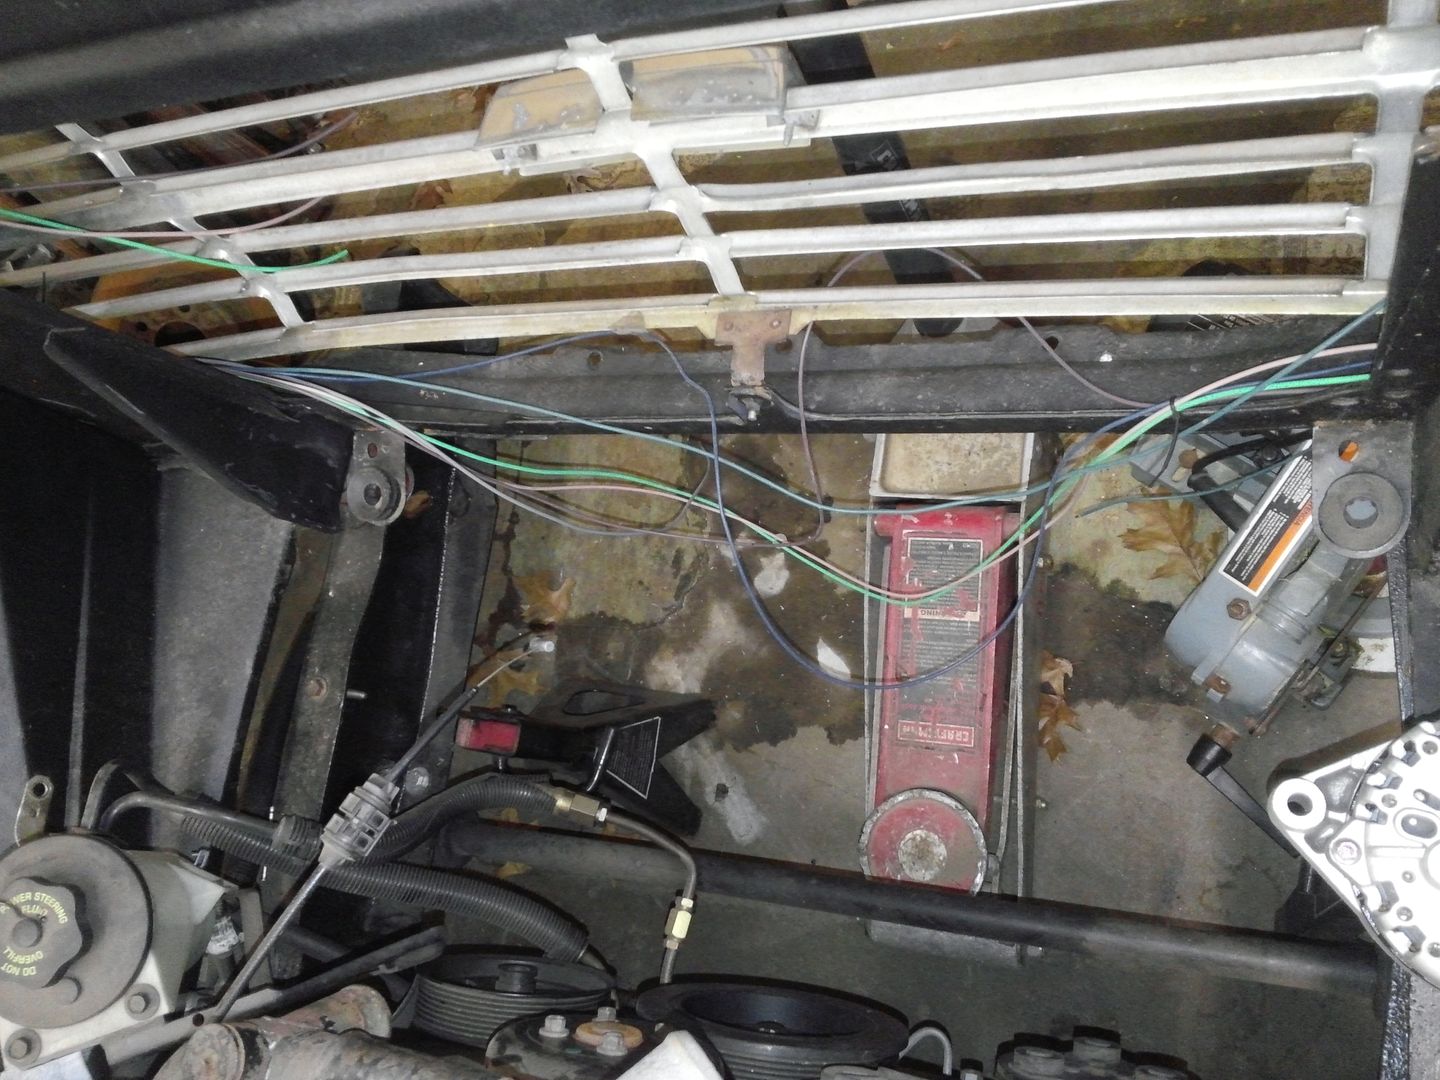
Finally got to stripping away the chopped up factory wiring. It made more sense than I thought it would after I got the Coyote control pack.

The one harness is indeed the engine harness, the other one has the alternator wire, starter trigger wire positive wire from the battery to the starter, transmission, o2 sensors and all the crap for the electric power steering.

Image

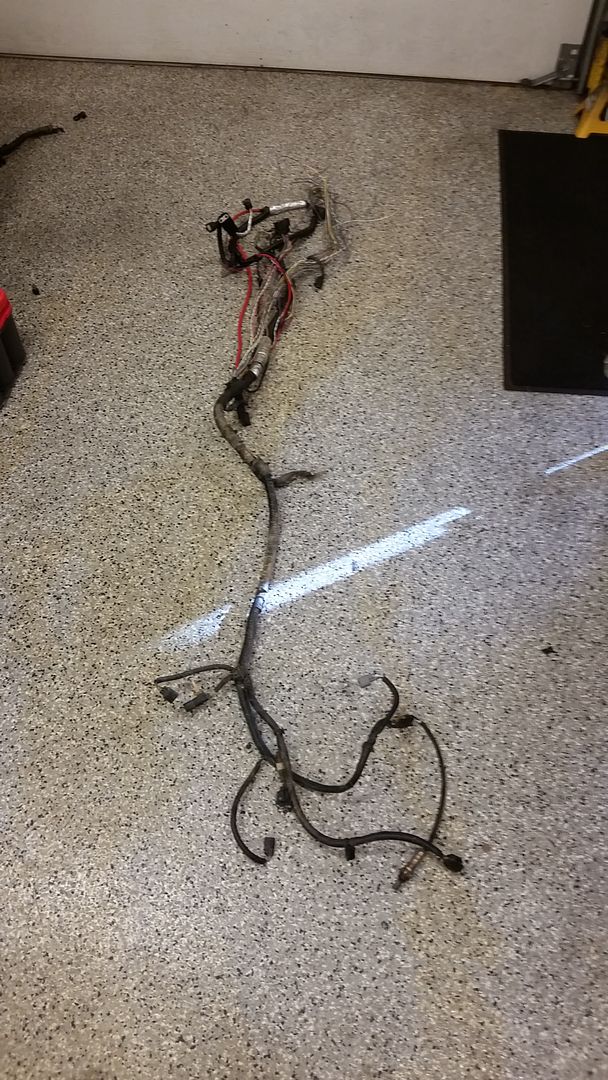
So once I got that out of the car I started to pair the harness down to see exactly what was in there. It turns out that there are kind of three sections, Transmission, power steering and power.

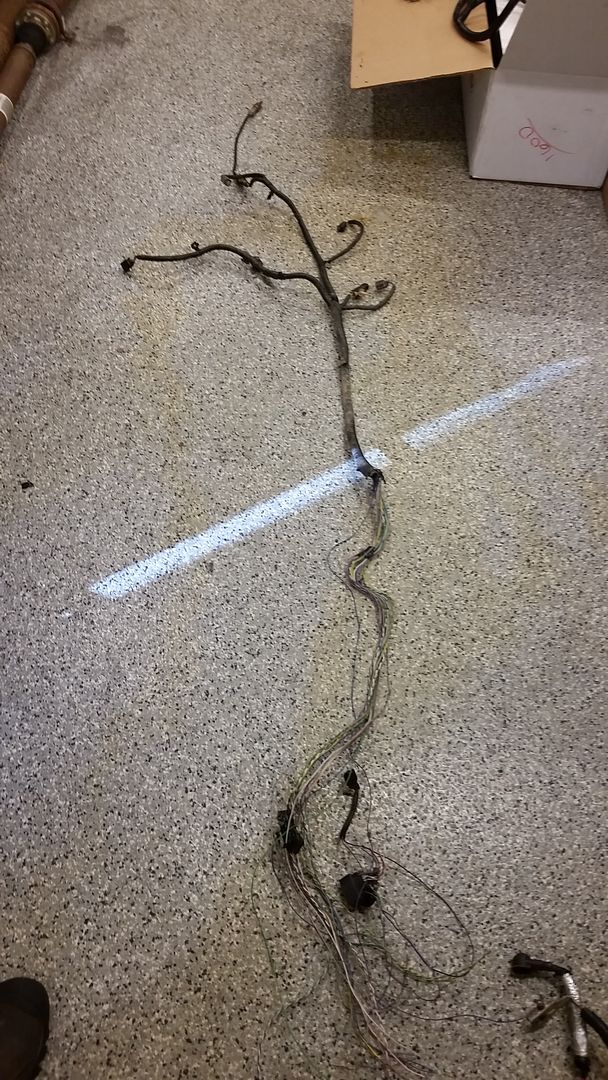
Here is the transmission and O2 stuff.

Image

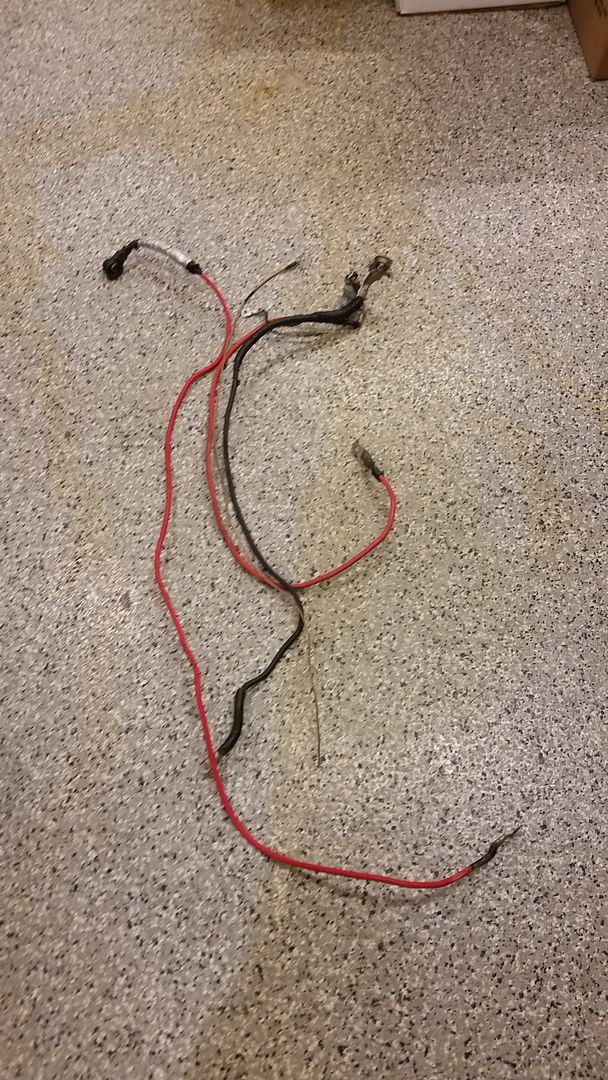
Power steering and alternator trigger wiring..

Image

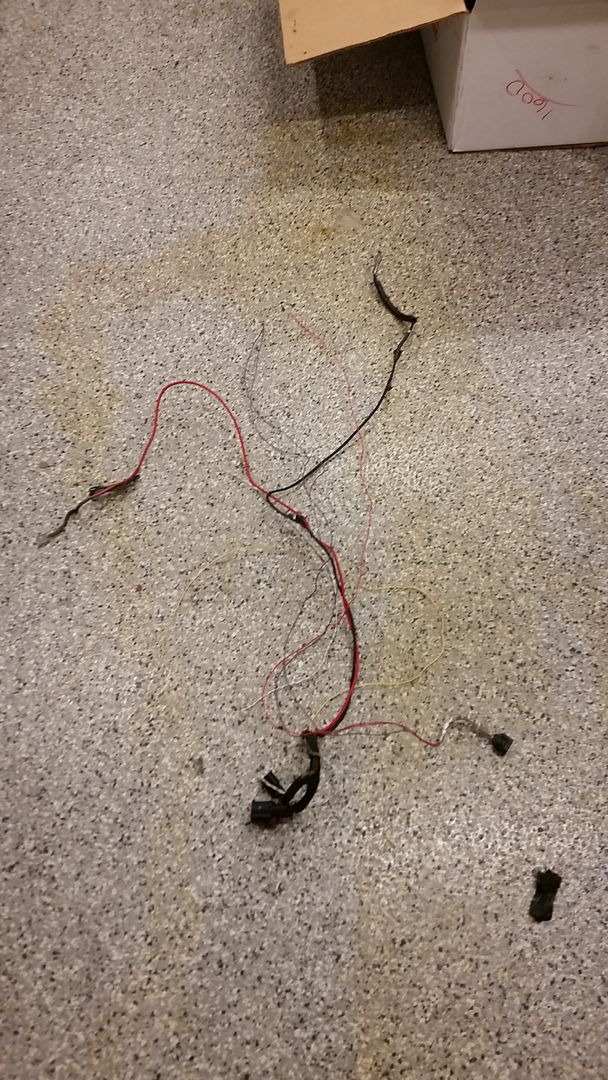
And pretty much what I needed was these few wires. Makes it pretty damn simple now doesnt it!!!

Image

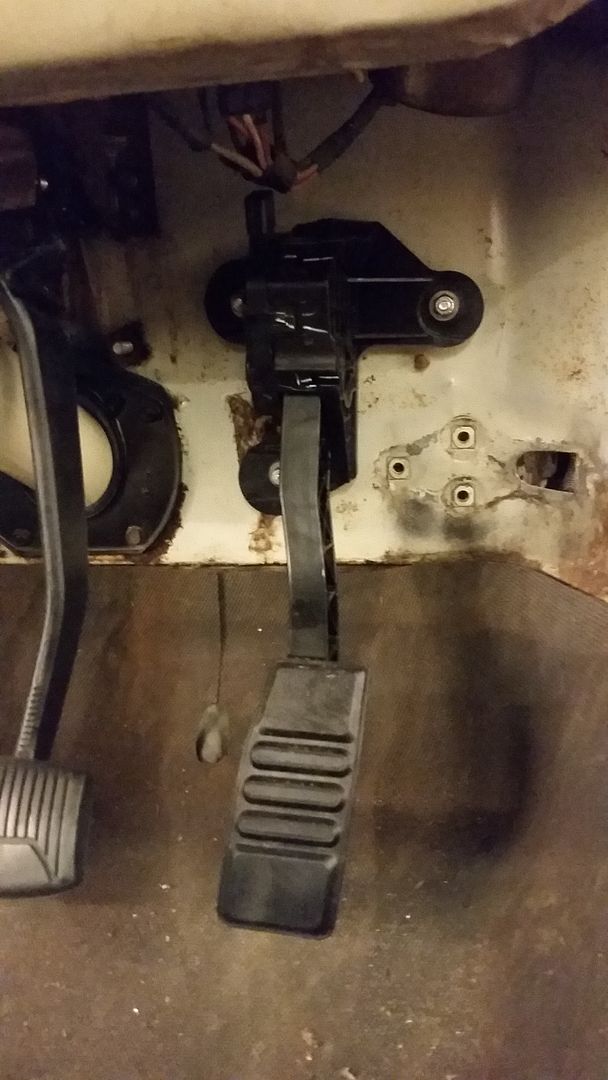
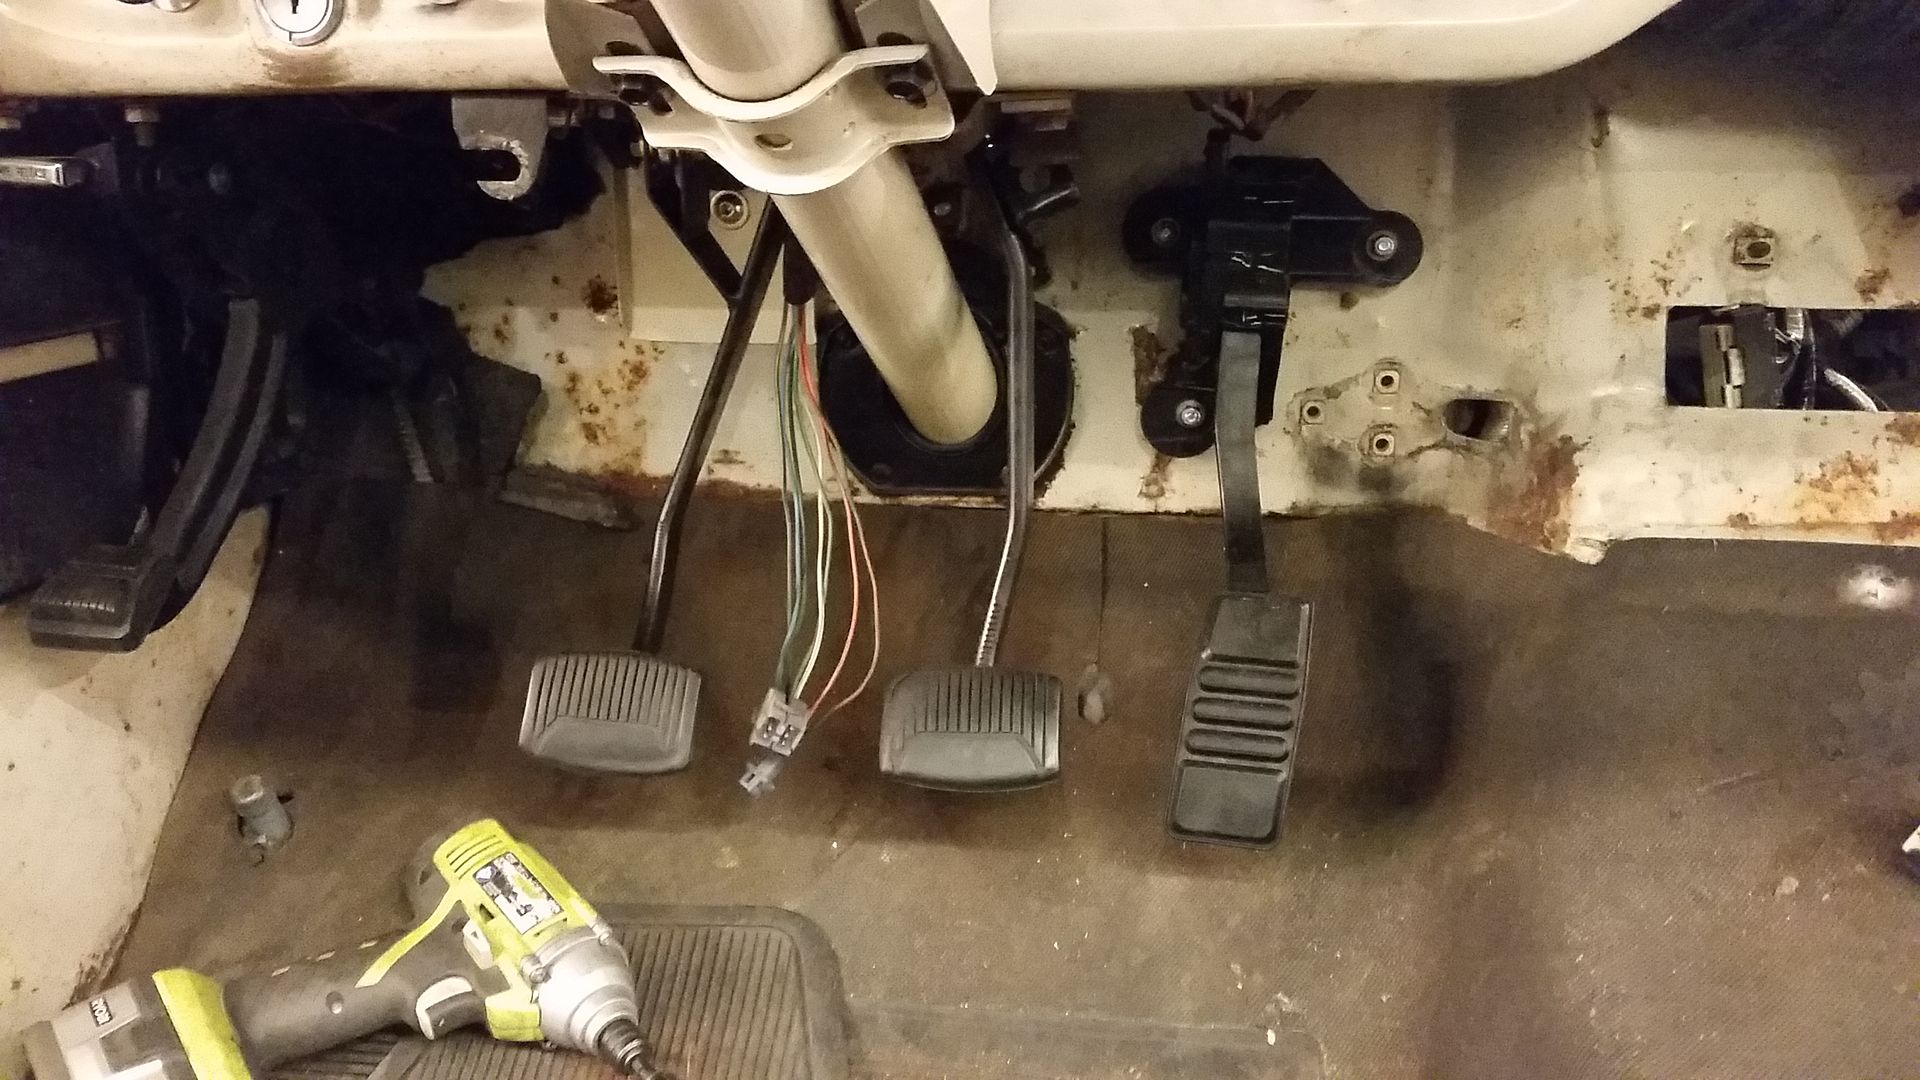
So I got to work on getting some other stuff done with the harness and got to work on getting the throttle pedal mounted. I was shocked at how easy that was, it damn near just bolted to the firewall, much better positioning than the ls swapped truck.

Image

Image

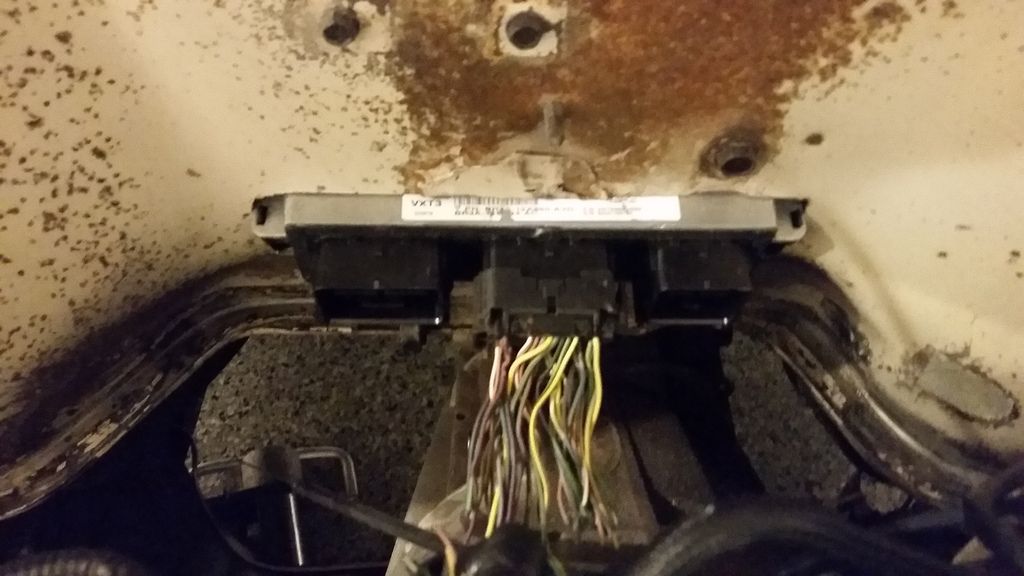
After lots and lots of consideration of where the computer would go, I know that I did not want it in the glove compartment and I did not want it in on the inner fender......So, I busted out the drill and airsaw and got a nice hole in the firewall now =) But the computer has a home now, I think Ill be able to hide it away behind the center console.

Image

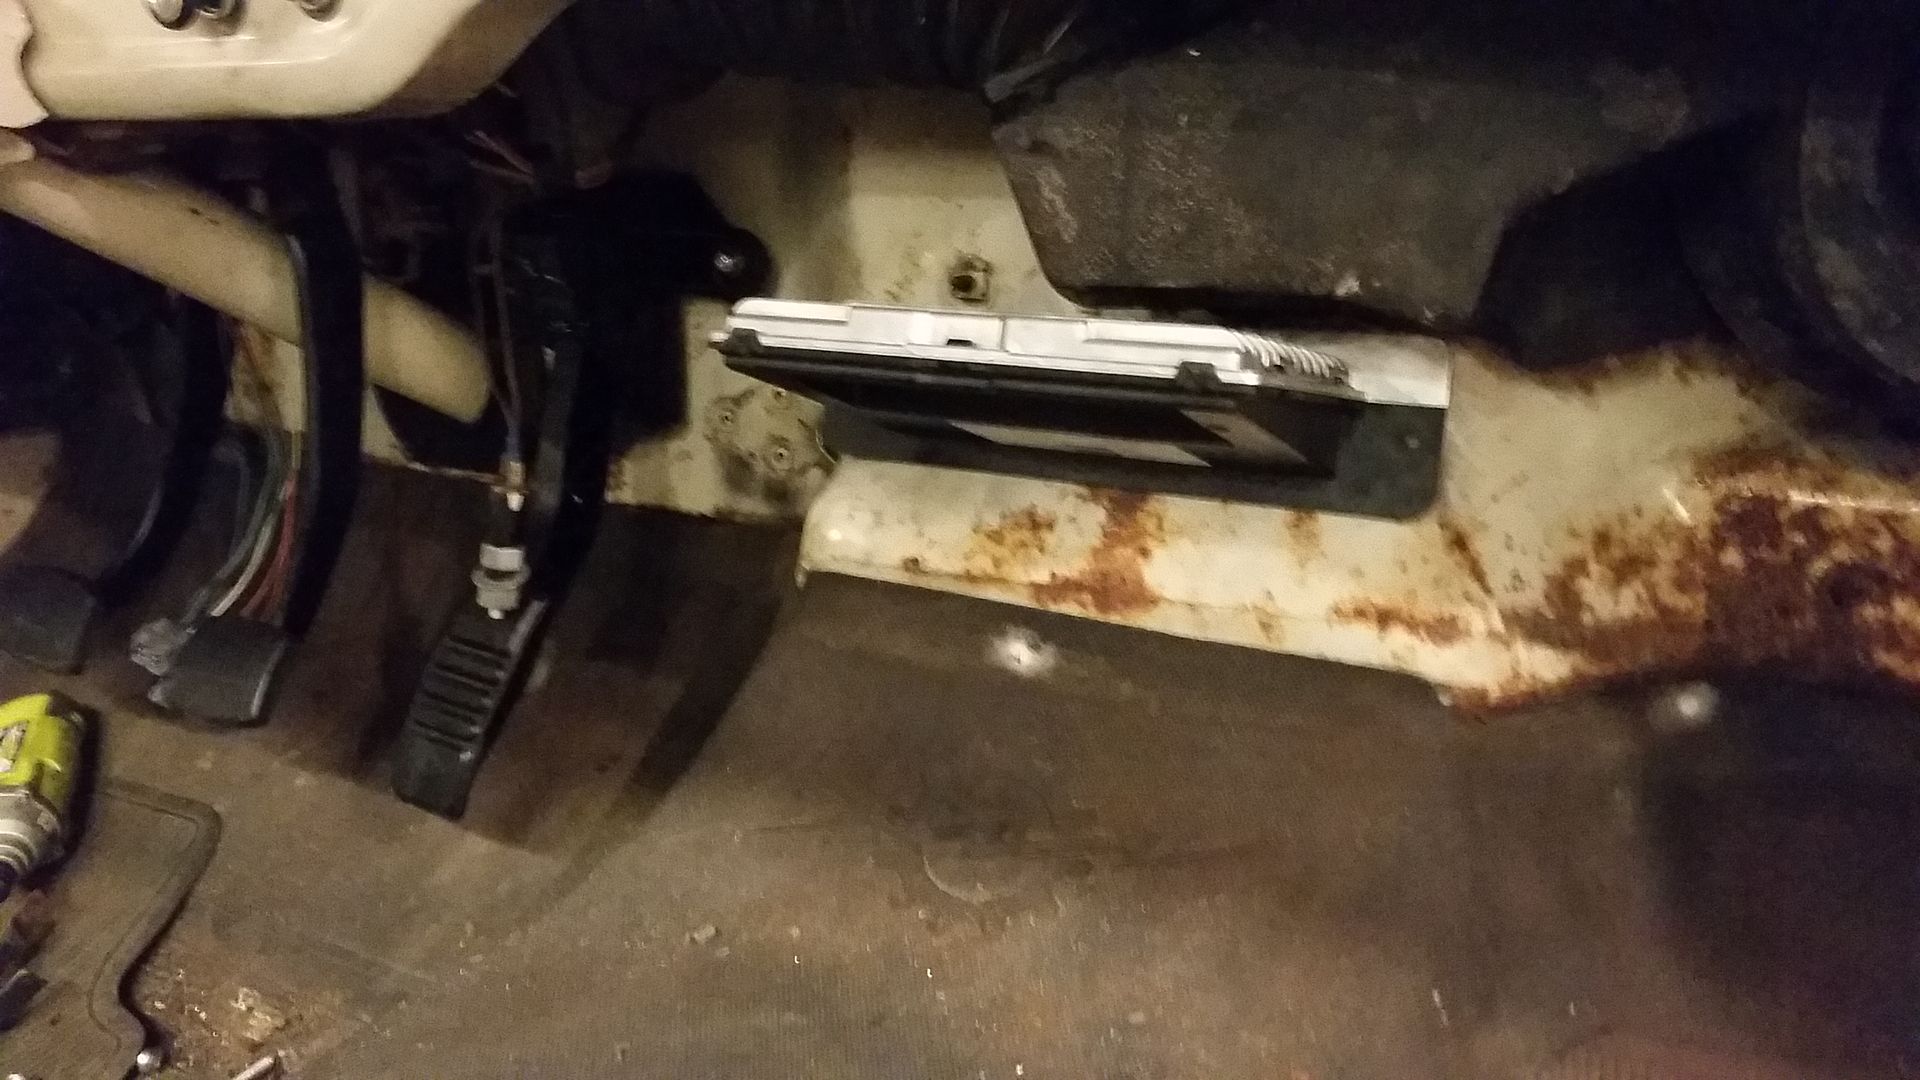
The hole still needs some trimming but it makes for a great spot for the harness to land.

Image

Image

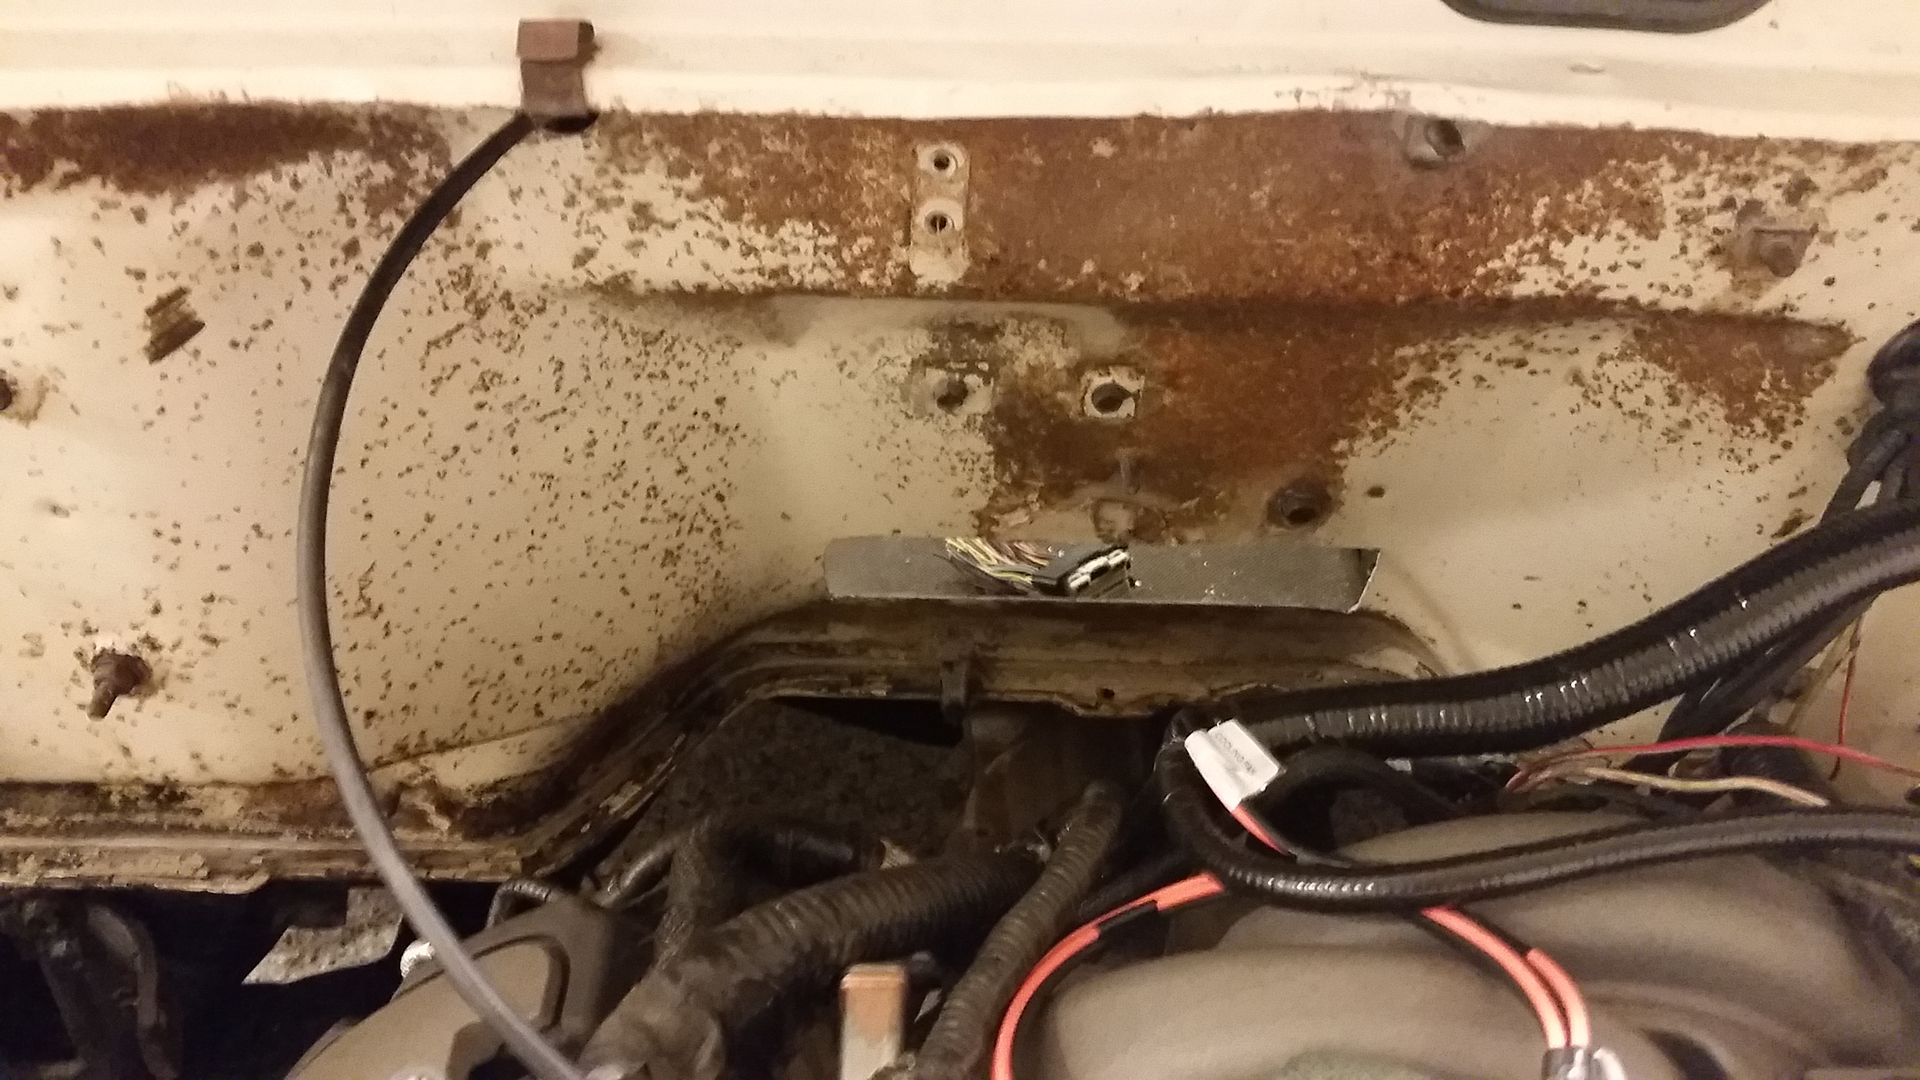
I hope to have the harness through the firewall tomorrow and figure out if I am going to run the battery up front or in the back....Thoughts?

Sean
michael9218
New Member
New Member
Posts: 35
Joined: Tue Sep 29, 2015 8:07 pm
Location: Woodstock, Ga

Re: Hackster's F100 #2 CV Swap 6 speed manual and Coyote

Post by michael9218 »

I would relocate the battery. Cleans up the engine bay and should be better for weight distribution. Either behind the passenger seat or under the bed.
hackster
Preferred User
Preferred User
Posts: 317
Joined: Fri Oct 18, 2013 11:21 am

Re: Hackster's F100 #2 CV Swap 6 speed manual and Coyote

Post by hackster »

michael9218 wrote:I would relocate the battery. Cleans up the engine bay and should be better for weight distribution. Either behind the passenger seat or under the bed.

I am leaning towards mounting the battery in the same spot as the LS truck, under the bed on the passenger side. However. With the engine being as wide as it is I am finding it really hard to get the power wire up to the starter. From there I am good but just not comfortable running it up the framerail right next to the fuel line then like an inch from the exhaust manifold up to the starter.

I agree with having it out of the way tucked back would be great as well as the weight in the rear would be nice as well.

Worked on getting the computer mounted up in its home for good today. I think it turned out well. I also drilled the hole in the firewall to get the harness out to the engine bay and got my grommet drilled and mounted up. This is going to keep all of the wiring off the inner fenders and fairly tidy.

Image

Then I spent the majority of the day trying to finish up a bunch of loose ends. Got the last couple of clamps on the hardlines for the brakes, tightened up most of the brake line fitings as well.

Built the last of the fuel lines with some nicer aeroquip fittings. This last one is in the proximity to the exhaust so it got wrapped with some fiberglass heat wrap from DEI. I dont think its needed but it makes me more comfortable.

Image

Got the fitting installed on the clutch master cylinder and the McLeod braided stainless line and the crazy fitting to adapt it to the transmision. That is all installed and tightened down. No pics though, I got lazy :evil:

Image

Spent a fair bit of time trying to figure out how I am going to do....Power steering lines to the pump, to the rack and back. Still need to order a reservoir as well. Think I have that ironed out.

Got the heater hose parts and pieces ordered, should have that ironed out in the next few days and installed.

That brings me to the radiator. I am having analysis paralysis. Cheap ones are well cheap and easy. Griffin and Be Cool both have drop in options for our trucks but they are crazy expensive.

Any input from you guys?

Sean
User avatar
SATURN5
New Member
New Member
Posts: 157
Joined: Tue Oct 02, 2012 1:08 pm
Location: Kettering, Oh

Re: Hackster's F100 #2 CV Swap 6 speed manual and Coyote

Post by SATURN5 »

I'm using a 2004 Mustang Gt radiator and fan. I used the late model mounts to secure it.
Bob
68 F100 Flareside, CVIFS, Cobra IRS, DOHC, M122, MS3, T45, 4.10, Cobra brakes
84 Mustang SVO, B234F, HE351, Full Cobra spec suspension and brakes including IRS, T-tops
96 Mark VIII, Complete chassis bracing, 03 Cobra wheels, Maruader converter, built trans.
hackster
Preferred User
Preferred User
Posts: 317
Joined: Fri Oct 18, 2013 11:21 am

Re: Hackster's F100 #2 CV Swap 6 speed manual and Coyote

Post by hackster »

SATURN5 wrote:I'm using a 2004 Mustang Gt radiator and fan. I used the late model mounts to secure it.
Any photos?

Sean
User avatar
SATURN5
New Member
New Member
Posts: 157
Joined: Tue Oct 02, 2012 1:08 pm
Location: Kettering, Oh

Re: Hackster's F100 #2 CV Swap 6 speed manual and Coyote

Post by SATURN5 »

What I did was use two sets of upper mounts, the lowers are welded to the core support, then drilled and tapped for the uppers. I did have to cut the lower framework of the radiator and sectioned to fit in between the sides of the core then rewelded. I took a couple quick pics as all this stuff is stored out of the way currently. Uppers are in a box in the shed..

Image

Image
Bob
68 F100 Flareside, CVIFS, Cobra IRS, DOHC, M122, MS3, T45, 4.10, Cobra brakes
84 Mustang SVO, B234F, HE351, Full Cobra spec suspension and brakes including IRS, T-tops
96 Mark VIII, Complete chassis bracing, 03 Cobra wheels, Maruader converter, built trans.
Binegar50
New Member
New Member
Posts: 2
Joined: Tue Jul 30, 2013 5:29 pm

Re: Hackster's F100 #2 CV Swap 6 speed manual and Coyote

Post by Binegar50 »

Barry what do you do for a living ? started my project today , decided to stay low budget as possible for now , the engine i have is a 302 hi-po out of a 69 mach-1 with a 3 speed , replacing 3 speed with a 5 speed trans, not decided yet on trans , have a lot of body work to do .
hackster
Preferred User
Preferred User
Posts: 317
Joined: Fri Oct 18, 2013 11:21 am

Re: Hackster's F100 #2 CV Swap 6 speed manual and Coyote

Post by hackster »

That setup fits pretty good in there!! I am leaning towards the champion radiator and dual electric fans though.

For the battery stuff, read on.

I did make a little progress yesterday on the power steering. I figured out my reservoir and got it ordered up, got the fittings and line from the reservoir to the pump ironed out as well as the return from the rack to the reservoir. Should work good once I get the clip on so I can mount it and finish my lines up.

Biggest problem though was the pressure line from the pump over to the Crown Vic rack. Oil Filter Sales and service guys hooked me up with the parts and I shopped up a new crown vic setup to work. It turned out really nice and should be leak free with new lines and all new seals around. Happy about this.

Outlet from the pump

Image

Here you can see the hard line from the rack and the fitting on the hard adapted to the new hose. The 90 degree fitting is the return.

Image

One other little thing I needed to deal with was the heater hoses out of the engine. I know that you can cut up the factory ones and make them work but I was looking around and found that you could actually hook to the factory fitting and adapt to a 5/8" heater hose. Ordered those up and Ill be damned if they did not work perfect. Dorman part in case anyone want to know.

Image

Heater Control valve tucked back here and out of the way.

Image

Heater hoses to heater core, Ill get a clamp on these but you get the idea.

Image

After hours and hours of contemplation I decided to ditch the Optima and mount I already have and keep the battery mounted up front. This allows me to keep the power wire really short and clean and orderly as well as not have to run a remote disconnect. The battery I ended up going with is an Odyssey PC925. Before you all say I need the weight in the rear, I would agree with that. However, this battery is almost 30 ls lighter than the optima I was going to use. It has a little less CCA but I talked with several people and they have run them for a long time with no issue.


So with the plan all changed up, got the battery on the way home from work and started messing around. I have a ton of room between the motor and where radiator should go so the battery is going to on the passenger side between the power steering pump and the radiator just above the sway bar.

Now I have this cool little battery but I needed some way to stick this thing to the chassis.

As with all my stuff lets start with a template, it just so happens this one looks kind of cool.

Image

Image

Now all I have to do is duplicate that with some metal....its a little harder to cut and drill than the chipboard.

Needs some dimple dies and welded up tomorrow, but pretty happy with how its coming together.

Image

Image

Image

Bed time....5 gets here early

Sean
Post Reply